

Transforming ordinary broccoli into an extraordinary culinary delight has never been simpler! This comprehensive guide will walk you through the effortless process of preparing **perfectly roasted broccoli in your oven**, offering clear instructions on how to achieve that irresistible crispy-tender texture, ideal serving suggestions, and expert tips to ensure flawless results every single time. Prepare to discover your new favorite healthy side dish!

Achieving Perfectly Roasted Broccoli Every Time
Roasted broccoli is more than just a side dish; it’s a versatile, flavorful addition that elevates any meal. Our recipe focuses on a simple seasoning blend and a quick roasting time to produce broccoli florets that are wonderfully tender on the inside with delightfully crisp, golden-brown edges. You’ll master the art of oven-roasting broccoli in under 20 minutes, transforming this cruciferous vegetable into a family favorite. Say goodbye to soggy, uninspired broccoli and hello to a vibrant, satisfying side!
P.S. If you prefer a lighter, steamed texture, don’t miss our detailed tutorial on How to Steam Broccoli for another fantastic way to enjoy this healthy veggie.
Why You’ll Fall in Love with Oven-Roasted Broccoli
Forget about mushy, overcooked vegetables! Our method ensures your broccoli florets are roasted for just the right amount of time, resulting in a perfect balance of tender interiors and wonderfully crispy, slightly charred exteriors. This texture contrast is truly game-changing.
Each bite of this roasted broccoli is brightened by a splash of fresh lemon juice. The citrus not only enhances the natural sweetness of the broccoli but also adds a zesty finish that makes this dish incredibly refreshing and appealing.
This recipe is a dream for meal prep. Roasted broccoli holds up beautifully in the refrigerator, making it an excellent vegetable side to prepare ahead of time. You can enjoy healthy, flavorful greens all week long with minimal effort during busy weekdays.
Beyond its incredible taste and texture, roasted broccoli is packed with nutrients, making it a smart and delicious choice for a healthy lifestyle. It’s naturally vegan, gluten-free, and surprisingly satisfying.

The Abundant Health Benefits of Broccoli
Not only do we adore the delicious flavor and vibrant green hue of roasted broccoli, but this cruciferous vegetable is also incredibly beneficial for your health! Broccoli is a nutritional powerhouse, renowned for being rich in essential vitamins, minerals, and potent antioxidants. It’s a fantastic addition to any diet, especially if you’re looking for naturally vegan and gluten-free options.
Per 1 cup of raw broccoli (approximate values):
- Calories: Approximately 31 kcal, making it a low-calorie vegetable.
- Carbohydrates: Around 6g, with a good portion being dietary fiber.
- Protein: A respectable 2.6g for a vegetable, contributing to satiety.
- Fiber: About 2g, crucial for digestive health and blood sugar regulation.
- Fat: A minimal 0.3g, making it virtually fat-free.
- Vitamin C: Exceeds your daily requirement, boosting immunity and skin health.
- Vitamin K: Provides over 100% of your daily needs, vital for blood clotting and bone health.
- Additional Nutrients: Contains significant amounts of folate, potassium, iron, and manganese, along with powerful antioxidants like sulforaphane, which has been linked to anti-cancer properties and anti-inflammatory benefits.
Incorporating roasted broccoli into your regular meals is a simple yet effective way to enhance your overall nutritional intake and support a healthy body.
Key Ingredients for Flavorful Roasted Broccoli
Crafting delectable roasted broccoli requires just a handful of fresh, high-quality ingredients. Each component plays a crucial role in achieving the perfect texture and flavor profile.
Broccoli: Naturally, fresh broccoli is the star of this show. When selecting broccoli, look for firm, tightly packed florets with a deep green color. Avoid any yellowing or soft spots. For optimal and even roasting, it’s crucial to cut your broccoli into similar-sized florets. This ensures every piece cooks at the same rate, preventing some from being undercooked while others are burnt.
Fresh Lemon Juice: A squeeze of fresh lemon juice added after roasting is a game-changer. It provides a bright, acidic counterpoint to the rich, earthy flavors of the roasted broccoli, elevating its taste and adding a delightful tang that truly makes the vegetable sing. Always opt for fresh lemon juice over bottled for the best flavor.
Olive Oil: A good quality olive oil is essential for roasting. It helps the broccoli achieve that desirable golden-brown crispness and prevents it from sticking to the baking sheet. Olive oil also imparts a lovely, subtle flavor that complements the broccoli beautifully. While we prefer the taste of olive oil, feel free to use another high-smoke-point oil you enjoy, such as avocado oil or grapeseed oil.
Salt & Pepper: We’ve kept the seasoning intentionally simple for this recipe, allowing the natural flavor of the broccoli to shine through. A generous sprinkle of kosher salt enhances the taste and helps draw out moisture for better crisping, while freshly ground black pepper adds a hint of mild spice. You might be surprised how much flavor these basic seasonings unlock!
Parmesan Cheese (Optional): For those who love a cheesy kick, a dusting of finely grated Parmesan cheese added right before serving is a fantastic option. The savory, salty notes of the Parmesan create a wonderful umami boost and a delightful textural contrast. If you’re keeping it vegan, you can omit the cheese or use a plant-based alternative.

Expand Your Broccoli Horizons: More Ways to Cook & Enjoy
Creative Ways to Cook and Serve Broccoli
Broccoli is incredibly versatile, and while roasting is a fantastic method, it’s just one of many ways to prepare this nutritious vegetable. Explore these other delicious cooking techniques to keep your meals exciting and varied:
- Steamed Broccoli: A classic, gentle cooking method that preserves nutrients and offers a tender, vibrant green result.
- Air Fryer Broccoli: Achieve impressive crispness with minimal oil in your air fryer, perfect for quick and easy weeknight sides.
- Grilled Broccoli: Infuse your broccoli with a delicious smoky flavor and beautiful char marks by grilling it.
- Roasted Broccoli: (You are here!) The ultimate method for tender-crisp florets with irresistible caramelized edges.
Each method brings out a unique texture and flavor, allowing you to enjoy broccoli in countless ways!
Step-by-Step Guide: How to Perfectly Roast Broccoli
For precise measurements and a printable version of this recipe, please refer to the full recipe card below.
Step 1: Prepare & Season Your Broccoli
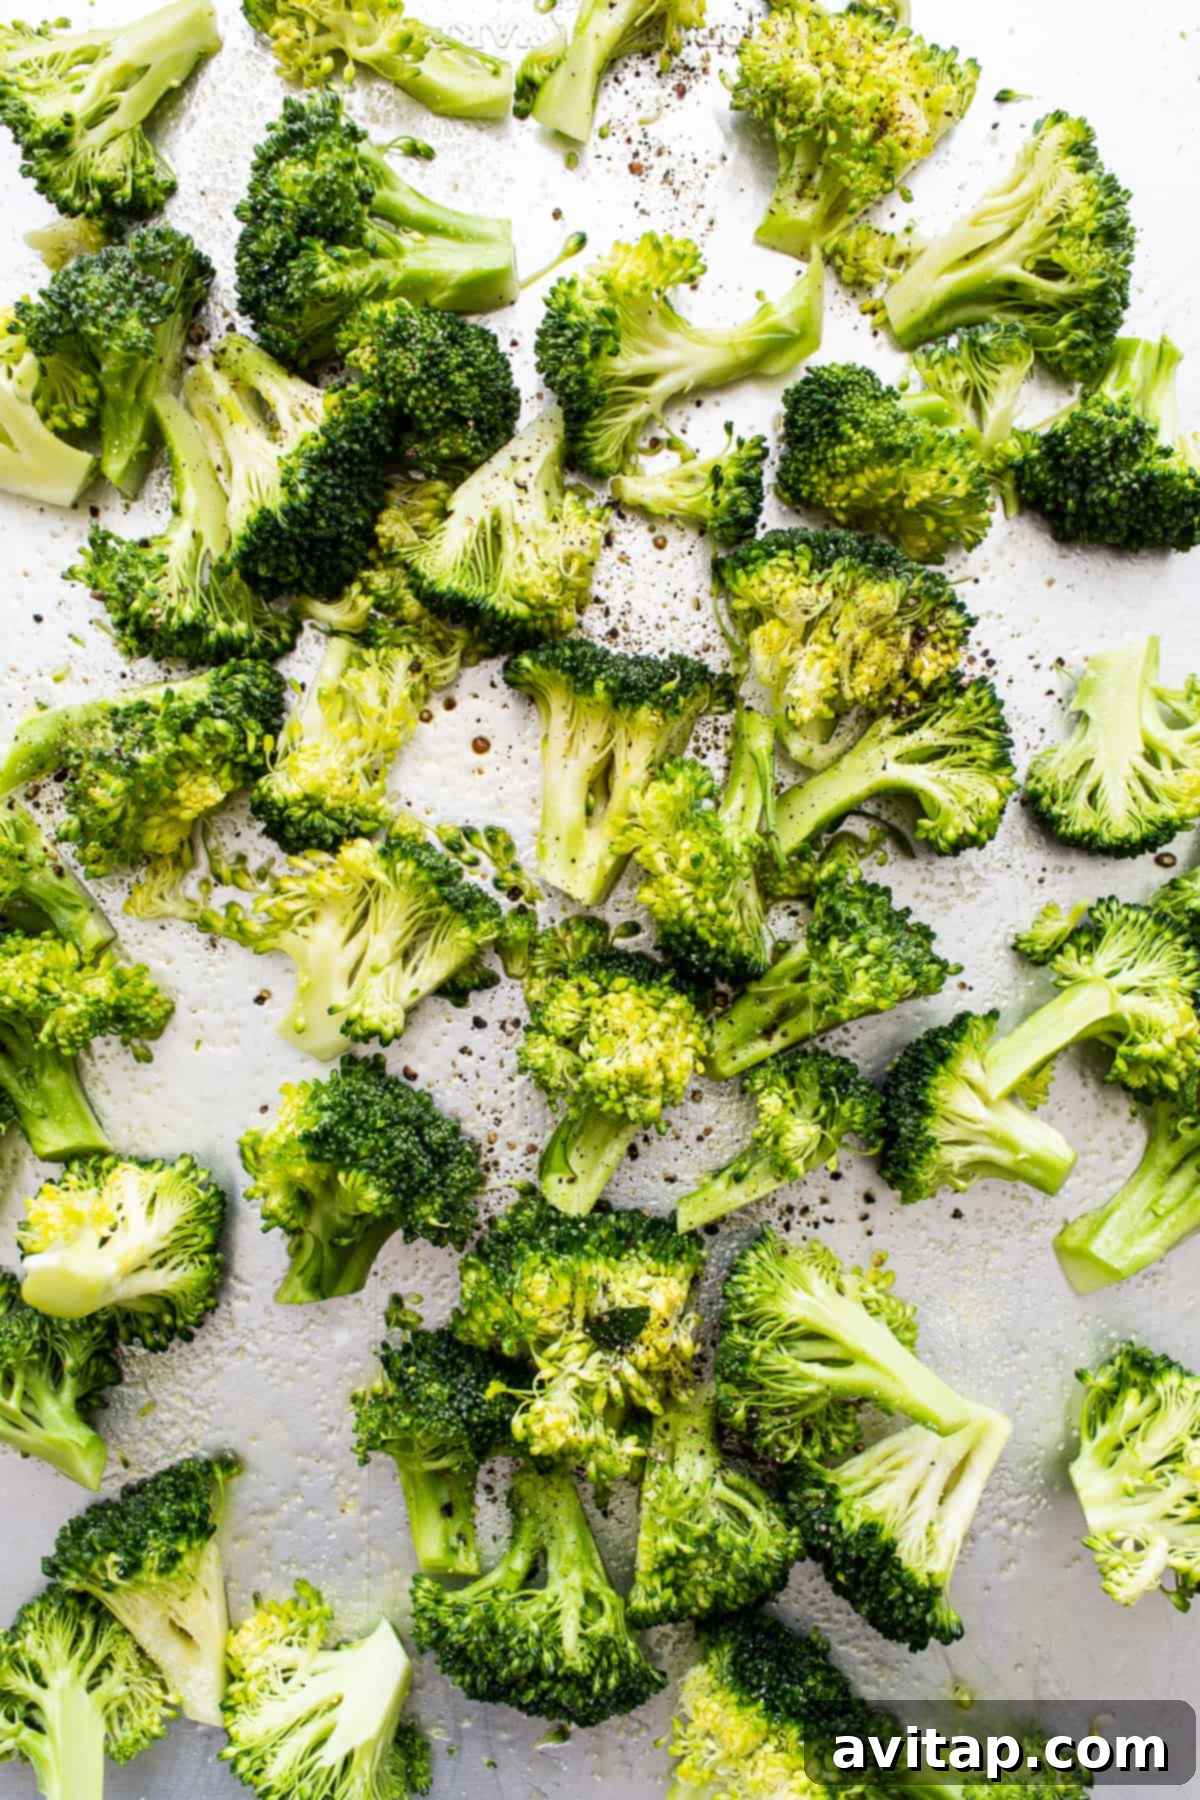
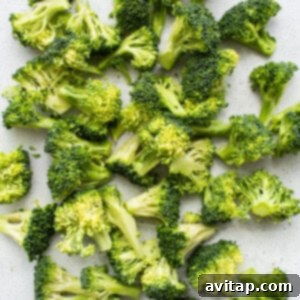
Begin by preheating your oven to 375ºF (190ºC). While the oven heats, wash your fresh broccoli and thoroughly pat it dry. Excess moisture can lead to steaming instead of roasting, preventing those desirable crispy edges. Carefully cut the broccoli into uniform florets. Aim for pieces that are roughly 1 to 1.5 inches in size, as consistency is key for even cooking.
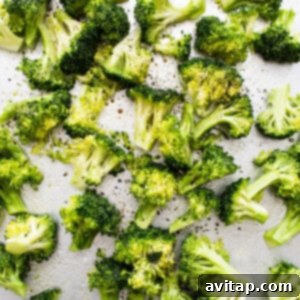
Spread the prepared broccoli florets evenly in a single layer over a large baking sheet. Ensure there’s enough space between each piece; crowding the pan can cause the broccoli to steam rather than roast. Drizzle the broccoli generously with olive oil. Using your clean hands, gently massage the oil into the florets, ensuring every surface is lightly coated. This helps with browning and prevents sticking.
Next, season the oiled broccoli with kosher salt and freshly ground black pepper. Massage the seasonings in again, ensuring they are evenly distributed. Don’t be shy with the salt; it’s essential for flavor and proper roasting.
Can I use frozen broccoli for this recipe? We highly recommend using fresh broccoli for optimal results. Frozen broccoli often contains a lot of moisture, which can cause it to steam and become super mushy when roasted, rather than developing those crisp, flavorful edges we’re aiming for.
Step 2: Roast to Perfection
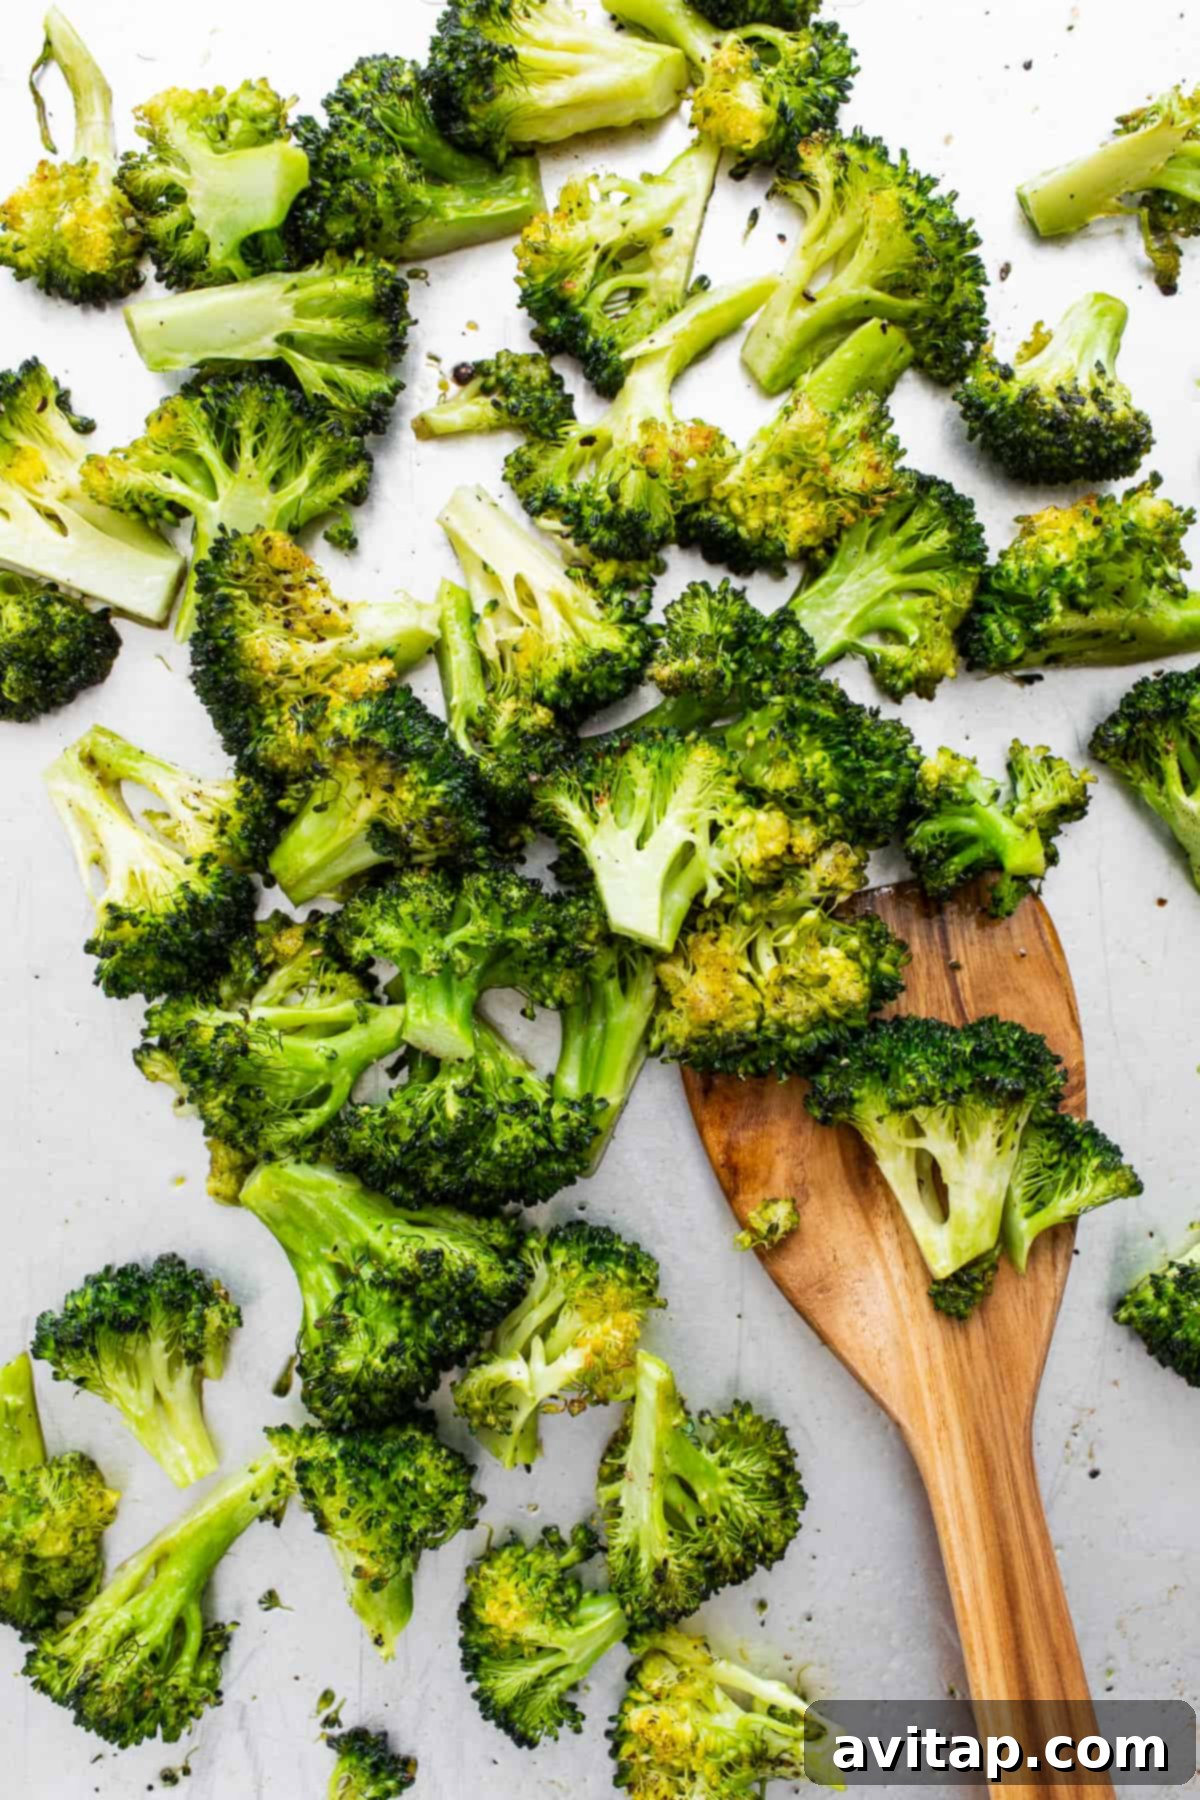
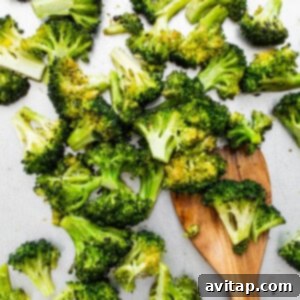
Once seasoned and spread, transfer the baking sheet to your preheated oven. Roast the broccoli for a total of 15-17 minutes. Halfway through the cooking time (around 8-9 minutes), remove the baking sheet from the oven and give the broccoli a good toss or stir. This ensures all sides get exposed to the direct heat, promoting even browning and crisping. Continue roasting until the florets are tender when pierced with a fork and their edges are beautifully golden brown and slightly caramelized.
Step 3: Garnish & Enjoy Immediately!
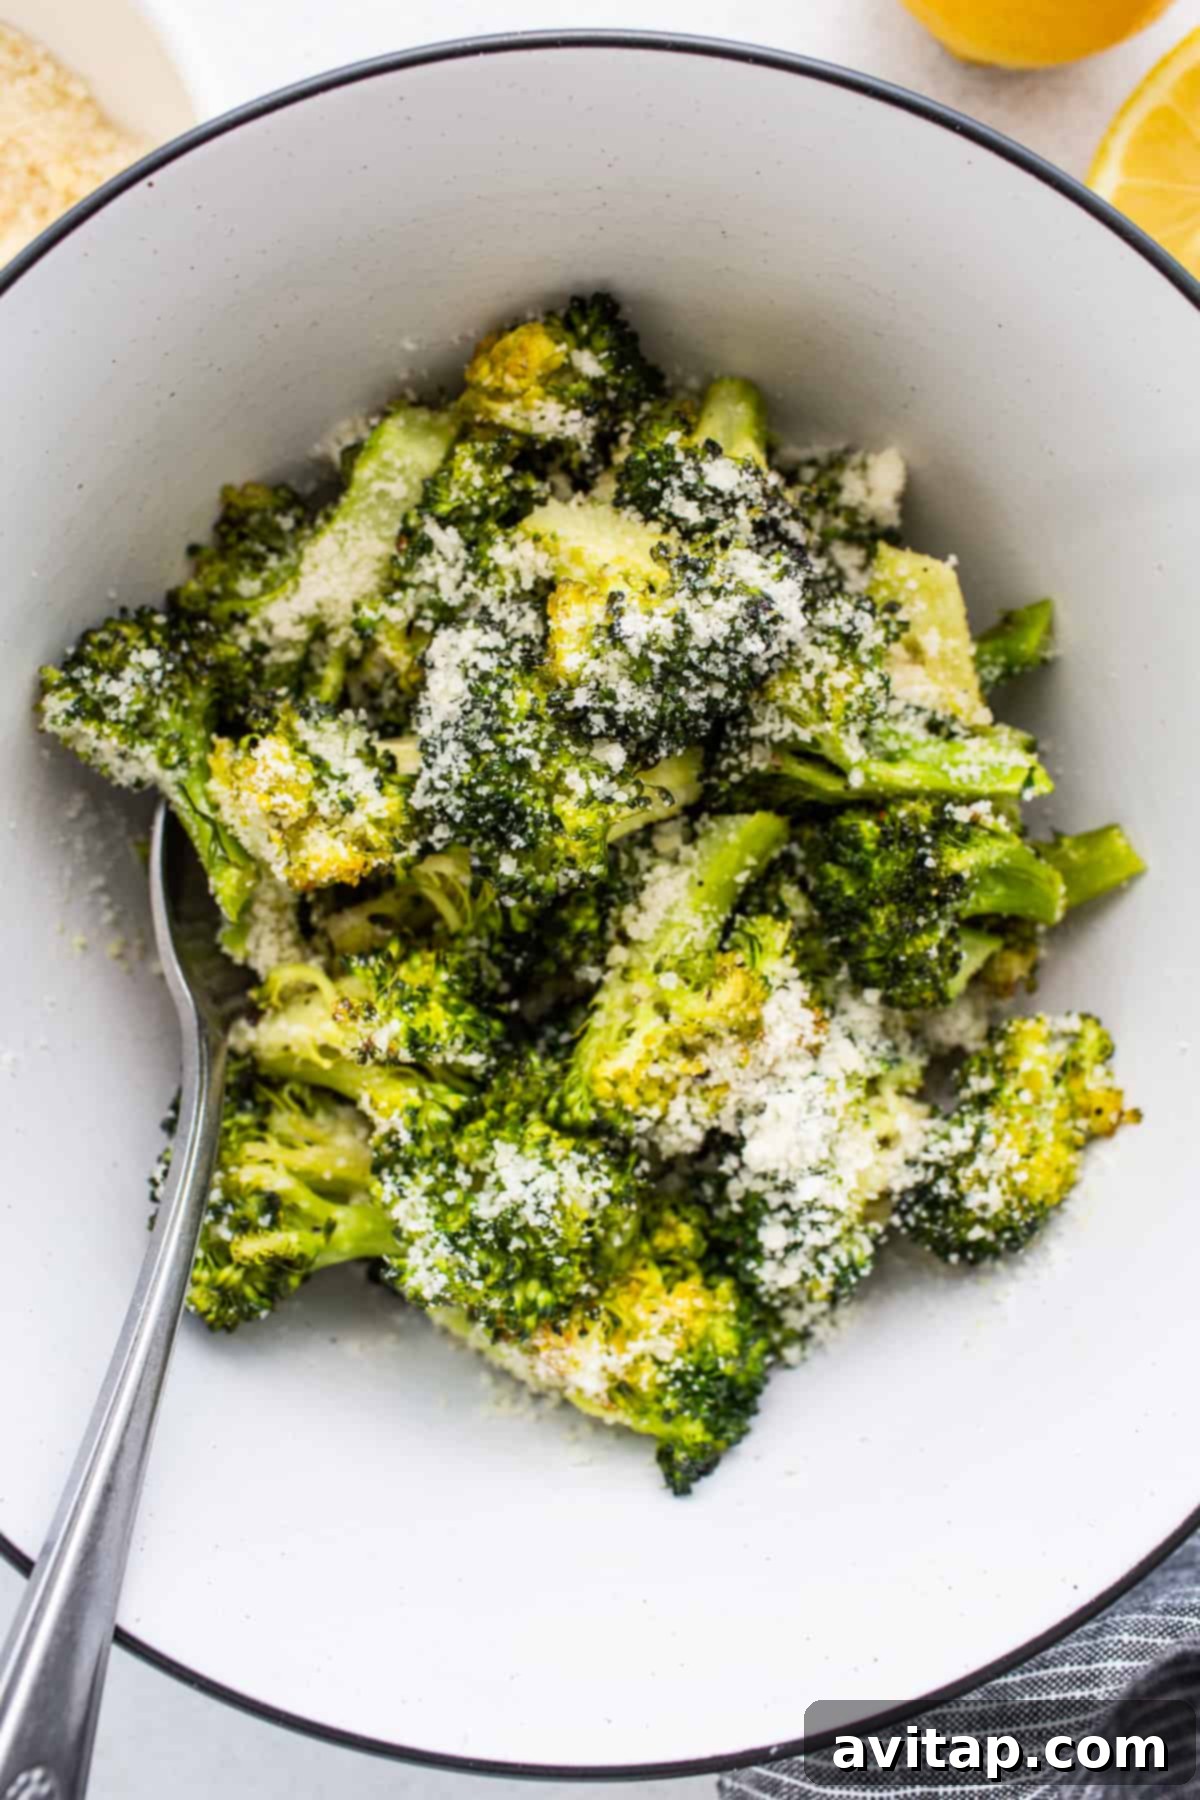
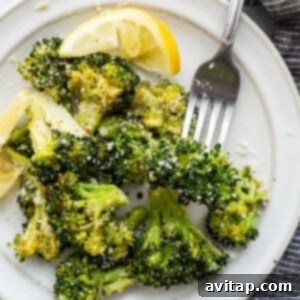
Carefully remove the roasted broccoli from the oven. Transfer the hot broccoli to a large serving bowl. Immediately add the fresh lemon juice and, if using, the grated Parmesan cheese. Toss gently to combine, allowing the warmth of the broccoli to slightly melt the cheese and infuse the lemon flavor throughout. Serve your perfectly roasted broccoli immediately to savor its optimal crispness and vibrant taste. Enjoy every flavorful bite!
Expert Tips for Unbeatable Roasted Broccoli
Achieving consistently perfect roasted broccoli is simple when you follow a few key tips:
Ensure Uniform Broccoli Floret Sizes: This is arguably the most crucial tip. When cutting your broccoli, aim for florets that are as close to the same size as possible, ideally 1 to 1.5 inches. This ensures that every piece roasts evenly, preventing smaller pieces from burning while larger ones remain undercooked. Take a moment to properly trim and break down larger heads of broccoli.
Roast Until Golden Brown, Not Burnt: The sweet spot for roasted broccoli is when it develops beautiful golden-brown, slightly caramelized edges, yet remains tender-crisp in the center. This usually takes around 15-20 minutes in a 375°F oven. Keep a close eye on it, especially towards the end of the cooking time. The goal is a slightly nutty flavor and satisfying bite, not an overly soft or charred texture.
Ovens Vary in Temperature: Every oven is different, and actual temperatures can fluctuate significantly from what’s displayed. It’s a good idea to use an oven thermometer to verify accuracy. Regardless, always check your broccoli halfway through roasting and adjust the cooking time as needed. If one side of your pan is browning faster, rotate the pan for even cooking.
Don’t Crowd the Pan: For truly crispy roasted broccoli, adequate air circulation is vital. Spread your florets in a single layer on the baking sheet, ensuring there’s a little space between each piece. If your pan is too crowded, the broccoli will steam in its own moisture rather than roast, resulting in a soggy texture. Use two baking sheets if necessary to give your broccoli room to breathe.
Pat Dry Thoroughly: Before tossing with oil, make sure your broccoli florets are completely dry. Use paper towels or a clean kitchen towel to absorb any residual moisture after washing. Dry broccoli will brown and crisp much more effectively.
Frequently Asked Questions About Roasted Broccoli
Absolutely not! While some recipes suggest blanching (briefly boiling) broccoli before roasting, it’s entirely unnecessary for this recipe. By roasting broccoli at a relatively high temperature of 375°F (190°C) for about 15-17 minutes, you’ll achieve perfectly tender-crisp broccoli with a delightful bite, without any mushiness. Skipping the blanching step saves you time and effort!
Soggy roasted broccoli is a common issue, but it’s easily avoidable! The main culprit is usually overcrowding the baking sheet. When too many florets are packed together, they release moisture, which then creates steam instead of allowing the broccoli to roast and brown. To prevent this, always spread your broccoli in a single layer with ample space between each piece. If you have a lot of broccoli, use two baking sheets. Additionally, ensure your broccoli is thoroughly dry before adding oil and seasoning.
Oiling vegetables before roasting serves multiple crucial purposes. Firstly, it helps prevent the vegetables from sticking to the baking pan, making cleanup much easier. Secondly, oil acts as a heat conductor, facilitating the browning process (Maillard reaction) which creates those delicious crispy edges and enhances flavor. Thirdly, oil contributes a rich, nutty depth to the taste of the roasted vegetables, and it helps carry fat-soluble vitamins found in the broccoli, making them more absorbable by the body.
Roasted broccoli is incredibly versatile and pairs beautifully with a wide array of main courses. It’s excellent alongside roasted chicken, baked salmon, grilled steak, or pork tenderloin. For vegetarian options, serve it with quinoa bowls, lentil soup, or a hearty bean burger. It also complements pasta dishes and can be added to stir-fries or grain salads for added texture and nutrition.
Craving Steamed Broccoli Instead?
While roasted broccoli offers a delightful crispness, sometimes you might prefer a softer, more traditional texture. If you’d like to prepare your broccoli florets using a steaming method, you can easily adapt this same fresh broccoli to cook on the stovetop or in the microwave. For detailed instructions on how to achieve perfectly tender and vibrant steamed broccoli, be sure to check out our comprehensive How to Steam Broccoli recipe guide.
Prefer Air Fryer Broccoli for Extra Crisp?
If you’re a fan of super crispy vegetables and speedy cooking, the air fryer is an excellent tool for preparing broccoli! You can achieve wonderfully crisp florets with very little oil in just about 10 minutes flat using your air fryer. For a quick and easy method that yields fantastic results, follow the instructions in our dedicated Air Fryer Broccoli recipe. It’s a fantastic alternative when you’re short on time but don’t want to compromise on flavor and texture.
Meal Prepping & Storing Leftover Roasted Broccoli
Roasted broccoli is an excellent vegetable for meal prepping, allowing you to enjoy a healthy side dish throughout the week. If you find yourself with leftover roasted broccoli, proper storage is key to maintaining its freshness and flavor. First, allow the roasted broccoli to cool completely to room temperature. This prevents condensation from forming in the container, which can lead to sogginess. Once cooled, transfer the broccoli into an airtight container. It will keep beautifully in the refrigerator for up to 3-5 days. While it won’t retain its initial crispness upon reheating, it will still be delicious and full of flavor.
How to Freeze Roasted Broccoli for Later
Freezing roasted broccoli is a fantastic way to extend its shelf life and ensure you always have a healthy vegetable on hand for quick meals. Follow these simple steps for successful freezing:
- Cool Completely: Just like with refrigeration, ensure your roasted broccoli has cooled down entirely to room temperature before proceeding. Warm broccoli will create ice crystals when frozen, affecting texture.
- Flash Freeze: Spread the cooled broccoli florets in a single layer on a parchment-lined baking sheet. Make sure the florets are not touching each other. This “flash freezing” step prevents them from clumping together in the freezer.
- Freeze Until Solid: Place the baking sheet in the freezer and allow the broccoli to freeze for approximately 2 hours, or until the individual florets are solid.
- Transfer & Store: Once thoroughly frozen, transfer the solid broccoli florets into an airtight freezer-safe container or a large gallon-size plastic freezer bag. Remove as much air as possible from the bag before sealing. Label the container with the date.
- Enjoy Later: Roasted broccoli can be frozen for up to 3 months. When ready to use, you can reheat it directly from frozen in the oven or incorporate it into soups, stews, or casseroles.
Discover More Delicious & Healthy Sides
More of Our Favorite Easy Vegetable Side Dishes
Looking to round out your meals with more simple, flavorful vegetable sides? Here are some of our top picks that are just as easy and delicious as roasted broccoli:
- Baked Potatoes in Foil: Perfectly tender and fluffy, great for a hearty side.
- Oven Roasted Asparagus: Elegant and simple, a seasonal favorite.
- Ranch Roasted Potatoes: Crispy and full of flavor, a crowd-pleasing potato dish.
- Roasted Root Vegetables: A colorful and nutritious medley, perfect for cooler months.
More Inspirational Broccoli Dishes
Explore Our Collection of Easy Broccoli Recipes
Broccoli is a versatile and healthy ingredient that can be enjoyed in so many ways beyond just a simple side dish. If you love broccoli as much as we do, you’ll want to explore these other fantastic recipes:
- Steamed Broccoli: A classic, healthy preparation for a tender texture.
- Air Fryer Broccoli: Quick and easy for extra crispy florets.
- Broccoli and Cheese Stuffed Chicken: A comforting and flavorful main course.
- Beef and Broccoli: A popular takeout favorite, easily made at home.
- Strawberry Broccoli Salad: A refreshing and unexpected combination of flavors and textures.
Rating: 5 out of 5 stars (based on 1 vote)
Roasted Broccoli
Ingredients
- 5 cups chopped broccoli florets, approximately 12 oz.
- 3 tablespoons olive oil
- ¾ teaspoon kosher salt
- ½ teaspoon black pepper
- 2 teaspoons fresh lemon juice
- ¼ cup grated Parmesan cheese (optional)
Instructions
-
Preheat your oven to 375ºF (190ºC).
-
Spread the chopped broccoli florets evenly in a single layer over a large baking sheet. Drizzle generously with olive oil. Using your hands, massage the oil into the broccoli to ensure every floret is lightly coated.

-
Season the broccoli with kosher salt and black pepper. Massage the seasonings into the broccoli again, ensuring even distribution.
-
Transfer the baking sheet to the preheated oven. Roast for 15-17 minutes, tossing the broccoli halfway through the cooking time. Continue roasting until the edges of the broccoli florets are golden brown and slightly caramelized, and the broccoli is tender-crisp.
-
Remove the roasted broccoli from the oven and transfer it to a large serving bowl. Add the fresh lemon juice and the optional grated Parmesan cheese, then toss to combine. Serve immediately and enjoy!
Tips & Notes
- This roasted broccoli recipe is designed to produce florets with a satisfying, tender-crisp bite. If you prefer your broccoli to be softer and more thoroughly cooked, simply add a few extra minutes to the roasting time, checking frequently until it reaches your desired tenderness.
- Remember that oven temperatures can vary significantly. It’s always a good practice to monitor your broccoli closely during the last few minutes of roasting to prevent it from burning or becoming too soft.
Nutrition Information (Approximate Per Serving)
Calories: 158 kcal
Carbohydrates: 9 g
Protein: 5 g
Fat: 13 g
Fiber: 3 g
Sugar: 2 g
Please note: Nutrition information is automatically calculated and should be used as an approximation only, as values can vary based on specific ingredients and preparation.
Photography: The beautiful photos featured in this post were captured by Ashley McGlaughlin from The Edible Perspective, adding visual inspiration to this delicious recipe.