
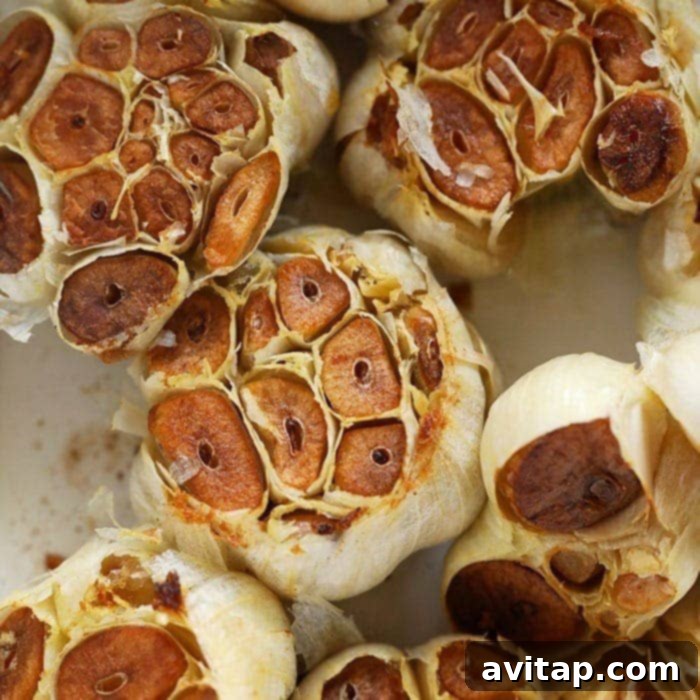
How to Roast Garlic: Your Ultimate Guide to Sweet, Caramelized Perfection
Unlock a world of exquisite flavor with this incredibly simple guide on how to roast garlic in the oven. Forget about the sharp, pungent bite of raw garlic; oven roasting transforms this humble ingredient into a soft, buttery, and profoundly sweet delicacy. It’s an effortless cooking technique that promises to elevate virtually any dish, infusing your kitchen with an irresistibly warm and inviting aroma.
Many home cooks might shy away from roasting garlic, imagining it to be a complex culinary task. However, you’ll be delighted to learn just how easy it is to achieve perfectly roasted garlic cloves that are ready to be spread, mashed, or incorporated into your favorite recipes. This tutorial breaks down the process into clear, manageable steps, ensuring delicious results every single time.

Why Roast Garlic? The Flavor Transformation You Need
Once you experience the magic of roasted garlic at home, you’ll find yourself reaching for it constantly. While fresh garlic cloves are undoubtedly delicious and vital for many cuisines, roasting unlocks an entirely different dimension of flavor. The high heat of the oven catalyzes a remarkable chemical change, mellowing out garlic’s intense pungency and coaxing out its natural sugars. This process results in gloriously caramelized, deeply savory, and distinctly sweet cloves that are incredibly tender – almost spreadable.
Beyond the incredible taste, the aroma that fills your kitchen as garlic roasts is an experience in itself. It’s a warm, comforting scent that signals something truly special is being prepared. This transformation makes roasted garlic a versatile secret weapon in any cook’s arsenal, capable of enhancing everything from simple toast to gourmet meals. It’s truly a game-changer for anyone looking to add depth and richness to their cooking with minimal effort.
Essential Ingredients for Perfectly Roasted Garlic
Making your own roasted garlic requires surprisingly few ingredients, focusing on quality to achieve the best flavor. This simplicity is part of its charm and why it’s so easy to integrate into your regular cooking routine. You likely already have these staples in your pantry.
- Whole Garlic Bulbs: The star of our show! Look for firm, plump garlic bulbs with intact, dry skins. Avoid any that feel soft or show signs of sprouting, as these may indicate an older, less flavorful bulb. You can roast as many or as few as you need; the method scales perfectly whether it’s one bulb or ten.
- High-Quality Olive Oil: A good extra virgin olive oil is crucial here. It helps the garlic cloves to soften, caramelize, and prevents them from drying out or burning. The oil also infuses with the garlic’s flavor, creating a delectable garlic-infused oil perfect for drizzling over your finished dishes.
- Salt (to taste): A sprinkle of sea salt enhances the garlic’s natural sweetness and savory notes. While optional, it’s highly recommended for a balanced flavor profile that brings out the best in the roasted cloves.
- (Optional) Freshly Ground Black Pepper: For a subtle hint of warmth and a touch of spice, black pepper can complement the rich flavors beautifully.
Step-by-Step Guide: How to Roast Garlic in Your Oven
Achieving perfectly roasted garlic is incredibly straightforward and requires minimal hands-on time. Follow these simple steps for a consistently delicious result that will impress your taste buds and elevate your culinary creations.
Equipment You’ll Need:
- Small baking dish or a quarter sheet pan
- Sharp knife
- Aluminum foil (optional, but recommended for tender results and easy cleanup)
- Nonstick cooking spray or a little extra olive oil for the pan
Detailed Instructions:
- Preheat Your Oven: Begin by preheating your oven to 375ºF (190ºC). This moderate temperature is ideal for allowing the garlic to slowly soften and caramelize without burning, ensuring a sweet, mellow flavor. While the oven preheats, lightly grease a small baking dish or a quarter sheet pan with nonstick cooking spray or a thin layer of olive oil. Set it aside for the prepared garlic.
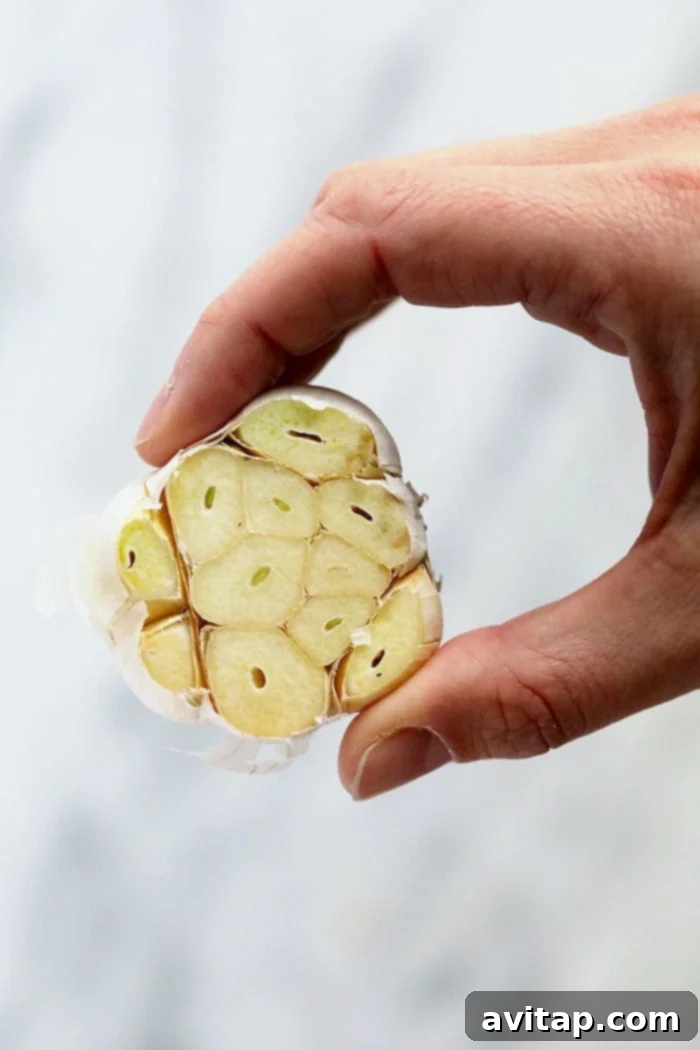
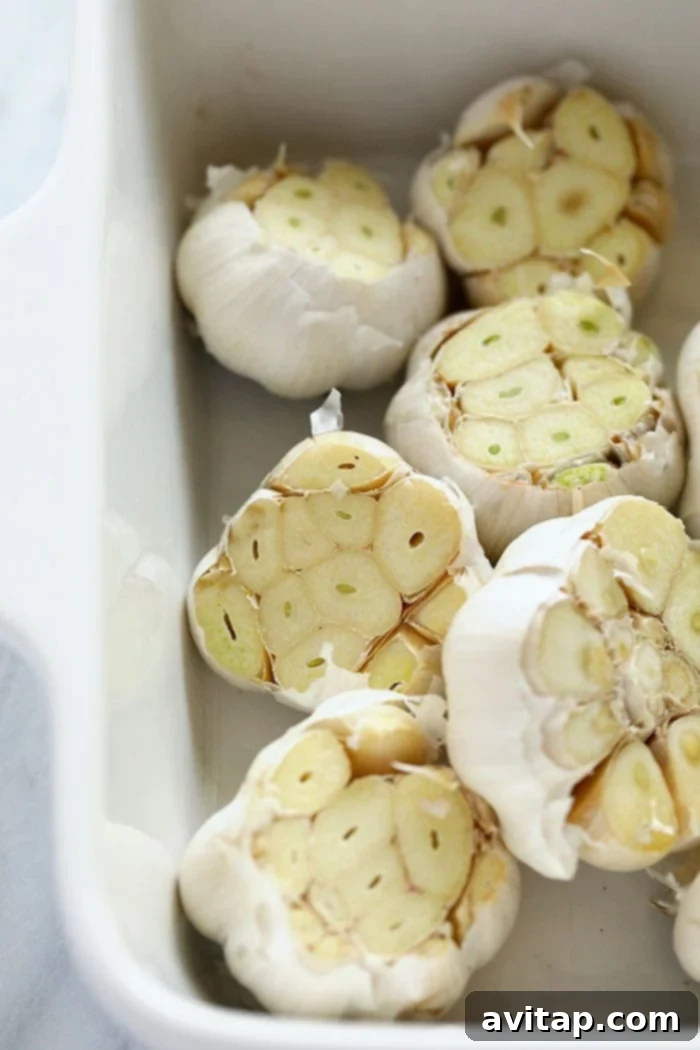
- Prepare the Garlic Bulbs: Take each whole garlic bulb. Using a sharp knife, carefully slice off about a quarter to a half-inch from the very top (the pointy end) of each bulb. This strategic cut should expose the tops of the individual garlic cloves within the bulb. It’s important to note there’s no need to peel the entire bulb; the papery outer skin acts as a protective layer during roasting, helping the cloves steam and soften beautifully.
- Arrange in the Baking Dish: Once trimmed, carefully place the prepared garlic bulbs in your greased baking dish. Ensure the cut-side of each bulb is facing upwards. This positioning is key, as it allows the olive oil to seep directly into the exposed cloves and facilitates even roasting and caramelization.
- Season and Drizzle: Drizzle each garlic bulb generously with olive oil – approximately 1/2 to 1 teaspoon per bulb, depending on its size. Make sure the exposed cloves are well-coated. At this stage, you can also sprinkle a pinch of salt and a dash of freshly ground black pepper over each bulb for added flavor. For extra moisture and to prevent any potential drying out, you can optionally cover the baking dish tightly with aluminum foil.
- Roast to Perfection: Transfer the baking dish to your preheated oven. Bake for approximately 40 to 45 minutes. For optimal caramelization and tenderness, we recommend a simple trick: flip the garlic bulbs halfway through the baking time (after about 20 minutes) so they are flat-side down for the remainder of the cooking. This helps ensure even browning and a uniformly soft texture throughout.
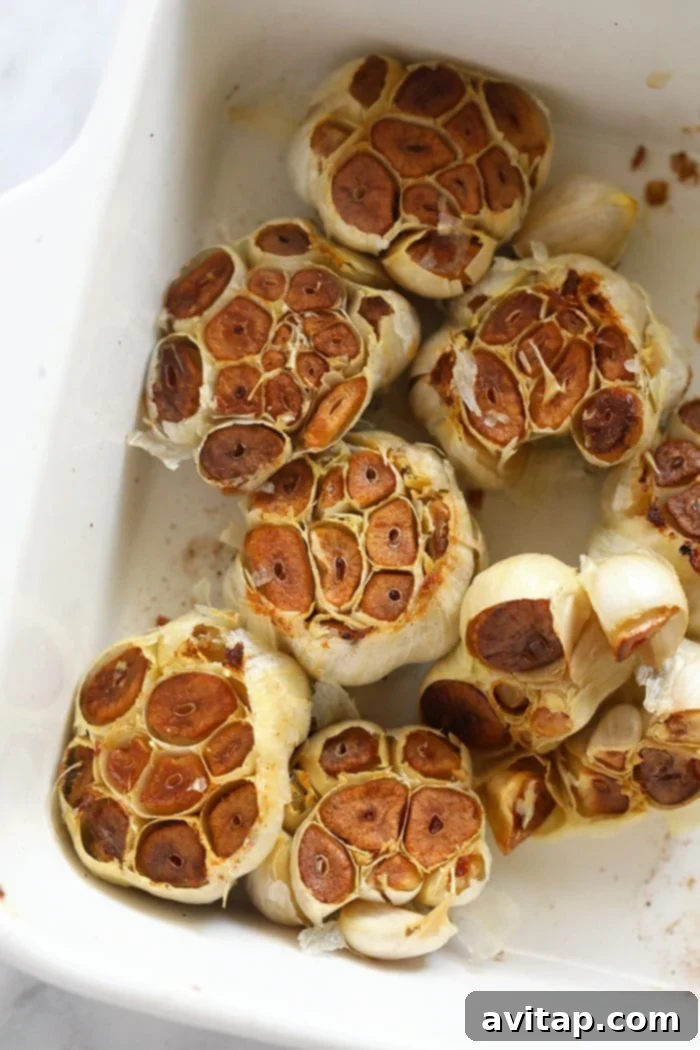
- Check for Doneness: Your roasted garlic is ready when the cloves are wonderfully fragrant, filling your kitchen with a sweet aroma. Visually, they should appear deeply golden brown and beautifully caramelized at the exposed tops. When gently squeezed, the entire bulb should feel very soft and yielding. If they don’t seem soft enough, you can return them to the oven for another 5-10 minutes.
- Cool and Serve: Carefully remove the baking dish from the oven and let the roasted garlic bulbs cool for about 10-15 minutes. This cooling period is important as it makes them much easier to handle and allows the intense flavors to mellow and settle further.
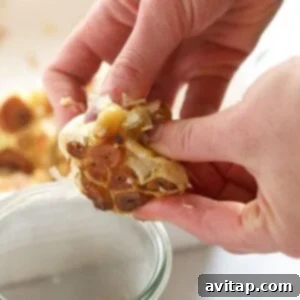
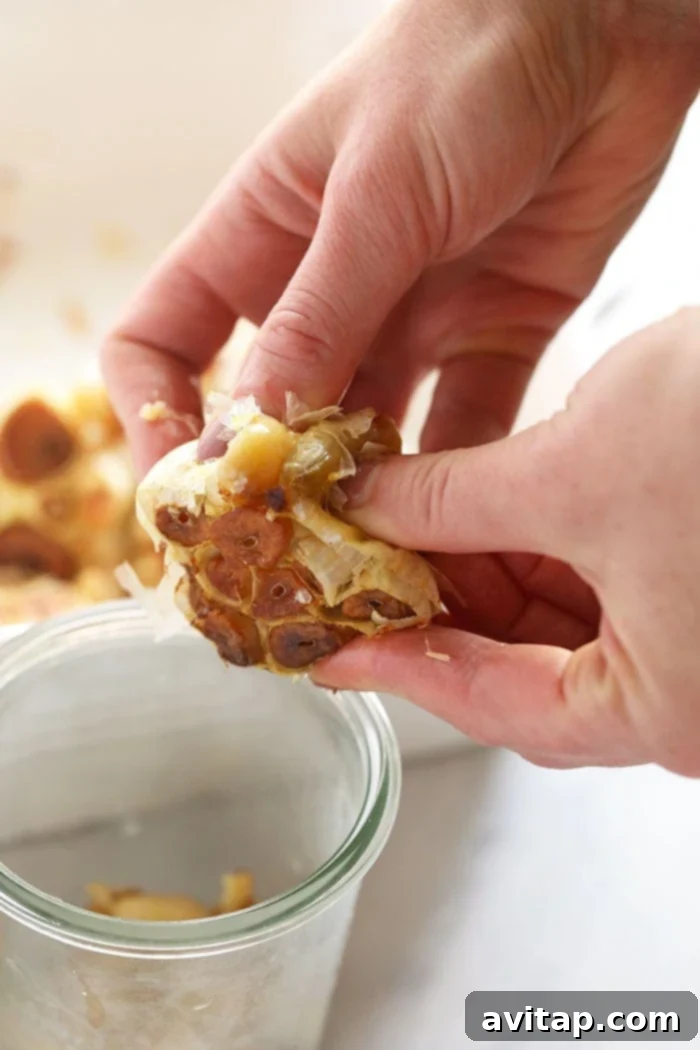
- Extract the Cloves: Once cool enough to touch, gently squeeze the bottom of each garlic bulb. The soft, sweet, and buttery roasted cloves will effortlessly pop out of their papery casings. Discard the skins. Your delicious homemade roasted garlic is now ready to be used as desired – whether mashed, spread, or added to your favorite dishes!

Roasted Garlic Variations: Unleash Your Creativity!
While the classic olive oil and salt method yields perfect results, don’t hesitate to experiment with different flavor profiles to match your culinary adventures. Roasted garlic is incredibly adaptable and welcomes creative additions:
- Herb and Spice Infusions: Before roasting, consider sprinkling the bulbs with your favorite dried herbs and spices. Think aromatic dried rosemary, thyme, or oregano for a Mediterranean touch. Smoked paprika can add a subtle depth, while a dash of chili flakes or cayenne pepper can introduce a pleasant, warm kick. A pinch of black pepper is always a welcome addition, enhancing the overall savory profile.
- Alternative Oils: While olive oil is traditional and complements garlic beautifully, you can certainly use other oils to subtly alter the flavor. Avocado oil offers a neutral taste and a high smoke point, making it a healthy alternative. For a hint of luxury, a touch of truffle oil can add an opulent aroma if drizzled *after* roasting. Alternatively, a neutral vegetable oil can also be used if olive oil is not preferred.
- Roast with Other Vegetables: Maximize your oven’s efficiency and infuse even more flavor by roasting garlic alongside other robust root vegetables. Onions, sweet potatoes, carrots, parsnips, and even Brussels sprouts all roast beautifully at similar temperatures and will absorb some of that delicious garlic aroma. Simply toss these vegetables with a little oil and your chosen seasonings, then add the garlic bulbs to the pan for a complete, flavorful side dish or base for a meal.
Frequently Asked Questions About Roasting Garlic
Absolutely not! One of the great advantages and time-savers of roasting garlic is that the papery outer skin acts as a protective barrier, essentially steaming the cloves inside and keeping them wonderfully moist. Attempting to peel raw garlic cloves beforehand would be a messy, tedious, and completely unnecessary task. After roasting, the tender, soft cloves will easily slide right out of their casings with a gentle squeeze.
Yes, this roasted garlic recipe is incredibly flexible and easily scalable. Whether you want to make a single head of roasted garlic for a quick addition to your meal or ten heads for extensive meal prep and future use, the cooking time and method remain essentially the same. Just ensure your baking dish is large enough to accommodate all the bulbs in a single layer for even roasting, and adjust the amount of olive oil accordingly to coat each one generously.
You’ll know your roasted garlic is perfectly done when your kitchen is filled with a sweet, aromatic fragrance that’s distinctly different from raw garlic. Visually, the cloves should be deeply golden brown and beautifully caramelized, especially at the exposed tops. When gently squeezed, the entire bulb should feel very soft and yielding, indicating the cloves inside are buttery-tender. This typically takes about 40-45 minutes when roasted at 375ºF (190ºC), but oven temperatures can vary, so always check for softness and color.
While you can soften garlic in a microwave or quickly cook it in an air fryer, neither method truly replicates the deep caramelization and unique, complex flavor profile achieved through traditional oven roasting. The oven’s gentle, consistent heat over a longer period allows the natural sugars in the garlic to develop slowly, creating that signature sweet and buttery texture. For authentic, richly flavored roasted garlic, the oven is truly the best and most recommended method.
Storage and Freezing Instructions for Roasted Garlic
Having roasted garlic readily available can be a game-changer for quick meal prep and effortlessly elevating everyday dishes. Proper storage ensures you can enjoy its rich, mellow flavor for an extended period.
- Refrigerator Storage: Once the roasted garlic cloves have cooled completely, transfer them to an airtight container. You can store them whole or mashed, depending on your intended use. For an extra layer of flavor and preservation, you can submerge the cloves in a small amount of fresh olive oil within the container. Stored this way, they will keep beautifully for up to 5 days in the refrigerator. Always ensure they are fully cooled before sealing to prevent condensation.
- Freezing Roasted Garlic: Roasted garlic freezes exceptionally well, making it perfect for batch cooking and stocking up!
- Individual Freezing: To prevent the cloves from clumping together into a solid block, spread the cooled roasted garlic cloves in a single layer on a parchment-lined baking sheet. Place the entire baking sheet in the freezer until the cloves are completely frozen solid (this usually takes about 1 hour).
- Transfer to Storage: Once thoroughly frozen, transfer the individual cloves into an airtight freezer-safe container or a heavy-duty freezer bag. Label with the date.
- Freezer Life: Roasted garlic can be stored in the freezer for up to 3 months without significant loss of flavor or texture. When ready to use, simply grab the desired amount of frozen cloves – there’s usually no need to thaw them before adding to most cooked dishes like soups, sauces, or stir-fries.
Elevate Your Appetizer Game: Roasted Garlic Crostini!
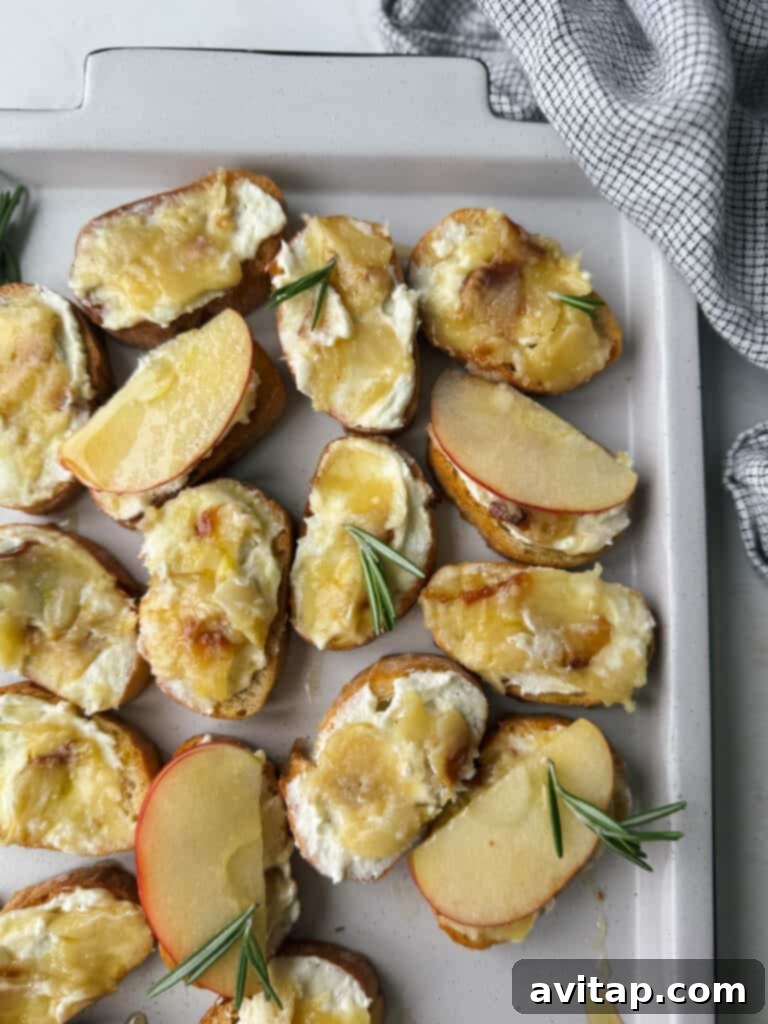
Roasted garlic isn’t just a background flavor; it can be the star of an appetizer! We particularly love serving this rich, sweet garlic on a crisp crostini, paired with creamy whipped feta, a hint of fresh apple, and a drizzle of honey. It’s an easy yet elegant starter perfect for any gathering or a sophisticated snack. Here’s a quick appetizer recipe for you to try:
Ingredients for Roasted Garlic Crostini:
- 3 heads of freshly roasted garlic (cloves extracted)
- 1 baguette, thinly sliced and lightly toasted until golden brown
- 1/3 cup whipped feta (store-bought or homemade by blending feta with a little cream cheese or Greek yogurt)
- 3 tablespoons high-quality honey
- A pinch of flaky sea salt, to taste
- Optional: Fresh chives or thyme for garnish
Instructions for Crostini:
- Spread a generous layer of whipped feta onto each toasted baguette slice, covering it evenly.
- Gently press a few roasted garlic cloves onto the feta. You can mash them slightly if you prefer a smoother texture.
- Arrange a thin slice of crisp apple (Granny Smith or Honeycrisp works wonderfully for a balance of sweet and tart) on top of the garlic.
- Drizzle each crostini with a small amount of honey, adding a touch of natural sweetness.
- Finish with a tiny pinch of flaky sea salt to enhance all the flavors. Garnish with fresh herbs like chives or thyme if desired for a burst of color and freshness, and serve immediately.
Versatile Serving Suggestions for Roasted Garlic
The beauty of roasted garlic lies in its incredible versatility. Its caramelized, slightly sweet yet savory profile allows it to seamlessly integrate into countless dishes, instantly elevating their flavor without the overpowering bite of raw garlic. Here are some of our favorite ways to enjoy this culinary gem:
- Savory Spreads: Mash roasted garlic cloves with cream cheese, goat cheese, or ricotta and spread it generously on bagels, toast, or crackers. It also makes a fantastic addition to softened butter for a gourmet garlic butter that’s divine on warm bread.
- Enhanced Vegetables: Mince or mash roasted garlic cloves and sauté them with fresh or roasted vegetables like green beans, asparagus, broccoli, mushrooms, or spinach. It adds a subtle depth of flavor that complements almost any veggie.
- Breakfast & Brunch Boost: Fold minced roasted garlic into scrambled eggs, omelets, or frittatas for a sophisticated flavor upgrade to your morning meal. It pairs wonderfully with herbs like chives or parsley.
- Dips and Spreads: Stir mashed roasted garlic into your favorite dips and spreads. It’s magnificent in classic hummus, a creamy white bean dip, a rich spinach and artichoke dip, or even a simple Greek yogurt dip.
- Pasta Perfection: Add roasted garlic to any pasta dish. Mash it into tomato sauces, creamy Alfredo sauces, or simply toss it with olive oil, fresh herbs, and Parmesan cheese for a quick, flavorful pasta. It’s superb in a simple ricotta pasta or mixed into a hearty bolognese or pesto.
- Hearty Soups and Stews: Stir mashed roasted garlic into any savory soup or stew just before serving. It deepens the flavor profile without adding an overpowering raw garlic taste. Imagine it in a rich minestrone, a comforting potato leek soup, a robust beef stew, or a vegetarian chili.
- Gourmet Salad Dressings: Mince and whisk roasted garlic into your homemade salad dressings, such as our balsamic vinaigrette. It adds a mellow, complex garlic note that’s far superior to raw garlic in dressings.
- Mash into Potatoes: Fold plenty of mashed roasted garlic into your mashed potatoes, baked potato filling, or even slow cooker mashed potatoes for an exceptionally flavorful and aromatic side dish.
- As a Side Dish: Seriously, eat it whole! The cloves are so sweet and buttery, they can be enjoyed on their own as a delightful snack or a unique accompaniment to a cheese board or charcuterie spread.
- Sheet Pan Dinners: Add whole garlic heads to a sheet pan of roasted root vegetables, chicken, or other proteins for a complete and flavorful one-pan meal.
How to Roast Garlic
Roasted garlic instantly elevates any dish! Follow this simple recipe for sweet, tender, and caramelized roasted garlic in no time.
By: Emily Richter
Prep time: 5 mins
Cook time: 40 mins
Total time: 45 mins
Yields: 6 servings (based on 6 bulbs)
Rating: 5 out of 5 stars (from 3 votes)

Ingredients
- 6 bulbs of whole garlic
- 3 teaspoons extra virgin olive oil
- Pinch of salt (to taste)
- Optional: Freshly ground black pepper
Instructions
- Preheat Oven: Preheat your oven to 375ºF (190ºC). Lightly grease a small baking dish or a quarter sheet pan with nonstick cooking spray or a little olive oil.
- Prepare Garlic: Using a sharp knife, slice off about 1/4 to 1/2 inch from the top (pointy end) of each garlic bulb, exposing the cloves inside. Keep the rest of the papery skin intact.
- Arrange: Place the prepared garlic bulbs into the baking dish, cut-side facing upwards.
- Drizzle: Drizzle each bulb with approximately 1/2 teaspoon of olive oil, ensuring the exposed cloves are coated. Sprinkle lightly with salt and pepper if desired. For very soft garlic, you can cover the dish loosely with foil.
- Roast: Bake for a total of 40-45 minutes. Halfway through the baking time (after about 20 minutes), carefully flip the garlic bulbs so they are flat-side down. This helps with even caramelization.
- Cool: Remove from the oven and let the garlic cool for 10-15 minutes until it’s comfortable to handle.
- Extract: Gently squeeze the bottom of each bulb to easily push out the soft, caramelized roasted garlic cloves from their skins. Use immediately or store for later.
Tips & Notes
- Storage: Store cooled roasted garlic cloves in an airtight container in the refrigerator for up to 5 days. For extended freshness, cover them with olive oil in the container.
- Freezing: For longer storage, spread individual roasted garlic cloves on a baking sheet and freeze until solid (about 1 hour). Transfer to a freezer-safe bag or container and freeze for up to 3 months. No need to thaw before using in cooked dishes.
Nutrition (per serving, approximate)
- Calories: 60 kcal
- Carbohydrates: 6 g
- Protein: 1 g
- Fat: 4 g
- Fiber: 0 g
- Sugar: 0 g
Nutrition information is automatically calculated and should be used as an approximation. Actual values may vary based on ingredients and preparation methods.
Discover More of Our Favorite…
Delicious Roasted Vegetable Recipes
If you love the simplicity and rich flavor of roasted garlic, you’ll adore these other easy and delicious roasted vegetable recipes, perfect for any meal:
- Honey Balsamic Roasted Carrots: A delightful blend of sweet and tangy, these carrots make an irresistible side dish.
- Oven Roasted Brussels Sprouts: Achieve perfectly crispy edges and tender centers, transforming a humble vegetable into a crowd-pleaser.
- Hearty Roasted Root Vegetables: A colorful medley of earthy goodness, these are excellent for meal prep or a comforting family dinner.
- Easy Roasted Delicata Squash: Naturally sweet and vibrant, this squash is incredibly simple to prepare and visually appealing.
- Flavorful Ranch Roasted Potatoes: A zesty and herbaceous twist on classic roasted potatoes that everyone will love.
- Super Simple Garlic Roasted Cauliflower: A nutritious and delicious way to enjoy cauliflower, amplified with the irresistible flavor of garlic.
Final Thoughts on Mastering Roasted Garlic
Roasting garlic is more than just a cooking technique; it’s a way to unlock a profound depth of flavor that can transform everyday meals into extraordinary culinary experiences. This simple, hands-off method yields a versatile ingredient that is equally at home in gourmet dishes as it is in a casual weeknight dinner. From its captivating aroma filling your home to its buttery-soft texture and sweet, mild taste, roasted garlic truly is a kitchen staple worth mastering.
We encourage you to experiment with different serving suggestions and confidently incorporate this delightful ingredient into your cooking. Once you discover the ease and deliciousness of homemade roasted garlic, you’ll wonder how you ever cooked without it. Happy roasting, and enjoy the incredible flavors you’re about to create!
Don’t forget to tag your posts on social media with the hashtag #fitfoodiefinds. We’d absolutely love to see what you’re up to and share your delicious culinary creations with our community!