
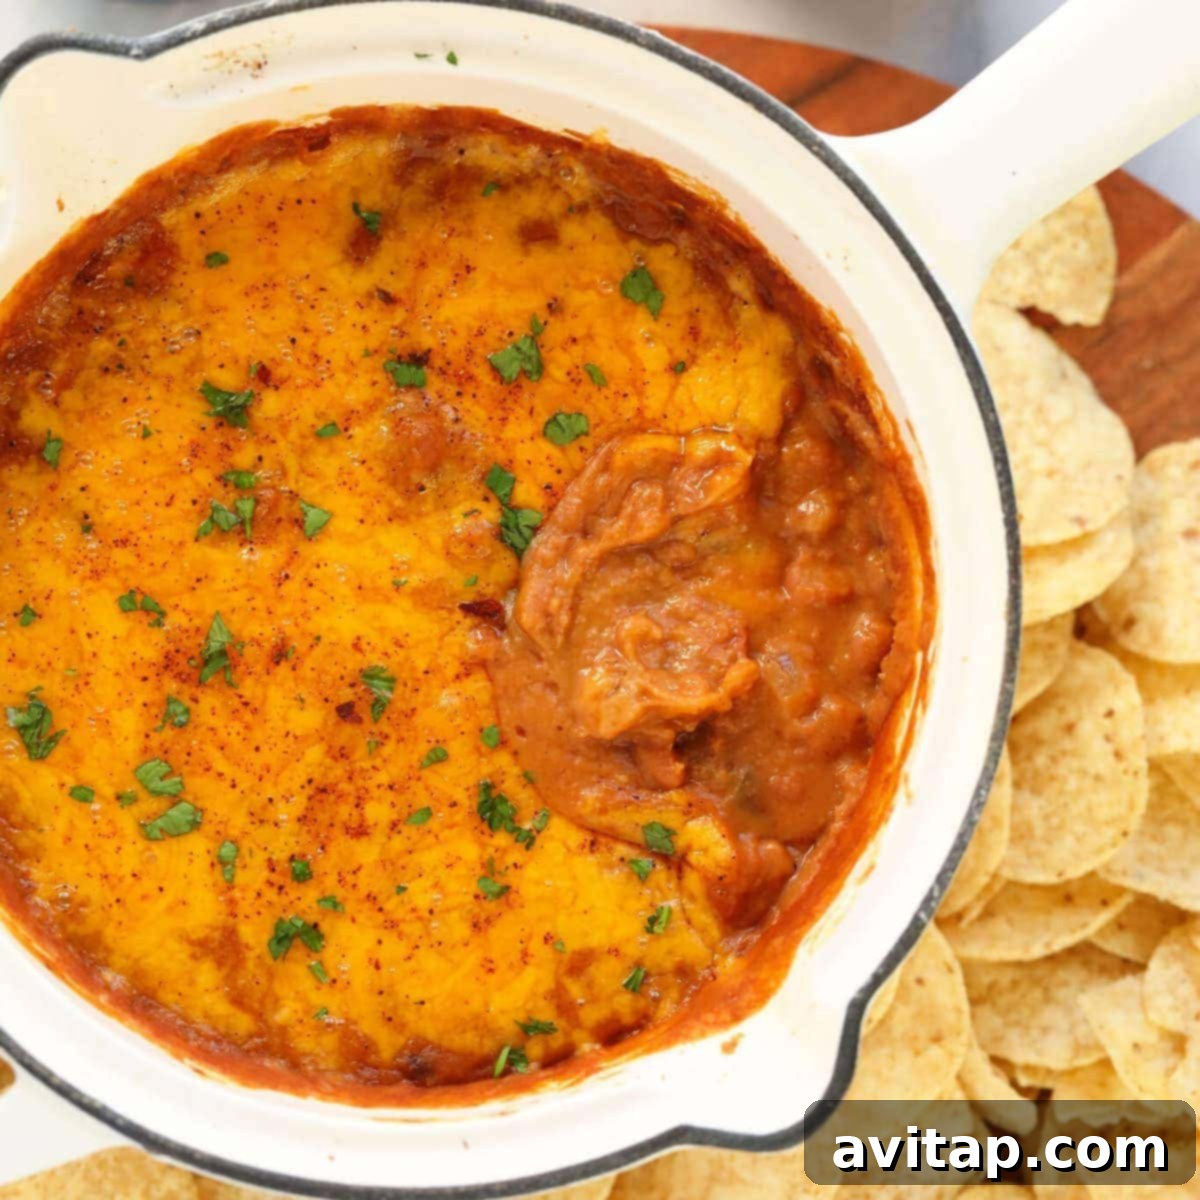
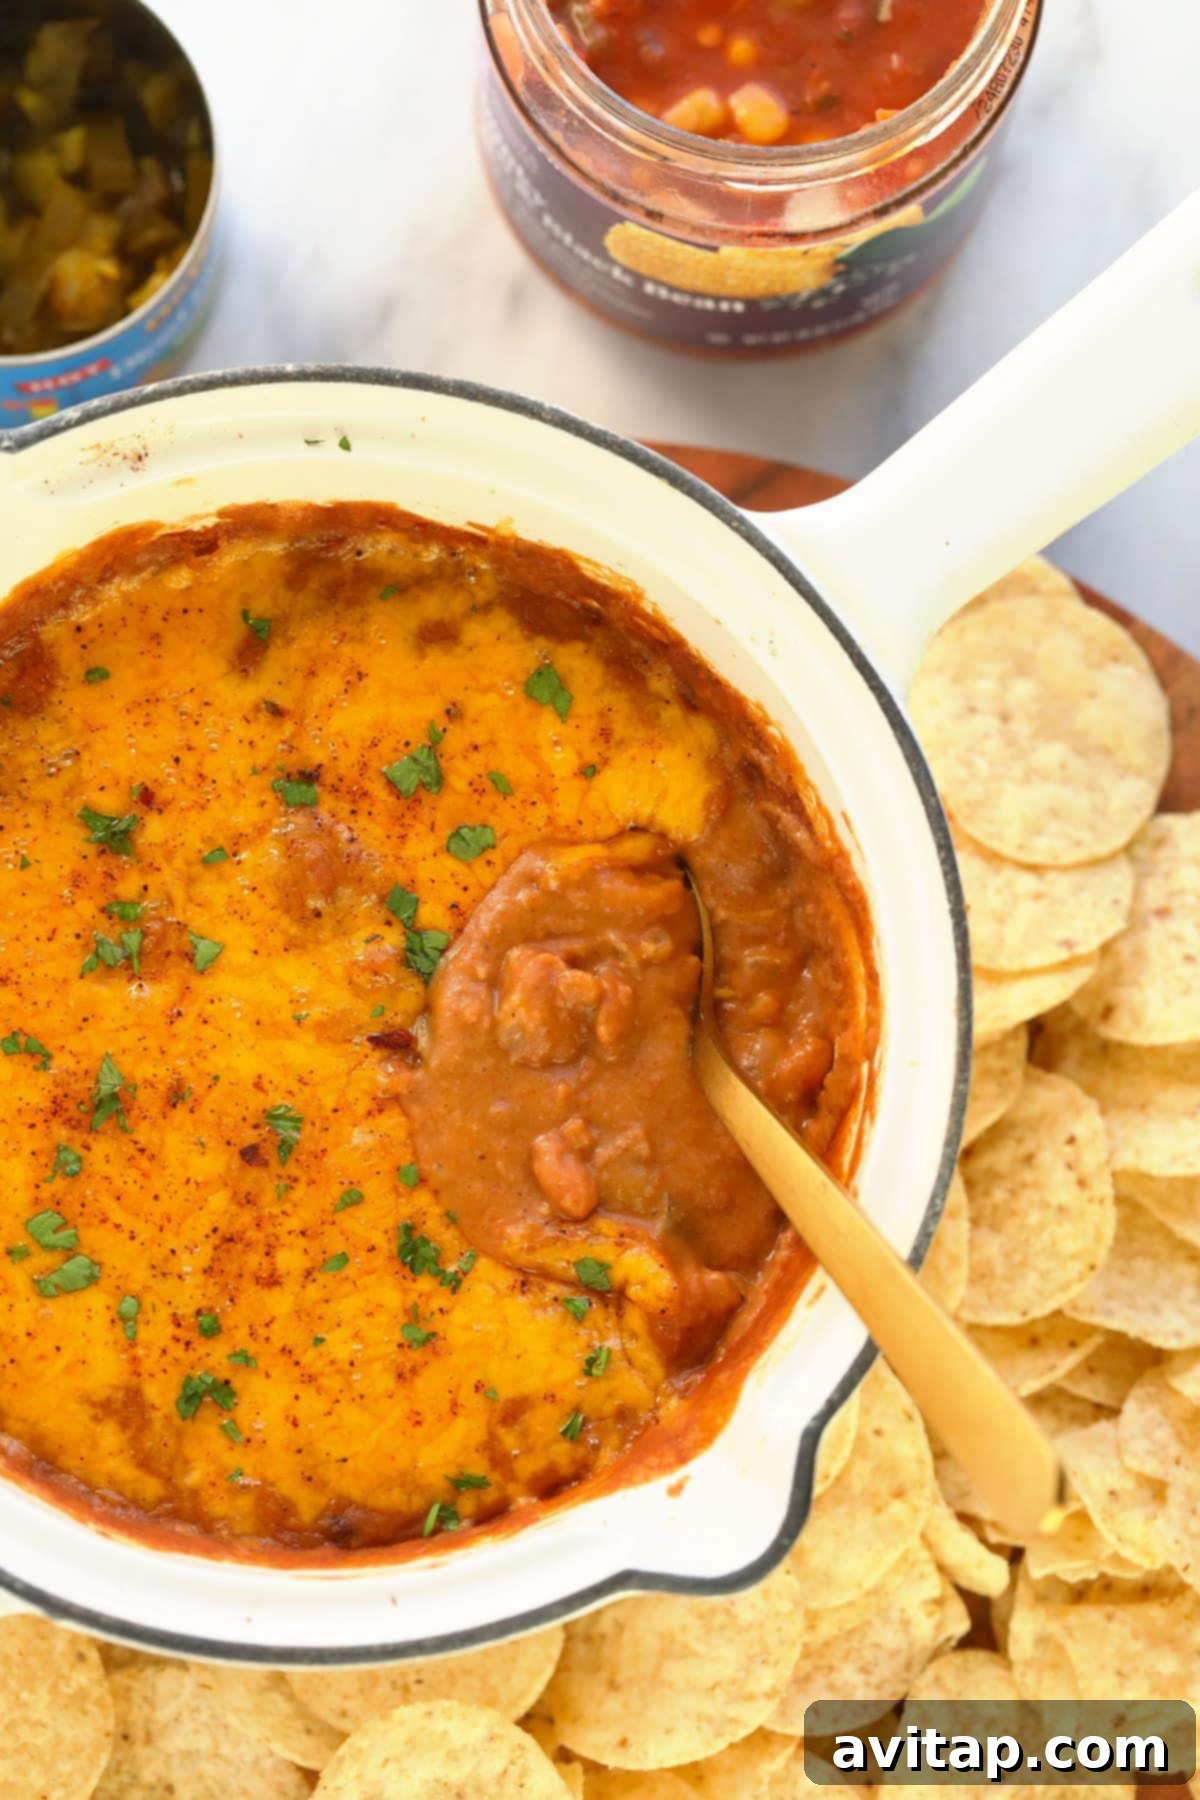
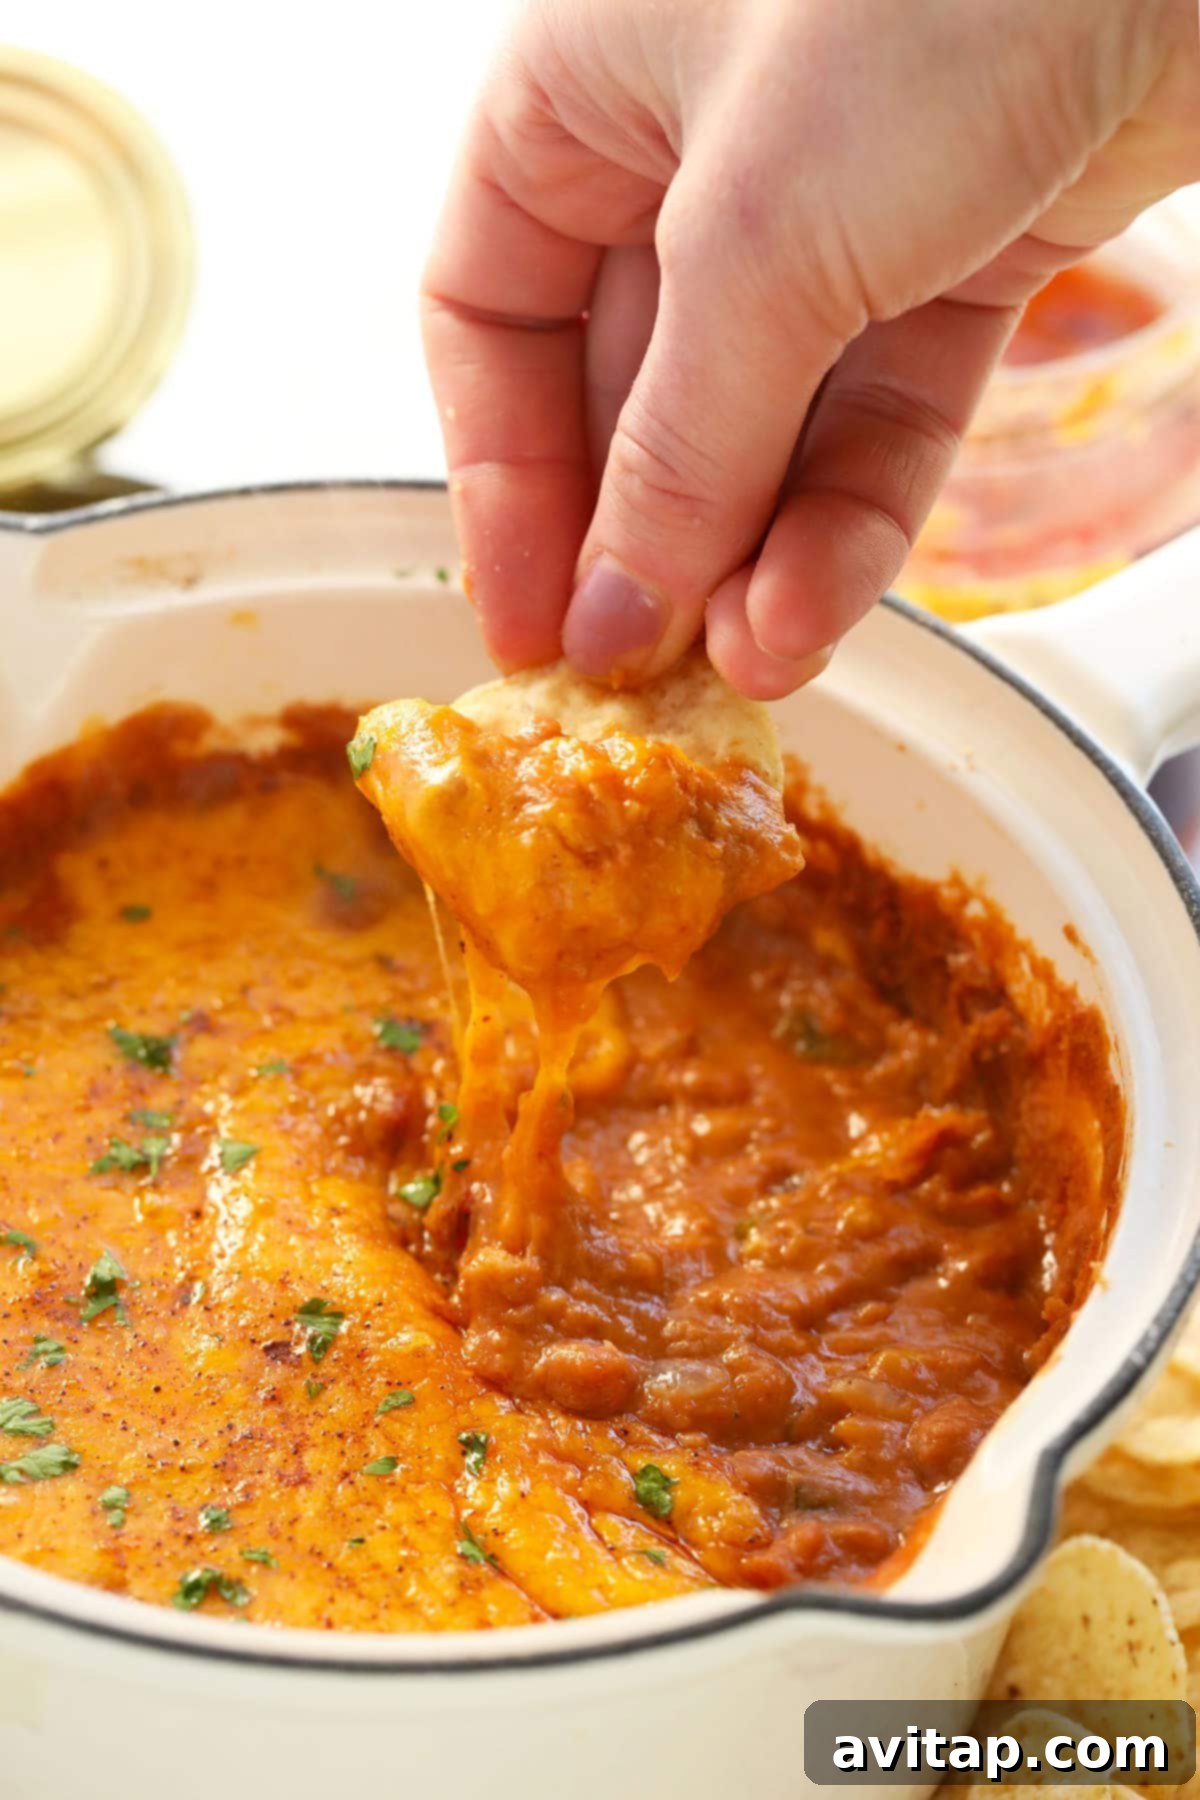
Unleash a burst of flavor with the ultimate cheesy bean dip recipe – your new go-to appetizer! Forget bland, store-bought options; this homemade delight is not only incredibly delicious but also surprisingly healthy. Packed with plant-based protein from hearty refried and pinto beans, enriched with creamy Greek yogurt, and crowned with generous layers of melted cheddar cheese, it truly stands out as the best bean dip you’ll ever make. Perfect for any gathering, from casual game days to elegant dinner parties, this dip promises to be a crowd-pleaser that guests will rave about and request again and again.
When it comes to crafting healthy, satisfying dips that don’t compromise on taste, we’ve got you covered. Beyond this irresistible bean dip, explore other delectable and nutritious options from our collection. Dive into our lightened baked spinach artichoke dip for a creamy classic, or savor the deeply aromatic roasted garlic caramelized onion dip for an unforgettable savory experience. With our diverse range of recipes, you’ll never be at a loss for wholesome and exciting appetizers to serve your family or guests, ensuring every snack time and special occasion is both flavorful and health-conscious.
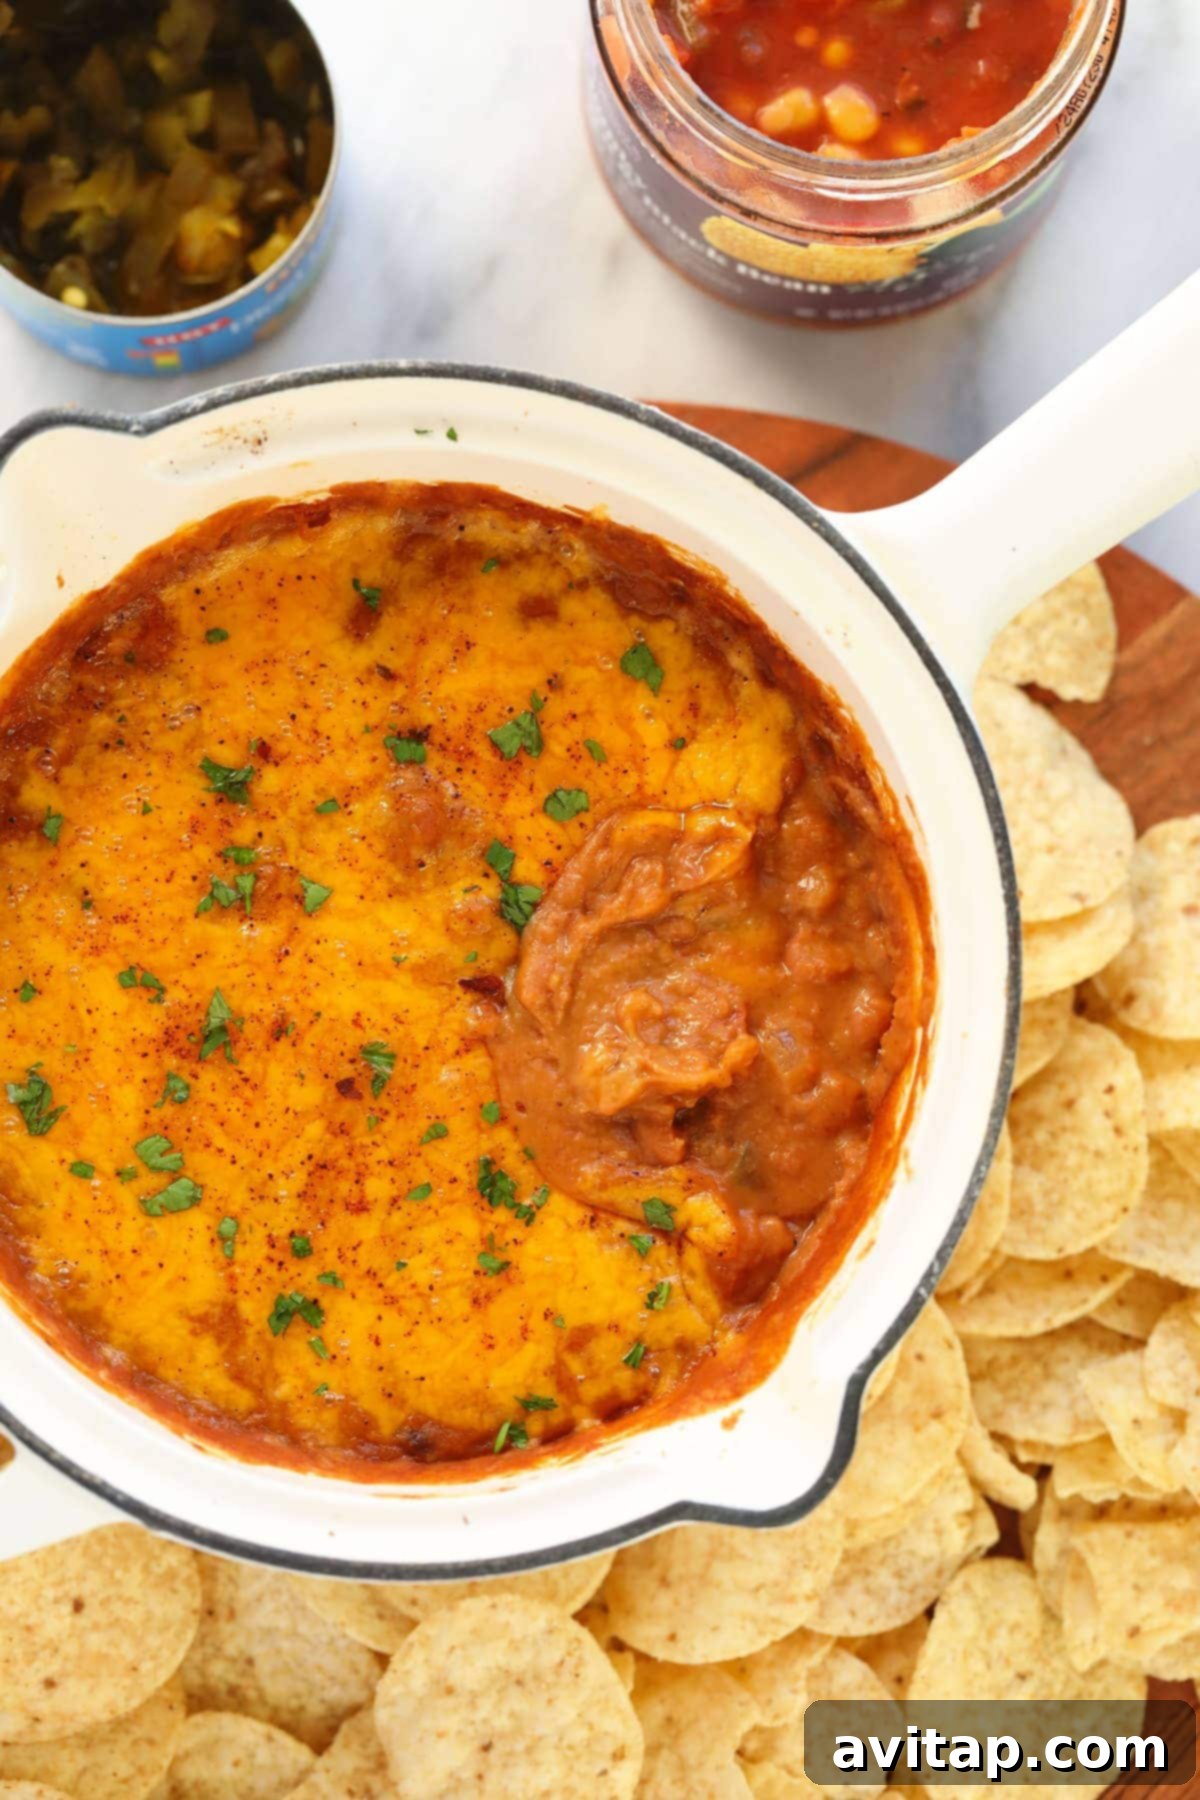
Why This is The Best Bean Dip Recipe for Any Occasion
What makes a dip truly exceptional and a guaranteed hit? We believe the best dips aren’t just tasty; they’re incredibly convenient, remarkably versatile, and offer a little something extra that makes them stand out. This Mexican-inspired bean dip hits all those marks and more, making it an ideal choice for virtually any occasion, especially as a game day appetizer. It’s gloriously cheesy, perfectly seasoned with a delightful blend of spices, and incredibly satisfying when scooped up with a crispy chip or fresh veggie stick. But there’s even more to love! Our philosophy for crafting outstanding dips centers on a few key elements that this recipe embodies:
- Effortlessly Serves a Crowd: Whether you’re hosting an intimate family gathering, a lively backyard barbecue, or a massive party, this healthy bean dip is designed to impress and satisfy. The base recipe generously serves 6-8 people, providing ample portions for everyone to enjoy. However, its true beauty lies in its remarkable adaptability. Need to feed a larger group for the big game, a festive holiday celebration, or a community potluck? This recipe can be effortlessly doubled or even tripled without compromising on its rich flavor or delectable texture, ensuring everyone gets to enjoy a hearty scoop of this delightful appetizer.
- Ready in Under 30 Minutes: Time is often of the essence, especially when you’re juggling multiple tasks or preparing for an event. This quick bean dip recipe is a true lifesaver when you need a delicious appetizer in a pinch. From the moment you start prepping to the instant it emerges from the oven, bubbling and golden, you’ll have this cheesy delight on the table in less than 30 minutes. This efficiency allows you more precious time to socialize with your guests, enjoy the festivities, or simply relax. It’s the perfect, stress-free solution for last-minute cravings or unexpected visitors who drop by.
- Smart Healthy Swaps for Guilt-Free Indulgence: We firmly believe that healthy eating should never mean sacrificing flavor, satisfaction, or the joy of indulging in your favorite foods. This bean dip is meticulously crafted with a handful of ingenious healthy swaps that significantly boost its nutritional profile without compromising its rich, satisfying taste. By incorporating protein-packed Greek yogurt as a creamy base and wholesome beans (both refried and pinto), we deliver a dip that feels incredibly indulgent while being genuinely good for you. It’s a harmonious blend of real, wholesome ingredients, resulting in authentic flavor and true satisfaction that you can feel great about enjoying.
So, whether you’re whipping up this protein-packed bean dip for an exciting game day, serving it as a fun and nutritious family appetizer, bringing it as a standout dish to a potluck, or simply treating yourself to a wholesome snack, prepare for rave reviews. This dip is guaranteed not to disappoint, offering a delightful blend of creamy texture, savory spices, and cheesy goodness that everyone, regardless of dietary preference, will adore.
Essential Ingredients for Your Savory, Protein-Packed Bean Dip
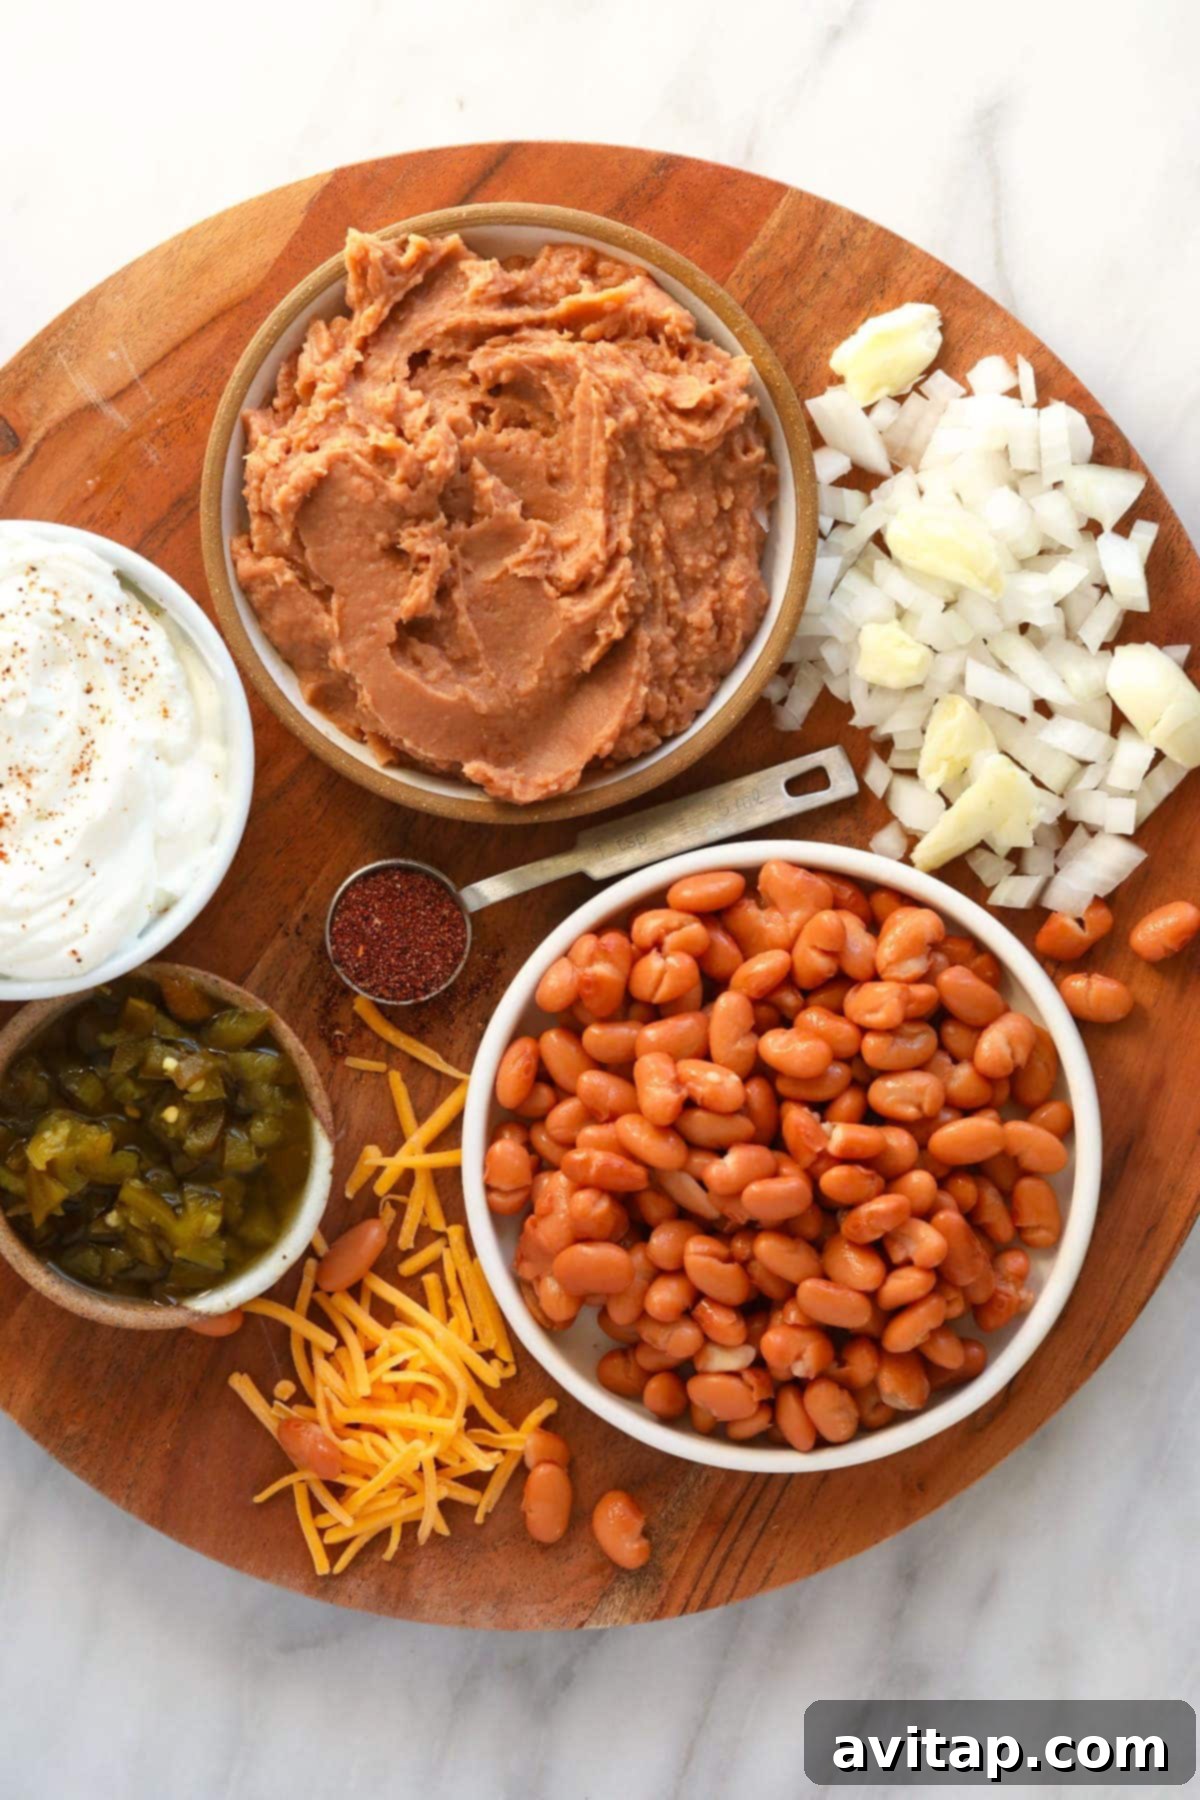
Crafting the perfect, flavorful bean dip begins with a thoughtful selection of fresh, wholesome ingredients. Our recipe utilizes a concise list of components that come together harmoniously to create a dip you’ll feel great about serving, knowing it’s both delicious and nutritious. Each ingredient plays a vital role in building the incredible depth of flavor and creamy texture of this protein-packed appetizer:
- Canned Jalapeños (or Green Chiles): These versatile peppers are crucial for adding a touch of zesty heat and a subtle depth of flavor to your dip. For those who enjoy a mild to moderate kick, canned diced jalapeños are perfect, infusing a vibrant warmth. If you or your guests prefer a milder flavor, or if you’re serving individuals with varying spice preferences, canned diced green chiles make an excellent, equally flavorful substitute. They provide a gentle, earthy pepper taste without overwhelming heat, ensuring everyone can enjoy this delicious appetizer.
- Refried and Pinto Beans: A truly satisfying bean dip wouldn’t be complete without its star ingredients! We elevate this classic recipe by combining two distinct varieties of beans – the smooth, creamy consistency of refried beans and the tender, whole texture of pinto beans. The refried beans provide an essential, rich, and velvety base that binds all the flavors together, while the whole pinto beans add a delightful textural contrast and a robust, earthy flavor profile. Together, they create a wonderfully satisfying foundation for our dip, packed not only with incredible taste but also with dietary fiber and abundant plant-based protein.
- Full-Fat Greek Yogurt: Our secret ingredient for achieving unparalleled creaminess and a significant protein boost is full-fat Greek yogurt. While any fat percentage of Greek yogurt will work, the full-fat variety offers a luxurious, rich texture that truly makes this dip special and incredibly decadent-tasting. It’s a fantastic, healthier alternative to traditional sour cream or cream cheese, providing a tangy richness and a wholesome nutritional profile without the extra saturated fat. We delve deeper into why Greek yogurt is a game-changer for dips in a dedicated section below!
- Taco Seasoning: This versatile and aromatic seasoning blend is the very heart of our bean dip’s savory, authentic Tex-Mex flavor. You have the flexibility to opt for a high-quality, store-bought blend for ultimate convenience, which is perfectly acceptable. However, for an even fresher, more customizable taste, and the ability to control the exact spice and salt levels, we highly recommend trying our homemade taco seasoning recipe. Crafting your own allows you to perfectly match your palate and ensure the freshest possible flavor profile.
- Minced White Onion and Garlic Cloves: These aromatic powerhouses are non-negotiable and form the essential flavor base of our healthy bean dip. Sautéing fresh minced white onion and garlic before adding the other ingredients is a critical step that unlocks their sweet, pungent, and deeply savory notes. These flavors beautifully complement and enhance the taco seasoning, creating a complex and well-rounded taste. Do not skip or skimp on these; they are absolutely fundamental for a truly savory and harmoniously flavored dip.
- Salsa: Personalize your dip’s flavor and heat level effortlessly with your favorite salsa! Whether you crave the fiery kick of a hot salsa to ignite your taste buds, the perfectly balanced zest of a medium variety, or the gentle, fresh tang of a mild one, any kind will work beautifully in this recipe. Feel free to use your preferred store-bought brand for ease or even a vibrant homemade salsa for an extra layer of freshness and bespoke flavor.
- Shredded Cheddar Cheese: What’s a truly cheesy bean dip without an abundance of rich, melted cheese? Shredded cheddar cheese is thoughtfully incorporated in two distinct ways to maximize its delicious impact. Half of the cheese is mixed directly into the dip mixture during the cooking process for gooey, melty richness throughout every single bite. The other half is then generously sprinkled on top before baking, creating that irresistible golden, bubbly, and slightly crispy crust that we all adore. For the best melting texture and flavor, we recommend freshly shredding your own block of cheddar over using pre-shredded varieties.
The Greek Yogurt Advantage in Dips: A Healthier, Creamier Choice
While we certainly appreciate the classic, rich decadence that ingredients like cream cheese and sour cream traditionally bring to many beloved dip recipes, we’re absolutely thrilled to let you in on a little secret: Greek yogurt is an absolute powerhouse ingredient that can elevate your dips to new levels of flavor, texture, and nutrition! It’s an incredible, often superior, substitute for traditional dairy bases, offering a wealth of benefits that extend far beyond just taste. Here’s why we champion Greek yogurt in our bean dip:
- Packs in the Protein: One of the most significant and celebrated advantages of Greek yogurt is its impressively high protein content. By thoughtfully swapping it in for sour cream or cream cheese, you instantly boost the nutritional value of your dip. This added protein helps you feel fuller and more satisfied for longer periods, making this bean dip a more substantial and healthy snack. Furthermore, protein plays a crucial role in muscle repair and growth, contributing to overall well-being. It’s a deliciously smart way to infuse a healthy dose of protein into your appetizer.
- Lower in Fat (and Calories): Depending on the specific variety you choose, Greek yogurt generally contains significantly less saturated fat and fewer calories compared to its traditional counterparts. This makes it an incredibly fantastic choice for those looking to enjoy indulgent-tasting dips without overdoing it on unhealthy fats. You get to savor a rich, creamy flavor profile and satisfying texture, all while making a smarter, more health-conscious dietary choice.
- Creamy as Can Be! Don’t let its healthier profile mislead you – Greek yogurt delivers an exceptionally creamy and luxurious texture that perfectly rivals, if not surpasses, traditional sour cream and cream cheese. Its naturally thick, velvety consistency mimics that of its higher-fat alternatives perfectly, ensuring your bean dip remains luxuriously smooth, delightfully spreadable, and wonderfully scoopable. Moreover, the subtle, characteristic tang of Greek yogurt adds a bright, refreshing contrast to the savory beans, robust spices, and rich cheese, creating a perfectly balanced flavor experience that keeps you coming back for more.
Of course, we understand that taste preferences are personal! If you’re truly craving the traditional, familiar taste and texture of cream cheese or sour cream, please feel free to make the swap! Simply replace the Greek yogurt 1:1 with your favorite softened cream cheese or a high-quality sour cream, and your dip will still be wonderfully delicious and satisfying. We encourage you to experiment and find what combination works best for your unique palate and dietary needs!
Simple Steps to Homemade Bean Dip Perfection: Quick and Easy
Preparing this irresistible bean dip is incredibly straightforward, promising cheesy, savory perfection with minimal effort. This recipe is designed for ease and speed, ensuring you can whip up a delicious appetizer without spending hours in the kitchen. We’ll guide you through the quick and easy four steps to create this delectable, protein-packed appetizer, and you’ll find the complete, detailed recipe card below for all the specifics and measurements!
Step 1: Preheat Your Oven & Sauté Aromatics
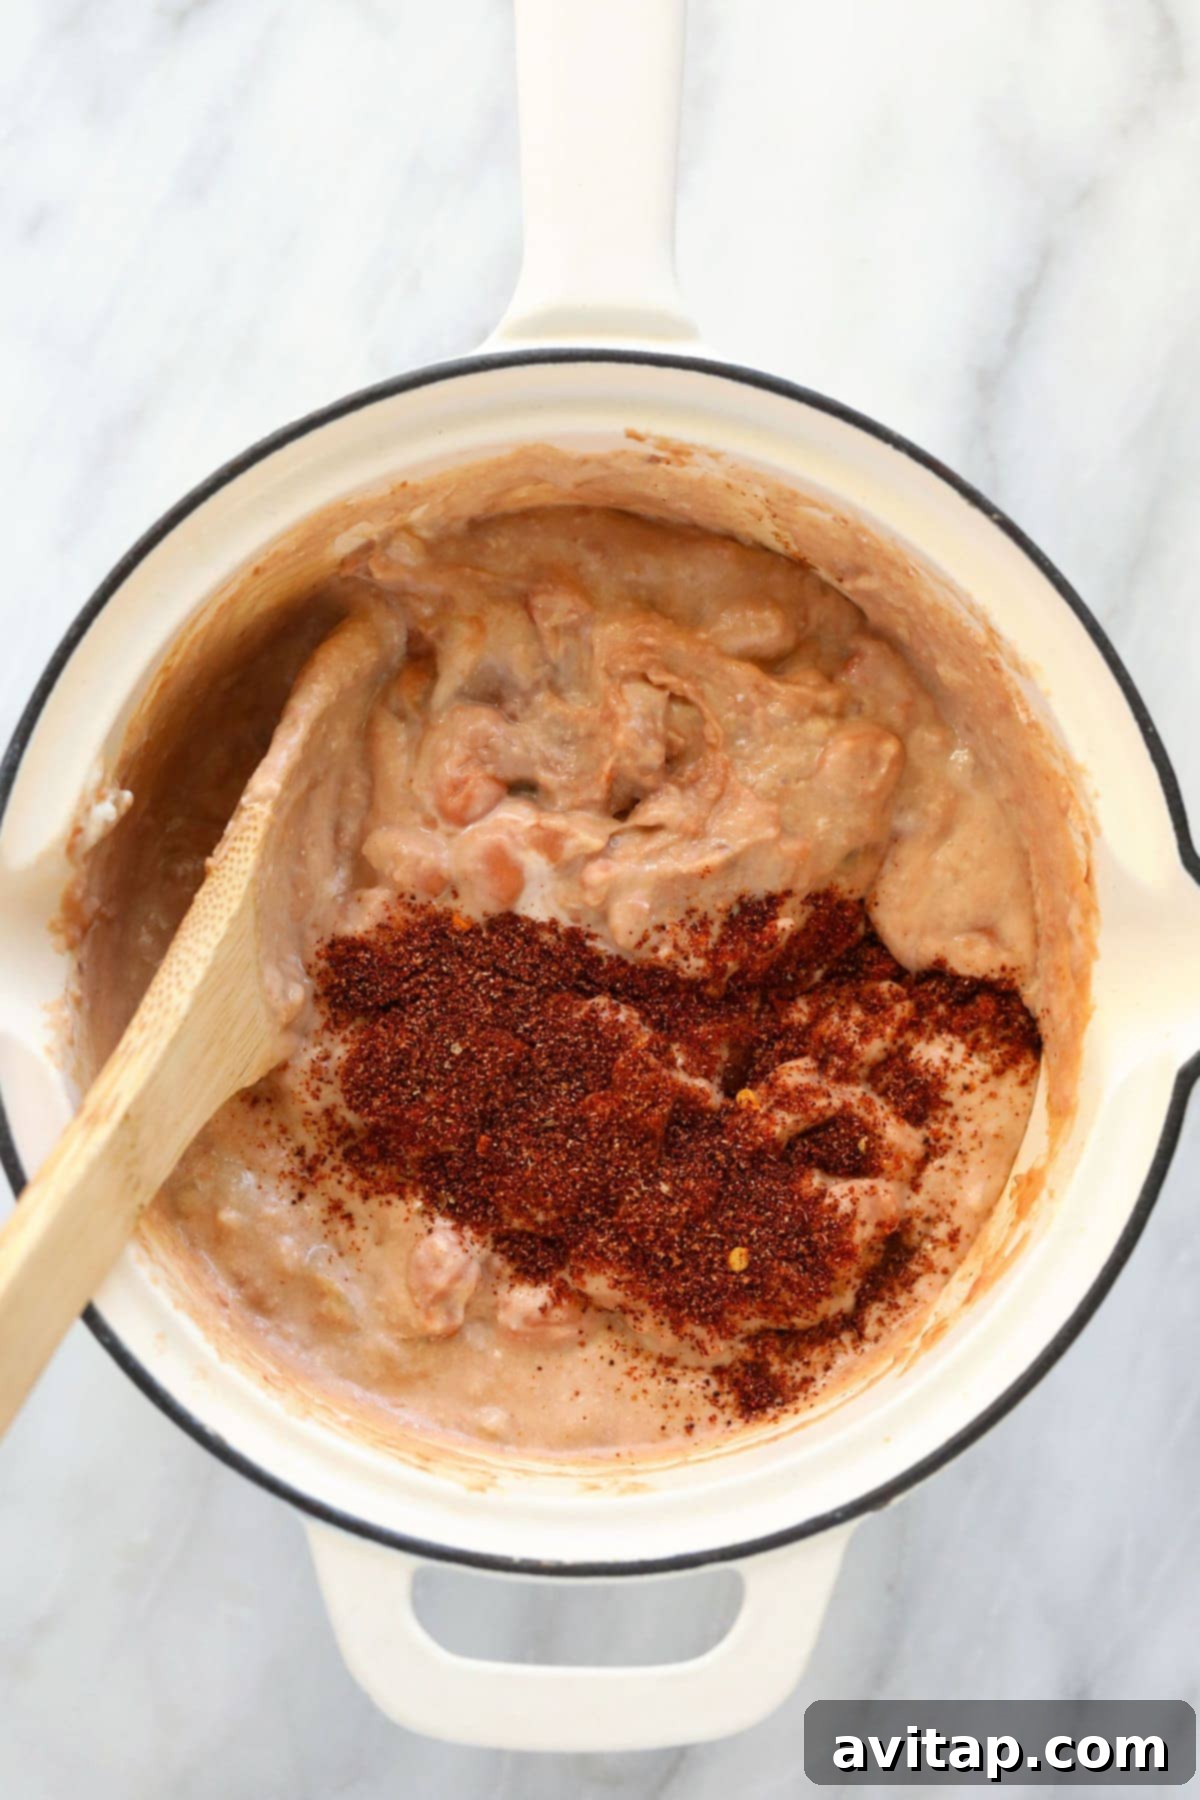
Begin your bean dip journey by preheating your oven to a precise 400ºF (200ºC). This crucial initial step ensures that your oven is perfectly ready and at the optimal temperature for baking once your dip is assembled, allowing for that glorious, bubbly melted cheese topping. Next, grab a small, sturdy oven-safe pot or skillet (we’ll explain why this is super convenient below!). Heat a tablespoon and a half of high-quality olive oil over medium-high heat on your stovetop. Once the olive oil is shimmering and fragrant, add your finely minced white onion, minced garlic cloves, and a pinch of salt. Sauté these aromatics for approximately 3 minutes, stirring occasionally to prevent burning, until the onions become beautifully translucent and soft, releasing their sweet, pungent, and incredibly inviting aromas. This initial step builds a crucial, savory flavor foundation that will permeate and enhance every bite of your finished dip.
No Oven-Safe Pot? No Problem! Easy Alternatives
Don’t have a skillet or pot that can go directly from the stovetop to the oven? Absolutely no worries at all! You can still make this delicious bean dip with complete ease and achieve the same fantastic results. A standard casserole dish or a baking pan will work perfectly as an alternative. Once you’ve completed the stovetop cooking steps, simply prepare your chosen casserole dish by spraying it generously with a nonstick cooking spray or lightly greasing it with a bit of olive oil. Carefully transfer the hot, savory bean dip mixture from your stovetop pot into the prepared baking dish, spreading it out evenly with a spoon or spatula to ensure uniform baking. Then, proceed with the baking instructions exactly as outlined, generously sprinkling the remaining shredded cheese on top before placing it into the preheated oven. This seamless transfer method ensures you can still achieve that irresistible bubbly, golden cheese crust without needing specialized cookware, making this recipe accessible for every kitchen!
Step 2: Combine Remaining Ingredients & Melt Initial Cheese
Once your onions and garlic are fragrant and softened, it’s time to bring the rest of the magic together to form your creamy bean dip. Add all the remaining ingredients to your pot, *reserving half of the shredded cheddar cheese for the topping*. This includes the canned jalapeños (or green chiles), both cans of refried beans and pinto beans (ensuring the pinto beans are drained and thoroughly rinsed), the full-fat Greek yogurt, taco seasoning, and your chosen salsa. Stir everything thoroughly with a sturdy spoon or spatula until all components are well combined and the mixture is heated through to a gentle simmer. Continue to heat over medium-high heat. Once the dip is hot and bubbling gently around the edges, add half of your shredded cheddar cheese directly into the mixture. Stir continuously for another 1 to 2 minutes, allowing the cheese to melt beautifully and smoothly into the dip, creating an even richer, creamier, and more cohesive consistency throughout the entire mixture.
Step 3: Bake to Golden Perfection & Serve Your Cheesy Dip
Now for the grand finale – achieving that utterly irresistible, bubbly, and perfectly golden cheese topping! Evenly sprinkle the remaining shredded cheddar cheese generously over the top of your hot bean dip. Carefully transfer your oven-safe pot (or casserole dish, if you opted for the transfer method) to the preheated oven. Bake at 400ºF (200ºC) for approximately 5 minutes. For an extra golden-brown, slightly crispy, and deeply caramelized cheese crust, you have the option to broil the dip for an additional 1-3 minutes at the very end of the baking process. During broiling, it’s crucial to keep a very close eye on it, as cheese can go from perfectly golden to burnt in a matter of seconds. Once the cheese is fully melted, bubbling vigorously, and slightly golden with delicious crispy edges, carefully remove the dip from the oven. Allow it to cool for just a moment or two before serving, as it will be extremely hot. Get ready to delight your taste buds and enjoy this incredible homemade bean dip!
Customize Your Kick: Spice It Up Your Way! Bean Dip Variations
One of the absolute best aspects of preparing homemade dips is the incredible ability to tailor them precisely to your personal taste and preference, especially when it comes to heat and spice levels! If you’re someone who loves a little more kick and fiery flavor in your bean dip, then by all means, you do you! Don’t be shy about experimenting with different levels of spice to create your perfect flavor profile that excites your palate. This recipe is incredibly adaptable, allowing you to easily increase the heat without compromising the overall deliciousness. Here are a few fantastic ways to amp up the heat and customize your spicy bean dip:
- Choose a Hotter Salsa: This is perhaps the simplest and most straightforward way to instantly increase the spice level of your bean dip. Instead of a mild or medium variety, opt for a “hot” or “extra hot” version of your favorite store-bought salsa. Alternatively, if you’re making your own salsa, use more spicy peppers to achieve the desired heat.
- Add Extra Jalapeños (or other chilies): If you enjoy the distinct, tangy flavor of jalapeños, simply increase the amount you add to the dip mixture. For an even more intense heat, you can include some of the seeds and membranes from fresh jalapeños, or consider incorporating other diced fresh or pickled hot peppers like serranos or even a touch of habanero for a more fiery experience. Remember to handle these spicier peppers with care and wear gloves if sensitive.
- Introduce Dry Spicy Seasonings: For a deeper, more pervasive heat, a dash of cayenne pepper, a generous pinch of red pepper flakes, or even a smoky chipotle powder can add a wonderful, warm, and lingering heat to the dip. Start with a small amount (like 1/4 teaspoon) and taste as you go, gradually adding more until you reach your desired level of spice.
- Finish with Your Favorite Hot Sauce: For a quick burst of heat and an extra layer of flavor, a few generous dashes or a drizzle of your favorite hot sauce (like Cholula, Tabasco, or a smoky chipotle sauce) stirred into the dip or simply drizzled on top just before serving can be an absolute game-changer.
As written, this bean dip recipe is intentionally crafted to be relatively mild when using a mild salsa variety and mild canned jalapeños (or green chiles), making it universally appealing and family-friendly. But never hesitate to ignite your taste buds and create a bean dip that truly reflects your personal love for spice!
Scaling Up Your Bean Dip for Bigger Gatherings: Party Perfect!
Planning a larger party, a family reunion, a significant holiday gathering, or an epic game day event? You’ll be delighted to know that this versatile and delicious bean dip recipe is incredibly easy to scale up to feed a crowd! You can effortlessly double or even triple the ingredients to accommodate a bigger group without any complicated adjustments or changes to the cooking method. When increasing the recipe quantities, just remember a few key considerations to ensure perfect results and maintain that exceptional flavor and texture:
- Choose the Right Cookware: The most important consideration when scaling up is ensuring your oven-safe pot or casserole dish is large enough to comfortably hold all the increased “bean-y deliciousness!” For a doubled batch, a larger baking dish (such as a 9×13 inch casserole dish) will be ideal. If you’re tripling the recipe, you might need an even larger roasting pan or two separate casserole dishes to prevent overcrowding, which can affect heating and browning.
- Ensure Even Heating: When doubling or tripling the recipe, it’s crucial to ensure the dip mixture is spread evenly in your chosen dish. This promotes uniform heating throughout the dip and allows for consistent melting and bubbling of the cheese topping. An uneven layer could result in some parts being hotter or cheesier than others.
- Adjust Baking Time Slightly: While the ingredient quantities will double or triple, the baking time might only need a slight increase, rather than a full proportional increase. Keep a careful eye on your dip in the oven; once it’s bubbling vigorously around the edges and the cheese on top is perfectly melted, golden brown, and slightly crispy, it’s ready to be removed. Use visual cues more than strict timing for larger batches.
By keeping these simple yet effective tips in mind, you can confidently prepare a generous batch of this sensational bean dip, ensuring there’s plenty for everyone to enjoy and rave about at your next big event! It’s the perfect party appetizer that caters to many.
Perfect Pairings: What to Serve with Your Irresistible Bean Dip
The beauty of this creamy, savory, and protein-packed bean dip lies in its incredible versatility when it comes to serving. While the classic tortilla chip is always a guaranteed winner (and undeniably delicious!), don’t hesitate to get creative with your dippers to add variety, different textures, and even extra nutritional value. The options are truly endless, catering to all tastes, dietary preferences, and occasions. Here are some of our favorite, highly recommended pairings for what to serve alongside your homemade bean dip:
- Classic Tortilla Chips: The quintessential and most beloved choice! Their salty crunch and sturdy build provide the perfect textural contrast to the smooth, creamy dip. Opt for sturdy, restaurant-style chips or thicker scoops for the best and easiest scooping experience, ensuring you get a generous portion of dip with every bite.
- Fresh Vegetable Sticks: For a lighter, healthier, and wonderfully crisp option, an assortment of vibrant, fresh vegetables is absolutely fantastic. They add a refreshing coolness and a satisfying crunch.
- Sliced Red, Green, or Yellow Bell Peppers: Their sweet, vibrant crunch and fresh, slightly peppery flavor are a wonderful complement to the rich dip.
- Crunchy Carrots Sticks: Naturally sweet, packed with nutrients, and satisfyingly crunchy, carrots are a timeless dipper.
- Cool Cucumber Slices: Offer a refreshing, cool contrast, which is particularly delightful if your dip has a bit of a spicy kick.
- Broccoli or Cauliflower Florets: Hearty, nutrient-dense, and with a unique texture, these make excellent dippers that can handle a thick scoop.
- Celery Sticks: Their crisp texture and mild, slightly bitter flavor provide a great counterpoint to the rich and savory dip.
- Toasted Breads:
- Pita Bread or Chips: Warm, soft pita bread, cut into triangles, or crispy, baked pita chips add a delightful Mediterranean twist and a different kind of satisfying chew.
- Toasted Baguette Slices: Thinly sliced baguette, lightly toasted or grilled until golden, provides a rustic, elegant, and perfectly crunchy dipper option for a more refined presentation.
- Beyond Dipping: Transform Your Meals! Don’t limit this amazing dip to just appetizers! Its rich flavor and hearty texture make it a fantastic, versatile addition to main meals, transforming them with creamy, cheesy goodness:
- Dollop onto Tacos or Fajitas: Add a creamy, cheesy, and protein-packed layer to your favorite Mexican-inspired dishes.
- Elevate Nachos: Spoon generous amounts over tortilla chips with extra toppings like seasoned ground beef, black olives, and fresh cilantro for gourmet, loaded nachos.
- Stuff into Quesadillas or Burritos: Spread a layer inside your quesadillas or burritos before cooking for an extra boost of flavor, richness, and protein.
- Serve as a Delicious Side Dish: It’s hearty and satisfying enough to be a delicious and unique side to grilled chicken, steak, or even alongside scrambled eggs for a creative brunch.
So, whether you’re keeping it simple with classic chips or venturing into gourmet territory with fresh veggies and creative meal additions, this bean dip is ready to be the star of your snack table or a delightful accompaniment to your main course!
Storage Tips for Your Delicious Bean Dip: Enjoying Leftovers
If you’re lucky enough to have any leftover bean dip (a rare occurrence, we know!), proper storage is absolutely key to maintaining its fresh flavor, creamy texture, and overall deliciousness for as long as possible. To ensure it stays wonderful for future enjoyment, store any remaining dip in an airtight container in the refrigerator for up to 5 days. This will ensure it remains safe and ready for your next snack attack, a quick lunch, or as a flavorful enhancement to another meal.
When Reheating Bean Dip: To best preserve its smooth consistency, prevent any undesirable separation, and ensure even heating, we highly recommend reheating your bean dip “low and slow,” mirroring the gentle heat it experienced during its initial cooking process. Transfer the desired amount of dip to a heavy-bottomed saucepan or skillet and reheat gently over low heat on the stovetop, stirring frequently until it is thoroughly warmed through. Alternatively, you can reheat it in an oven-safe dish at a moderate temperature of 300ºF (150ºC) in the oven, stirring every 10-15 minutes to distribute heat evenly. This gentle, patient approach helps the ingredients meld back together beautifully, prevents the cheese from becoming oily or gritty, and ensures the beans don’t dry out or separate unevenly, resulting in a reheated dip that tastes almost as good as fresh.
Freezing Bean Dip: Due to the significant dairy content in this recipe, particularly the cheese and Greek yogurt, this bean dip unfortunately does not freeze well. Dairy products, especially cheese and yogurt, tend to undergo undesirable textural changes when subjected to freezing and thawing, often becoming crumbly, watery, or exhibiting an unappealing separated consistency. For this reason, we do NOT recommend freezing this bean dip, as it will likely compromise its delightful creamy and smooth texture that makes it so irresistible. It’s always best enjoyed fresh or from the refrigerator within a few days of preparation for the optimal culinary experience.
More of Our Favorite Creations
Discover More Healthy Dip Recipes for Every Craving
If you’ve fallen in love with this healthy, protein-packed bean dip, you’ll be thrilled to explore our other fantastic dip recipes. We’re passionate about creating appetizers and snacks that are both incredibly nutritious and absolutely bursting with flavor. Dive into these other crowd-pleasing options and expand your repertoire of delicious, wholesome dips:
- Lightened Baked Spinach Artichoke Dip
- Mexican Black Bean Hummus
- Roasted Garlic Caramelized Onion Dip
- Healthy Chili Cheese Dip
- Explore ALLOur Delicious & Healthy Dip Recipes
The Best Bean Dip Recipe
This bean dip makes a perfect protein-packed appetizer. It’s rich with refried and pinto beans, creamy Greek yogurt, and savory cheddar cheese. It truly is the best homemade dip you’ll make!
By: Emily Richter

Ingredients
- 1.5 tablespoons olive oil
- 1/2 medium white onion, minced
- 2 cloves garlic, minced
- Pinch of salt
- 2 tablespoons canned jalapeños, diced (or green chiles for a less spicy option)
- 1 (15-oz.) can refried beans
- 1 (15-oz.) can pinto beans, drained and rinsed
- 1/2 cup full-fat Greek yogurt
- 1 tablespoon taco seasoning
- 2 tablespoons salsa, any kind (mild, medium, or hot)
- 1 cup shredded cheddar cheese, divided
Instructions
- First, preheat your oven to 400ºF (200ºC).
- Next, heat olive oil in a small oven-safe pot or skillet over medium/high heat. Once the olive oil is fragrant, add the minced onion, garlic, and a pinch of salt. Sauté for approximately 3 minutes, or until the onions become translucent and softened.
- Then, add all the remaining ingredients to the pot (except for half of the shredded cheddar cheese). Mix everything thoroughly until well combined. Continue to heat over medium/high heat until the mixture is hot and gently bubbling. Once hot, stir in 1/2 cup of the shredded cheese until it is fully melted and incorporated into the dip (about 1-2 minutes).
- If you are using a casserole dish instead of an oven-safe pot: Spray a 9×9 inch casserole dish with nonstick cooking spray. Carefully transfer the hot bean dip mixture into the casserole dish and spread it out evenly. Sprinkle the remaining shredded cheese evenly over the top of the dip.
- Bake at 400ºF (200ºC) for 5 minutes. For a golden, bubbly top, you have the option to broil for an additional 1-3 minutes at the very end, watching closely to prevent burning. Serve immediately with your favorite dippers!
Tips & Notes
- Oven-safe Pot Alternative: If you don’t have an oven-safe pot, simply transfer the dip to a 9×9 inch casserole dish before baking.
- Spice Level: Adjust the amount of jalapeños and salsa to your preference. Add a pinch of cayenne or red pepper flakes for extra heat.
- Serving Size: This recipe can easily be doubled or tripled for larger crowds; just use a larger baking dish.
Nutrition Information (Approximate per serving)
Calories: 236 kcal, Carbohydrates: 26 g, Protein: 12 g, Fat: 10 g, Fiber: 6 g, Sugar: 4 g
Nutrition information is automatically calculated and should only be used as an approximation.
Don’t forget to tag your posts on social media with the hashtag #fitfoodiefinds, we’d love to see what you’re up to and feature your culinary creations!