
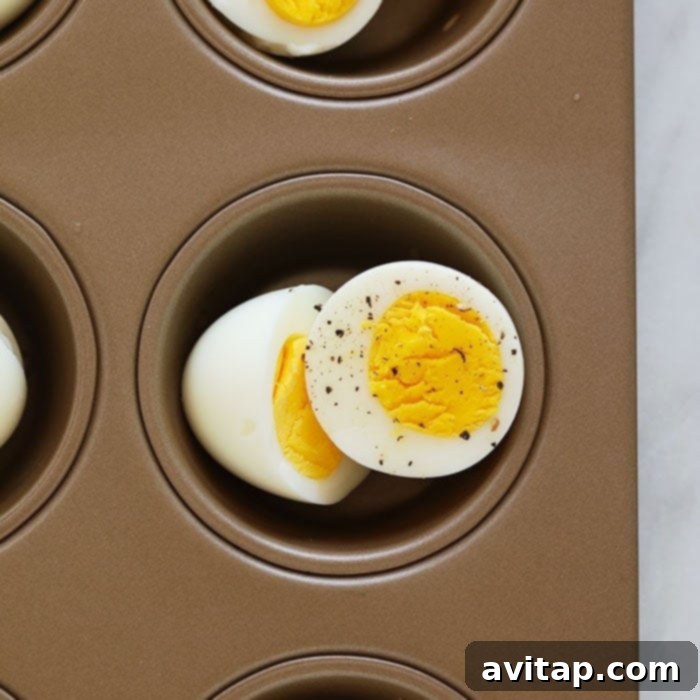
Are you a fan of perfectly cooked hard-boiled eggs? So are we! While there are many ways to prepare this versatile staple, we’ve found that making hard-boiled eggs in the oven is an incredibly simple, consistently excellent, and truly revolutionary method.
This “baked hard-boiled eggs” technique is a game-changer for anyone looking to streamline their meal preparation, whip up a healthy and quick breakfast, prepare a delicious egg salad, or simply have a protein-packed snack ready throughout the week. Join us as we explore everything you need to know about baking hard-boiled eggs to absolute perfection!
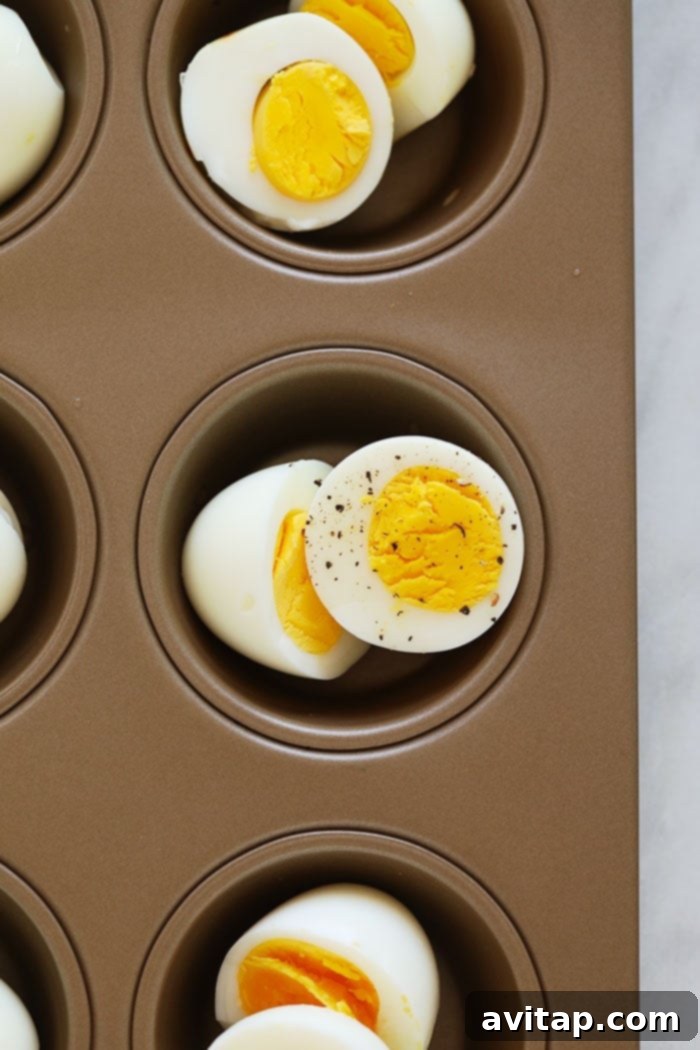
Why Choose Oven-Baked Hard-Boiled Eggs? Unbeatable Convenience and Consistency
You might be pondering why the oven should be your go-to for hard-boiled eggs when stovetop boiling or an Instant Pot are common alternatives. Through extensive testing, we’ve discovered that baking hard-boiled eggs offers unique advantages that make it a superior choice, especially for busy individuals and those focused on efficient meal prepping:
- Foolproof Perfection: This method stands out for its remarkable consistency. Say goodbye to the guesswork, the disheartening green ring around the yolk, or rubbery whites. Once you identify your preferred baking time using our guide, you can reliably achieve your ideal yolk consistency every single time, without fail.
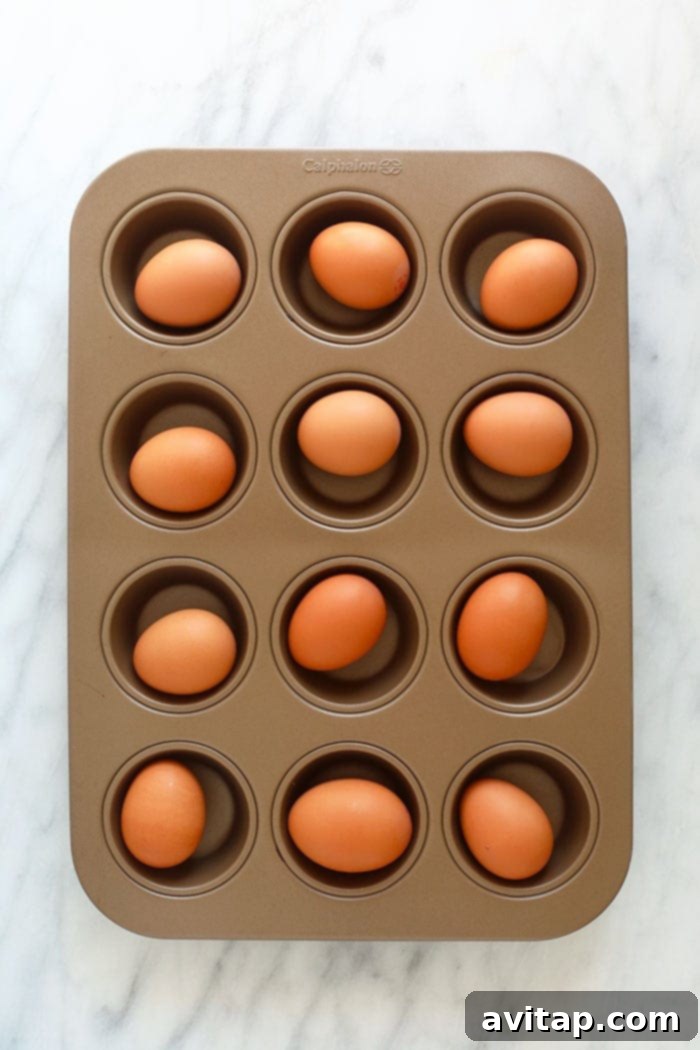
- Effortless & Hands-Off Cooking: Traditional stovetop boiling demands constant attention to prevent overflowing water and precise heat management. The oven method, however, transforms egg preparation into a largely “set it and forget it” task. Simply arrange your eggs in a muffin tin, slide them into the oven, and freely attend to other kitchen duties or personal errands while they cook undisturbed. No stirring, no rapid boiling, and absolutely no fuss.
- Batch Cooking Bliss: The oven method truly excels when you need to prepare a significant quantity of eggs. A standard 12-cup muffin tin perfectly accommodates a dozen eggs, and if your oven provides ample space, you can easily utilize two muffin tins simultaneously, cooking 24 eggs in one go. This makes it an incredibly efficient solution for weekly meal prep, catering to a gathering, or stocking up for various recipes such as classic egg salad or delectable deviled eggs.
- Enhanced Safety and Simplicity: Handling large pots of boiling water can present a hazard, particularly in a bustling kitchen. The oven method completely circumvents this risk, offering a safer and inherently simpler approach to cooking eggs without the worry of hot water splashes or spills.
We’ve meticulously experimented with various baking durations to empower you to achieve precisely your desired yolk consistency, whether your preference leans towards a soft, jammy center or a firm, thoroughly cooked yolk. This guide will walk you through each timing option, ensuring your hard-boiled egg aspirations are met with delicious results.
The Incredible Power of Eggs: A Nutritional Superfood
Here at Fit Foodie Finds, our affection for eggs is profound, and for excellent reasons! They stand as one of nature’s most complete and perfect foods, delivering an impressive spectrum of health benefits and unparalleled culinary adaptability. Eggs are:
- An Exceptional Source of High-Quality Protein: Each large egg typically contains about 6 grams of complete protein, meaning it supplies all nine essential amino acids crucial for muscle repair, growth, and optimal bodily function. This makes them incredibly satiating, helping to keep you feeling full and energized.
- Rich in Essential Vitamins and Minerals: Eggs are a true nutritional powerhouse. They are abundantly rich in Vitamin D (essential for bone health and a robust immune system), Vitamin B12 (vital for nerve function and energy metabolism), riboflavin, selenium, iron, and zinc. Furthermore, eggs contain choline, a critical nutrient known for supporting brain health, liver function, and metabolism.
- Deliciously Versatile for Any Meal: From a simple breakfast scramble to elaborate savory quiches, and of course, hard-boiled for salads, snacks, and appetizers, eggs seamlessly integrate into almost any meal of the day. Their mild and adaptable flavor profile makes them an ideal canvas for a wide array of seasonings and ingredients.
Our journey with egg preparation is extensive. Beyond this ingenious oven-baked method, we’ve explored other convenient and delicious ways to enjoy eggs. Our popular guides include How to Bake Eggs in the Oven (for softer, baked eggs), the time-saving Instant Pot Hard Boiled Eggs Meal Prep Breakfast, and even sophisticated Cheesy Sous Vide Egg Bites. With eggs, rest assured, you’re always on the path to a nutritious and delicious experience!
Your Burning Questions Answered: Hard-Boiled Egg FAQs
Before we delve into the precise step-by-step instructions, let’s address some of the most common questions about preparing and enjoying hard-boiled eggs, particularly when utilizing the convenient oven method.
How hot does the oven need to be to make hard-boiled eggs in the oven?
For consistently perfect baked hard-boiled eggs, your oven should be accurately preheated to 325ºF (160ºC). This moderate and stable temperature ensures the eggs cook gently and evenly within their shells, preventing the whites from becoming rubbery and minimizing the risk of shell browning or cracking. Maintaining this precise temperature is key to achieving predictable and desirable results.
What can you make with hard-boiled eggs?
Hard-boiled eggs are incredibly versatile and serve as a culinary Swiss Army knife! They are the perfect grab-and-go easy breakfast, an ideal high-protein snack for sustained energy throughout the day, and a fantastic ingredient in countless recipes. Having a prepped batch of oven-baked hard-boiled eggs readily available makes meal planning and preparation exceptionally easy. Consider using them for:
- Crafting classic Egg Salad for sandwiches, wraps, or lettuce cups.
- Elevating vibrant salads such as a hearty Cobb Salad, a sophisticated Niçoise salad, or simply sliced over any fresh green salad for added texture and nutrition.
- Preparing elegant deviled eggs, a perennial favorite for parties, picnics, and family gatherings.
- Topping your morning avocado toast for an extra boost of satisfying protein and healthy fats.
- Adding to stir-fries, grain bowls, or as a garnish for soups and stews.
- Simply enjoying them seasoned with a sprinkle of sea salt, freshly cracked black pepper, a dash of paprika, or your favorite hot sauce for a quick, wholesome bite.
How long can you keep hard-boiled eggs in the fridge?
Hard-boiled eggs are excellent for meal prepping and can be safely stored in the refrigerator for up to one week (7 days). You have the option to store them with their shells intact, which provides a natural protective barrier against absorbing refrigerator odors and helps maintain moisture. Alternatively, you can peel them beforehand for ultimate convenience. Regardless of whether they are peeled or unpeeled, always ensure they are completely cooled to room temperature before placing them in an airtight container or specialized stasher bags or meal prep containers. For more detailed and expert tips on egg storage and food safety, reliable resources like Incredible Egg offer comprehensive advice.
Do older eggs peel easier?
Yes, this is a common and highly effective trick! Generally, eggs that are about a week to 10 days old tend to peel much more easily and cleanly than very fresh eggs. The scientific reason is that as an egg ages, its pH level slightly increases, which causes the inner membrane to separate more readily from the shell after cooking. Keeping this in mind can significantly reduce peeling frustration and result in beautifully smooth, unblemished eggs.
Why do hard-boiled yolks sometimes have a green ring?
The appearance of a grayish-green ring around the yolk of a hard-boiled egg is a frequent occurrence and is entirely harmless to consume. This phenomenon typically indicates that the eggs have been overcooked or cooked at an excessively high temperature. The iron present in the egg yolk reacts with hydrogen sulfide, a gas naturally produced from the egg white when subjected to heat. This reaction forms ferrous sulfide, which is responsible for the characteristic greenish hue. An immediate ice bath after cooking can significantly help prevent this chemical reaction by rapidly cooling the egg and halting the process.
How to Make Hard-Boiled Eggs in Oven: Step-by-Step
Achieving perfect hard-boiled eggs in the oven is remarkably straightforward, requiring just a few basic items and a simple, stress-free process. Forget about complex setups or special equipment; simplicity is the cornerstone of this method!
Essential Tools and Ingredients
- Large Eggs: You can use chilled eggs directly from your refrigerator; no need to bring them to room temperature first.
- Muffin Tin: A standard 12-cup muffin tin is the ideal vessel. It cleverly cradles each egg, preventing them from rolling around and potentially cracking during baking. If a muffin tin isn’t available, you could improvise with a cake pan or even a sturdy cookie sheet, carefully creating small “nests” out of aluminum foil to keep the eggs stable.
- Large Bowl: This will be crucial for preparing the essential ice bath after baking.
- Ice and Water: Plenty of ice combined with cold water for an effective ice bath.
The inherent design of the muffin tin provides a secure and stable environment for each egg, ensuring even cooking and minimizing any potential harm during the baking process. Now, let’s proceed to the clear and simple step-by-step method.
The Simple Oven Baking Method
- Preheat Oven: Begin by thoroughly preheating your oven to 325ºF (160ºC). Allowing your oven sufficient time to reach and stably maintain this specific temperature is critical for achieving even and consistent cooking results across all your eggs.
- Arrange Eggs in Muffin Tin: Gently and carefully transfer your chilled large eggs, one by one, into the individual cups of the muffin tin. You have the flexibility to cook as many eggs as you require, filling as many cups as desired. If you’re undertaking a larger batch preparation, feel free to utilize multiple muffin tins simultaneously, ensuring they fit comfortably within your oven without overcrowding.
- Bake to Perfection: Carefully place the filled muffin tin onto the middle rack of your preheated oven. Bake the eggs for a duration of 25 to 32 minutes, adjusting the time based on your precise preference for yolk consistency (detailed in the next section). The eggs will cook gently and steadily within their protective shells.
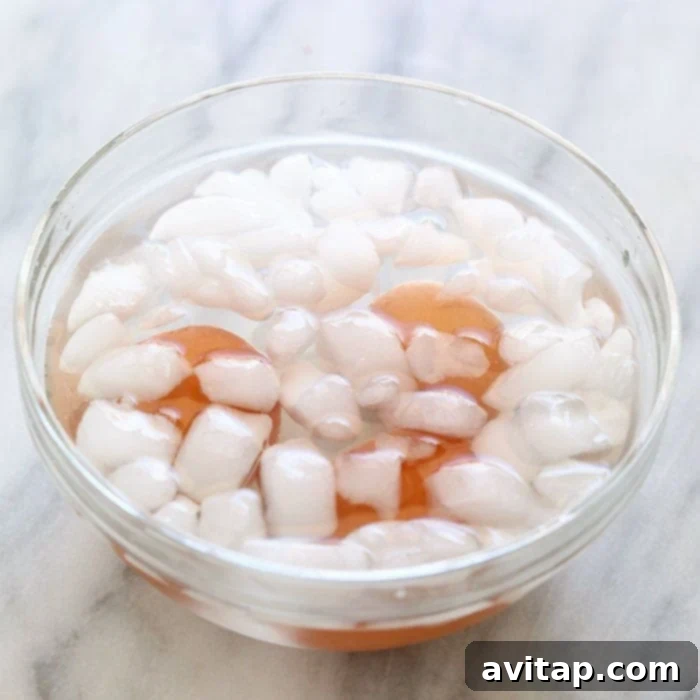
- Immediate Ice Bath (Crucial Step): This step is absolutely vital for success! As soon as the baking time is complete, carefully and promptly remove the muffin tin from the oven. Using tongs or a spoon, immediately transfer the hot eggs directly into a large bowl that you have pre-filled with ice water. Allow them to chill thoroughly in this invigorating ice bath for a minimum of 10 minutes. This rapid cooling process serves two critical purposes: it instantly halts the cooking process, preventing overcooking and the dreaded green ring around the yolk, and it significantly aids in achieving a much easier peeling experience.
- Store or Enjoy: Once the eggs have had their full 10-minute (or longer) ice bath, remove them from the water. At this point, you can either peel them immediately and savor their perfect texture, or, for future use, store them unpeeled in an airtight container in the refrigerator. They will remain fresh and delicious for up to one week.
Unlocking Your Ideal Yolk: A Guide to Oven Baking Times
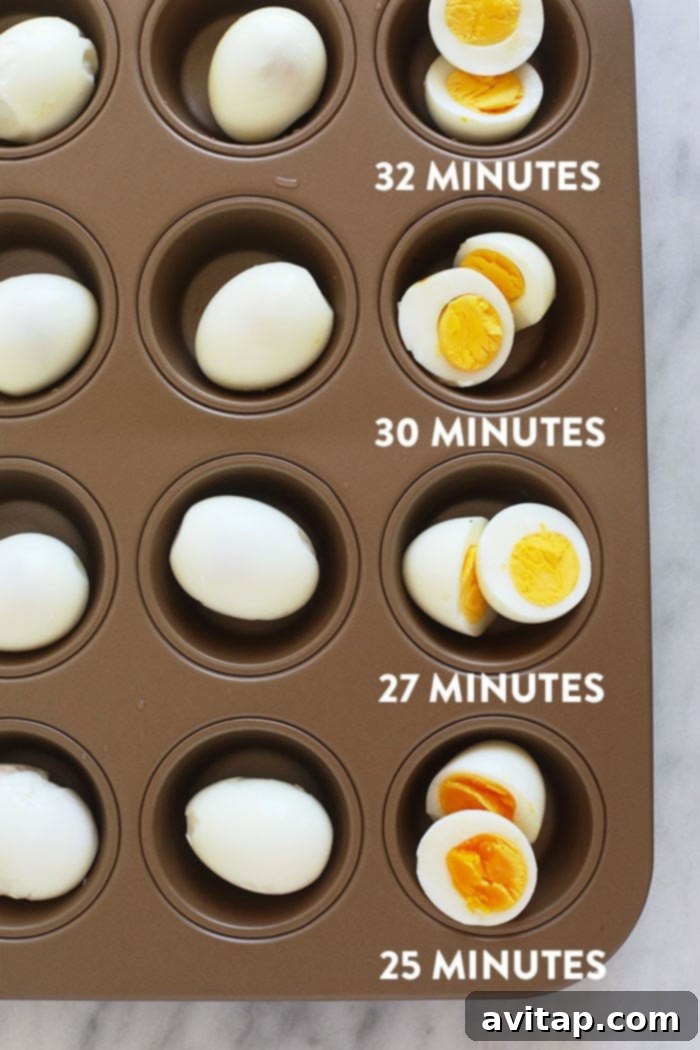
Whether you dream of a luscious, soft, and jammy center or prefer a firm, fully cooked yolk, the oven method provides exceptional control over your egg’s texture. We’ve meticulously tested various timings to guide you in achieving your personal preference. Please remember that individual oven calibrations can vary slightly, so consider these timings as excellent starting points for your culinary explorations.
25 Minutes: Soft & Jammy Perfection
Baking your eggs for 25 minutes will yield a stunningly beautiful, soft, and jammy yolk, boasting a vibrant deep orange hue. The egg whites will be perfectly set but retain a wonderfully tender quality. This consistency is truly divine for elevating dishes such as ramen bowls, spreading decadently on avocado toast, or simply enjoying with a sprinkle of flaky sea salt and a crack of black pepper. While these eggs are a culinary delight, they might initially present a slightly greater challenge to peel. To mitigate this, ensure they receive a full and uninterrupted 10-minute (or longer) soak in the ice bath to effectively loosen the shell membrane.
27 Minutes: Moist & Creamy Centers
A bake time of 27 minutes delivers a perfectly yellow, thoroughly cooked yolk that remarkably retains a moist and creamy texture. It strikes a delightful balance—not quite jammy, yet distinctly not dry or chalky. This particular consistency is exceptionally well-suited for crafting classic deviled eggs, enriching the flavor and texture of various salads, or serving as a delightful, substantial addition to sandwiches. As with the 25-minute egg, approaching the peeling process with patience after an adequate ice bath period will prove highly beneficial, resulting in beautifully intact eggs.
30 Minutes: Classic Fully Cooked Yolk
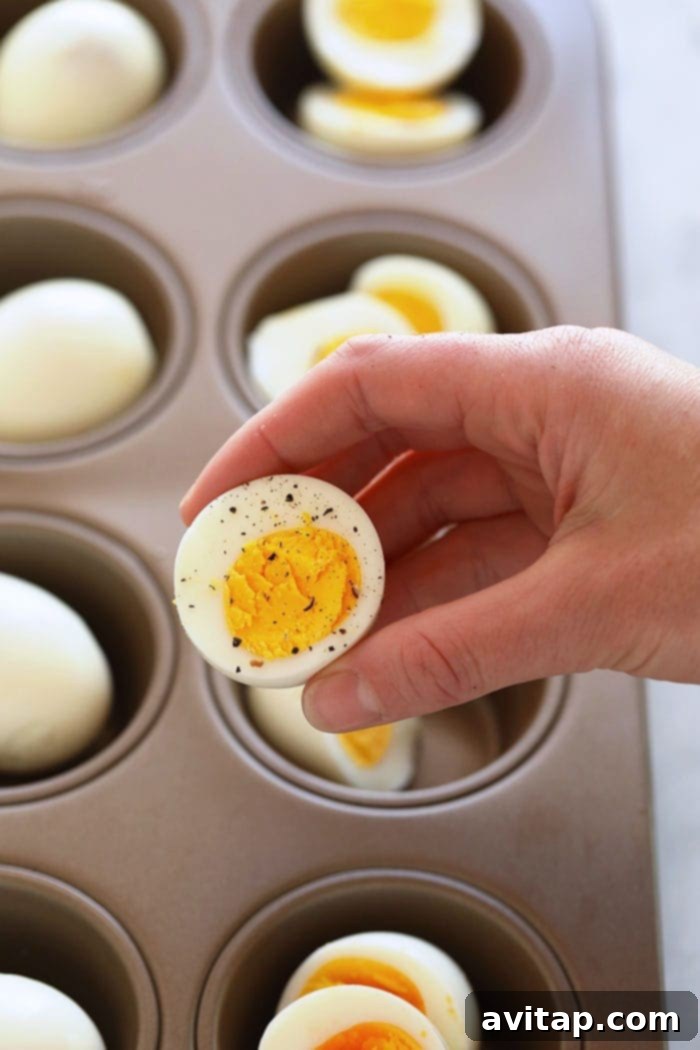
Reaching the 30-minute mark provides you with the quintessential, traditional fully cooked hard-boiled egg. The yolk will be solid and uniformly yellow throughout, entirely devoid of moisture, yet it maintains a pleasing and palatable texture. At this duration, the egg white will have firmed up nicely, and you will typically find these eggs considerably easier to peel compared to their softer counterparts. This timing represents the ideal choice for batch prepping for classic egg salad, enhancing your favorite potato salad, or for straightforward snacking where a firm, reliable yolk is your preferred standard.
32 Minutes: Firm & Fluffy Yolk (Easiest to Peel!)
For those who categorically prefer no hint of a wet yolk, a 32-minute bake time is your absolute sweet spot. The yolk will be completely firm, often described as having a slightly fluffy texture, with a consistently uniform dryness. A significant and welcome bonus of baking for this extended duration is the remarkably easier peeling experience. In our tests, the 32-minute eggs consistently proved to be the simplest and most cooperative to peel, making them perfect for quick, hassle-free enjoyment or when preparing very large quantities where efficiency is paramount.
Hard-Boiled Eggs: Tips, Tricks, and Troubleshooting
Whether you’re a newcomer to the delightful world of hard-boiled eggs or a seasoned veteran who has been peeling and preparing them for years, there’s always something new to learn or a clever trick to discover for perfecting them. Here are our top tips, smart tricks, and practical troubleshooting advice to ensure your oven-baked eggs are a consistent success every single time:
Always Set a Timer
Precision is an absolute must when it comes to cooking eggs. Regardless of which method you employ – be it the oven, stovetop, or Instant Pot – accurately tracking your cooking time is the ultimate key to achieving your desired yolk consistency. Invest in a reliable kitchen timer and diligently adhere to the recommended cooking durations. It’s crucial to remember that eggs continue to cook even after they’ve been removed from the heat source. To effectively halt this residual cooking process and prevent any possibility of overcooking, a rapid and effective cool-down is absolutely essential.
The Crucial Ice Bath
The ice bath is not merely an optional step; it serves two critically important functions that directly impact the quality and ease of your hard-boiled eggs. Firstly, it immediately and effectively stops the cooking process, ensuring your yolks remain at their intended consistency and preventing the undesirable green ring. Secondly, it significantly aids in making the peeling process remarkably easier. As your eggs approach their optimal cook time, prepare your ice bath: fill a large bowl with plenty of cold water and add a generous amount of ice (a good ratio is roughly 1/2 to 1 cup of ice for about 8 cups of water). The moment your eggs are done baking, carefully transfer them directly and swiftly into this prepared ice bath. Allow them to chill thoroughly for at least 10 minutes; extending this soak can further enhance peeling ease. This rapid temperature change causes the egg white to contract, gently pulling it away from the inner shell membrane.
Making Peeling Easier
The stubborn, clinging shell is often cited as the most annoying part of enjoying hard-boiled eggs! Some days, the eggs peel effortlessly, revealing a perfectly smooth surface in seconds. Other days, you’re left with a pockmarked, cratered egg, and a mound of tiny shell fragments. To dramatically increase your chances of an easy, frustration-free peel:
- Ensure a Proper Ice Bath: As emphasized, a sufficient and thorough soak in an ice bath is the single most effective step you can take.
- Opt for Older Eggs: Eggs that are approximately a week to 10 days old tend to peel much more easily than very fresh eggs due to changes in pH that loosen the membrane.
- Tap and Roll Technique: Gently tap the wider, flatter end of the egg on a hard, firm surface to create an initial crack. Then, roll the egg firmly but gently between your palms to create a network of many small cracks all over the shell.
- Peel Under Running Water: If you’re still encountering resistance, try peeling the egg under a slow, continuous trickle of cold water from your faucet. The water helps to seep under the membrane, lubricating it and washing away small shell fragments as you peel.
Avoid the Green Ring
That grayish-green discoloration sometimes found around the yolk is a tell-tale sign of overcooking. While entirely harmless to eat, it detracts from the egg’s visual appeal. By diligently adhering to our recommended oven baking times and, most importantly, promptly transferring your hot eggs to an ice bath immediately after cooking, you can effectively prevent this discoloration. This ensures your hard-boiled eggs consistently feature beautifully golden, appealing yolks every single time.
Creative Ways to Enjoy Your Oven-Baked Hard-Boiled Eggs
With a batch of perfectly cooked hard-boiled eggs ready and waiting, the culinary possibilities are truly boundless! Here are some of our favorite and most creative ideas for seamlessly incorporating them into your daily meals and snacks, transforming ordinary dishes into extraordinary delights:
- Quick & Healthy Snacks: Enjoy them simply plain, perhaps with a sprinkle of your favorite seasoning blend, or alongside a dollop of creamy hummus. They make an excellent addition to a healthy charcuterie board or a balanced protein plate featuring cheese, lean deli meats, and fresh seasonal fruit.
- Breakfast Boosters: Elevate your morning meal by slicing hard-boiled eggs onto your avocado toast, dicing them into breakfast burritos, or serving them alongside a savory hash for a truly filling and nutritious start to your day.
- Salad Stars: Hard-boiled eggs are a beloved, classic addition to a myriad of salads. Envision them in a hearty Cobb Salad, a vibrant Niçoise Salad, or simply sliced and arranged over any fresh garden salad to provide an extra layer of protein and delightful richness.
- Sandwiches & Wraps: Naturally, they are the undisputed star of classic egg salad sandwiches. However, they can also be sliced and added to virtually any sandwich or wrap for an added boost of nutrition, satisfying texture, and savory flavor. Be sure to try our Healthy Egg Salad or the equally delicious Tuna Egg Salad.
- Potato & Pasta Salads: Dice these perfectly cooked eggs and gently fold them into your favorite Baked Potato Salad or a creamy pasta salad recipe. They contribute a wonderful texture and a significant protein upgrade.
- Appetizers & Deviled Eggs: The oven method’s reliable results and ease of peeling make it an absolutely ideal technique for preparing impressive deviled eggs, a guaranteed crowd-pleaser for any gathering, party, or family event.
Storing Your Batch-Prepped Hard-Boiled Eggs
Proper storage is paramount to ensure your delicious oven-baked hard-boiled eggs remain fresh, safe, and flavorful for as long as possible. Here’s a comprehensive guide to best practices:
- Airtight Containers are Essential: Whether you choose to store your eggs peeled or unpeeled, it is always crucial to place them in an airtight container. Hard-boiled eggs possess a distinct “eggy” aroma, which can regrettably permeate and affect the flavor of other foods stored nearby in your refrigerator. An airtight container effectively prevents this odor transfer and actively helps keep your eggs fresher for longer.
- Peeled vs. Unpeeled Storage:
- Unpeeled Eggs: Storing eggs with their shells still on provides a natural protective barrier. This method not only helps prevent them from absorbing unwanted odors from the refrigerator but also significantly aids in retaining their moisture content. Generally, unpeeled eggs are considered to have a slightly longer shelf life and maintain their quality better.
- Peeled Eggs: If you prefer the convenience of having your eggs ready to eat immediately after the ice bath, you can peel them beforehand. When storing peeled eggs, you have a couple of options: place them in an airtight container with a damp paper towel to maintain moisture, or submerse them in a bowl of cold water (remembering to change the water daily). While convenient, peeled eggs can sometimes dry out more quickly or absorb subtle flavors from other refrigerated items.
- Refrigerator Life: Regardless of whether they are stored peeled or unpeeled, hard-boiled eggs will safely keep for up to 7 days in the refrigerator. Always, without exception, ensure that your eggs are thoroughly cooled to room temperature before placing them into storage.
- Freezing is Not Recommended: Hard-boiled eggs, particularly the egg whites, do not tolerate freezing well. The whites tend to develop a rubbery, watery, and unappetizing texture after being thawed. For optimal taste and texture, it is strongly advised to enjoy hard-boiled eggs fresh within their recommended refrigerated shelf life.
By diligently adhering to these comprehensive storage guidelines, you can confidently prepare a large batch of oven-baked hard-boiled eggs, knowing they will remain delicious and ready to be enjoyed throughout your entire week.
More of our Favorite Egg Recipes…
Explore More Egg-cellent Recipes
- How to Bake Eggs In the Oven (for softer eggs and hash)
- Instant Pot Egg Bites
- Cheesy Sous Vide Egg Cups
- Egg in a Frame
- 4 Healthy Egg Cup Recipes
Easy Hard Boiled Eggs (in Oven)
Prep: 5 minutes
Cook: 25 minutes
Total: 30 minutes
Print Recipe
Ingredients
- 12 large eggs, chilled (or however many you want to make!)
- 4 cups ice
- 8 cups cold water
Instructions
-
First, preheat your oven to 325ºF (160ºC). Ensure it is fully preheated for consistent results.
-
Place large eggs (chilled, straight from the fridge) into a muffin tin. You can make as many eggs as you want, utilizing multiple muffin tins if your oven can accommodate them.
-
Bake at 325ºF (160ºC) for 25-32 minutes, depending on desired yolk consistency:
- 25 minutes: Soft, jammy yolk with a deep orange color. May be slightly harder to peel.
- 27 minutes: Moist, fully cooked yolk, still creamy. Peeling might require a bit of patience.
- 30 minutes: Classic fully cooked hard-boiled yolk, firm but not dry, and easier to peel.
- 32 minutes: Hard yolk with no moisture, very firm, and typically the easiest to peel.
-
While your eggs are baking, prepare an ice water bath. Fill a large bowl generously with cold water and ice.
-
Once the eggs are done cooking, promptly remove the muffin tin from the oven and immediately transfer the hot eggs into the ice water bath. Let them chill for at least 10 minutes. This crucial step stops the cooking process, prevents discoloration of the yolk, and makes peeling significantly easier.
-
After 10 minutes in the ice bath, remove the eggs. You can either peel and enjoy them immediately or store them.
-
For storage, place the hard-boiled eggs (peeled or unpeeled) in an airtight container in the refrigerator for up to 7 days.
Nutrition
Carbohydrates: 0 g,
Protein: 6 g,
Fat: 5 g,
Fiber: 0 g,
Sugar: 0 g
Nutrition information is automatically calculated, so should only be used as an approximation.
Shop This Post
Nesting Bowls
Egg Holder
Love this? Leave a comment below!
Don’t forget to tag your posts on social media with the hashtag #fitfoodiefinds, we’d love to see what you’re up to!