
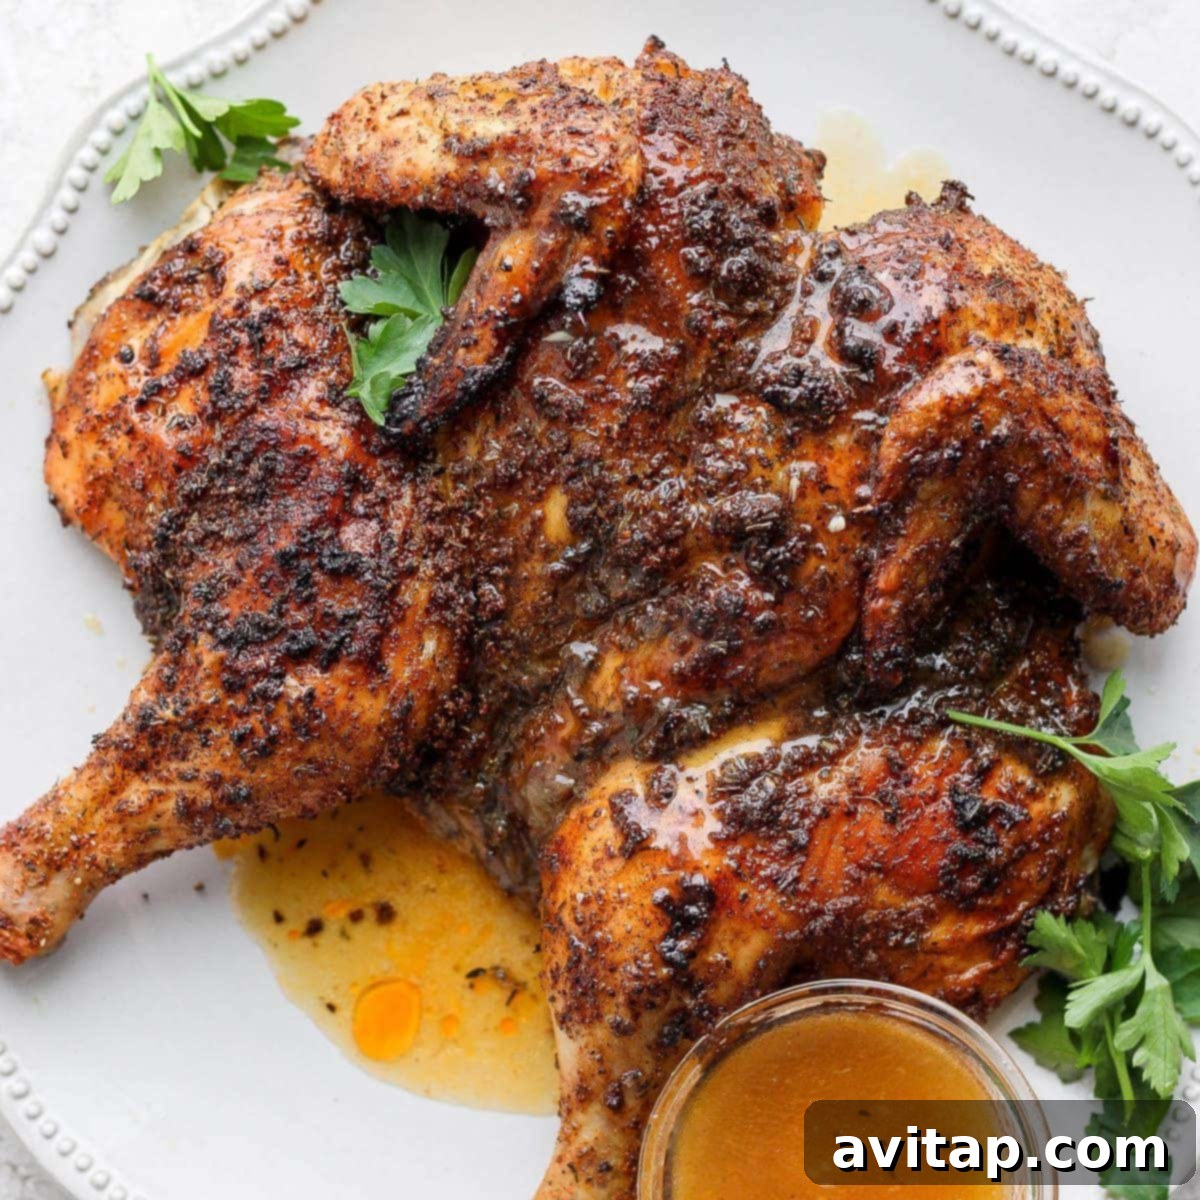
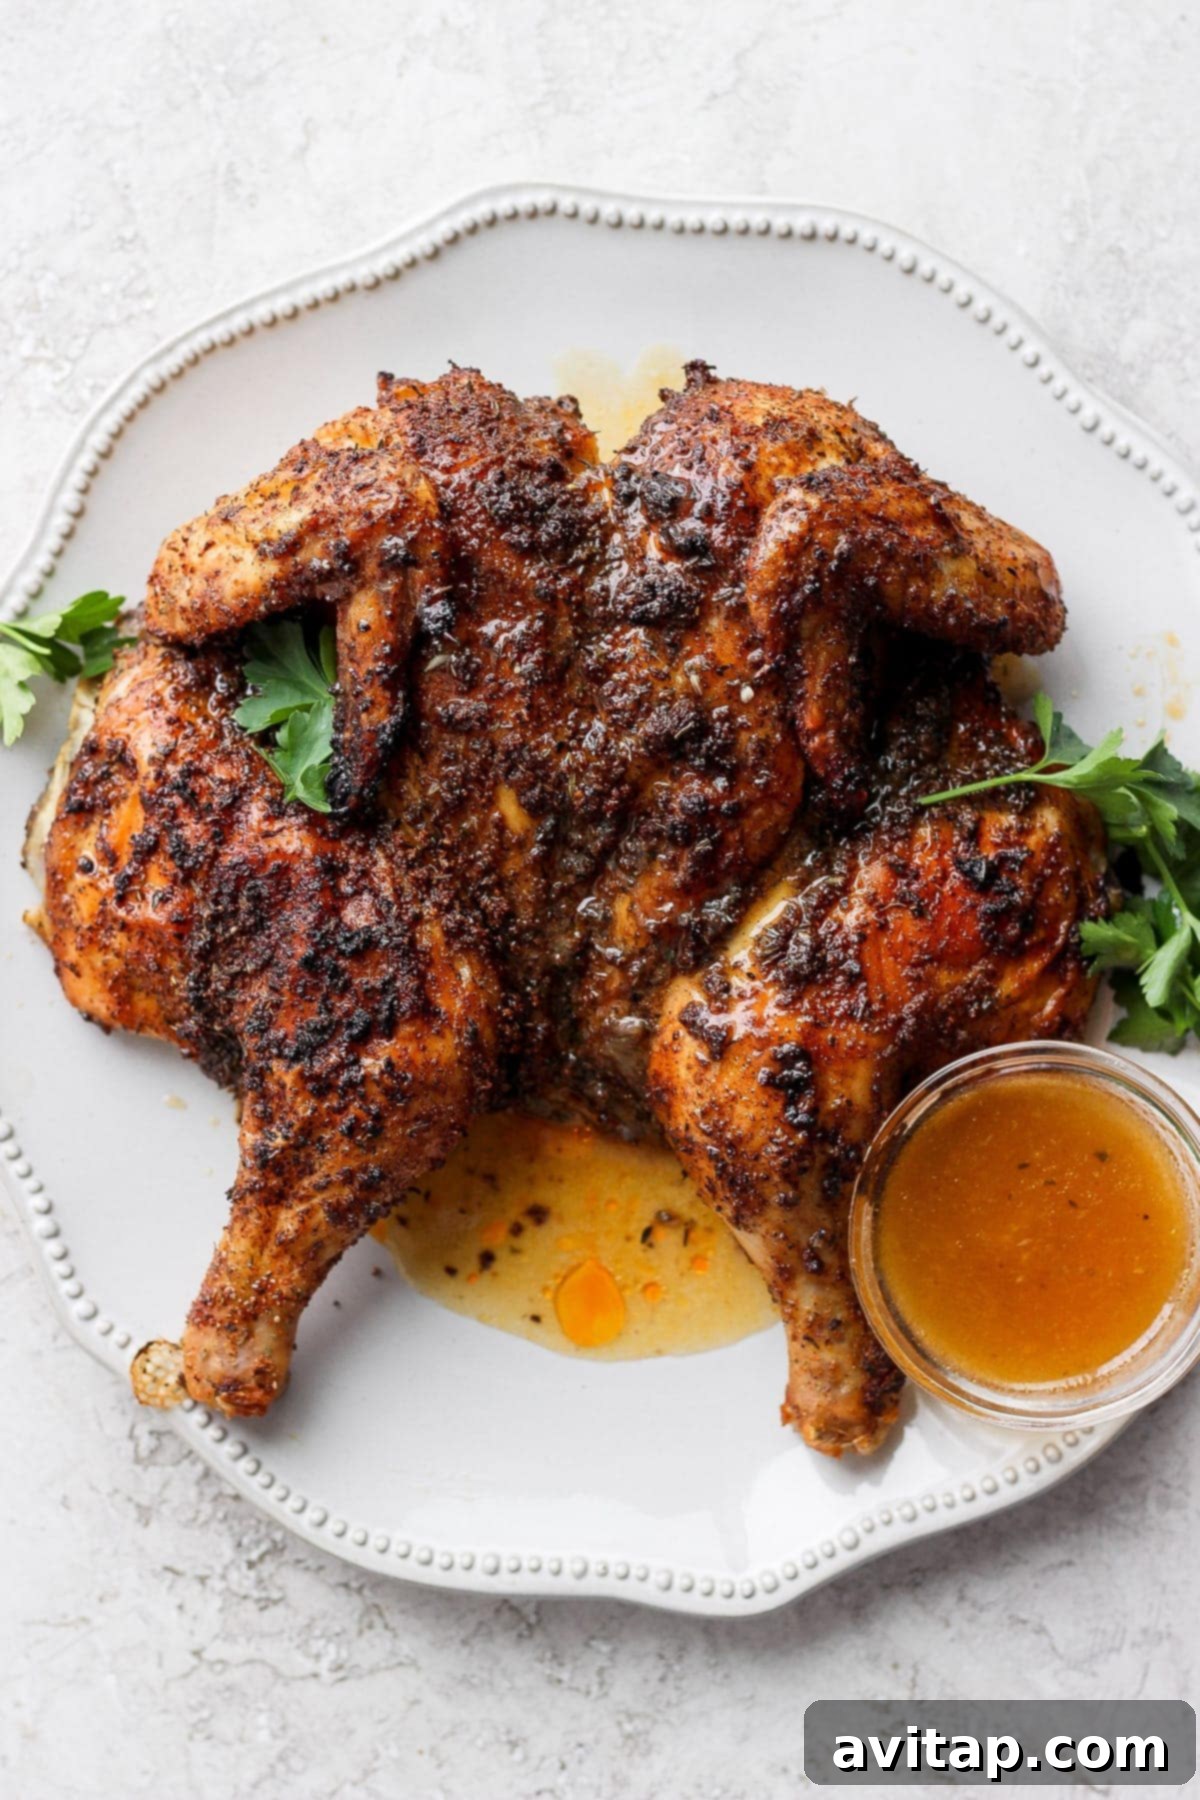
Spatchcock chicken is undoubtedly the fastest, most efficient, and arguably the most delicious way to cook a whole chicken. This ingenious technique, also known as butterflying, involves removing the backbone and flattening the bird, allowing it to cook remarkably quickly and evenly. The result? Consistently succulent, juicy chicken meat beneath a gloriously super crispy skin that will have everyone reaching for more.
We absolutely love incorporating this recipe into our weekly meal rotation because the chicken always emerges from the oven or grill incredibly tender and uniformly cooked. Its versatility is unmatched – savor it as a standalone main course, or easily shred the cooked meat to incorporate into future meals, such as our ever-popular shredded chicken tacos, flavorful salads, or comforting soups. A chef’s secret we highly recommend: always save the rich drippings from your cooked chicken! These flavorful juices are the foundation for an incredible, savory sauce or gravy that truly elevates the entire dining experience, adding an extra layer of gourmet indulgence to your home-cooked meal.
Featured Reader Comment
“This was my inaugural attempt at cooking a whole chicken in the oven, and I must say, deciding to spatchcock it made the process far less intimidating than I expected. I’m absolutely delighted that the recipe was a resounding success right from the very first try. I managed to achieve that sought-after crispy skin and a wonderfully juicy interior, all without the need for brining the chicken beforehand. I will definitely be turning to this recipe again and look forward to fine-tuning the chili powder to perfectly match my taste preferences. Thank you so much for sharing this truly fabulous recipe!” – Merivale
Merivale’s glowing review perfectly encapsulates the magic of this method: it demystifies whole chicken cooking, making it accessible even for first-timers, while delivering consistently impressive results. The unparalleled success of our spatchcock chicken recipe hinges on two fundamental pillars: first, the meticulously crafted and incredibly flavorful chicken seasoning blend, and second, the rich, aromatic sauce or gravy made directly from the savory pan drippings. In the following sections of this comprehensive guide, we will meticulously teach you not only how to perfectly butterfly a chicken to achieve astonishingly crispy skin, but also how to masterfully transform those precious cooking juices into an exquisite, velvety gravy that will beautifully complement your perfectly roasted chicken.
Adding to its appeal, there is absolutely no laborious chicken brine involved in this recipe, simplifying your prep work significantly. Furthermore, this entire meal can be expertly prepared and ready to serve in less than 60 minutes, positioning it as an ideal choice for a quick yet gourmet weeknight dinner, or an impressive dish for entertaining guests without spending hours in the kitchen.
Mastering the Technique: What You Need to Make this Spatchcock Chicken Recipe
To embark on your journey to the perfect spatchcock chicken, gathering the right ingredients is key. Each component plays a crucial role in developing the deep flavors and textures that make this dish so special:
- Whole Chicken (3-4 lb.): This recipe is designed for a medium-sized whole chicken, typically weighing between 3 and 4 pounds. We’ve consistently found that the higher the quality of the meat – for instance, free-range, organic, or pasture-raised chickens – the more superior the flavor and tenderness of the cooked chicken. A healthier chicken generally tastes better and yields more satisfying results.
- Olive Oil (or similar high-smoke point oil): A generous application of olive oil is essential. It acts as a conductor for heat, helping the chicken skin crisp up beautifully to a golden-brown perfection. It also ensures the seasoning adheres uniformly across the bird. Alternatives like avocado oil or grapeseed oil work equally well.
- Homemade Chicken Seasoning: The secret to an exceptionally flavorful spatchcock chicken lies in its seasoning. Our proprietary blend is a close cousin to our renowned chicken dry rub, featuring a harmonious mix of spices that create a robust, savory profile:
- Garlic Powder: For a foundational savory aroma.
- Chili Powder: Adds a gentle warmth and rich color.
- Cumin: Earthy and slightly peppery, enhancing the overall depth.
- Dried Thyme: A classic herb for poultry, imparting a delicate, aromatic essence.
- Ground Mustard: Provides a subtle tangy kick that brightens the spice profile.
- Dried Basil: Sweet and peppery, contributing a fragrant Mediterranean touch.
- Black Pepper: Essential for a well-rounded and pungent flavor.
- Paprika: Delivers a mild sweetness and a vibrant red hue to the skin.
- Brown Sugar: Crucial for caramelizing the skin, which contributes to its crispiness and a subtly sweet, complex flavor.
- Red Pepper Flakes (optional): For those who enjoy a hint of heat to awaken the palate.
- Aromatics for the Gravy (Garlic and Fresh Herbs): These ingredients are strategically placed beneath the chicken during roasting. As the chicken cooks, their flavors meld with the drippings, forming the aromatic base for an exquisite gravy. You’ll need:
- White Onion: Adds a sweet and pungent depth to the pan juices.
- Fresh Garlic Cloves: Smashed to release their potent flavors.
- Fresh Thyme Sprigs: Infuses the drippings with its herbaceous, earthy notes.
- Dry White Wine: Used to deglaze the pan and add a layer of sophisticated flavor to the gravy. Choose a dry variety like Sauvignon Blanc or Pinot Grigio.
- Broth (any kind, separated): The liquid base for the gravy, adding essential moisture and richness.
- Lemon Juice: A splash of fresh lemon juice at the end brightens the gravy and balances its richness.
- Cornstarch: A thickening agent that gives the gravy its smooth, velvety texture.
P.S. For a similar flavor experience scaled up for a larger bird, be sure to check out our spatchcock turkey recipe!
#1 Tip You Don’t Want to Skip: The Power of the Wire Baking Rack!
This single piece of kitchen equipment is absolutely critical for transforming good spatchcock chicken into truly exceptional spatchcock chicken. **Do not, under any circumstances, skip using a wire rack to bake your chicken on.** Placing the chicken flat on a rack within a rimmed baking sheet is the ultimate secret weapon for achieving consistently crispy skin, every single time. Here’s why it’s so indispensable:
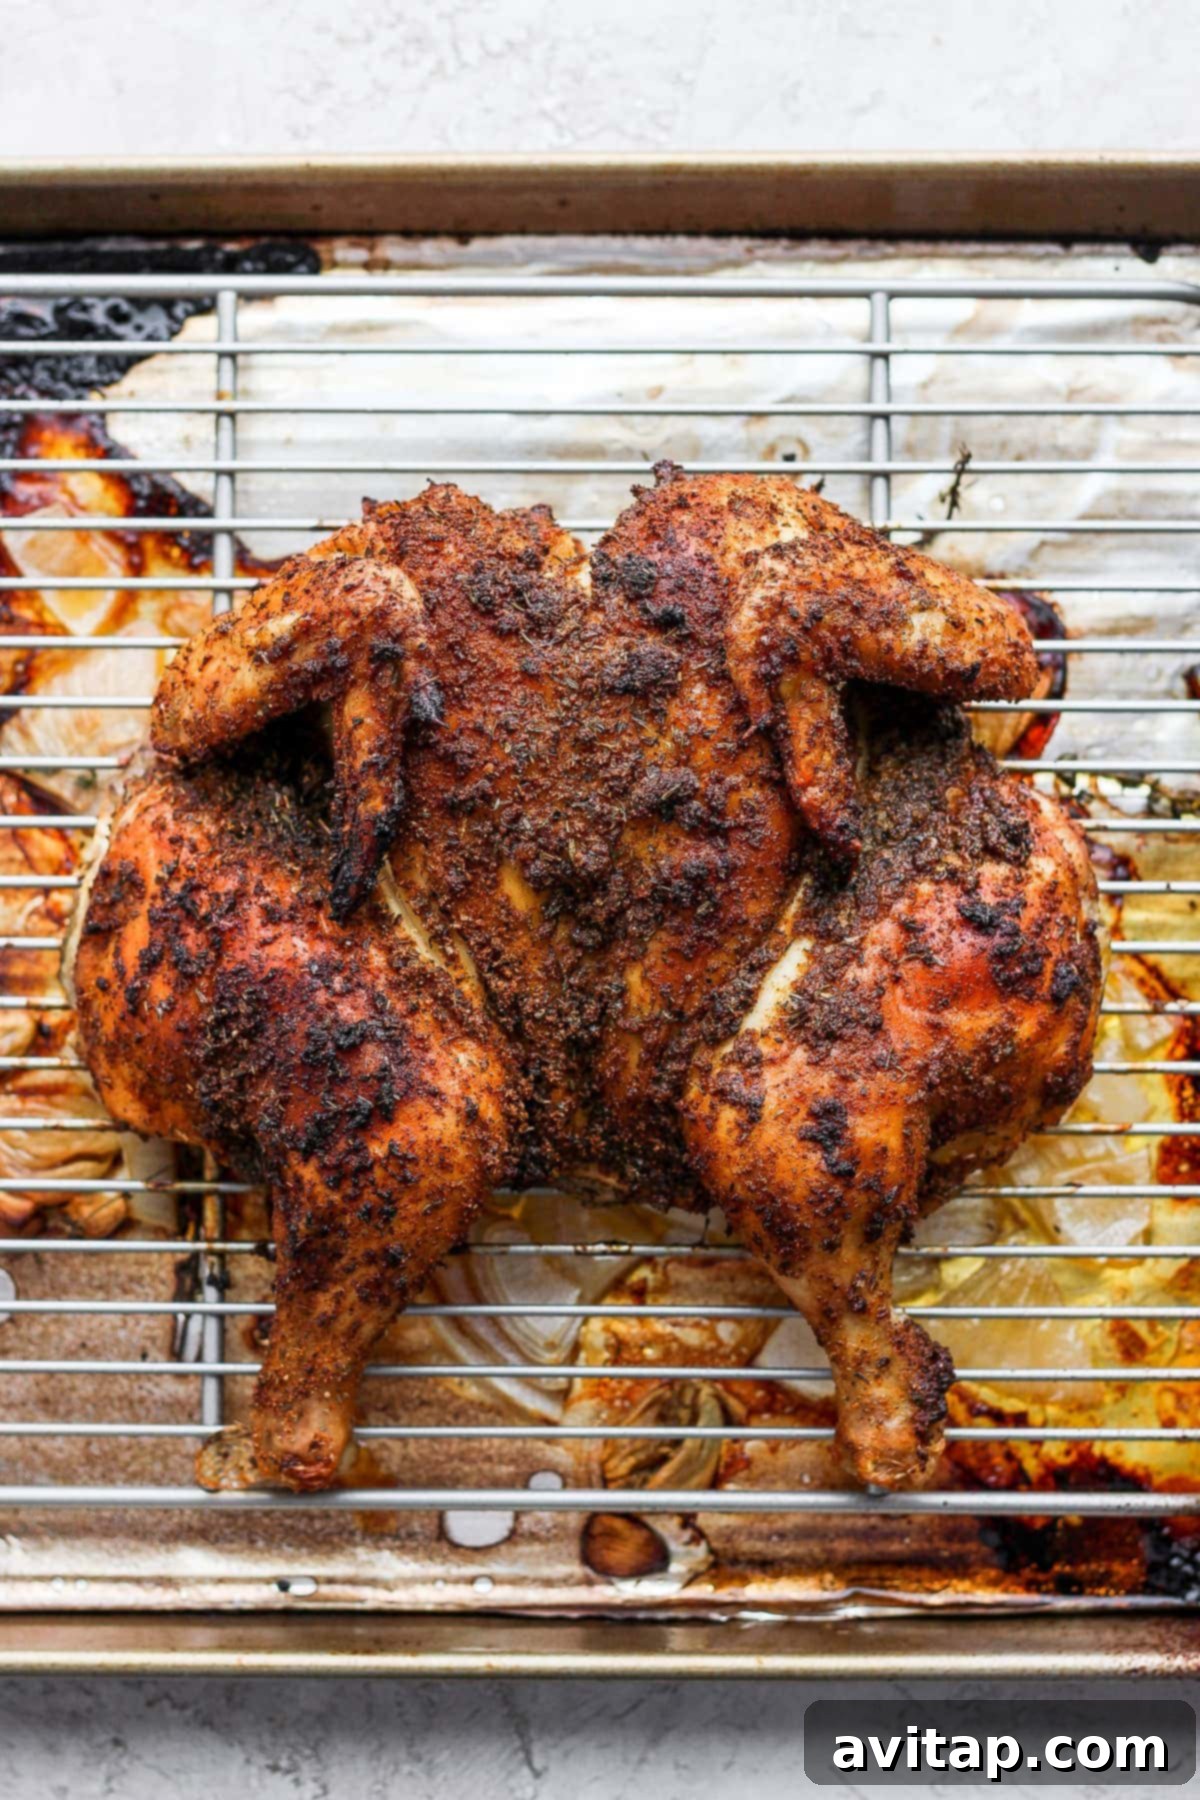
The wire rack provides a vital barrier, elevating the chicken above the baking sheet. This elevation allows hot air to circulate freely and evenly all around the entire bird, including its underside. Without this crucial airflow, the bottom of the chicken would end up sitting in its own rendered fats and juices, effectively steaming rather than roasting. The result would be soggy, limp skin – the exact opposite of what we’re striving for! By promoting 360-degree air circulation, the wire rack ensures that every inch of the chicken skin gets perfectly crisped and beautifully golden-brown, while simultaneously facilitating more even cooking throughout the meat. This small investment in a wire rack will yield monumental improvements in the texture and overall quality of your roasted poultry.
Essential Kitchen Tools You’ll Also Need
Before you begin your culinary adventure with spatchcock chicken, ensure you have these fundamental kitchen tools readily assembled. Having them on hand will make the preparation process smooth, efficient, and enjoyable:
- Sharp Kitchen Shears: These are your best friend for spatchcocking! A sturdy, sharp pair of kitchen shears is absolutely essential for cutting through the chicken’s backbone cleanly and safely. Don’t attempt this with a regular knife unless you are extremely skilled and cautious, as it’s far more difficult and less safe.
- Large Plate: Useful for holding the chicken after preparation and seasoning, before it goes onto the baking sheet.
- Cutting Board: A large, stable cutting board is necessary for the spatchcocking process and for handling raw poultry safely. Consider having a dedicated board for meats to prevent cross-contamination.
- Paper Towels: Crucial for thoroughly patting the chicken dry. This step is non-negotiable for achieving that coveted crispy skin.
- Wire Rack: As highlighted, this is vital for allowing air circulation around the entire chicken, ensuring all sides get crispy.
- Rimmed Baking Sheet: To hold the wire rack, catch all the delicious pan drippings, and prevent any juices from overflowing into your oven. Ensure it’s large enough to accommodate the flattened chicken.
- Aluminum Foil: For lining the baking sheet beneath the wire rack, which makes cleanup incredibly simple and effortless.
- Medium Pot or Saucepan: For simmering and thickening the aromatic pan gravy after the chicken has cooked.
- Chef’s Knife for Slicing: For carving the perfectly roasted chicken into individual serving portions.
- Instant-Read Meat Thermometer: The most reliable tool for accurately checking the chicken’s internal temperature, guaranteeing it’s safely cooked without being overdone.
How Long Does It Take to Cook a Spatchcock Chicken?
One of the most appealing aspects of the spatchcocking technique is its remarkable efficiency in cooking time. A typical 3-4 lb. spatchcock chicken, roasted at a high temperature of 425ºF (220ºC), will generally be ready in approximately **35-45 minutes**. This makes it an ideal solution for a satisfying and impressive meal, even on a busy weeknight.
However, it’s important to note that cooking times can vary slightly. Factors such as the precise size and thickness of your chicken, whether it’s cooked from room temperature or straight from the refrigerator, and the accuracy of your oven’s thermostat can all influence the final cooking duration. The most reliable indicator of doneness, irrespective of the clock, is always the internal temperature of the chicken, which should reach the safe minimum for poultry.
The Importance of Chicken Internal Temperature
Ensuring your poultry is cooked to a safe internal temperature is paramount for food safety. According to the USDA, the safe internal cooking temperature for all poultry, including whole chicken, is **165ºF (74ºC)**. Always use a reliable instant-read meat thermometer inserted into the thickest part of the thigh, making sure to avoid touching any bones, to get the most accurate reading.
Let Your Chicken Rest: Once your chicken reaches the target temperature, resist the urge to carve it immediately! It is absolutely crucial to remove the chicken from the oven and let it rest, loosely tented with foil, for at least 10-15 minutes. During this vital resting period, two important things happen: first, the internal temperature will continue to rise by about 5ºF (a phenomenon known as “carryover cooking,” ensuring it reaches the full 165ºF if removed at 160ºF); and second, the juices, which have been driven to the center by the heat, will redistribute throughout the meat. This redistribution process is what guarantees an incredibly tender, moist, and flavorful chicken, preventing dry and stringy results.
Switch Up the Seasonings: Personalizing Your Spatchcock Chicken
While our signature homemade chicken rub delivers an exceptional flavor profile, the beauty of spatchcock chicken lies in its adaptability. Don’t hesitate to get creative and personalize the seasonings to match your taste preferences or to explore new culinary horizons. Here are some fantastic ways to switch up the flavors:
- Use a Store-Bought Seasoning: For ultimate convenience, a quality store-bought seasoning blend can be a fantastic alternative. If you choose this route, we highly recommend selecting a **salt-free seasoning**. This crucial tip allows you complete control over the saltiness of your dish, letting you add salt to your liking and preventing an overly seasoned or salty result. There are countless blends available, from zesty lemon-herb to robust BBQ rubs, all of which can transform your chicken.
- Herb-Forward Blends: Experiment with a blend heavy on dried rosemary, sage, oregano, or a classic Herbes de Provence mix for a fragrant, Mediterranean-inspired chicken.
- Spicy Kick: If you love heat, increase the chili powder, add a pinch of cayenne pepper, or incorporate smoked paprika for both spice and a smoky depth.
- Citrus Infusion: Finely grate the zest of a lemon, orange, or lime into your rub. The citrus oils add a bright, fresh, and aromatic layer that complements chicken beautifully.
- Asian-Inspired: For a different twist, consider a rub with ginger powder, five-spice powder, and a touch of white pepper, perhaps finished with a drizzle of soy sauce-based glaze.
Instructions for Grilling Your Spatchcock Chicken: A Smoky Outdoor Alternative
While oven-roasting is a fantastic method for spatchcock chicken, taking it to the grill offers a whole new dimension of flavor – a delightful hint of char and irresistible smoky notes. This recipe has been thoroughly tested on the grill, yielding equally spectacular results, especially for warm-weather cooking. Here’s how to achieve a perfectly grilled spatchcock chicken:
- Prepare and Season the Chicken: Begin by spatchcocking your chicken as instructed in the main recipe, ensuring the backbone is removed and the bird is flattened. Then, apply your chosen seasoning blend generously over the entire chicken, ensuring it is well-coated for maximum flavor.
- Preheat Your Grill for Two Zones: Set up your grill for two-zone cooking. This means one side of your grill should be designated for high, direct heat (around 450ºF or 230ºC), while the other side should be left off or on very low for indirect heat. This setup is crucial for searing and then gently cooking the chicken.
- Initial Sear (Skin-Side Down): Once your grill is preheated, place the spatchcock chicken skin-side down directly over the high, direct heat. Close the lid and grill for approximately 3-4 minutes. This initial sear is key to developing that beautiful, crispy, golden-brown skin. Keep a close watch to prevent burning.
- Flip and Cook Indirectly: After the initial sear, carefully flip the chicken over so it is skin-side up. Move the chicken to the indirect heat side of the grill. Close the lid and allow it to cook for around 45 minutes, or until an instant-read meat thermometer inserted into the thickest part of the thigh (avoiding bone) registers 165ºF (74ºC). The indirect heat ensures the chicken cooks through evenly without overcooking or burning the skin.
- Rest Before Carving: Just like oven-roasted chicken, it’s vital to let the grilled spatchcock chicken rest for 10-15 minutes off the grill before carving. This allows the juices to redistribute, guaranteeing a tender and incredibly flavorful result.
For more detailed insights into grilling a whole chicken and achieving perfect results, be sure to explore our dedicated grilled whole chicken recipe!

Recommended Tool
Thermoworks Thermapen ONE
We absolutely swear by using a high-quality meat thermometer when cooking any cut of meat, especially poultry, to ensure both safety and perfect doneness. The Thermapen ONE is our absolute go-to choice. It provides incredibly fast and accurate temperature readings every single time, guaranteeing your chicken is cooked perfectly to 165ºF without any guesswork or overcooking. This tool is a true game-changer for confident cooking.
Serving Suggestions: Perfect Pairings for Your Spatchcock Chicken
This incredibly flavorful and versatile spatchcock chicken is a star on its own, but it truly shines when paired with well-chosen side dishes. The rich, savory meat and crispy skin complement a wide array of flavors and textures. Here are some of our favorite recommendations to complete your meal:
- Grilled Brussels Sprouts: With their slightly charred, nutty flavor and tender-crisp texture, grilled Brussels sprouts offer a delightful contrast and earthy complement to the chicken.
- Air Fryer Baked Potatoes: Achieve perfectly fluffy interiors and wonderfully crispy skins with minimal effort. These are ideal for soaking up every drop of that delicious homemade gravy.
- Sautéed Mushrooms: Earthy, umami-rich mushrooms, delicately sautéed with garlic and herbs, add a sophisticated and savory depth to your plate.
- Fresh Corn on the Cob: A simple, sweet, and satisfying classic that provides a refreshing burst of flavor and a lovely textural counterpoint to the rich chicken.
- Creamy Mashed Potatoes: A timeless classic, perfect for absorbing the luscious gravy and offering a comforting, smooth texture.
- Roasted Asparagus: Lightly roasted asparagus spears with a squeeze of lemon add a fresh, green crunch and vibrant color to the plate.
- Wild Rice Pilaf: A hearty and aromatic side dish that complements the savory chicken with its nutty flavors and satisfying texture.
Storage & Leftovers: Maximizing Your Spatchcock Chicken
One of the many benefits of cooking a whole spatchcock chicken is the potential for delicious leftovers, making it fantastic for meal prepping! Properly stored, cooked chicken will remain fresh and flavorful. Store any leftover chicken in an airtight container in the refrigerator for up to 5 days. For optimal juiciness, you can store the carved meat with a small amount of the accompanying gravy or pan drippings.
Don’t just reheat slices – unleash the versatility of leftover chicken! Shred the meat and transform it into a variety of exciting and quick meals:
- Vibrant Cobb Salad: A hearty and visually appealing salad featuring shredded chicken, crispy bacon, creamy avocado, hard-boiled eggs, and fresh mixed greens.
- Comforting Chicken Noodle Soup: The ultimate warm and nourishing meal, made even quicker and easier with pre-cooked chicken.
- Quick & Easy Chicken Tacos: A family-friendly weeknight favorite. Simply warm the shredded chicken and serve with your favorite tortillas and toppings.
- Chicken Sandwiches or Wraps: Mix shredded chicken with a touch of mayonnaise, a squeeze of lemon, and your favorite herbs for a delightful lunch option.
- Creamy Chicken Pot Pie: Use the leftover chicken as the flavorful base for a comforting, homemade chicken pot pie topped with a flaky crust.
- Enchiladas or Quesadillas: Incorporate shredded chicken into cheesy enchiladas or quick quesadillas for a satisfying Mexican-inspired meal.
For longer storage, you can also freeze cooked, shredded chicken. Allow it to cool completely, then store it in freezer-safe airtight bags or containers for up to 3-4 months. Thaw in the refrigerator overnight before use.
Our Ultimate Spatchcock Chicken Recipe
Print Recipe
Ingredients
- 3 – 4 lb. whole chicken
- 1.5 teaspoon salt, separated
- 3 tablespoons olive oil, separated
- ½ white onion, chopped
- 4 cloves garlic, peeled and smashed
- 10 sprigs fresh thyme
- ¼ cup dry white wine
- 1.5 cups broth, any kind (separated)
- 2 teaspoons lemon juice
- 2 teaspoons cornstarch
Chicken Seasoning
- 2 teaspoons garlic powder
- 1 teaspoon chili powder
- 1 teaspoon cumin
- 1 teaspoon dried thyme
- 1 teaspoon ground mustard
- 1 teaspoon dried basil
- 1/2 teaspoon ground pepper
- 1/2 teaspoon red pepper flakes
- 1/2 teaspoon sea salt
- 1/2 teaspoon paprika
- 1 teaspoon brown sugar
Instructions
-
First, prepare your flavorful chicken seasoning. In a small bowl, thoroughly mix together all the spices listed under “Chicken Seasoning.” Set this blend aside.
-
Next, remove the whole chicken from its packaging. Place it breast-side down on a clean, dry cutting board. This positioning will make the backbone easily accessible for removal.
-
Using paper towels, generously pat the entire chicken dry, both inside and out. Removing as much moisture as possible is a critical step for achieving wonderfully crispy skin.
-
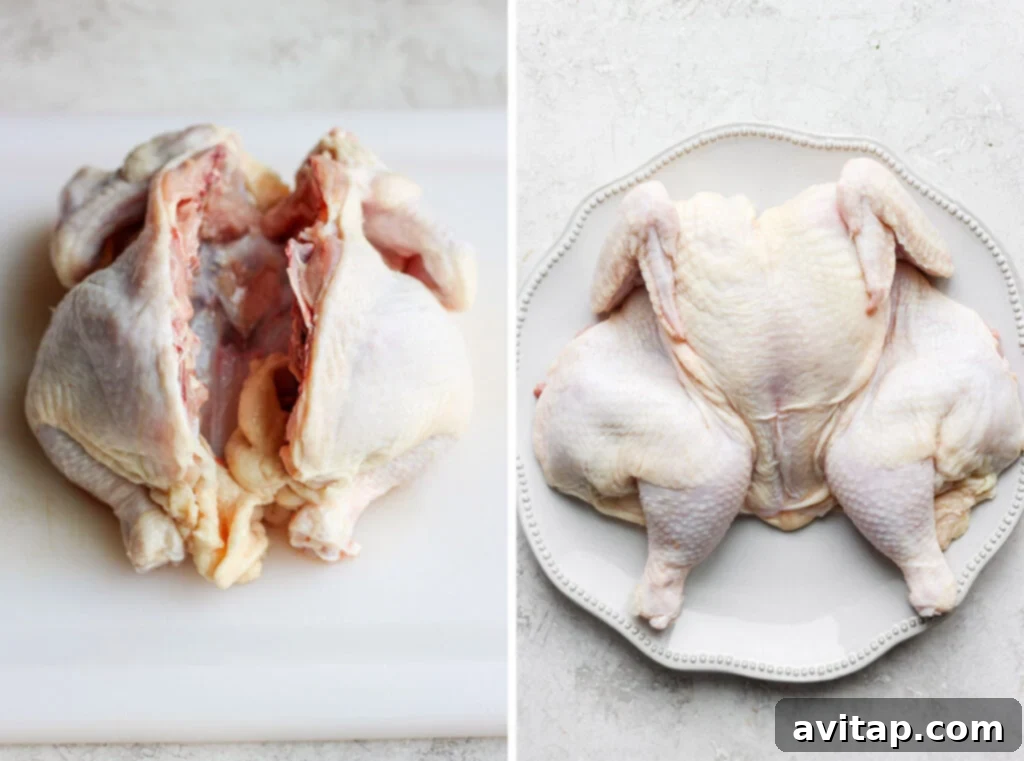
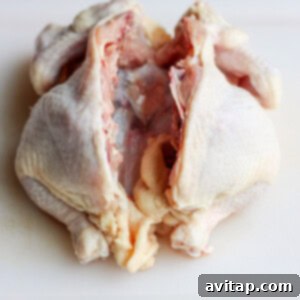
To spatchcock the chicken: With the chicken still breast-side down, use a sharp pair of kitchen shears to cut along one side of the spine, starting from the tail end and working your way up to the neck. Repeat this process on the other side of the spine. Once both cuts are complete, remove the backbone entirely. You can discard it or save it for making future chicken stock.

-
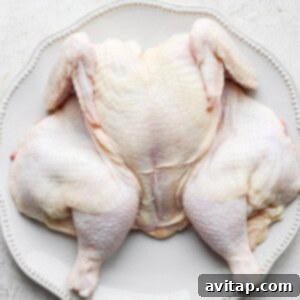
Flip the chicken over so it is now breast-side up on the cutting board. Place the heel of your hand firmly on the middle of the breastbone and press down forcefully until you hear a crack. This action flattens the chicken, ensuring it cooks more evenly.
-
Carefully transfer the flattened chicken to a large plate. Gently slide your hand under the skin of the chicken breasts and thighs, subtly separating the skin from the meat without tearing it. This creates pockets for seasoning.
-
Take 1 teaspoon of the separated salt and rub it directly onto the chicken meat under the skin. Ensure the meat is thoroughly covered with salt; this seasons the meat from within, adding incredible flavor.
-
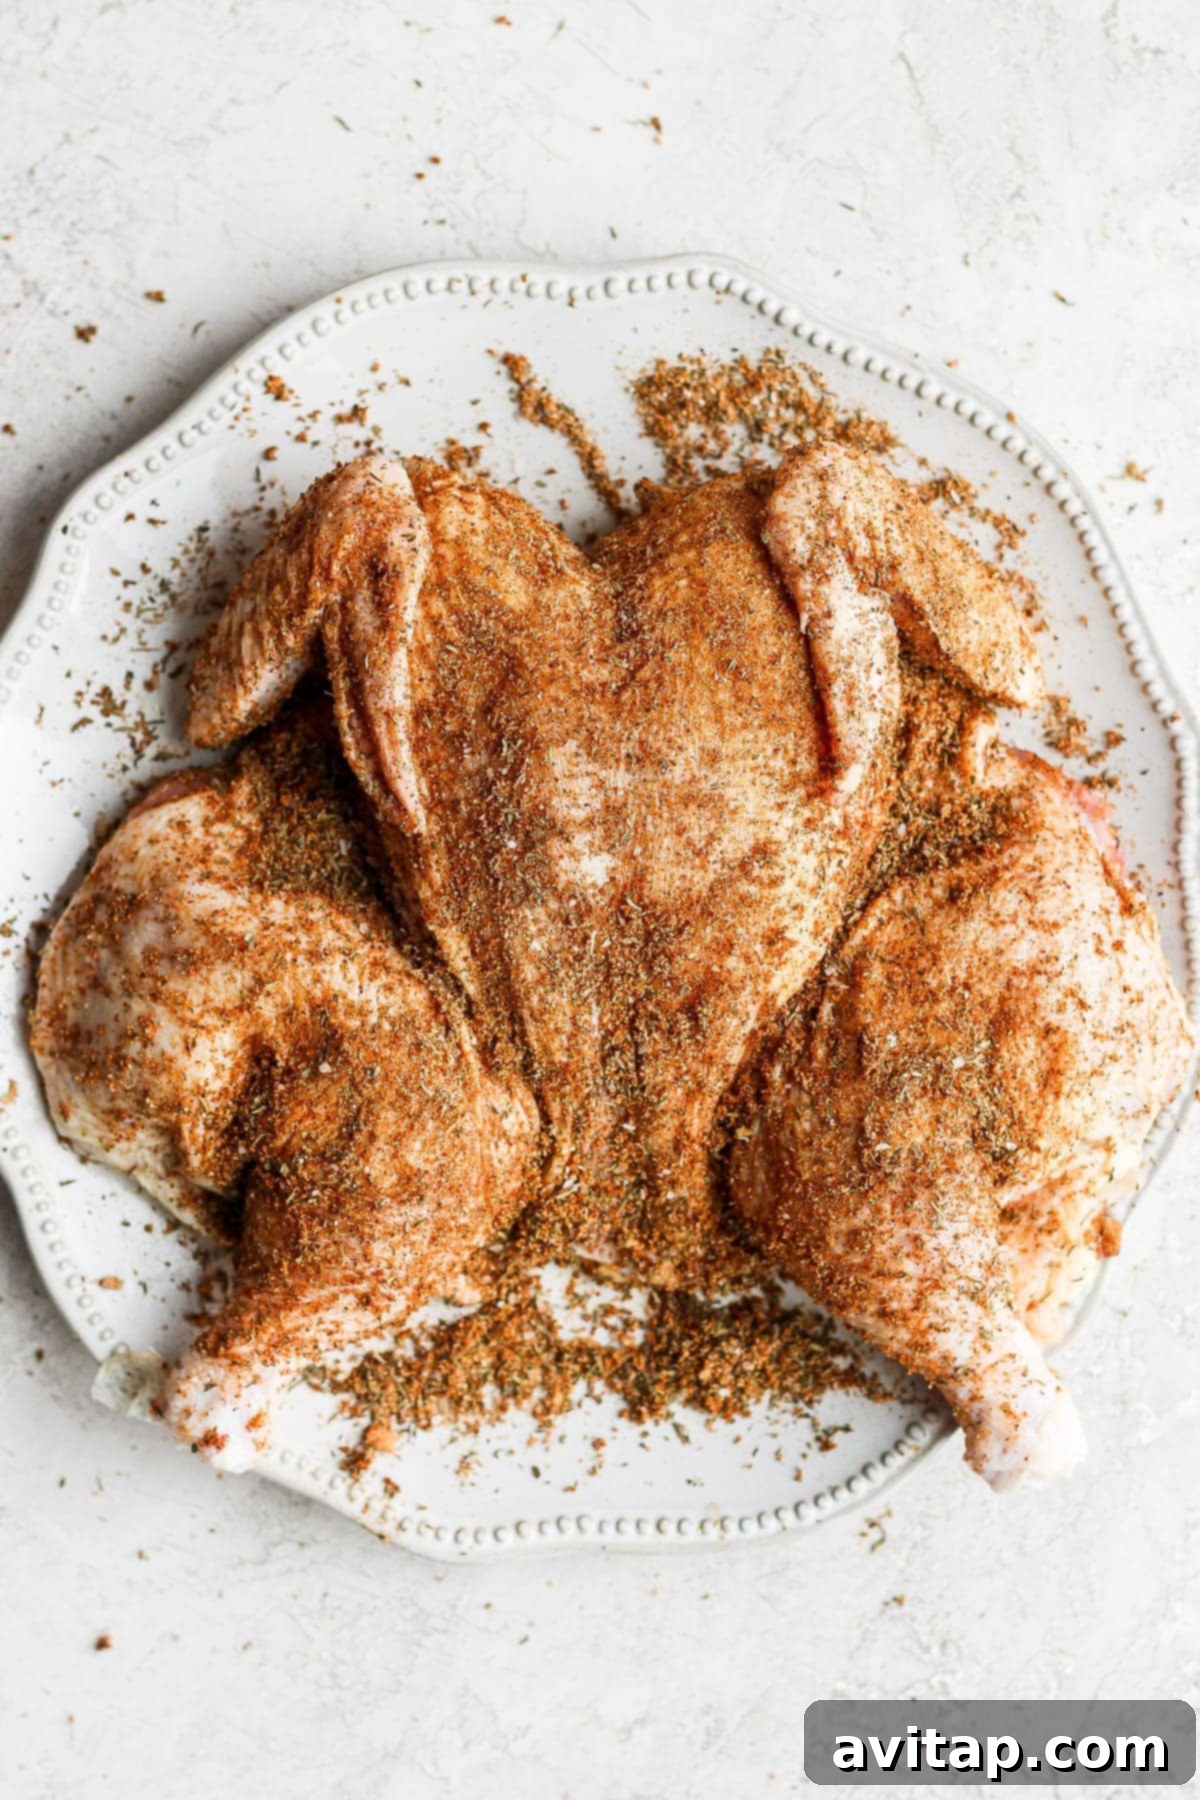
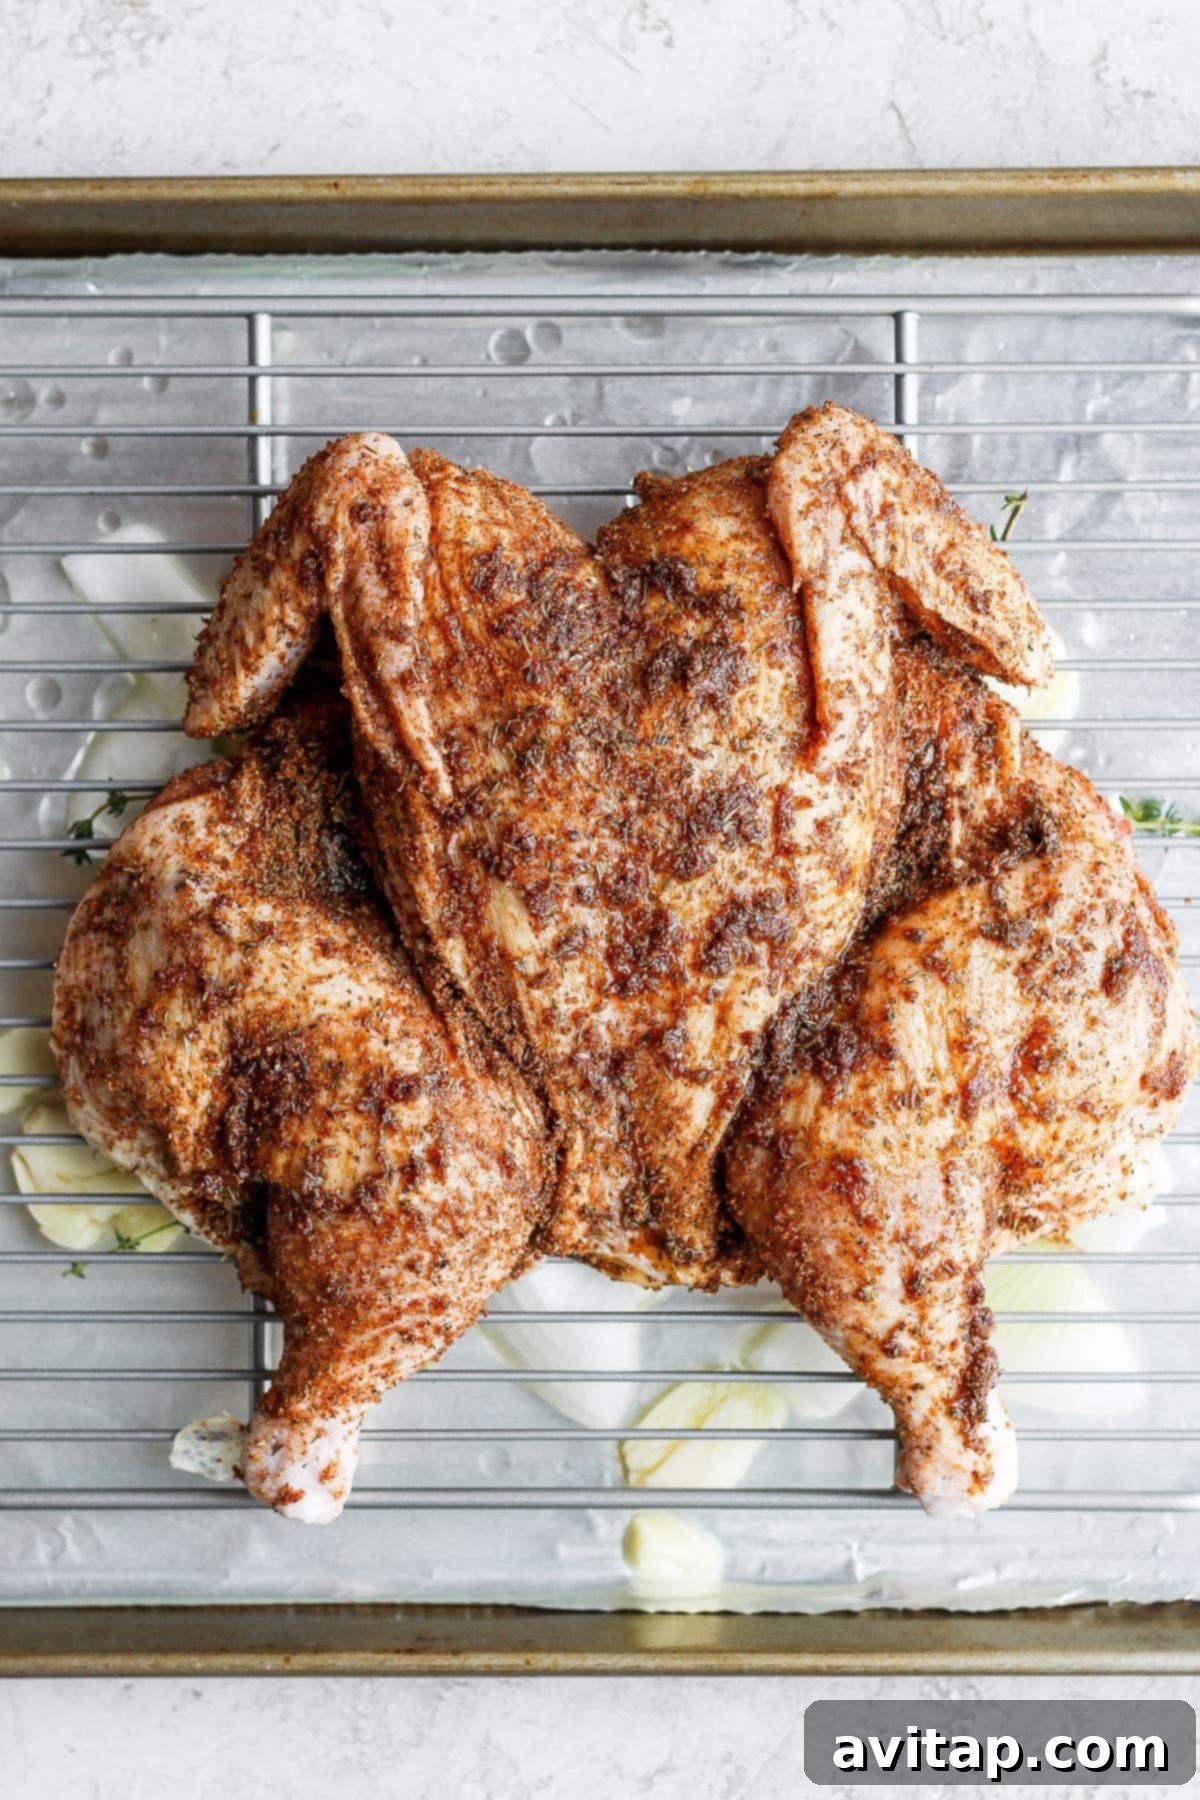
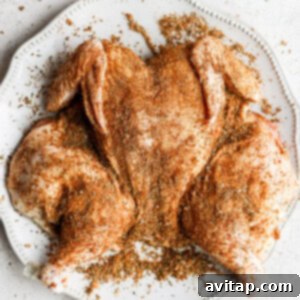
Next, generously season the entire exterior of the chicken with your prepared seasoning blend. Make sure to cover the skin, legs, and thighs evenly. For optimal flavor infusion and crispiest skin, refrigerate the seasoned chicken for at least 15 minutes, or ideally up to 2 hours.
-
When you’re ready to cook, preheat your oven to 425ºF (220ºC). Line a rimmed baking sheet with aluminum foil for easy cleanup of the delicious drippings.
-
Remove the seasoned chicken from the refrigerator and allow it to sit at room temperature for about 15-20 minutes while the oven preheats. This helps ensure more even cooking.
-
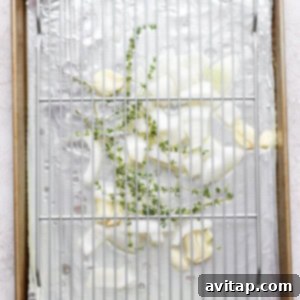
On the foil-lined baking sheet, evenly scatter the chopped white onion, smashed garlic cloves, and fresh thyme sprigs. Pour in the dry white wine and ½ cup of broth, then sprinkle with the remaining ½ teaspoon of salt. This aromatic bed will infuse the pan drippings with incredible flavor for your gravy.
-
Place a wire rack directly on top of the foil and the aromatic vegetables on the baking sheet. Carefully position the whole spatchcock chicken flat on the wire rack, breast-side up.
-
Rub the chicken generously with the additional 2 tablespoons of olive oil. Ensure you thoroughly massage the oil into all parts of the skin – this is crucial for achieving that beautiful golden and shatteringly crispy finish.
-
Place the baking sheet with the chicken into the preheated oven. Bake at 425ºF (220ºC) for 35-45 minutes, or until an instant-read meat thermometer inserted into the thickest part of the thigh (avoiding the bone) registers at least 160ºF (71ºC). The skin should be deeply golden brown and incredibly crisp.
-
Once cooked, carefully remove the chicken from the oven. Tent it loosely with foil and let the chicken rest on the wire rack for at least 15 minutes. This crucial resting period allows the juices to redistribute, ensuring maximum tenderness. During this time, the internal temperature will continue to rise to the safe 165ºF (74ºC).
-
While the chicken is resting, prepare the glorious pan gravy. Carefully pour all the cooked vegetables, flavorful liquid, and herbs from the bottom of the baking pan into a small saucepan. Add the remaining 1 cup of broth to the saucepan.
-
Bring the mixture in the saucepan to a gentle boil over medium-high heat. Once boiling, reduce the heat to medium-low and stir in the fresh lemon juice.
-
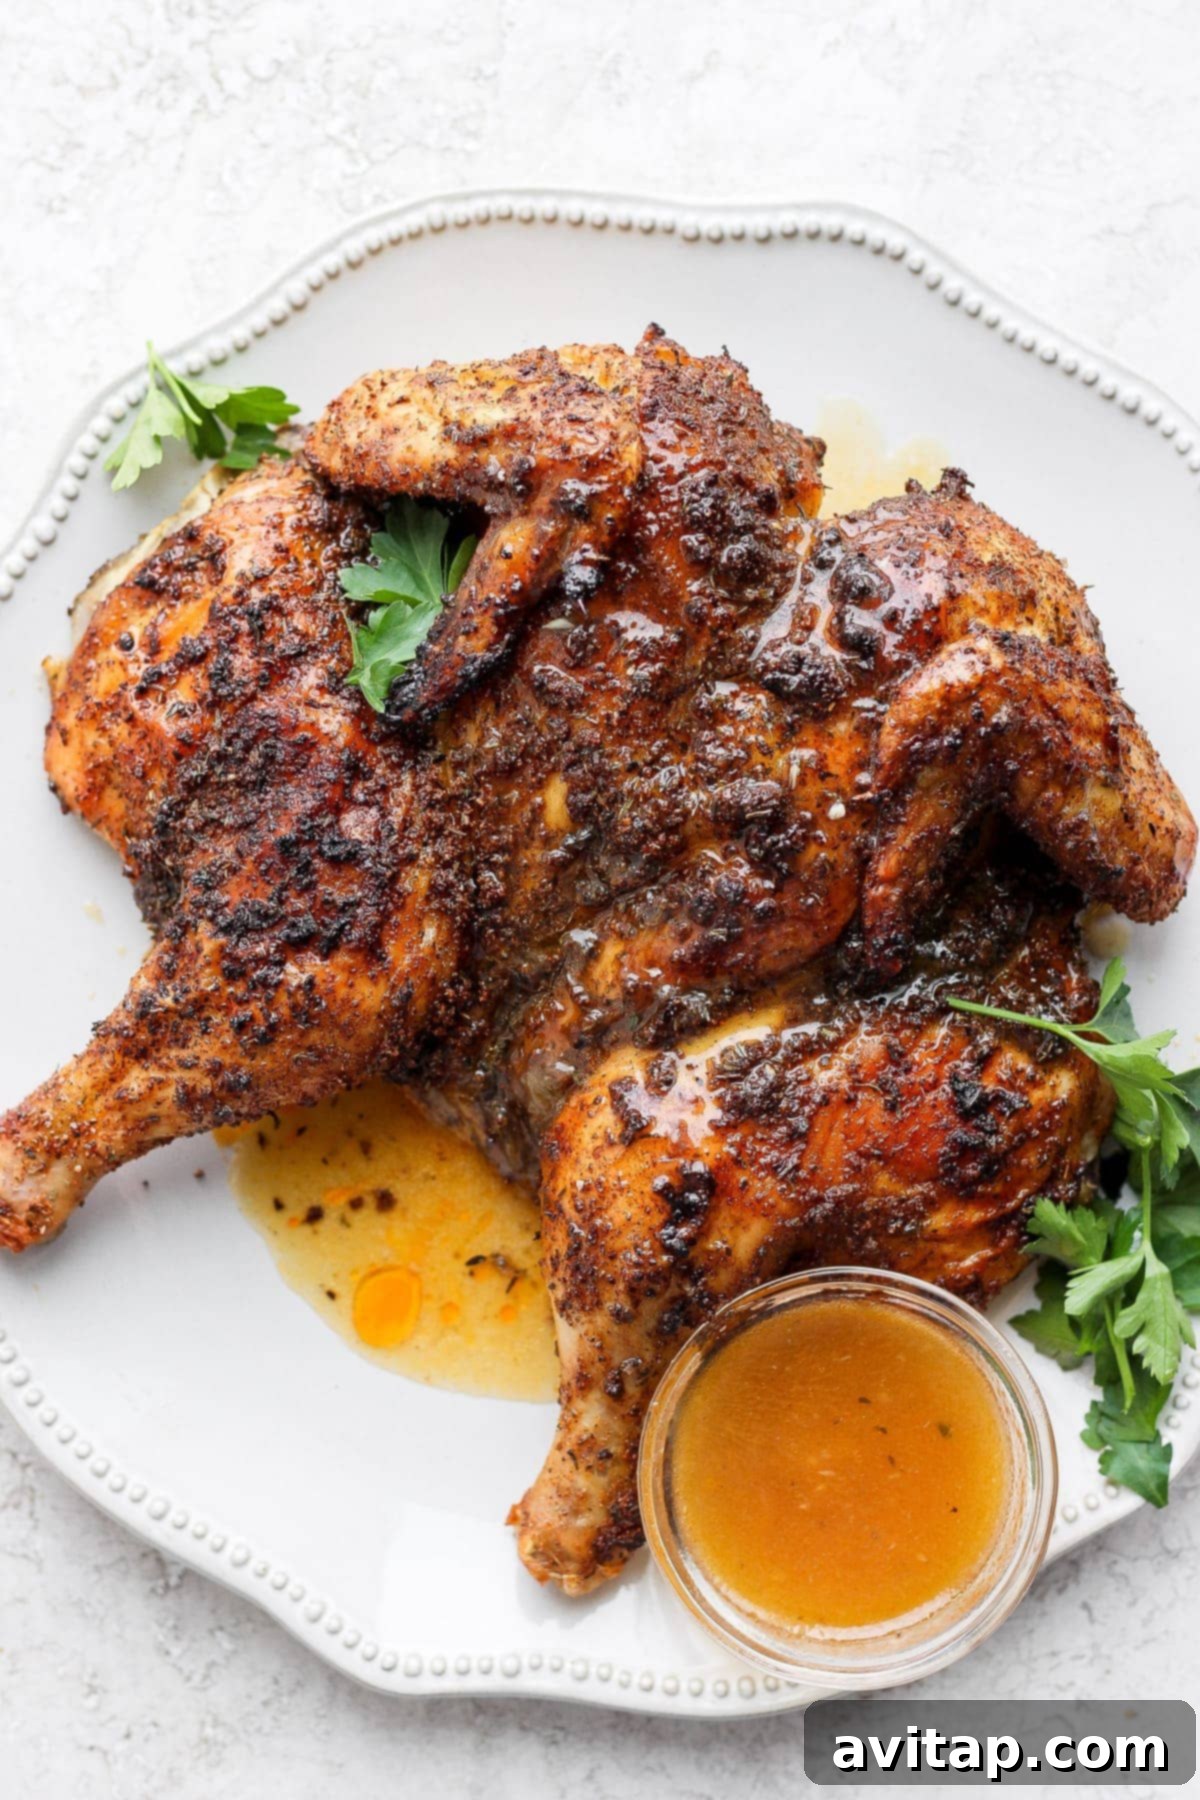
In a small bowl, whisk together the cornstarch with 1 tablespoon of cold water to create a smooth slurry. Slowly pour this cornstarch slurry into the simmering gravy, whisking continuously to prevent lumps. Let the gravy cook over medium heat, stirring occasionally, until it thickens to your desired consistency. Remove from heat and discard the herb stems before serving.
-
Carve the perfectly roasted and rested spatchcock chicken into serving pieces. Serve immediately, generously drizzled with the homemade pan gravy. Enjoy your masterpiece!
Expert Tips & Notes for Spatchcock Chicken Success
- Optimal Refrigeration for Flavor & Crispiness: For the absolute best results, we highly recommend refrigerating the seasoned chicken for the full 2 hours if your schedule permits. This extended chilling period serves a dual purpose: it allows the aromatic spices to deeply penetrate and infuse the chicken meat, intensifying its flavor, and it helps to further dry out the chicken skin. Drier skin is the ultimate secret to achieving that coveted, shatteringly crispy crust when roasted. However, if you’re truly pressed for time, even a 15-minute refrigeration period will still offer some noticeable benefits.
- The Indispensable Wire Rack: As we’ve emphasized throughout this guide, this is a non-negotiable step! Do not skip placing the chicken on a wire rack set within a rimmed baking sheet. This setup is absolutely crucial for ensuring consistent and proper air circulation around the entire bird, which is precisely what facilitates incredibly crispy skin on all sides and prevents the bottom from becoming soggy.
- Starting at Room Temperature: After refrigeration, letting the chicken sit out for 15-20 minutes before it goes into the oven allows it to come closer to room temperature. This small step helps the chicken cook more evenly and can slightly reduce the overall cooking time.
- Avoid Overcrowding the Pan: Ensure your chosen baking sheet is large enough to comfortably accommodate the flattened chicken without any overlap. Overcrowding inhibits proper airflow and can prevent the chicken from browning and crisping effectively.
- Don’t Discard the Backbone: The backbone you remove during spatchcocking is a treasure trove of flavor! Don’t throw it away; instead, save it in your freezer. It’s excellent for making homemade chicken stock, which will add incredible depth of flavor to your future soups, sauces, and risottos.
- Seasoning Personalization: Feel completely free to adjust the amount of chili powder or any other spices in the dry rub to suit your family’s specific preferences. Whether you prefer it spicier, milder, or with a different herbaceous note – the choice is entirely yours to customize.
Watch Our Spatchcock Chicken Tutorial Video
(Video Placeholder: A detailed video guide on how to spatchcock a chicken and roast it to perfection, showcasing all the steps for crispy skin and juicy meat.)
Nutrition Information (Approximate Per Serving)
Carbohydrates: 5 g,
Protein: 56 g,
Fat: 24 g,
Fiber: 1 g,
Sugar: 1 g
Note: Nutrition information is automatically calculated and should be used as an approximation. Exact values may vary significantly based on ingredients, brands, and specific preparation methods.
Shop These Essential Kitchen Tools for Spatchcock Chicken
Cutting Boards
Baking Sheet
Love this recipe? Leave a comment and let us know!
Don’t forget to tag your delicious posts on social media with the hashtag #fitfoodiefinds – we’d absolutely love to see what culinary masterpieces you’re creating!
Discover More of Our Favorite…
Explore More Delicious Whole Chicken Recipes
If you’ve enjoyed mastering the art of spatchcock chicken, you’re in for a treat! Our collection features a variety of other fantastic whole chicken recipes, each offering unique flavors and cooking methods. Expand your culinary repertoire and find your next family favorite:
- Grilled Spatchcock Chicken: Perfect for outdoor cooking enthusiasts, this recipe delivers a delightful smoky char and tender meat straight from the grill.
- Smoked Whole Chicken: Dive into the rich, complex flavors of slow-smoked chicken, ideal for a weekend project and guaranteed to impress.
- Instant Pot Whole Chicken: Achieve incredibly tender, fall-off-the-bone chicken in a fraction of the time with your pressure cooker – perfect for busy days.
- Beer Can Chicken: A fun and flavorful method that uses a beer can to keep the chicken incredibly moist from the inside out, resulting in fantastic flavor and presentation.
- Classic Herb Roasted Whole Chicken: A timeless, aromatic roast recipe, perfect for any occasion, featuring fragrant herbs and a beautifully golden crust.
Photography by: The Wooden Skillet