
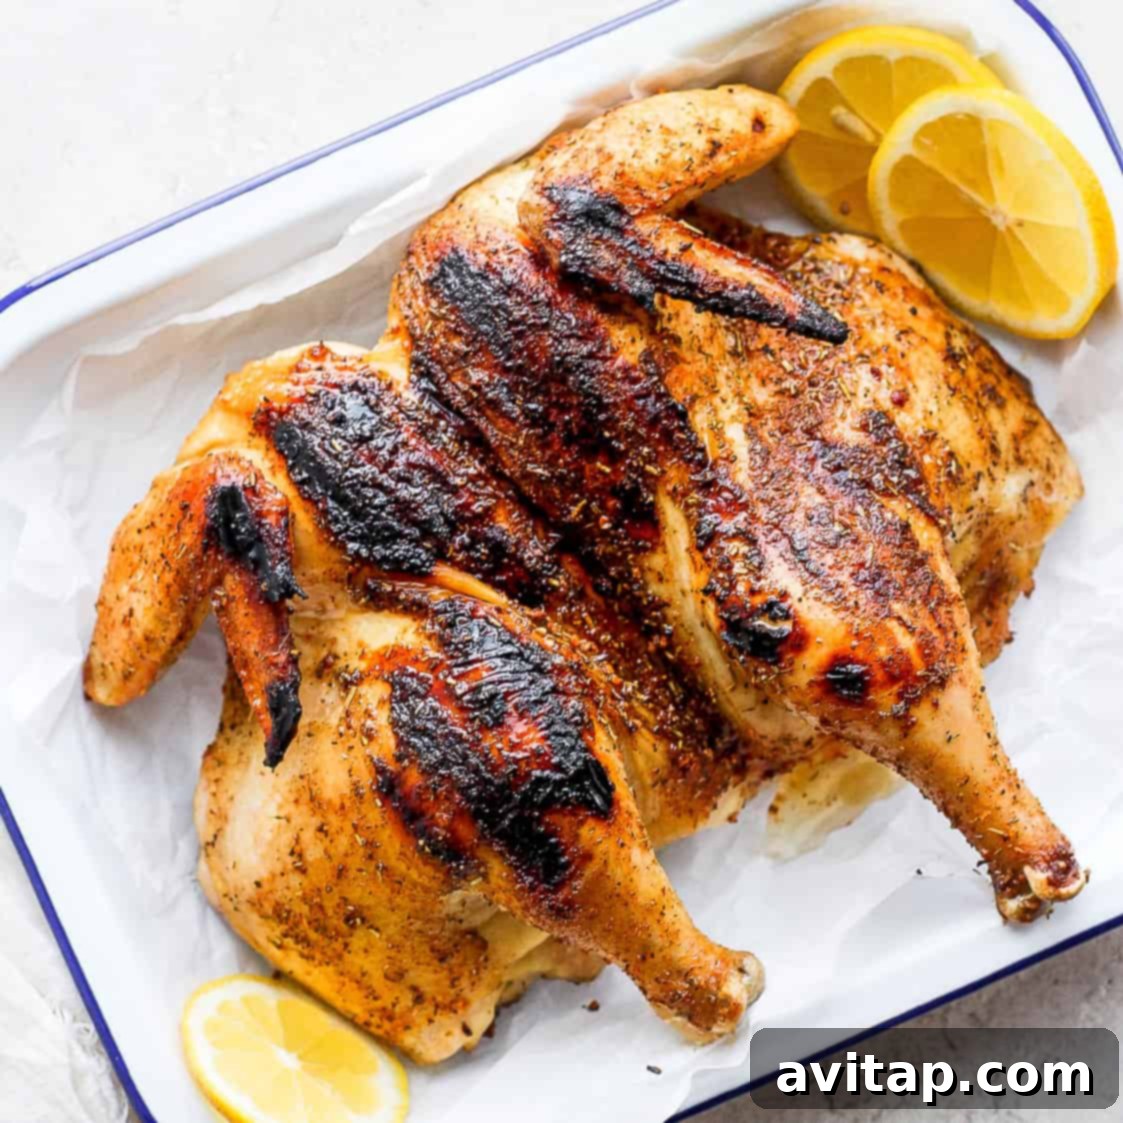
Discovering how to spatchcock a chicken was a genuine revelation in our kitchen. This simple yet transformative technique makes grilling a whole chicken remarkably faster and ensures every part, from breast to thigh, cooks incredibly evenly. Gone are the days of dry spots and unevenly cooked poultry; with spatchcocking, you’re set for succulent, perfectly grilled chicken every time.
Join us as we guide you through the ultimate method to achieve a **perfectly grilled whole chicken**. Our proven process involves strategic brining for maximum moisture, spatchcocking for even cooking, a flavorful dry rub, and precise grilling techniques that result in juicy, tender perfection!
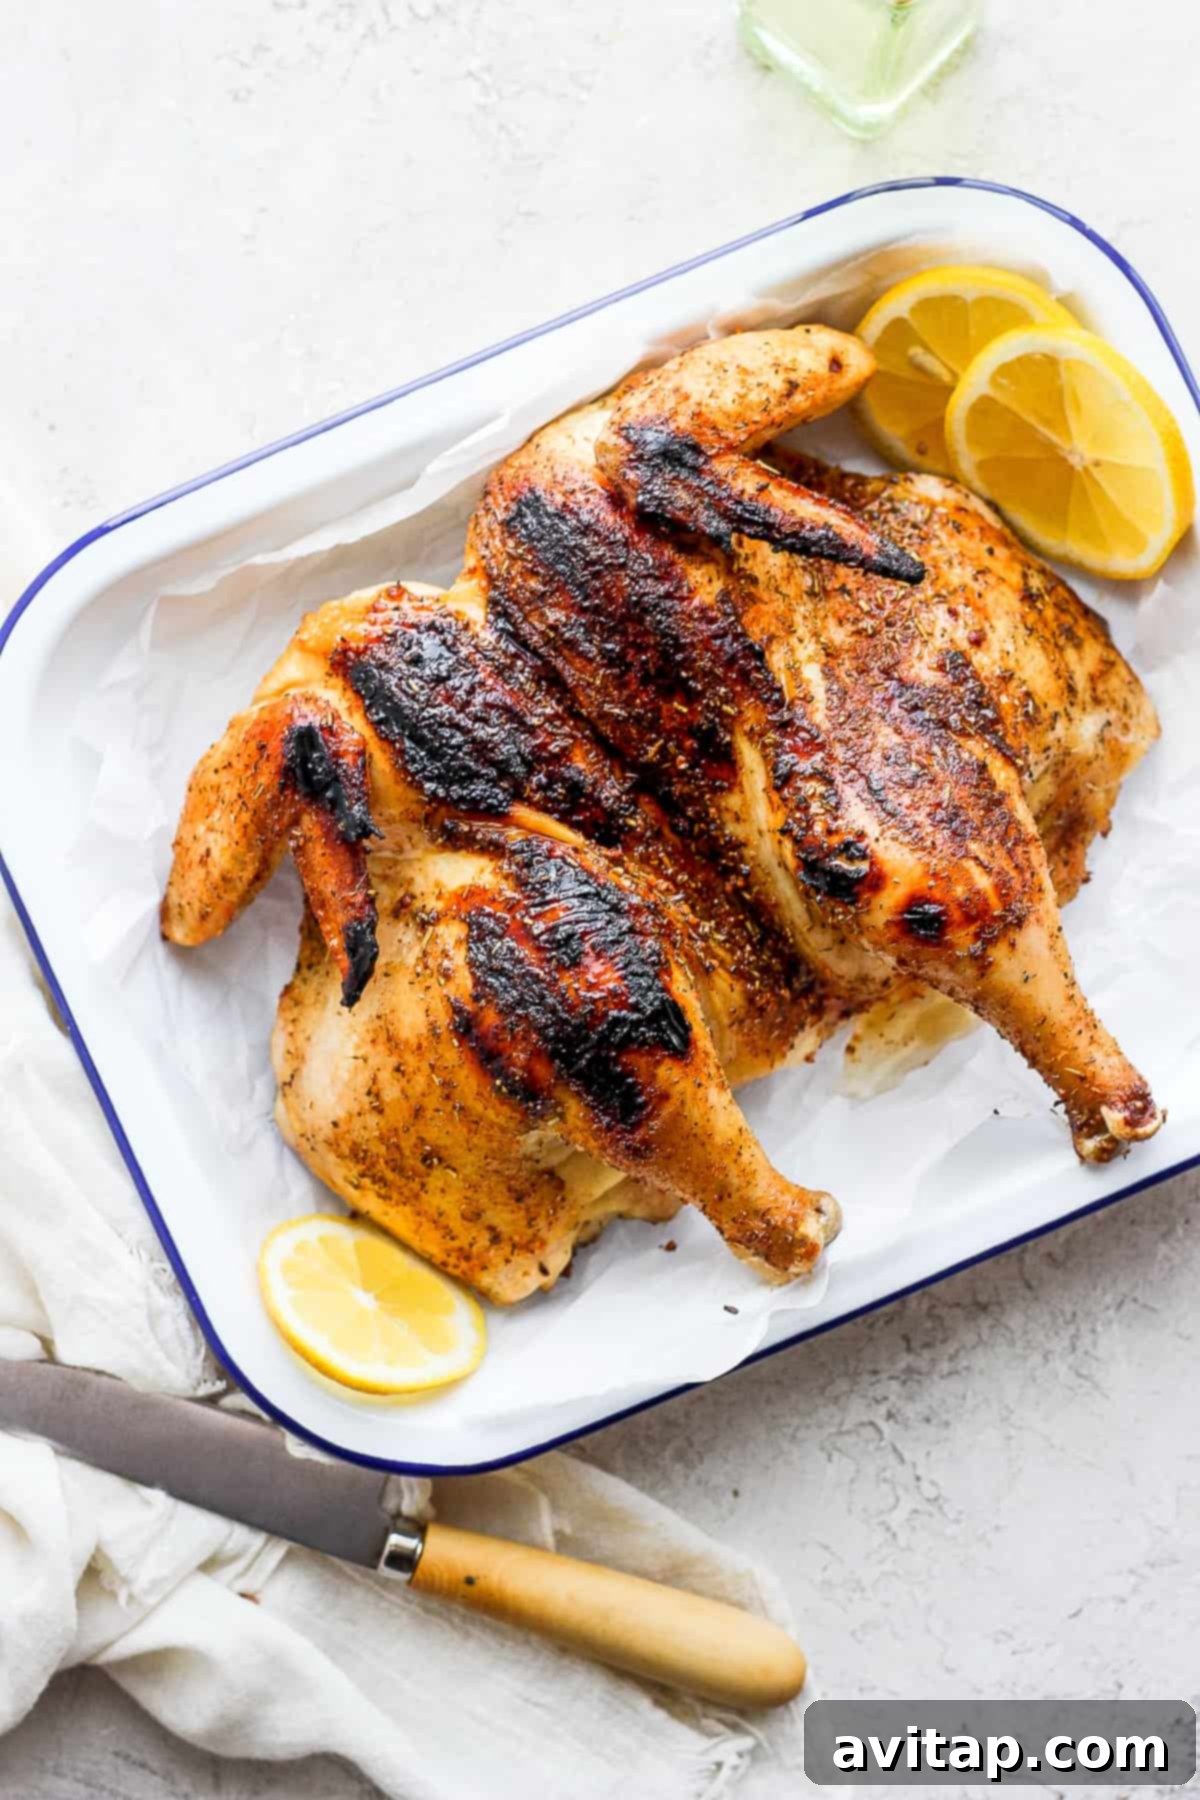
Have you ever considered grilling a whole chicken but felt daunted by the process? You’ve landed in the right place! We’re here to share all our tried-and-true tips and tricks for mastering the grill and achieving a flawlessly juicy chicken that will impress your family and friends.
Our key to success? **Spatchcocking your chicken!** By expertly removing the backbone and flattening the bird, you allow for faster, more uniform cooking across the grill. This method isn’t just a shortcut; it’s a game-changer for texture and flavor. We utilize similar techniques to our popular roasted spatchcock chicken recipe, adapting them specifically for the unique environment of the grill.
Why Grill a Whole Chicken?
Grilling a whole chicken isn’t just a culinary task; it’s an experience. It offers a depth of flavor that individual pieces often lack, as the bones and skin contribute to a richer taste. Beyond flavor, it’s often more economical to buy a whole chicken, making it a smart choice for feeding a family or entertaining guests. The aroma of a whole chicken cooking on the grill is simply incomparable, promising a delicious meal that’s both satisfying and visually appealing.
Essential Tools & Ingredients for a Perfectly Grilled Whole Chicken
Before you fire up the grill, gathering your necessary tools and ingredients ensures a smooth and enjoyable cooking process. Here’s what you’ll need to create a mouth-watering grilled whole chicken:
- 4-5 lb. Whole Chicken: The star of our dish! Choose a fresh, high-quality bird.
- Chicken Brine: Essential for infusing moisture and flavor. You can use our homemade chicken brine recipe.
- Chicken Dry Rub: A custom blend of spices will enhance the chicken’s exterior with a delicious crust.
- Olive Oil: For seasoning and preventing sticking.
- Large Pot or Brining Bag: Necessary for submerging the chicken in brine.
- Sharp Kitchen Shears: Crucial for the spatchcocking process.
- Tongs: For safely handling the chicken on the hot grill.
- Meat Thermometer: Absolutely vital for ensuring the chicken reaches a safe internal temperature.
- Gas or Charcoal Grill: Ready to achieve those perfect char marks and smoky flavor.
- Cutting Board: For prep work.
How to Grill a Whole Chicken: A Detailed Guide
Follow these steps closely to transform a simple whole chicken into a grilled masterpiece. Each stage is designed to maximize flavor and ensure an exceptionally tender and juicy result.
Step 1: Brine the Chicken for Ultimate Juiciness
The brining process is your first secret weapon for achieving a truly juicy grilled chicken. It’s a simple step that yields incredible results, preventing your chicken from drying out during grilling and infusing it with deep flavor.
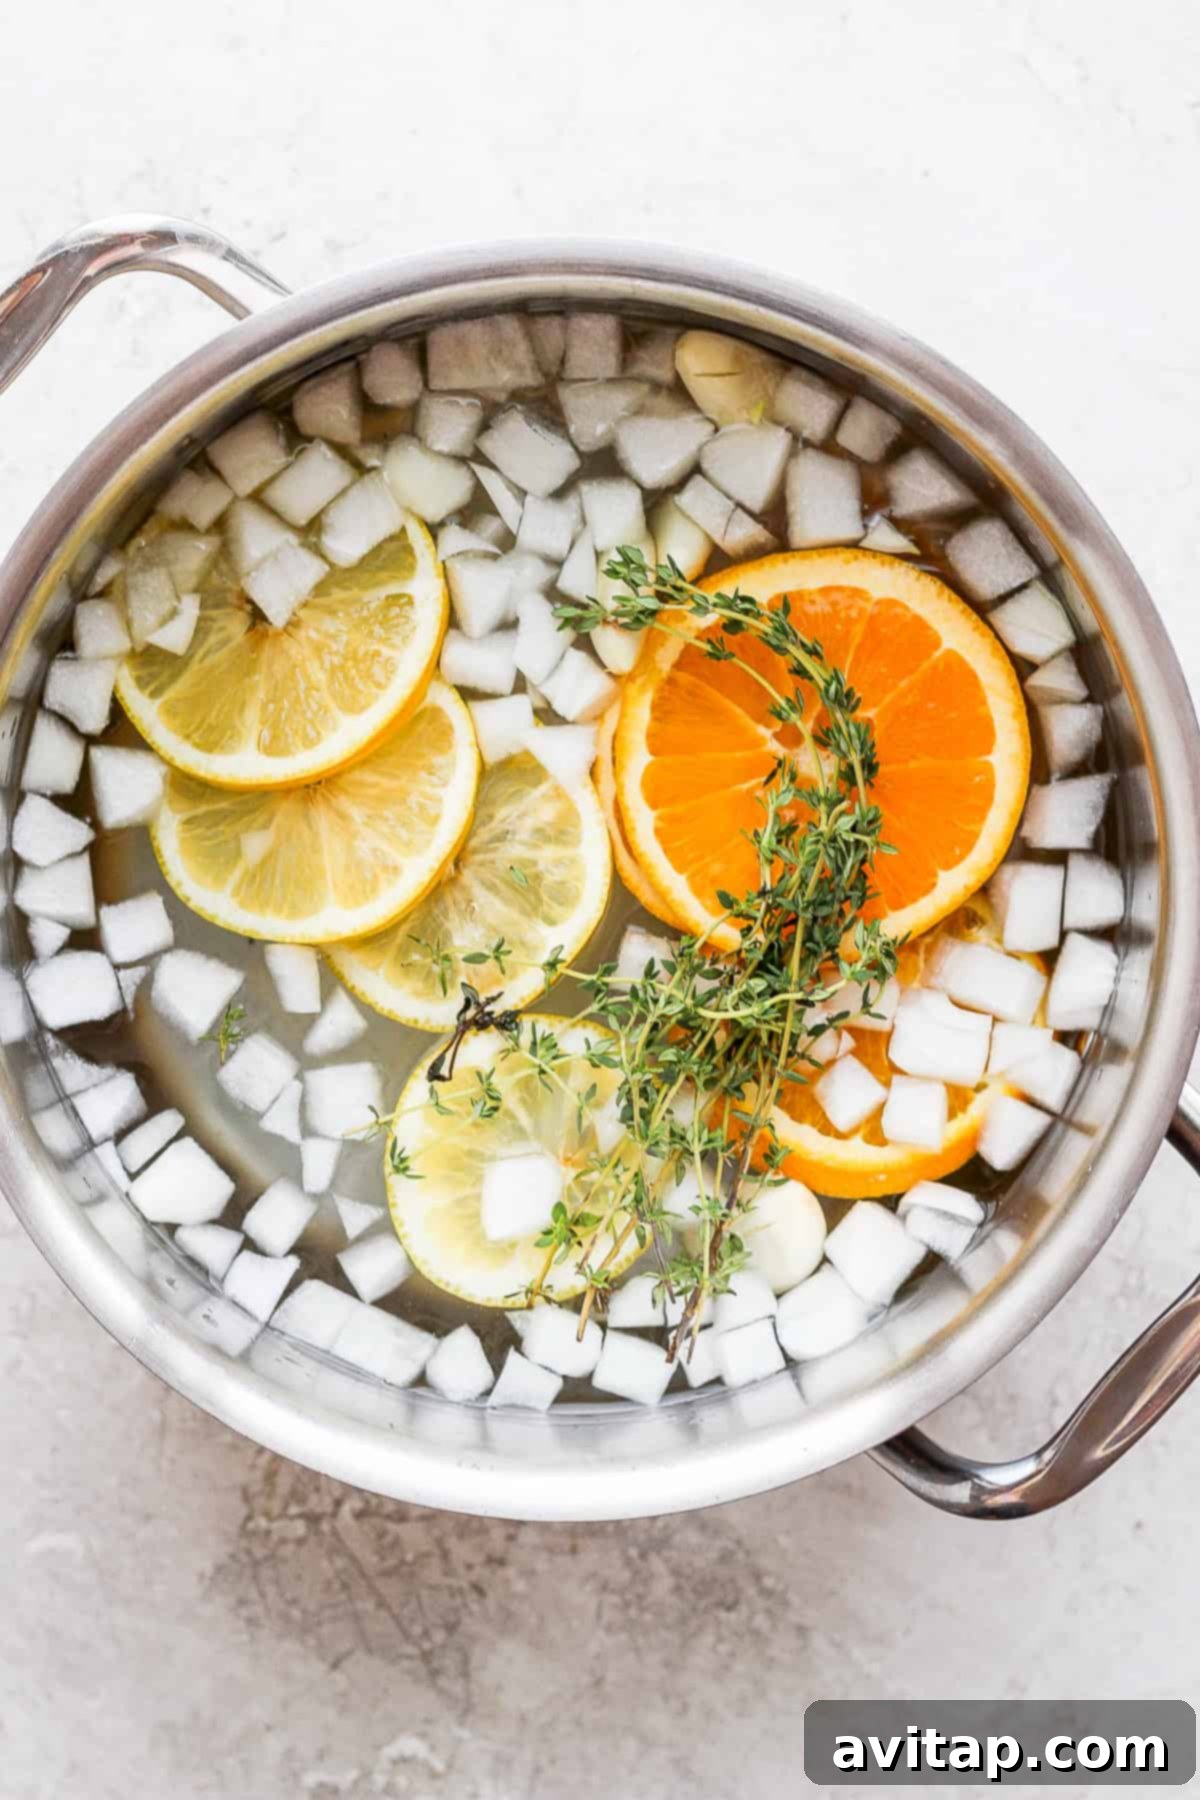
First, prepare your chicken brine. We highly recommend visiting our dedicated chicken brine post HERE for a comprehensive guide on how to prepare it properly, ensuring you get the most out of this crucial step. Once your brine is ready, submerge the whole chicken completely.
Then, place the entire pot or brining bag in the fridge for a minimum of 12 hours, or ideally, overnight. This extended soak allows the salt and aromatics to penetrate deeply into the meat.
Why Brine Your Chicken?
Brining is a game-changer because it allows the chicken meat to absorb extra moisture and salt. This process not only keeps your chicken incredibly juicy even after grilling but also seasons it from the inside out, resulting in a more flavorful and tender final product. It’s especially beneficial for grilling, where high heat can often dry out poultry quickly.
Is Brining Essential for Grilling a Whole Chicken?
While you can certainly grill a whole chicken without brining it, we strongly advocate for this step. Brining makes a noticeable difference in both the juiciness and flavor of the chicken. If time allows, it’s a simple investment that pays off immensely in the quality of your meal.
Step 2: Prep & Spatchcock the Chicken
Once brined, remove the chicken from the brine solution and thoroughly pat it dry with paper towels. This is an important step, as dry skin leads to crispy skin on the grill. Discard the used brine.
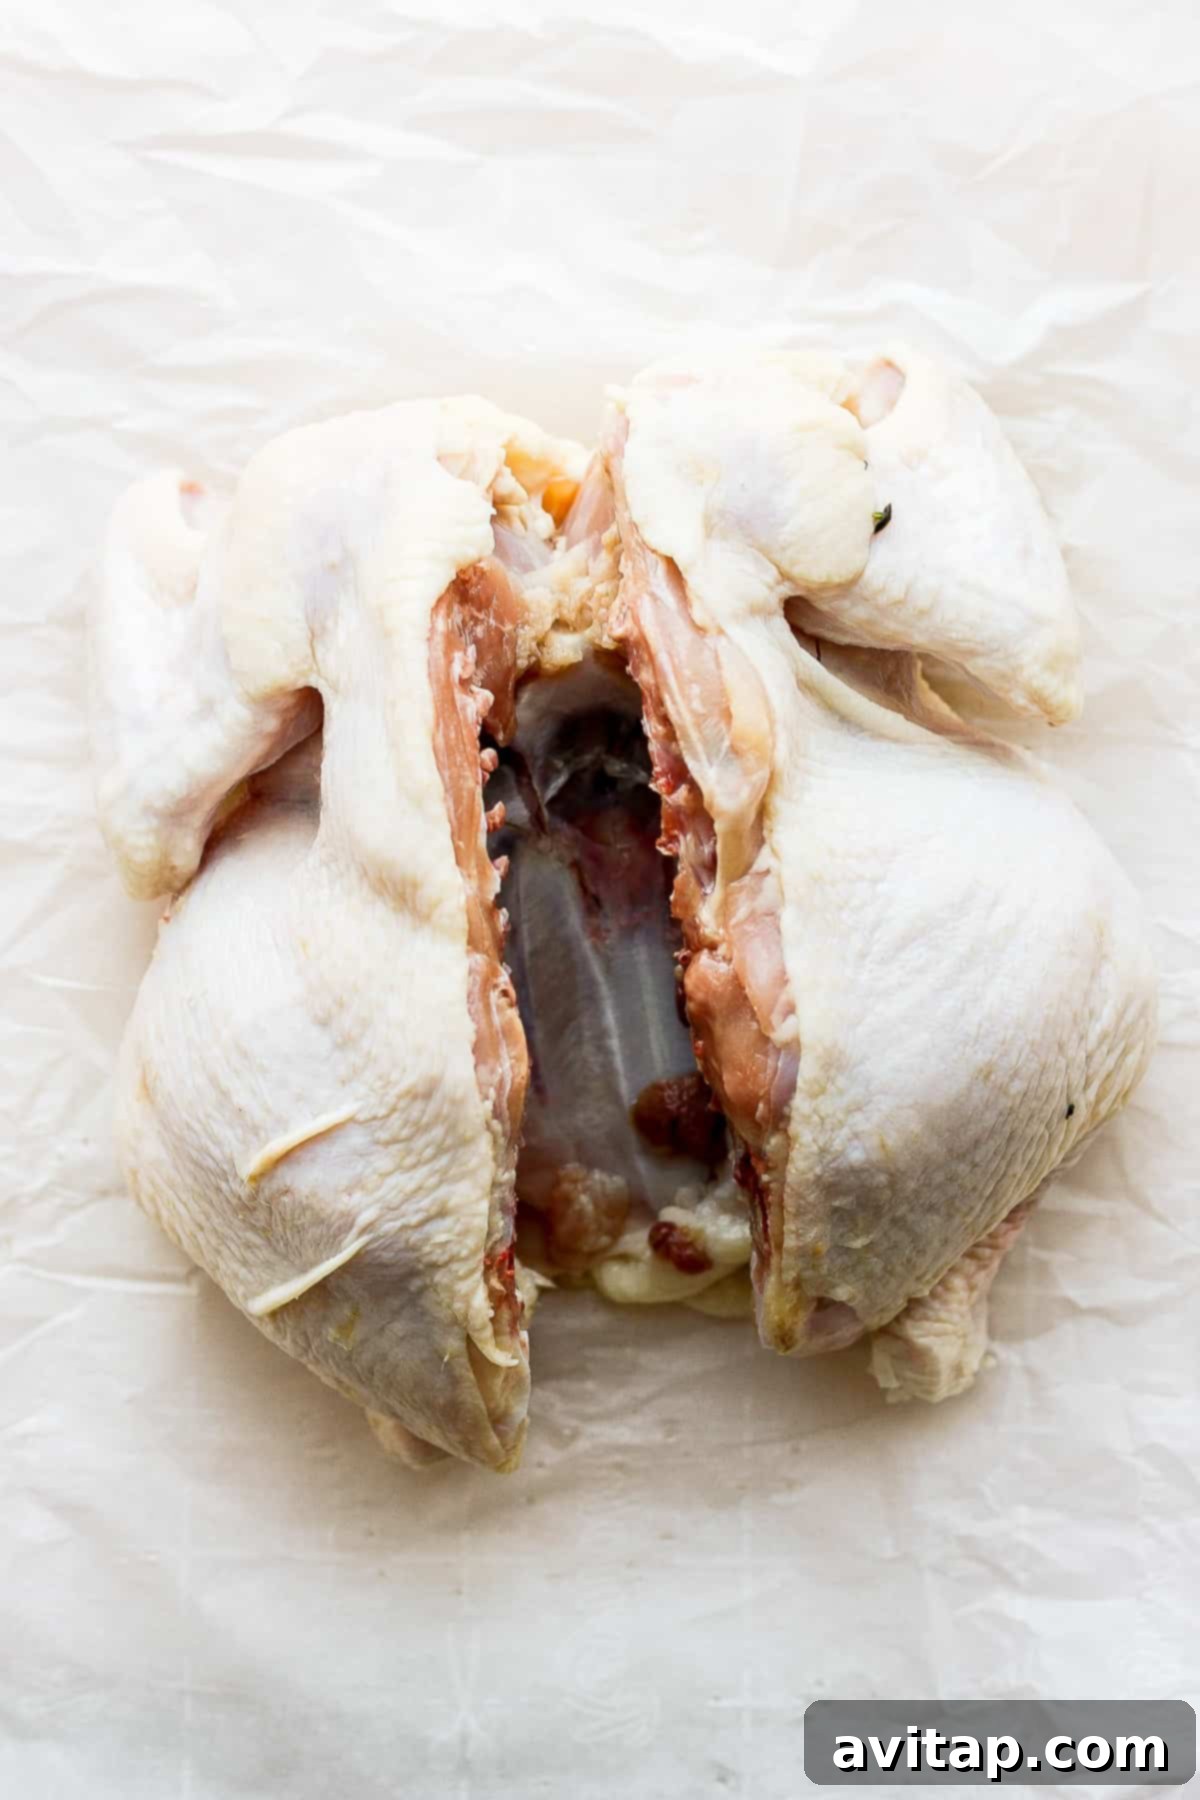
Now, it’s time to spatchcock! Lay the chicken breast-side down on a sturdy cutting board. Using a sharp pair of kitchen shears, carefully cut along both sides of the backbone, from the tail to the neck. Remove the backbone completely and discard it (or save it for making chicken broth!).
Flip the chicken over so it’s breast-side up. Using the heel of your hand, press down firmly on the breastbone until you hear a crack. This flattens the chicken, allowing it to lie completely flat on the cutting board. This ensures even heat distribution and speeds up cooking.
Step 3: Season Your Spatchcock Chicken
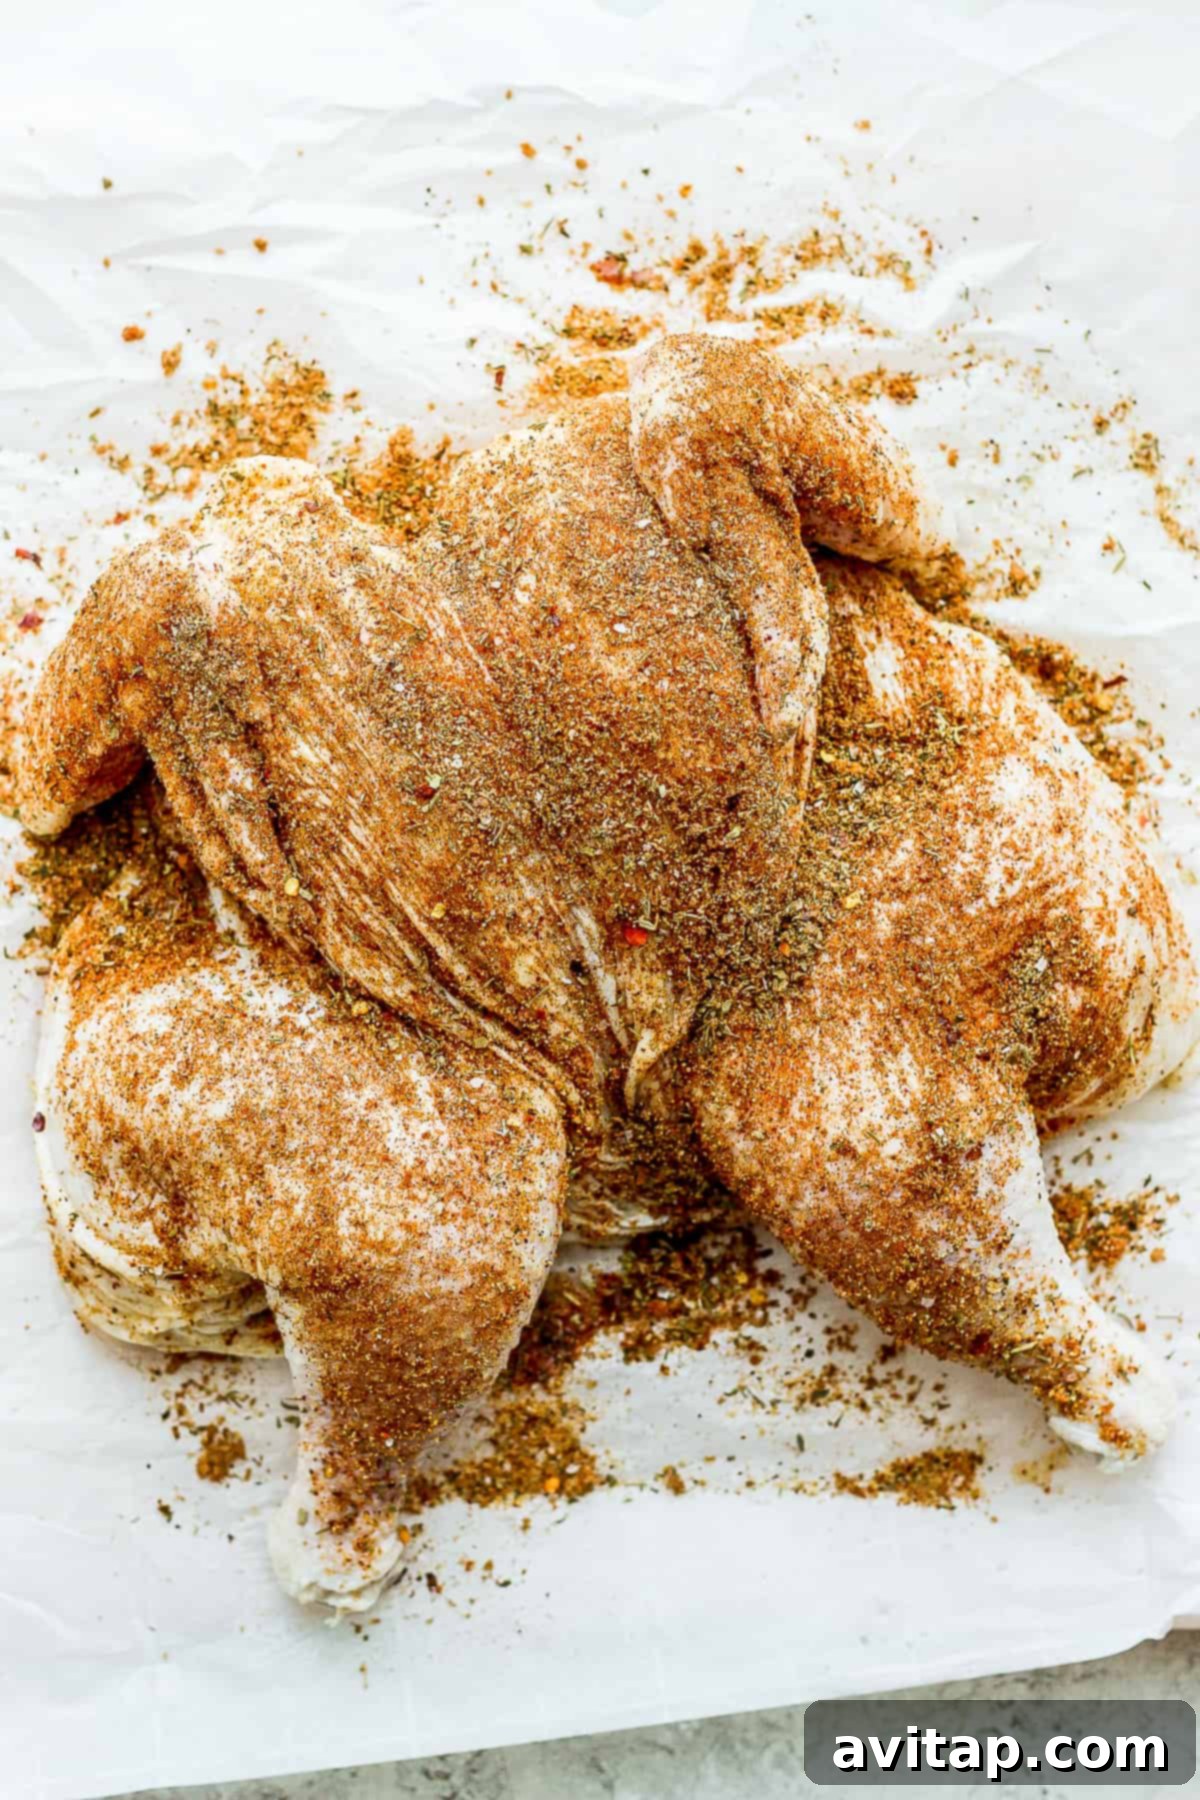
Generously season your chicken to build incredible flavor. First, gently lift the skin of the chicken (especially over the breasts and thighs) and rub about 1/2 teaspoon of salt directly onto the meat. This ensures seasoning beyond just the surface.
Next, combine all the spices for your chosen dry rub in a small bowl. Apply this dry rub liberally over the entire outside of the bird, making sure it’s fully coated. Don’t be shy – a good rub creates a beautiful crust and a burst of flavor.
After seasoning, let the chicken sit at room temperature for 15-20 minutes. This allows the rub to adhere and the chicken to lose some of its chill, promoting more even cooking and preventing the skin from sticking to the grill.
PS: You can always use our homemade chicken seasoning or our versatile chicken dry rub for this recipe. Both are fantastic options!
Step 4: Grill the Whole Chicken to Perfection
Now for the exciting part – grilling! Proper grill setup and temperature management are key to a perfectly cooked, juicy whole chicken.
- Preheat your grill: Set your grill to a target temperature of 450ºF. Ensure the grates are clean, and lightly spray them with cooking spray to prevent sticking. For charcoal grills, aim for a two-zone fire setup with one side hot and the other cooler for indirect cooking.
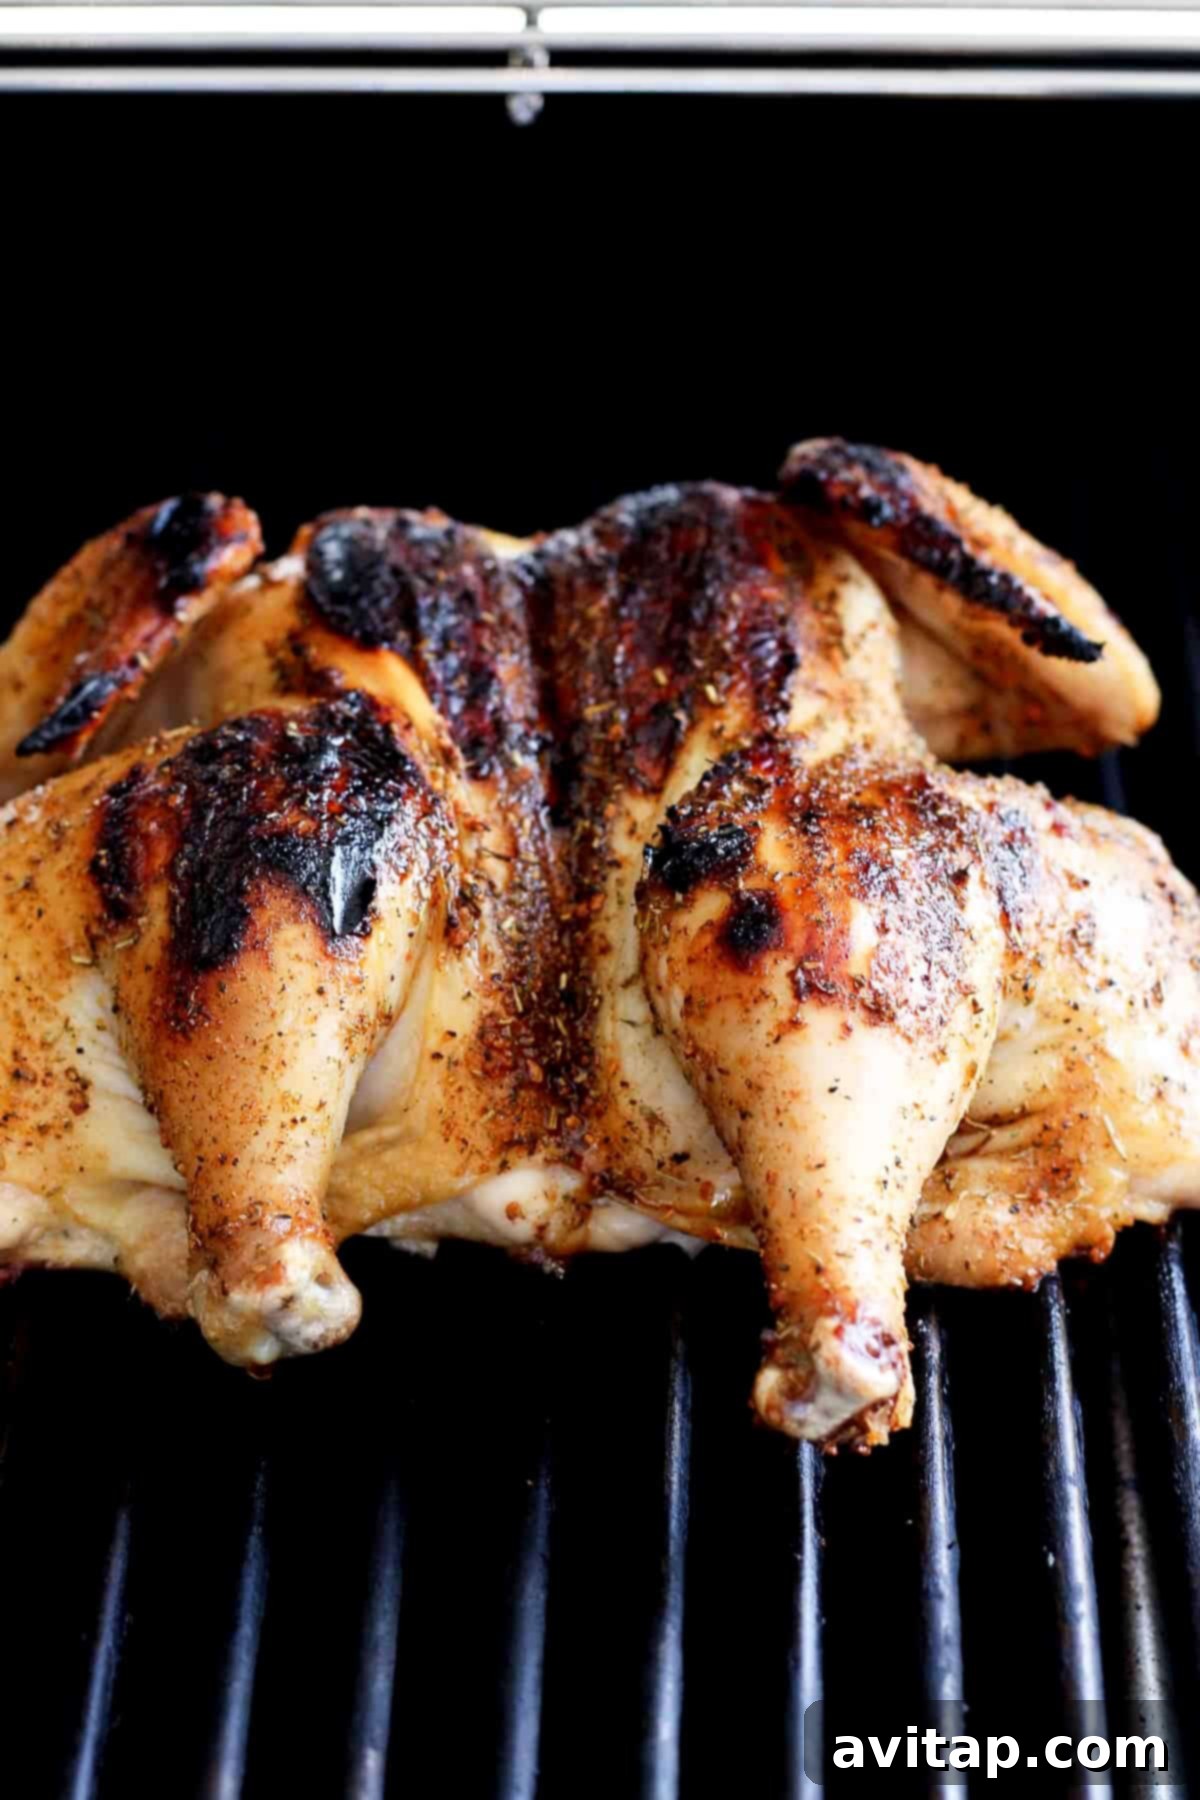
- Sear the skin: Place the chicken skin-side down over direct heat for 3-4 minutes. This initial sear is crucial for developing a crispy, golden-brown skin.
- Move to indirect heat: Carefully flip the chicken over and immediately move it to the indirect heat zone of your grill. Close the grill lid to maintain a consistent temperature.
- Cook indirectly: Continue cooking for 45-60 minutes, checking the chicken’s internal temperature every 10-15 minutes. Grill until the thickest part of the thigh (without touching the bone) reaches an internal temperature of 160ºF.
Important Grilling Tip: Always grill your whole chicken over indirect heat for the majority of the cooking time. The drippings from the bird can easily cause flare-ups and grease fires if exposed to direct flames, potentially charring your chicken or causing a dangerous situation. We speak from experience!
Understanding Chicken Internal Temperature
According to the USDA, the safe internal cooking temperature for all poultry is 165ºF. While we aim for 160ºF on the grill, remember the crucial resting period!
Let it Rest: After removing the chicken from the grill, allow it to rest for at least 5-10 minutes. During this time, the internal temperature will continue to rise by another 5ºF, ensuring it reaches the safe 165ºF, while also allowing the juices to redistribute throughout the meat, resulting in an incredibly tender and moist chicken. Do not skip this step!
Step 5: Rest Your Grilled Chicken
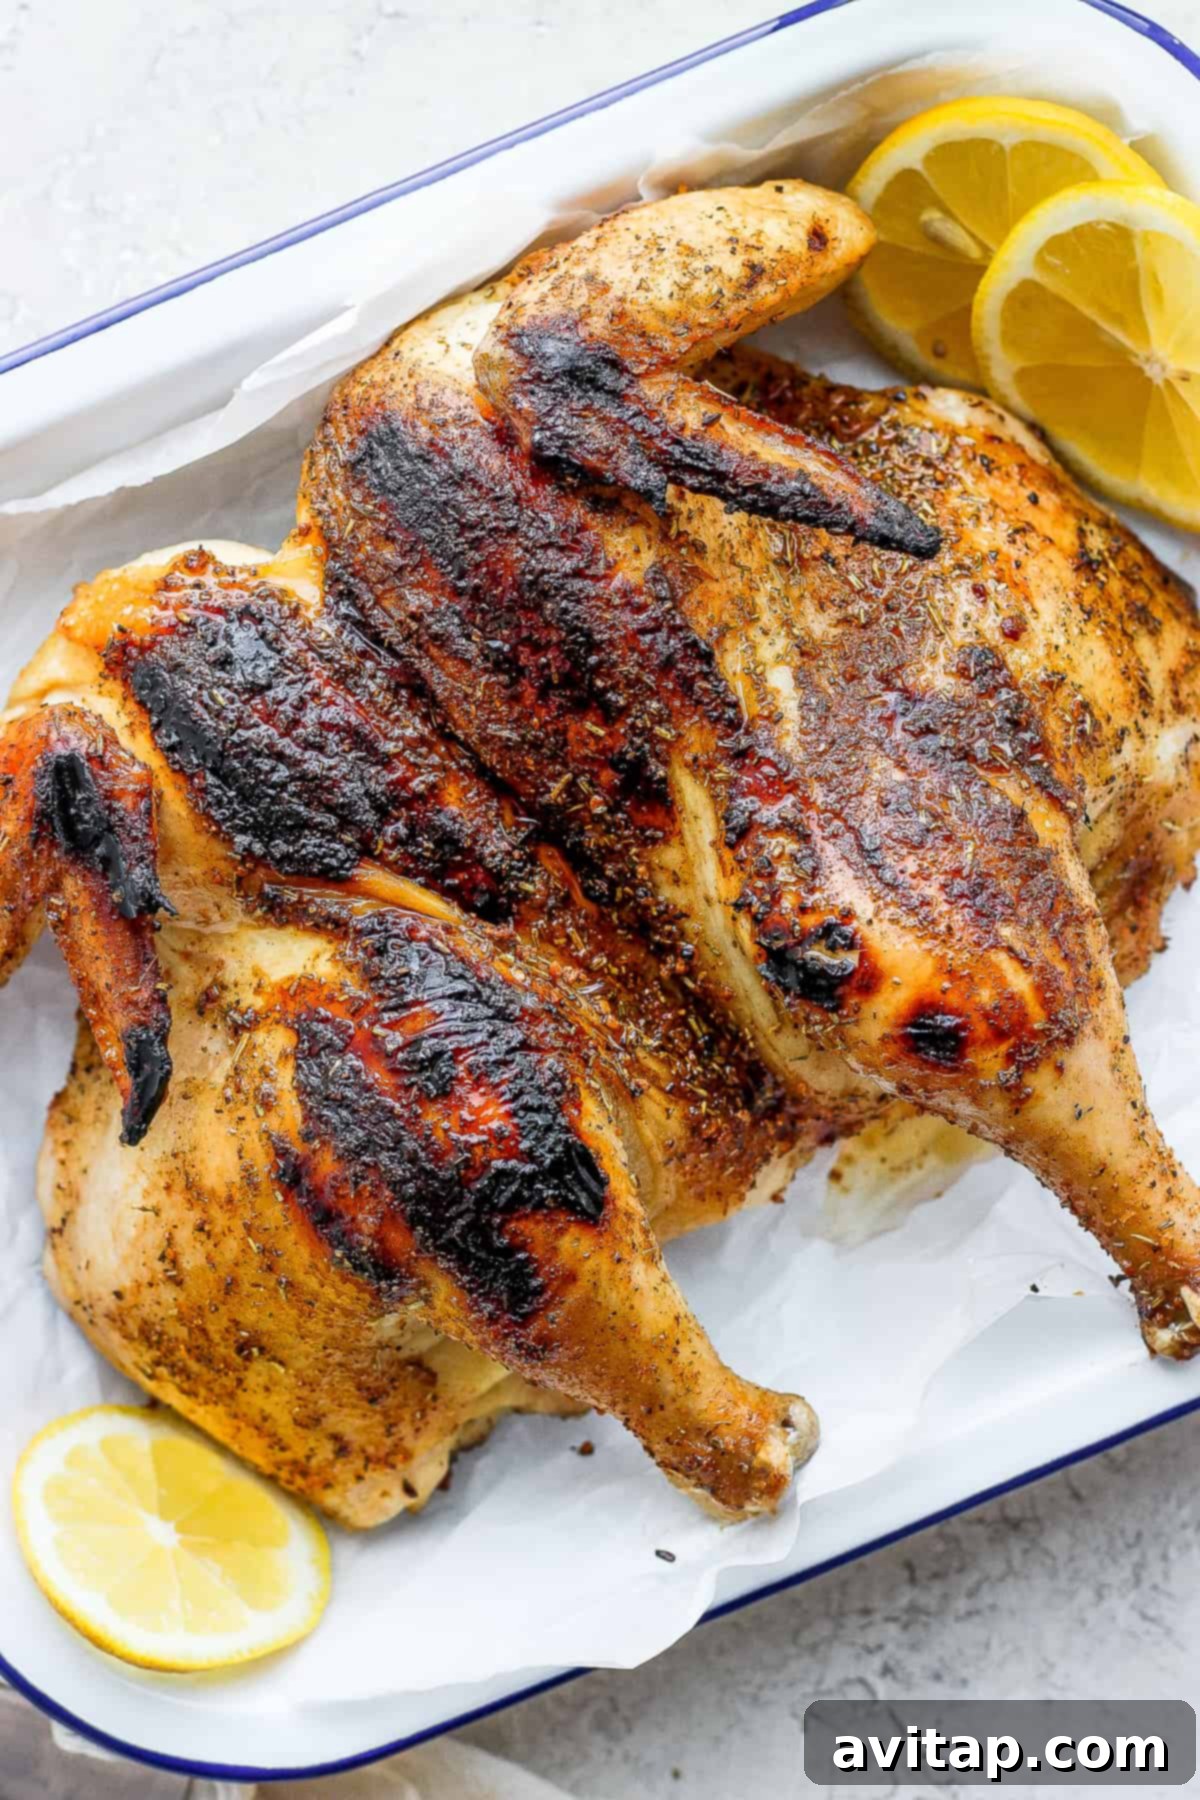
Once your chicken has reached the target internal temperature, carefully transfer it from the grill to a clean cutting board or platter. Cover it loosely with foil and let it rest for at least 15 minutes before carving. This resting period is critical for the meat to reabsorb its juices, ensuring every bite is super tender and incredibly juicy. It also allows the residual heat to finish cooking the chicken to the perfect final temperature.
Frequently Asked Questions About Grilling a Whole Chicken
- How long does it take to grill a whole chicken?
- Grilling a whole spatchcocked chicken typically takes around 45-60 minutes over indirect heat at 450ºF, after an initial sear.
- How do you cook a whole chicken on a grill?
- To grill a whole chicken, first brine and spatchcock it. Season generously with a dry rub. Sear it skin-side down over direct heat for 3-4 minutes, then move it to indirect heat. Cook at 450ºF for 45-60 minutes, or until the internal temperature reaches 160-165ºF in the thickest part of the thigh. Always allow it to rest before carving.
- Should you flip a whole chicken when grilling?
- Yes, you should flip the chicken once during the grilling process. First, sear it skin-side down over direct heat for a few minutes. Then, flip it over and move it to indirect heat for the remainder of the cooking time. There’s no need to flip it repeatedly after that, as constant flipping can slow down cooking and prevent a good crust from forming.
- What temperature should I grill a whole chicken at, and for how long?
- Grill a whole spatchcocked chicken over indirect heat at 450ºF for 45-60 minutes. The chicken is done when its internal temperature reaches 160ºF – 165ºF in the thickest part of the thigh, away from the bone.
Creative Ideas for Leftover Grilled Chicken
Grilled whole chicken is not only delicious fresh off the grill but also provides fantastic leftovers for various meals throughout the week. Here are some versatile ideas:
- Add to Soups & Salads: Shred the cooled chicken and toss it into a fresh grilled chicken salad or add it to a comforting chicken noodle soup for a quick and hearty meal.
- Make Chicken Broth: Don’t let the bones go to waste! Use the leftover carcass to make our rich homemade chicken broth recipe, perfect for future soups and sauces.
- Whip Up Burritos: Transform your leftovers into delicious and easy shredded chicken burritos. These are great for meal prep and can even be frozen for later!
- Build Nachos: Layer shredded chicken onto nachos with your favorite toppings for a quick, crowd-pleasing snack or dinner. Baked chicken nachos are always a hit!
Storage and Reheating Tips
Properly storing your leftover grilled chicken ensures it remains fresh and delicious for future meals.
Store any leftover grilled chicken in an airtight container in the refrigerator for up to 3-5 days.
To reheat: For best results, shred or slice the chicken and microwave on high for 60-90 seconds, or gently reheat in a pan on the stovetop with a splash of broth to maintain moisture.
Expand Your Grilling Skills: How to Grill Your Favorite Meats
Mastering the whole chicken is just the beginning! Explore more grilling tutorials to perfect your skills with a variety of meats:
- Grilled Chicken Breast
- Grilled Salmon
- Grilled Pork Chops
- Grilled Chicken Thighs
- Grilled Flank Steak
- Grilled Whole Chicken
- Grilled Pork Tenderloin
- Grilled Chicken Legs
- Grilled Shrimp
- Grilled Scallops
- Grilled Ribs
Juicy Grilled Whole Chicken
With our spatchcock, brine, and dry rub method, you’ll never want to make a grilled whole chicken any other way! Achieve incredibly juicy, flavorful, and evenly cooked results every time.
By: Lee Funke
Prep: 12 hrs
Cook: 1 hr
Total: 13 hrs
Servings: 4
Ingredients
Chicken Brine
- 9 cups water
- 1/2 cup kosher salt
- 4 cloves garlic, smashed
- 1 small white onion, chopped
- ½ orange, thinly sliced
- ½ lemon, thinly sliced
- 5 sprigs fresh thyme
- 4- lb. whole chicken
Dry Rub
- 2 teaspoons garlic powder
- 1 teaspoon chili powder
- 1 teaspoon cumin
- 1 teaspoon dried thyme
- 1 teaspoon ground mustard
- 1 teaspoon dried basil
- 1/2 teaspoon ground pepper
- 1/2 teaspoon red pepper flakes
- 1/2 teaspoon sea salt
- 1/2 teaspoon paprika
- 1 teaspoon brown sugar
Other
- ½ teaspoon coarse sea salt (for under the skin)
- 2 tablespoons olive oil
Instructions
- First, begin the brining process. Fill a large pot, bucket, or brining bag with 9 cups of water.
- Remove 1 cup of water from the pot and transfer it to a saucepan. Add the kosher salt to the saucepan. Heat this mixture over medium heat, whisking continuously until the salt is completely dissolved. Do not allow it to boil. Remove from heat and pour the salted water back into the large pot, mixing well with the remaining water.
- Next, add the smashed garlic, chopped onion, orange slices, lemon slices, and fresh thyme sprigs to the pot, stirring gently to combine. Finally, carefully add the whole chicken to the pot, ensuring it is fully submerged in the brine solution.
- Place the pot in the refrigerator for 12 hours or overnight. This extended brining time is essential for maximum flavor and moisture infusion.
- After brining, remove the chicken from the refrigerator. Discard the brine solution. Place the chicken on a clean cutting board and pat it thoroughly dry with paper towels. A dry surface is key to crispy skin.
- While the chicken rests, prepare your dry rub. Combine all the spices listed under “Dry Rub” in a small bowl and mix until well blended.
- To spatchcock the chicken, set it breast-side down on your cutting board. Using very sharp kitchen shears, cut along one side of the spine through the ribs, from the tail to the neck. Repeat this on the other side of the spine. Remove and discard the spine.
- Flip the chicken over so it is breast-side up. Use your hands to press down firmly on the center of the bird (the breastbone), flattening the chicken completely until it lies flat.
- Place the flattened chicken onto a large plate. Carefully separate the chicken skin from the meat, especially over the breast and thighs, by gently sliding your hand underneath. Then, rub ½ teaspoon of coarse sea salt directly onto the chicken meat under the skin.
- Next, generously season the entire top side (skin-side) of the chicken with your prepared dry rub, ensuring it’s evenly coated. Drizzle the chicken with olive oil. Set the chicken aside to rest at room temperature for 15-20 minutes. This helps the skin prevent sticking to the grill and ensures even cooking.
- Preheat your grill to 450ºF. Make sure the grill grates are clean and carefully spray them with cooking spray to prevent sticking.
- Place the chicken skin-side down over direct heat on the preheated grill for 3-4 minutes to achieve a beautiful sear and crisp the skin.
- Carefully flip the chicken over and immediately move it to the indirect heat zone of your grill.
- Close the grill lid and continue to grill the chicken over indirect heat for 45-60 minutes, or until the internal temperature, measured in the thickest part of the thigh (without touching the bone), reaches 160ºF.
- Remove the chicken from the grill and transfer it to a clean carving board or platter. Tent it loosely with foil and let it rest for a minimum of 15 minutes before carving. This crucial step allows the juices to redistribute, ensuring a tender and moist result, and the internal temperature will rise to the safe 165ºF.
Tips & Notes
- During step 12 (searing the chicken skin), keep a close eye on the chicken to ensure the skin browns nicely without over-charring. Grill temperatures can vary, so adjust as needed.
- As emphasized, it is vital to grill your chicken primarily over **indirect heat**. If you cook over direct heat for too long, the fat drippings from the chicken can cause significant flare-ups and grease fires, which can be dangerous and burn your chicken.
- For an extra smoky flavor, you can add wood chips (like apple or hickory) wrapped in foil or placed in a smoker box to your charcoal or gas grill during the indirect cooking phase.
- A reliable meat thermometer is your best friend. Always verify the internal temperature to ensure safety and prevent overcooking.
Nutrition
Calories: 475 kcal, Carbohydrates: 5 g, Protein: 56 g, Fat: 24 g, Fiber: 1 g, Sugar: 1 g
Nutrition information is automatically calculated and should only be used as an approximation.
Don’t forget to tag your posts on social media with the hashtag #fitfoodiefinds, we’d love to see what you’re up to!
Photography by: The Wooden Skillet