
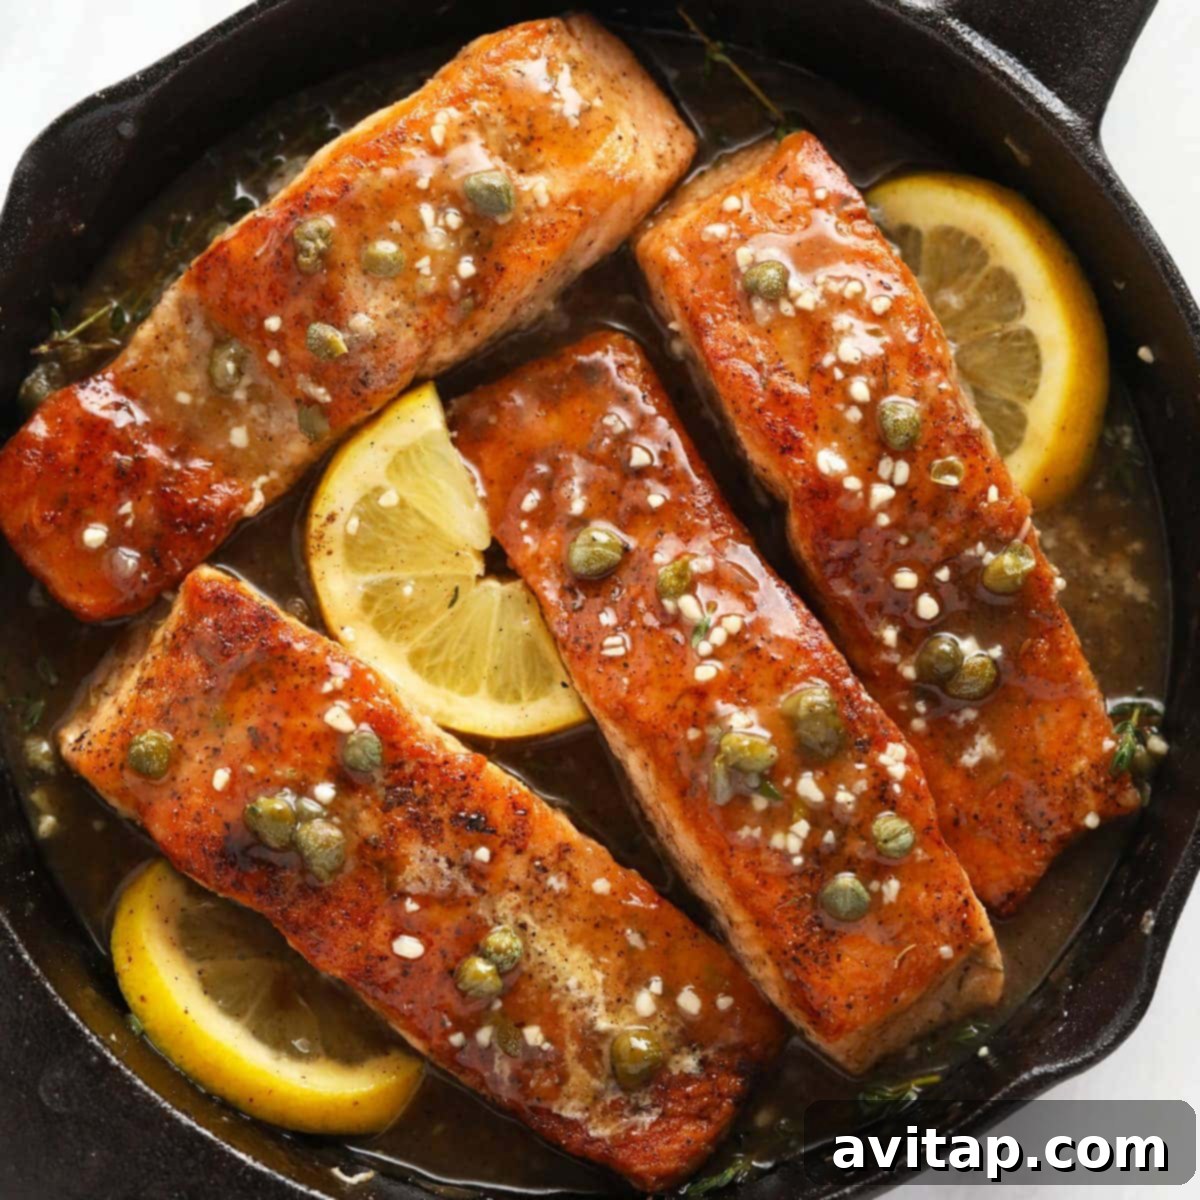
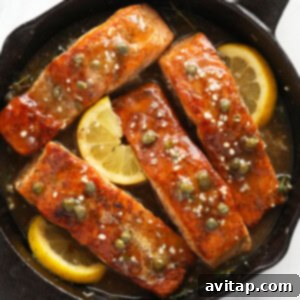
Prepare to be amazed by this **ultimate salmon piccata recipe**, a remarkably flavorful and elegant dish that comes together in just 30 minutes. Featuring perfectly seared salmon fillets enveloped in a vibrant, zesty piccata sauce, this meal is designed to delight your taste buds and impress any dinner guest, whether for a quick weeknight meal or a special gathering.
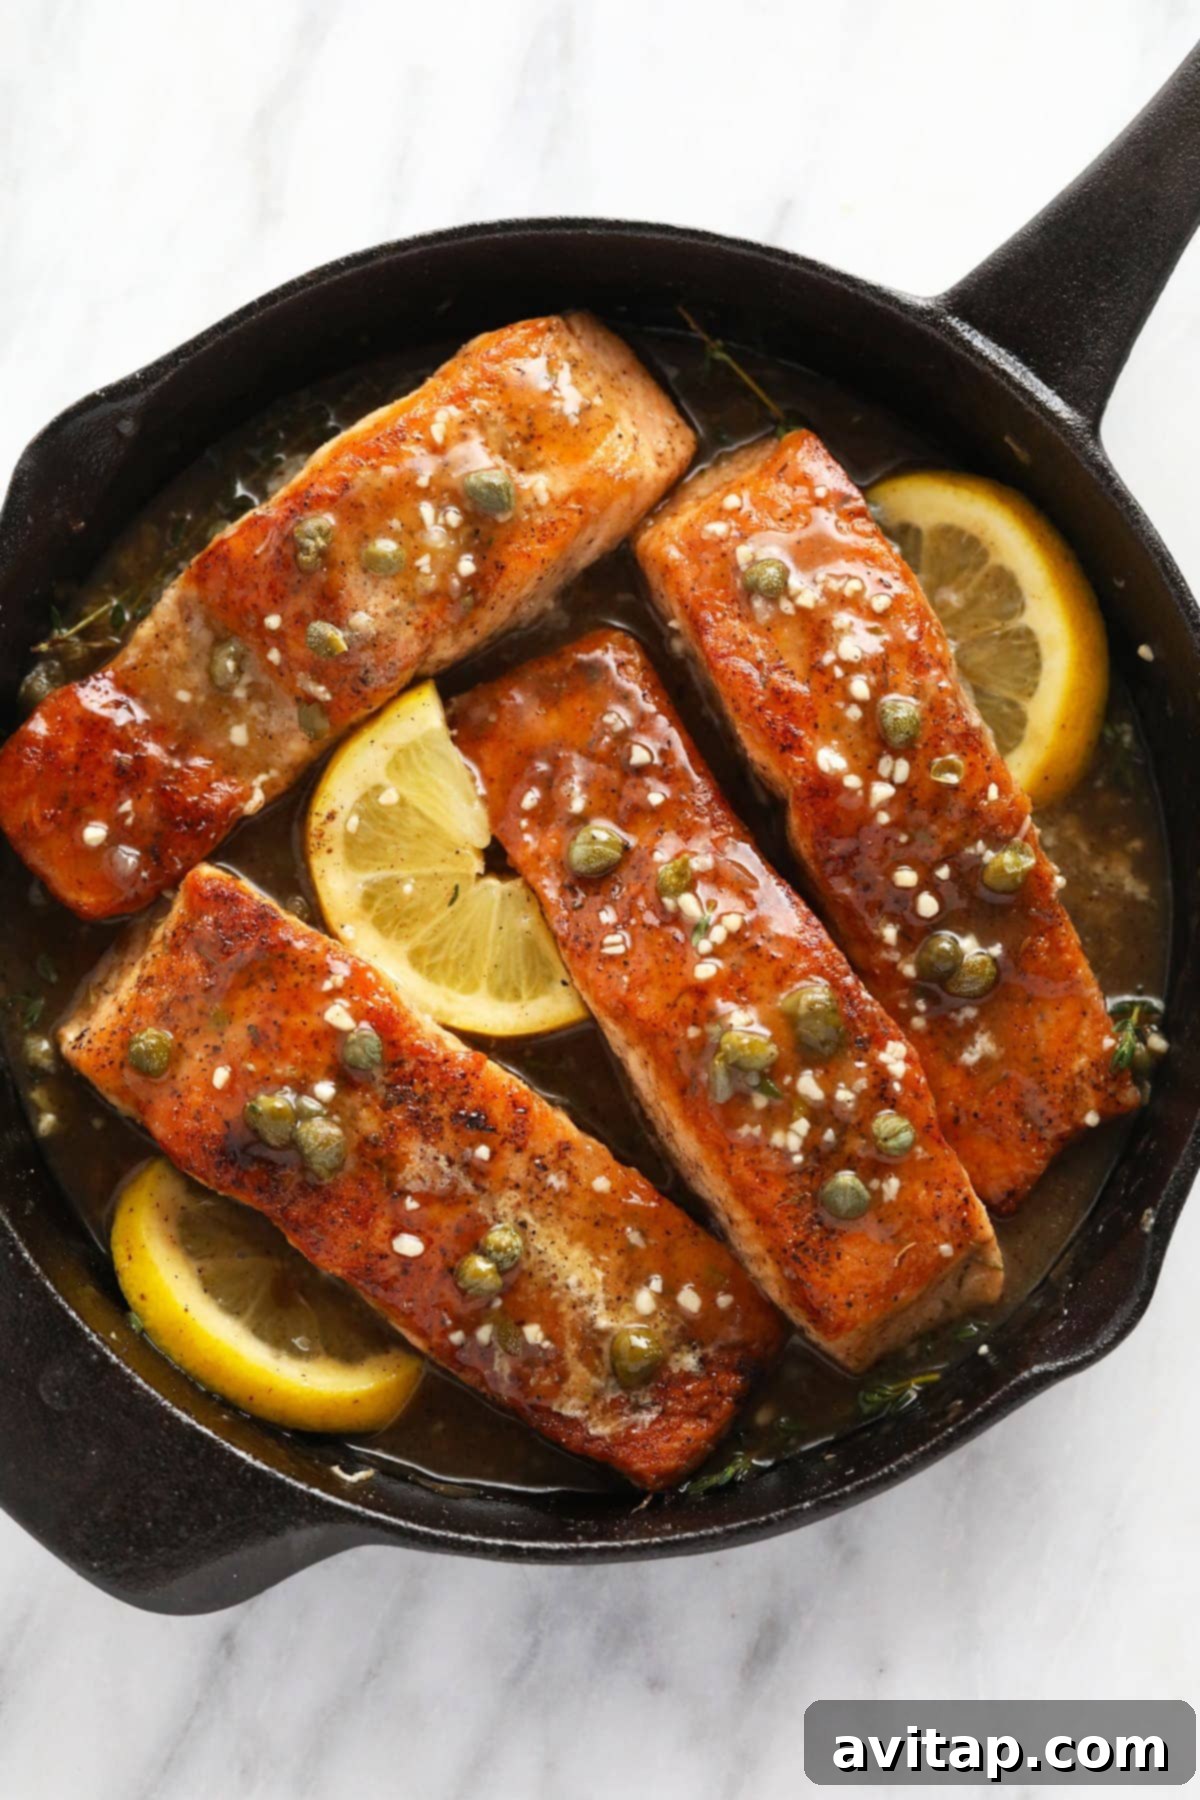
Discover the Best Salmon Piccata Recipe for a Quick & Healthy Meal
At the heart of a truly exceptional meal is simplicity meeting sensational flavor. This salmon piccata recipe embodies exactly that, quickly becoming a top favorite in any kitchen. While we cherish many delicious salmon creations—from effortlessly baked salmon in foil and succulent grilled salmon to vibrant salmon rice bowls—this piccata variant brings a sophisticated yet approachable twist to your weeknight repertoire. It’s an indispensable addition to any salmon lover’s recipe collection, proving that gourmet flavors can be achieved swiftly.
What makes this salmon piccata truly stand out and garner such rave reviews? Let us enumerate the compelling reasons why you’ll fall in love with this dish:
- Perfect Texture Every Time: Experience salmon that boasts a beautifully flaky, moist interior, melting in your mouth, complemented by an irresistibly crispy, golden-brown skin. The searing technique ensures an exquisite contrast in textures that elevates each bite.
- Unbeatably Fast: From initial preparation to the moment it graces your plate, this entire gourmet meal is ready in approximately 30-40 minutes. This makes it an ideal choice for busy weeknights when you crave something special without spending hours in the kitchen, making it a perfect quick dinner solution.
- Explosion of Flavor: The star of the show, the lemon piccata sauce, is a bright, tangy, and savory concoction. It infuses the delicate salmon with an incredible depth of flavor from fresh lemon, briny capers, and aromatic garlic, transforming a simple fillet into a culinary masterpiece.
- Nutrient-Rich Goodness: Salmon is renowned for being packed with omega-3 fatty acids, high-quality protein, and essential vitamins and minerals like Vitamin D and B12. This makes the dish not just delicious but also a wonderfully healthy option, contributing to heart health and overall well-being.
- Versatile Pairing: This salmon piccata pairs beautifully with a variety of sides, offering endless meal combinations. Serve it alongside creamy mashed potatoes, fluffy rice, al dente pasta, steamed green beans, roasted asparagus, or a crisp green salad for a complete and satisfying meal.
Essential Ingredients for Your Perfect Salmon Piccata
Crafting this exquisite salmon piccata requires a selection of fresh, high-quality ingredients that harmonize to create its signature flavor profile. Each component plays a crucial role in building the layers of taste and texture that make this dish so special. Here’s what you’ll need, along with notes on their importance:
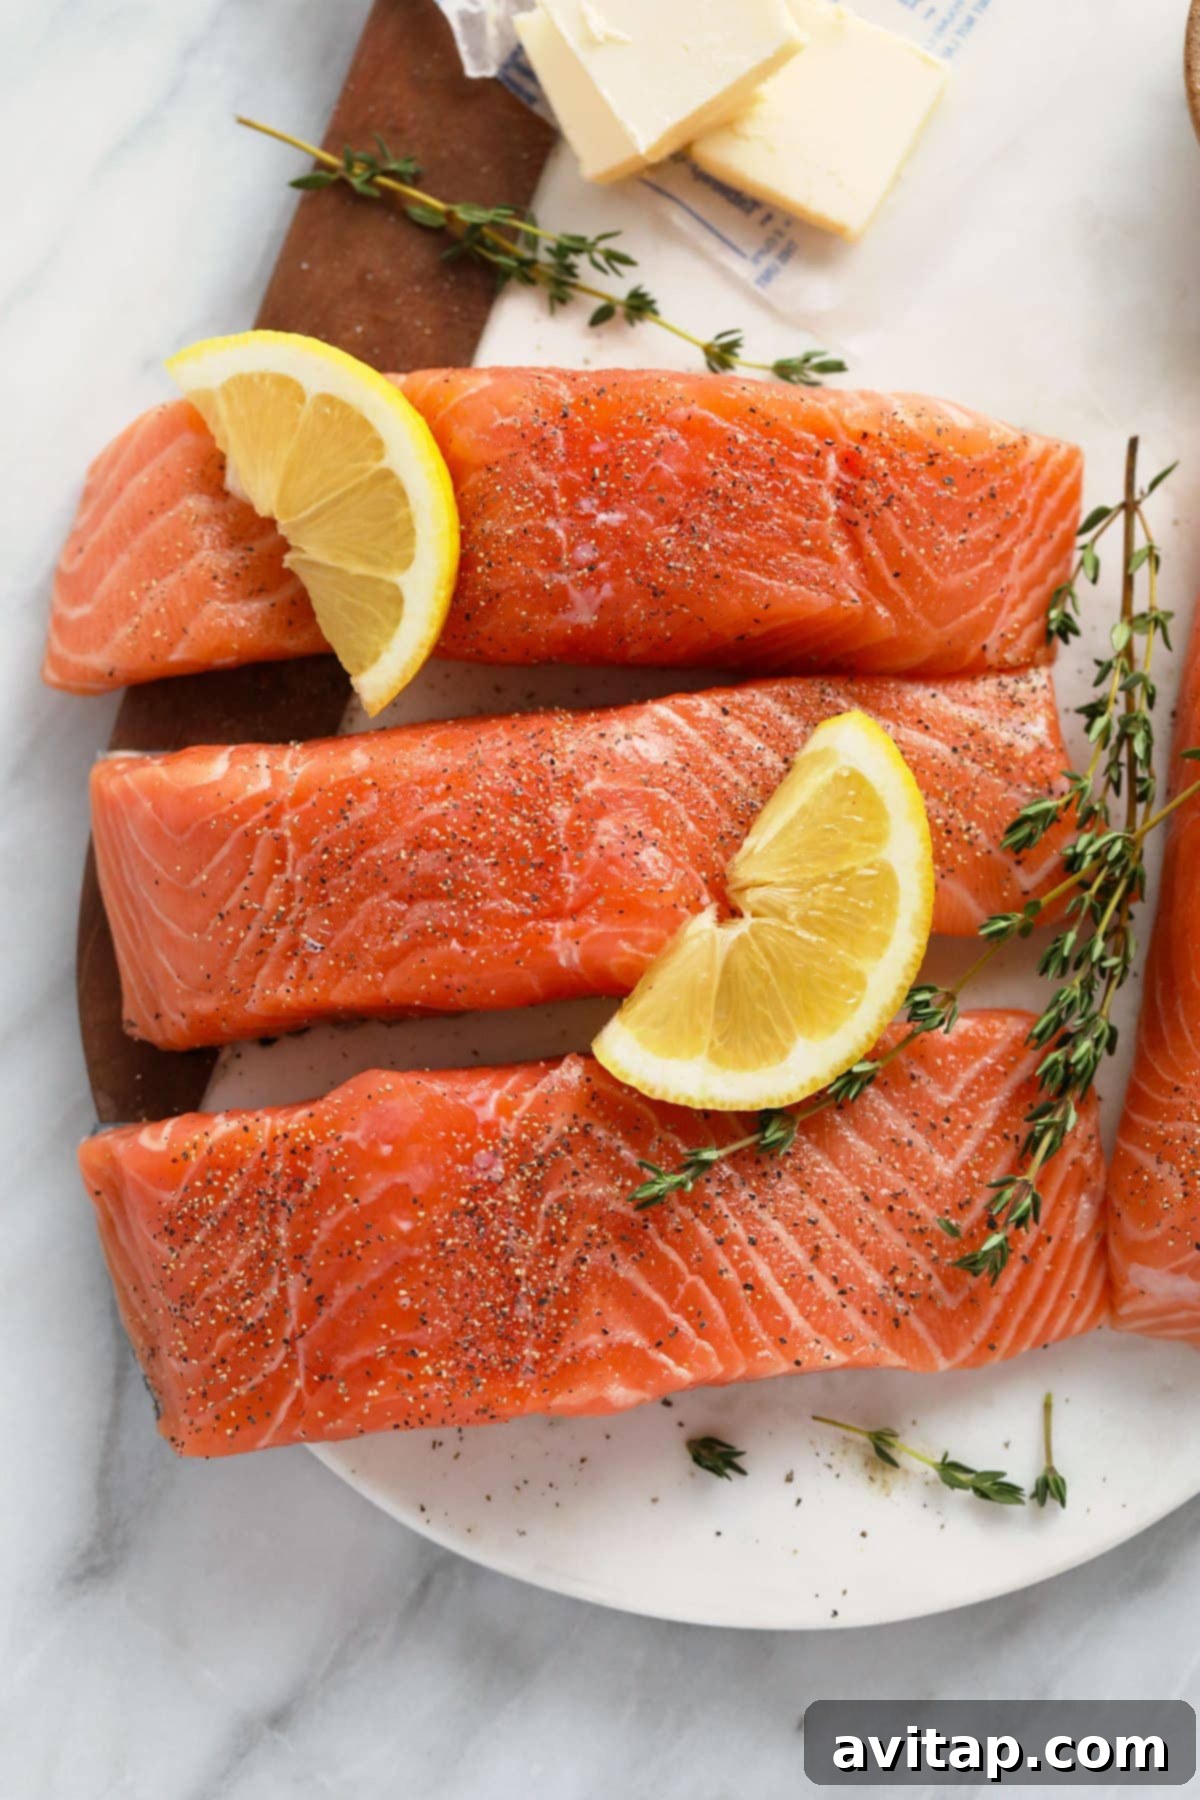
- Salmon Fillets: We recommend using four 5-ounce salmon fillets, preferably with the skin on. The skin helps protect the delicate flesh during searing and crisps up beautifully, adding another textural dimension. While this recipe is designed for four servings, feel free to adjust the size and quantity of your fillets; just be mindful that cooking times may vary slightly. Aim for uniformly thick fillets to ensure even cooking.
- Salt + Pepper: These fundamental seasonings are crucial for enhancing the natural taste of the salmon. Applied generously before cooking, they not only season the fish but also help draw out surface moisture, which is essential for achieving that desirable crispy skin during the searing process. Use freshly ground black pepper for the best aroma.
- White Whole Wheat Flour (or alternative): A light dusting of flour, mixed with spices, creates a delicate, golden-brown crust on the salmon when seared. You can use white whole wheat flour for added fiber and nutrition, all-purpose flour for a classic result, or even almond flour for a gluten-free option without significantly altering the outcome.
- Spices (Garlic Powder, Onion Powder, Dried Thyme): This aromatic blend is combined with the flour to form a flavorful coating for the salmon. Garlic and onion powder provide a foundational savory base, while dried thyme adds a subtle, earthy herb note that complements the fish beautifully, adding depth to the crust.
- Butter: Searing the salmon in butter imparts a rich, nutty flavor and helps achieve that irresistible golden-brown crust. The butter also becomes part of the flavorful fond in the pan, which is crucial for the sauce. For those who prefer, high-quality olive oil can be used instead, offering a lighter, fruitier note.
- Dry White Wine: An indispensable ingredient for deglazing the pan after searing the salmon. The wine lifts all the delicious browned bits (fond) from the bottom of the skillet, infusing the sauce with a layer of sophisticated depth and brightness. Varietals like Sauvignon Blanc, Pinot Grigio, or even a dry vermouth work wonderfully.
- Chicken Broth (or Vegetable Broth): This forms the savory base of your piccata sauce, providing body and richness. Any good quality, low-sodium broth will work. For a vegetarian or pescetarian version, opt for vegetable broth or even a light fish stock to intensify the seafood flavor.
- Fresh Lemon Juice: Do not underestimate the power of freshly squeezed lemon juice! It is the defining acidic component of piccata sauce, providing its characteristic bright, tangy, and refreshing flavor that cuts through the richness of the butter and salmon. Bottled lemon juice pales in comparison to fresh.
- Minced Garlic: Beyond the garlic powder in the coating, a touch of fresh minced garlic added to the sauce elevates its aromatic profile, contributing a pungent, savory kick that rounds out the flavors and provides a delightful fragrance as it simmers.
- Fresh Thyme Sprigs: While dried thyme is used for the salmon coating, a few sprigs of fresh thyme simmered directly in the sauce release a delicate, herbaceous aroma and flavor. This fresh element perfectly ties the dish together and adds a gourmet touch.
- Capers: No piccata is complete without capers! These briny, tangy, and slightly pungent pickled flower buds are essential. They add an unmistakable salty, vinegary punch that creates the unique, piquant flavor profile that defines piccata sauce. They are non-negotiable for authenticity.
- Corn Starch: A small amount of corn starch, mixed into a “slurry” with cold liquid, is used to gently thicken the piccata sauce. This gives it a luscious, velvety consistency that clings perfectly to the salmon fillets, ensuring every bite is coated in flavor.
The Foundation: Choosing the Right Salmon for Your Piccata
While all the ingredients play a vital role, the quality of your salmon is paramount to the success of this dish. For the most exceptional results, seek out the highest quality salmon fillets available. Wild-caught salmon (such as sockeye or coho) often boasts a cleaner, more robust flavor profile and firmer texture compared to farmed varieties, which can sometimes be fattier and milder.
If fresh wild-caught salmon isn’t readily available, high-quality frozen salmon fillets are an excellent alternative. Look for brands that prioritize sustainable sourcing and quick freezing to lock in freshness. Many find wild Alaskan sockeye salmon fillets, even frozen, to be an excellent choice due to their rich color and firm texture.
When selecting your salmon, look for fillets that are vibrant in color, firm to the touch, and free from any strong, “fishy” odor. Ideally, purchase fillets with the skin on, as it crisps up beautifully and adds a protective layer during searing, helping to keep the flesh moist. If you’re using skinless fillets, simply adjust your cooking time slightly and be extra careful not to overcook.
Step-by-Step Guide: Crafting Your Delicious Salmon Piccata
Creating this flavorful salmon piccata is simpler than you might think, and with our detailed instructions, you’ll achieve a perfectly cooked salmon and a rich, zesty sauce every time. Follow these steps carefully for a truly outstanding meal:
- Prepare the Salmon: Begin by gently patting your salmon fillets thoroughly dry with paper towels. This crucial step removes excess surface moisture, which is key for achieving that desirable crispy skin during searing. Once dry, generously sprinkle both sides of each fillet with salt and freshly ground black pepper. Allow the seasoned salmon to rest for about 10 minutes at room temperature; this helps the flavors penetrate and contributes to a more even cook, preventing the fish from shrinking too much when it hits the hot pan.
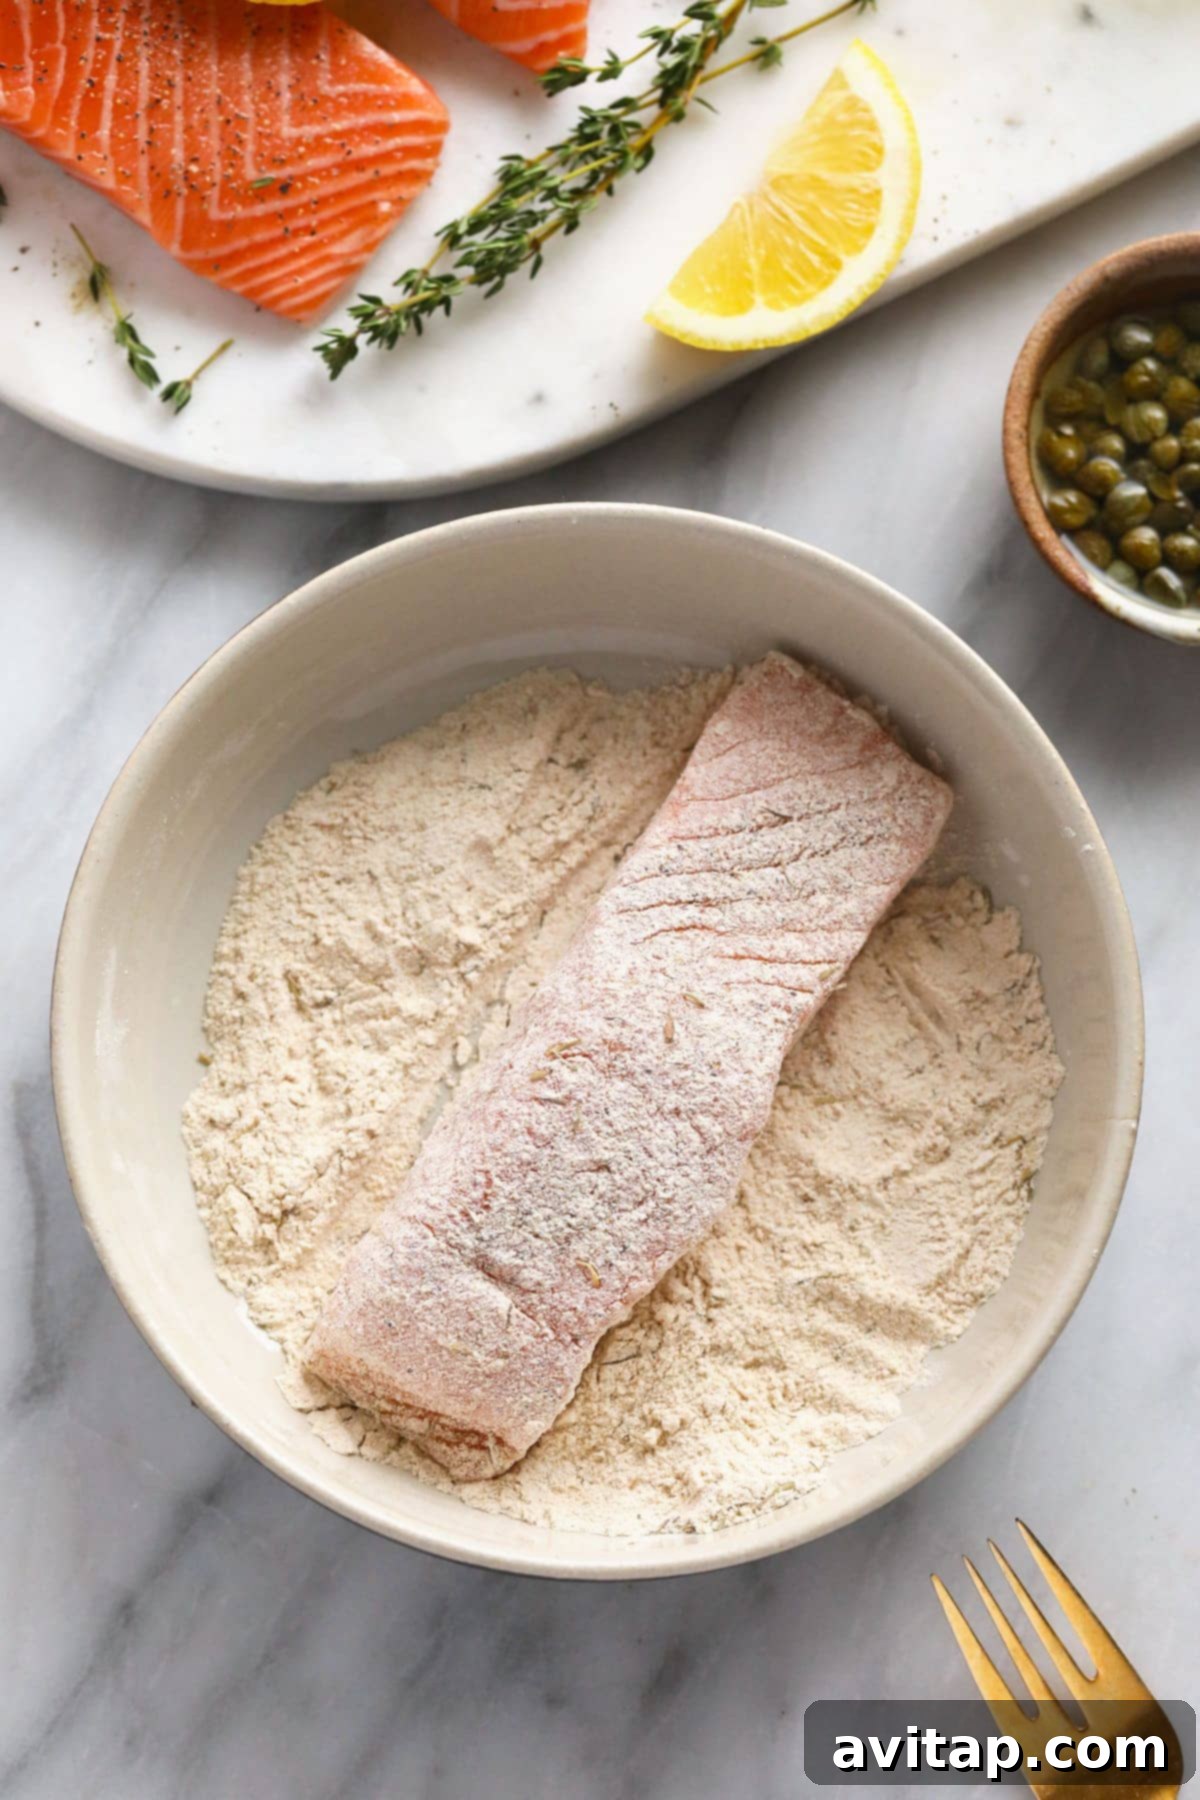
- Create the Flavorful Dredge: In a shallow bowl or a wide plate, combine the white whole wheat flour (or your chosen alternative), garlic powder, onion powder, and dried thyme. Whisk these ingredients together thoroughly until well combined. This mixture will form a delicate, spiced crust on your salmon, adding another layer of flavor and texture.
- Dredge the Salmon: Take each salmon fillet and lightly dredge it through the flour and spice mixture, ensuring both sides are evenly coated. Gently shake off any excess flour, as too much coating can become gummy. This thin, even coating not only adds flavor but also helps create a beautiful golden-brown crust when seared.
- Heat the Skillet: Place a large, heavy-bottomed skillet (cast iron works wonderfully for its even heat distribution) over medium-high heat. Add the butter to the hot pan. Allow the butter to melt completely and foam slightly. This foaming indicates that the butter is hot enough and its water content is evaporating, making it ready for searing. If using olive oil, heat until shimmering but not smoking.
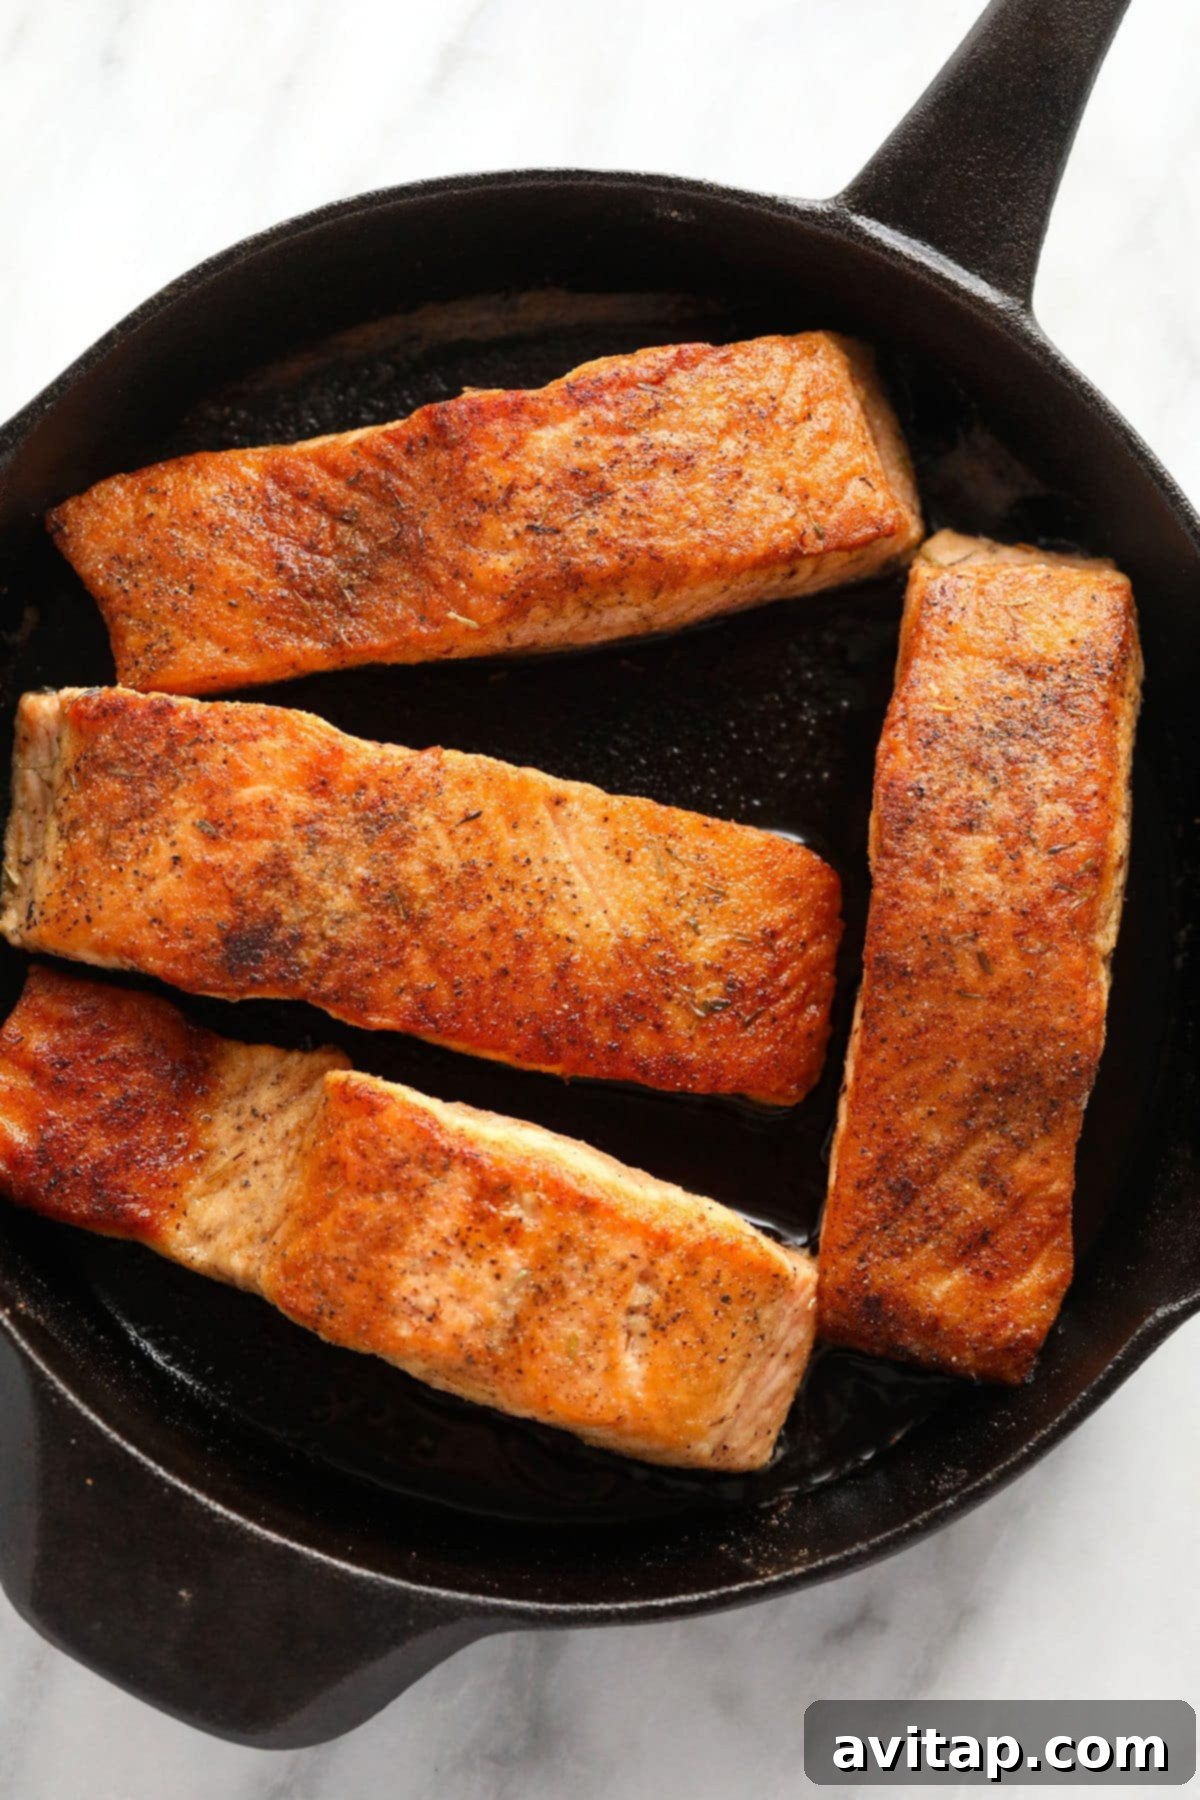
- Sear the Salmon to Perfection: Carefully place the floured salmon fillets into the hot skillet. If your fillets have skin, place them skin-side down first. Sear for 4-5 minutes on this side, or until the skin is beautifully golden-brown and crispy, and the fish has cooked about two-thirds of the way up (you’ll see the color change creep up the sides). Then, carefully flip the fillets using a fish spatula and cook for another 3-4 minutes on the flesh side, or until the salmon reaches your desired doneness (refer to the doneness tips below). The exact cooking time will depend on the thickness of your fillets.
- Rest the Salmon: Once cooked, remove the salmon fillets from the pan and transfer them to a plate. Tent them loosely with aluminum foil to keep them warm while you prepare the sauce. This resting period is important as it allows the internal temperature to equalize, resulting in more tender, juicy fish throughout.
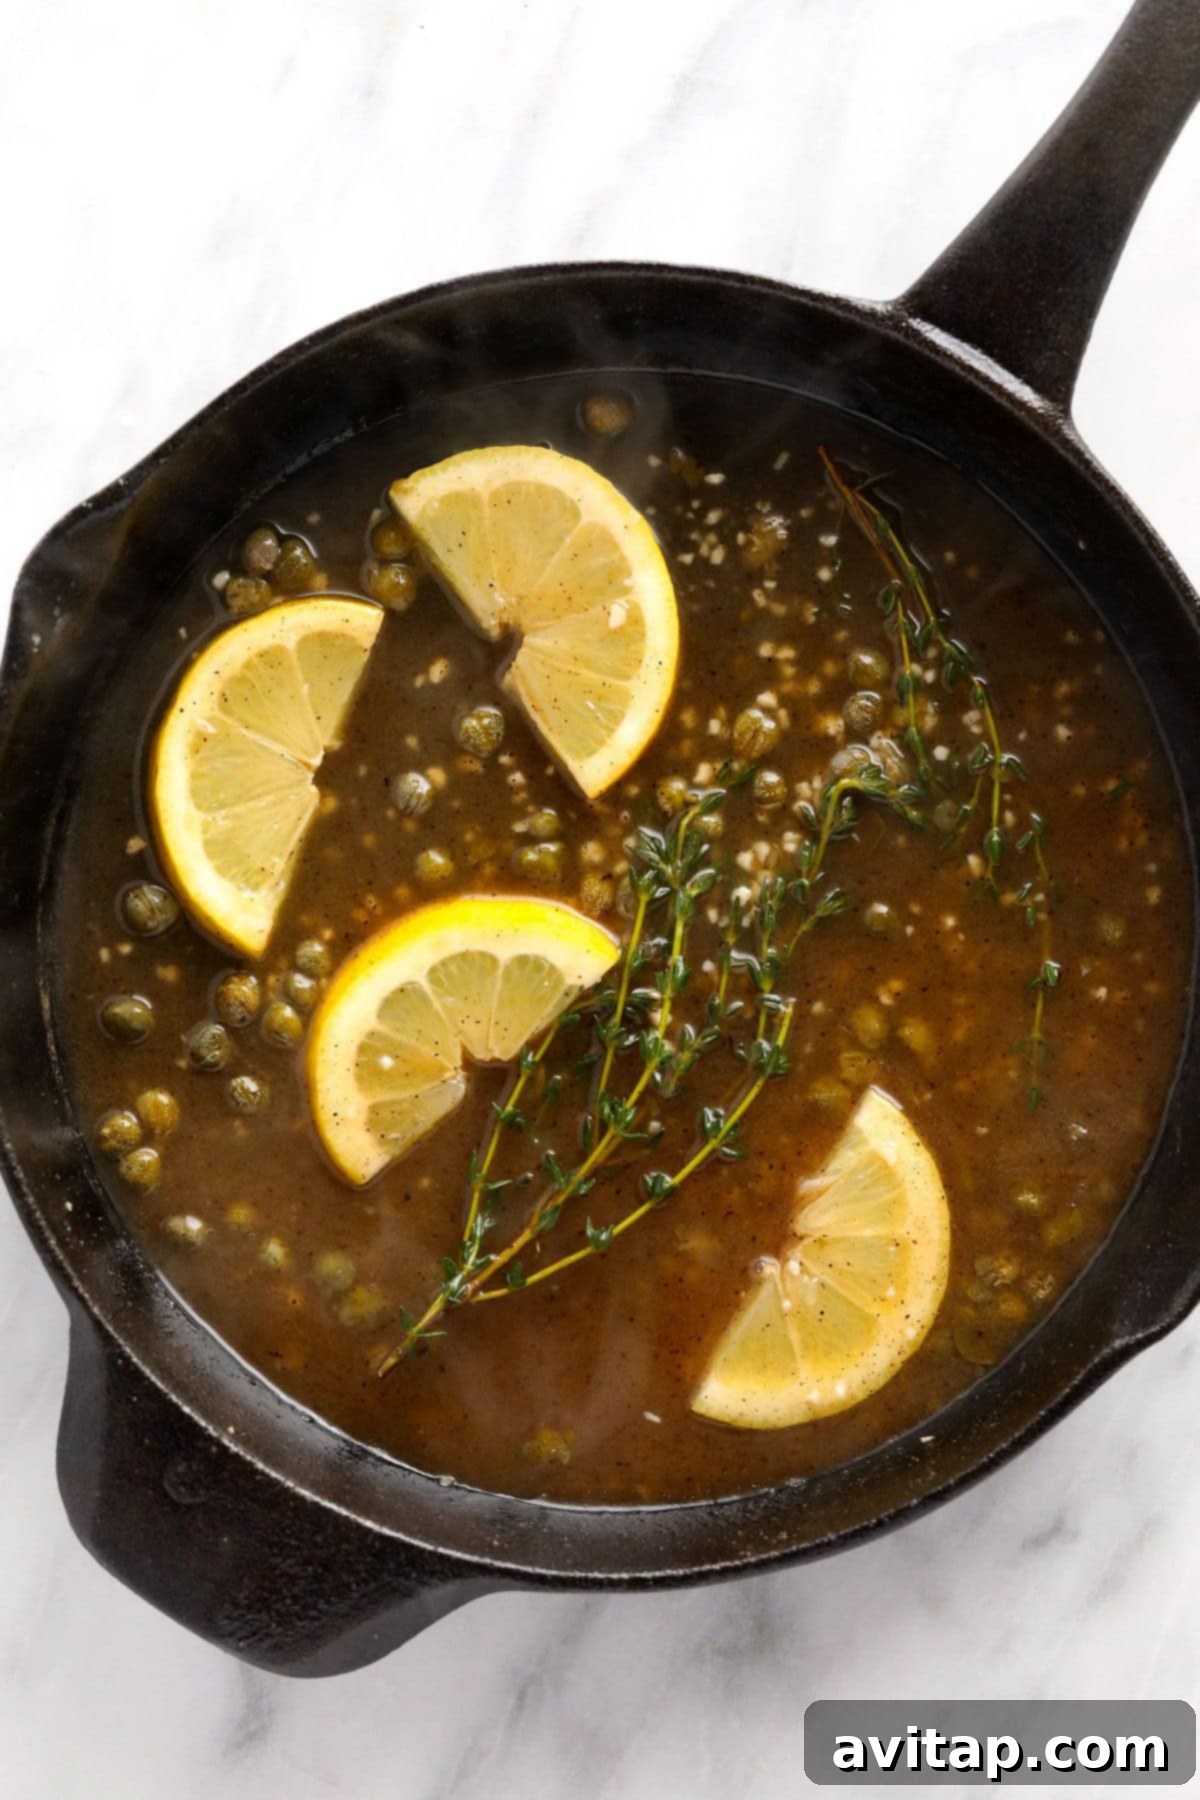
- Deglaze the Pan: Reduce the heat in the skillet to medium. Carefully pour the dry white wine into the hot pan. Immediately use a wooden spoon or a heat-resistant spatula to scrape up all the flavorful browned bits (known as “fond”) stuck to the bottom of the skillet. This deglazing step is absolutely essential for building the rich, complex base of your piccata sauce, capturing all the deliciousness left behind by the salmon.
- Build the Sauce Base: Once the wine has mostly evaporated and the fond is incorporated, add 1/2 cup of chicken broth to the pan and whisk it together with the deglazed bits. Bring this mixture to a gentle simmer, allowing the flavors to combine.
- Infuse with Aromatics and Zest: Stir in the fresh lemon juice, minced garlic, fresh thyme sprigs, and capers. Continue to simmer the sauce for a few minutes, allowing the flavors to meld and deepen. The aroma will be incredible at this stage, a true hallmark of piccata!
- Prepare the Corn Starch Slurry: In a small, separate bowl, combine the remaining 1/4 cup of chicken broth with the corn starch. Whisk vigorously with a fork or mini-whisk until no lumps remain and the mixture is completely smooth. This slurry is what will gently thicken your sauce without making it gloopy.
- Thicken the Sauce: While the sauce in the pan is simmering, gradually pour the corn starch slurry into the pan, whisking continuously to ensure even distribution. Continue to whisk over medium-low heat until the sauce visibly thickens to a desired, luscious consistency that coats the back of a spoon. This usually takes just 1-2 minutes.
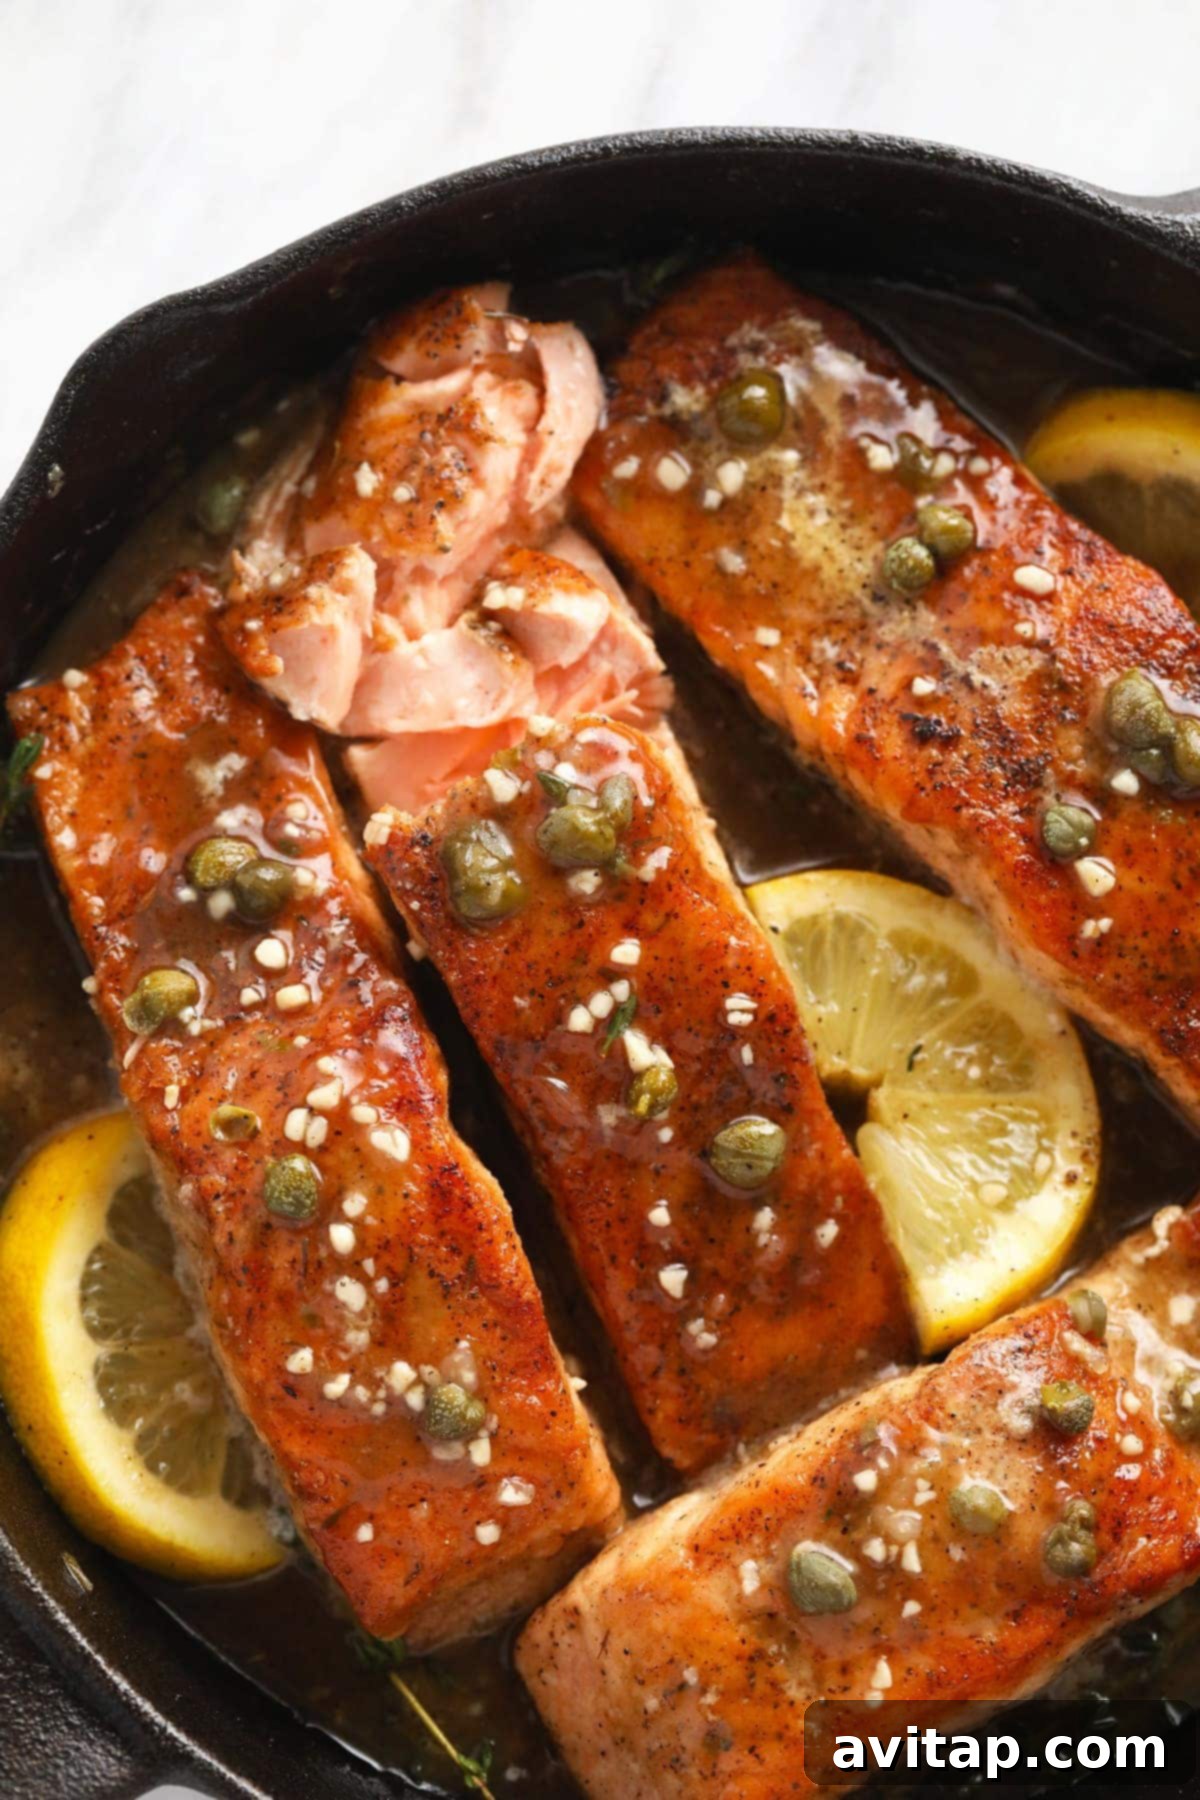
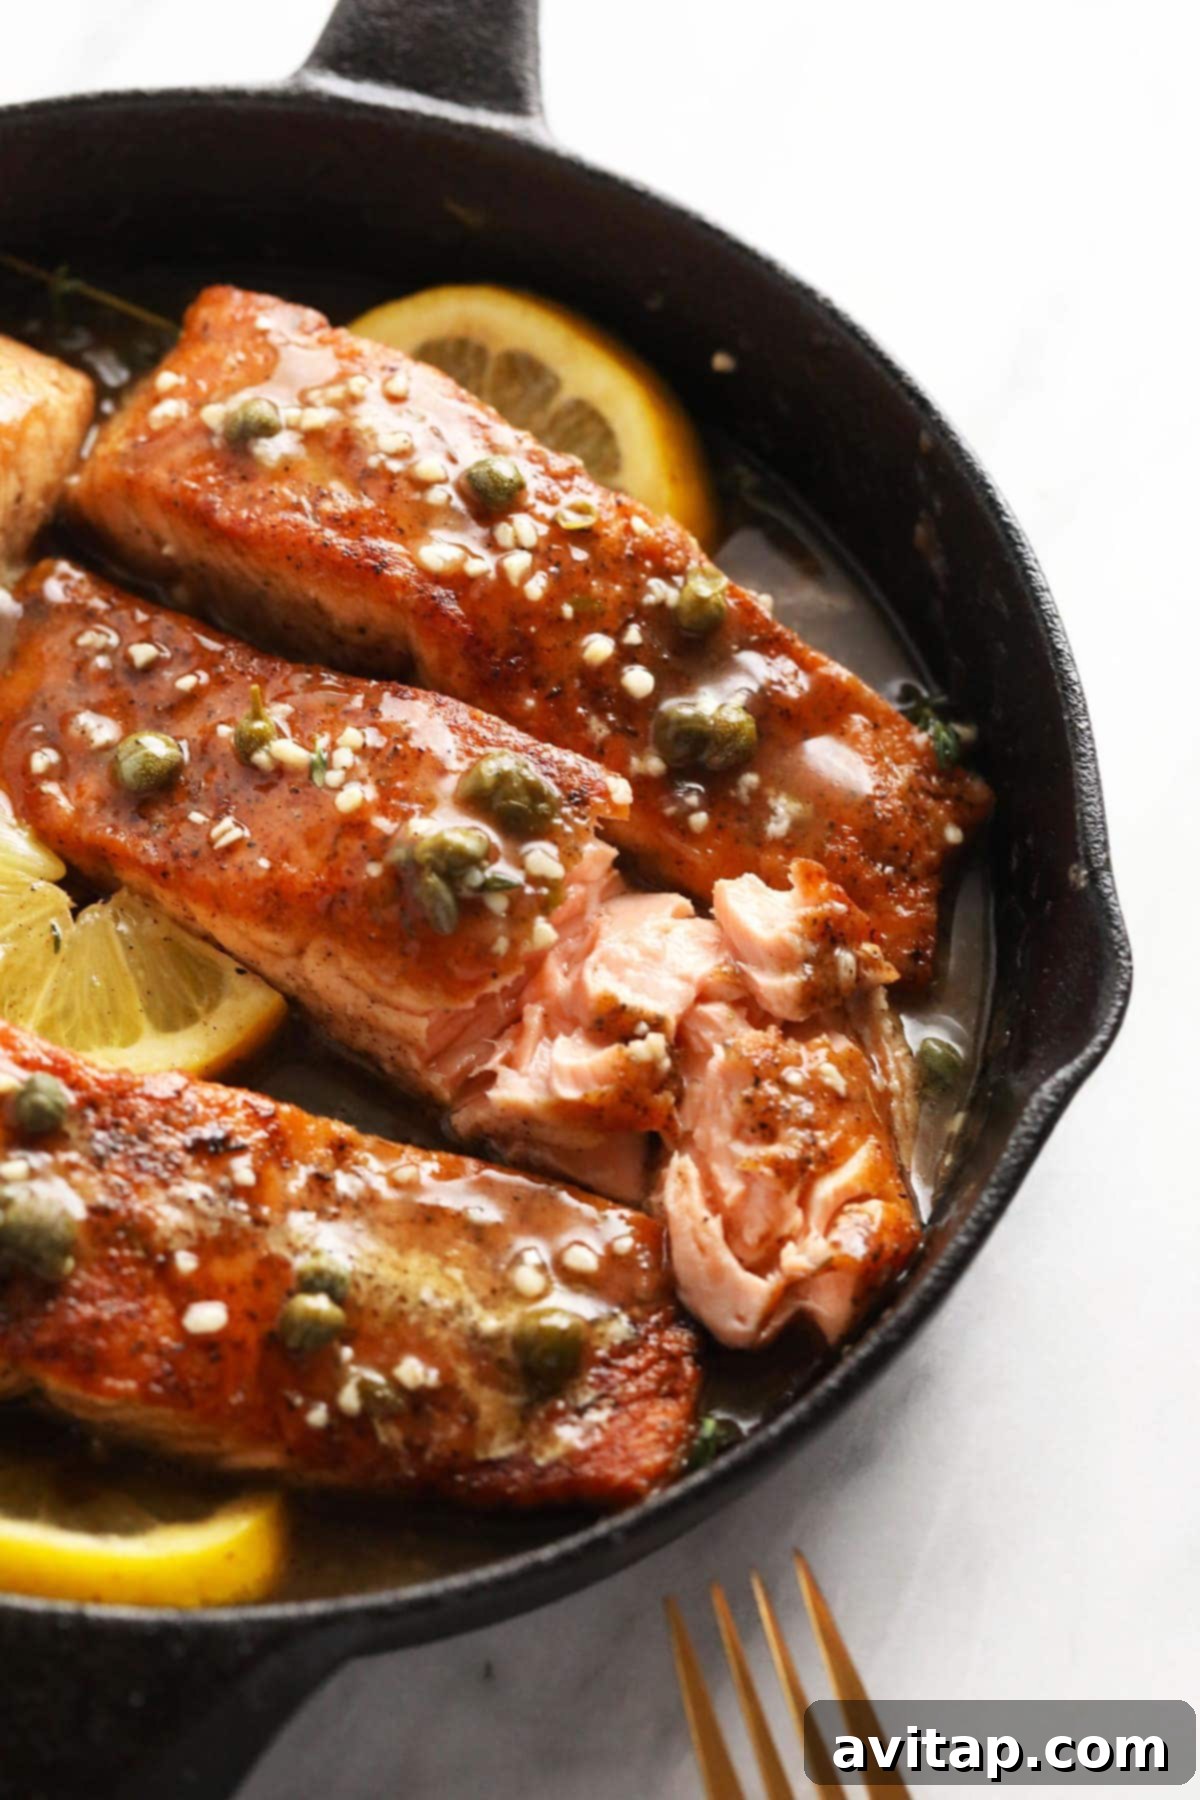
- Combine and Serve: Carefully return the seared salmon fillets to the pan, nestling them into the thickened piccata sauce, ideally skin-side down to allow the sauce to permeate the flesh. Spoon the vibrant sauce generously over each salmon fillet. Serve immediately, perhaps with an extra sprinkle of fresh thyme or a lemon wedge for garnish. Enjoy your restaurant-quality salmon piccata!
Achieving Perfect Doneness: How to Tell When Your Salmon is Ready
Knowing exactly when salmon is cooked through but still moist, tender, and incredibly flavorful can be a culinary challenge for many home cooks. Overcooked salmon quickly becomes dry and unappetizing. Here are reliable methods to ensure your salmon piccata is perfectly done every time:
- The Flake Test: This is a classic visual and tactile cue often used by chefs. Gently insert a fork into the thickest part of the salmon fillet and twist slightly. If the salmon is ready, the flesh will easily flake apart, and its color will have transitioned from translucent to opaque throughout. If it resists flaking or still appears translucent in the center, it needs a little more time.
- Internal Temperature (The Most Reliable Method): For absolute precision and optimal food safety, using an instant-read meat thermometer is highly recommended. Insert the thermometer into the thickest part of the fillet, ensuring it doesn’t touch the pan. The FDA recommends an internal temperature of 145°F (63°C) for cooked fish. However, many experienced chefs and home cooks prefer to remove salmon from the heat slightly earlier, around 138°F-140°F (59°C-60°C). This is because the salmon will continue to cook a few degrees more as it rests off the heat (a phenomenon known as carryover cooking), ensuring a perfectly moist and flaky result without becoming dry.
- Visual Cues: Observe the color change from the outside in. As salmon cooks, its raw, deep reddish-orange color gradually turns to a lighter pink or opaque orange. Aim for a consistent color throughout, without any raw, translucent spots, but also avoid a completely dry, pale appearance which signifies overcooking. The albumen (white fatty protein) that sometimes appears on the surface is also a sign of doneness, though excessive amounts can indicate slightly overcooked fish.
By employing these techniques, you’ll confidently achieve perfectly cooked salmon, crucial for a truly outstanding salmon piccata experience that’s moist, tender, and full of flavor. Practice makes perfect, and a good thermometer is your best friend!
Expert Tips & Tricks for the Best Salmon Piccata
To truly master this salmon piccata recipe and consistently deliver a restaurant-quality meal, consider these expert tips and insights. They’ll help you refine your technique and enhance the overall flavor experience:
Unlocking the Secret to a Luscious Piccata Sauce
The piccata sauce is undoubtedly the crowning glory of this dish, transforming simple salmon into something extraordinary. Achieving its perfect balance of tang, savory depth, and velvety texture is key. The “secret” is multi-faceted, involving both technique and the careful selection of critical ingredients:
- The Power of Deglazing: Never skip deglazing the pan with white wine after searing the salmon. Those flavorful browned bits (fond) stuck to the bottom of the skillet are packed with intense, concentrated flavors. Scraping them up with the wine and dissolving them into the liquid forms the incredibly rich and savory foundation of your sauce. This step is non-negotiable for true depth of flavor.
- Simmer for Flavor Concentration: Once you’ve added the main liquid components (wine, broth, lemon juice, garlic, thyme, capers), allow the sauce to simmer gently for a few minutes. This process naturally reduces the liquid, concentrating all those wonderful flavors and allowing them to meld together beautifully. A slight reduction ensures a more intense and harmonious taste.
- Perfecting the Corn Starch Slurry: This is your primary thickening agent. Always ensure you mix the corn starch thoroughly with a small amount of *cold* broth (or water) until it’s a completely smooth, lump-free paste *before* adding it to the simmering sauce. Adding corn starch directly to hot liquid can instantly create stubborn lumps. Once the smooth slurry is incorporated, whisk continuously and allow the sauce to simmer for another minute or two until it reaches your desired silky, glossy consistency that perfectly coats the back of a spoon.
- The Essential Balance of Acidity and Salt: The capers and fresh lemon juice are not just ingredients; they are the defining characteristics of an authentic piccata sauce. Capers provide a complex briny, salty, and slightly pungent kick, while lemon juice delivers that essential bright, tangy acidity that cuts through richness and provides freshness. Taste and adjust the seasoning. If the sauce feels flat, often a touch more fresh lemon juice or a pinch of salt will balance it out perfectly.
Smart Substitutions for Your Salmon Piccata
Life happens, and sometimes you don’t have every ingredient on hand. Don’t let that stop you from making this delicious meal! Here are some excellent and effective substitutions that will still yield a fantastic salmon piccata:
- White Whole Wheat Flour: Easily swap this for standard all-purpose flour for a similar texture and coating. For a gluten-free option, a good quality almond flour or a gluten-free all-purpose flour blend can be used.
- Chicken Broth: Any type of clear broth will work perfectly here. This includes vegetable broth (making the dish suitable for pescetarians or vegetarians if you substitute butter with olive oil), beef broth (though it will impart a slightly richer, darker flavor profile), or even fish stock for an intensified seafood taste.
- Capers: If you don’t have capers, finely minced green olives can offer a similar briny, salty note, though their flavor is slightly different. Alternatively, you can omit them entirely and simply add a pinch more salt and a splash of white wine vinegar or extra lemon juice to mimic their tang.
- Fresh Thyme: Dried thyme is a perfectly acceptable substitute. As a general rule, use half the amount of dried herbs compared to fresh (e.g., 1/2 teaspoon dried for every 1 teaspoon fresh). You can also experiment with other fresh herbs like fresh parsley or oregano.
- Dry White Wine: If you prefer not to cook with alcohol, white wine vinegar diluted with a little water (e.g., 1 part vinegar to 2 parts water) can mimic the acidity and some of the deglazing properties. Fresh lemon juice with an extra dash of chicken broth is another good non-alcoholic option. Some adventurous cooks even use a splash of ginger ale for a touch of sweetness and effervescence, though this will significantly alter the flavor profile.
- Butter: For searing the salmon, high-quality olive oil can be used for a dairy-free option. For the sauce, a good quality plant-based butter alternative can work, or simply use extra olive oil, though it will result in a slightly different richness and mouthfeel.
Storage and Reheating Best Practices for Leftovers
If you’re lucky enough to have leftovers (it’s often so good there aren’t any!), proper storage ensures your salmon piccata remains enjoyable and safe to eat:
- Refrigeration: Always allow the salmon and sauce to cool completely to room temperature (within two hours of cooking) before transferring them to an airtight container. This prevents condensation and inhibits bacterial growth. Store the sealed container in the refrigerator for up to 3-4 days. For the best texture and flavor, consuming it within 1-2 days is ideal.
- Reheating: Gently reheat salmon piccata to prevent the delicate fish from drying out. The best method is to warm it slowly in a skillet over low heat, adding a splash of extra broth or water if the sauce has thickened too much during refrigeration. Cover the skillet to trap steam and ensure even heating. Alternatively, you can microwave on medium power in short bursts (30-60 seconds at a time), stirring the sauce around the fish between intervals. Avoid high heat, as it can make the salmon tough and rubbery.
Freezing Salmon Piccata: A Word of Caution
We generally **do not recommend freezing cooked salmon piccata.** While technically possible, freezing and thawing can significantly alter the delicate texture of the salmon, often making it dry, mealy, and less appealing. The piccata sauce, which relies on its smooth emulsion and thickness, might also separate or become watery upon thawing. This dish is truly best enjoyed fresh or after a short stint in the refrigerator for optimal flavor and texture quality.
Expand Your Culinary Horizons with More of Our Favorite…
Delicious Salmon Recipes to Explore
If you love salmon as much as we do, and are looking for more ways to incorporate this versatile and healthy fish into your diet, be sure to check out these other fantastic salmon recipes that are perfect for any occasion:
- Mastering Grilled Salmon: Tips for Juicy Perfection Outdoors
- Sous Vide Salmon: Achieve Unrivaled Tenderness and Flakiness
- Effortless Oven Baked Salmon in Foil: A Quick Clean-Up Meal
- Zesty Baked Lemon Pepper Salmon: A Simple and Flavorful Classic
5 from 3 votes (Original Rating)
Salmon Piccata Recipe
Linley Hanson
4
Pin This Recipe
Print Recipe
Ingredients
- 4 5-oz. salmon fillets, skin on
- 1/4 teaspoon salt
- 1/4 teaspoon pepper
- 1/4 cup white whole wheat flour (or all-purpose)
- 1 teaspoon garlic powder
- 1 teaspoon onion powder
- 1/2 teaspoon dried thyme
- 3 tablespoons butter
- 1/3 cup dry white wine
- 3/4 cup chicken broth, separated
- 1 tablespoon fresh lemon juice
- 1 tablespoon minced garlic
- 3 sprigs fresh thyme
- 2 tablespoons capers
- 1.5 teaspoons corn starch
Instructions
- Prepare Salmon: Pat salmon fillets dry with a paper towel. Season generously with salt and pepper, then let them rest for 10 minutes.
- Make Dredge: In a bowl, combine flour, garlic powder, onion powder, and dried thyme. Mix well.
- Coat Salmon: Dredge salmon fillets through the flour mixture, ensuring both sides are coated. Shake off excess.
- Heat Skillet: Heat a large skillet over medium-high heat. Add butter and let it melt until fragrant.
- Sear Salmon: Place salmon, skin-side up (if applicable), in the skillet. Sear for 4-5 minutes per side, depending on thickness, until golden and cooked through.
- Rest Salmon: Remove salmon from the pan and tent loosely with foil to keep warm.
- Deglaze Pan: Reduce heat to medium. Add white wine to the pan and scrape up any browned bits.
- Start Sauce: Add 1/2 cup broth to the pan and whisk.
- Add Aromatics: Stir in lemon juice, minced garlic, fresh thyme sprigs, and capers. Let simmer.
- Make Slurry: In a separate bowl, whisk corn starch into the remaining 1/4 cup broth until lump-free.
- Thicken Sauce: Pour slurry into the simmering sauce, whisking continuously over medium-low heat until thickened.
- Serve: Return salmon to the pan, skin side down. Spoon sauce over the salmon and serve immediately.
Nutrition
Carbohydrates: 17 g,
Protein: 18 g,
Fat: 25 g,
Fiber: 1 g,
Sugar: 0 g
Nutrition information is automatically calculated and should be used as an approximation. Individual results may vary.
Love this recipe? Leave a comment below!
Don’t forget to tag your culinary creations on social media with the hashtag #fitfoodiefinds – we’d absolutely love to see what you’re cooking up and share in your success!