
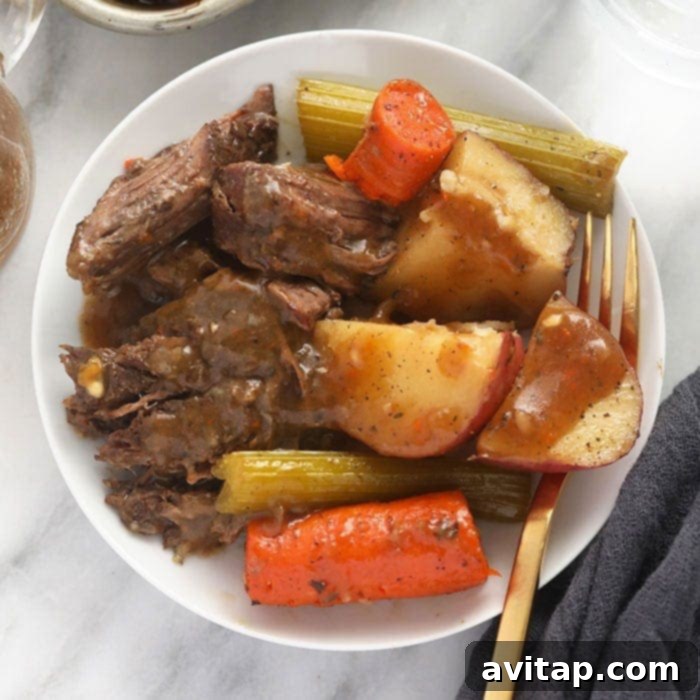
For pot roast enthusiasts, this recipe is a true game-changer! Prepare to indulge in the most succulent and flavorful Instant Pot Pot Roast, complete with tender vegetables and a rich, homemade gravy, all ready in just under two hours. Forget the long hours of traditional oven roasting; your pressure cooker is about to become your new best friend for creating this classic comfort food.
Looking for more incredible roast recipes? Don’t miss our equally delicious Instant Pot Pork Roast for another delightful meal!
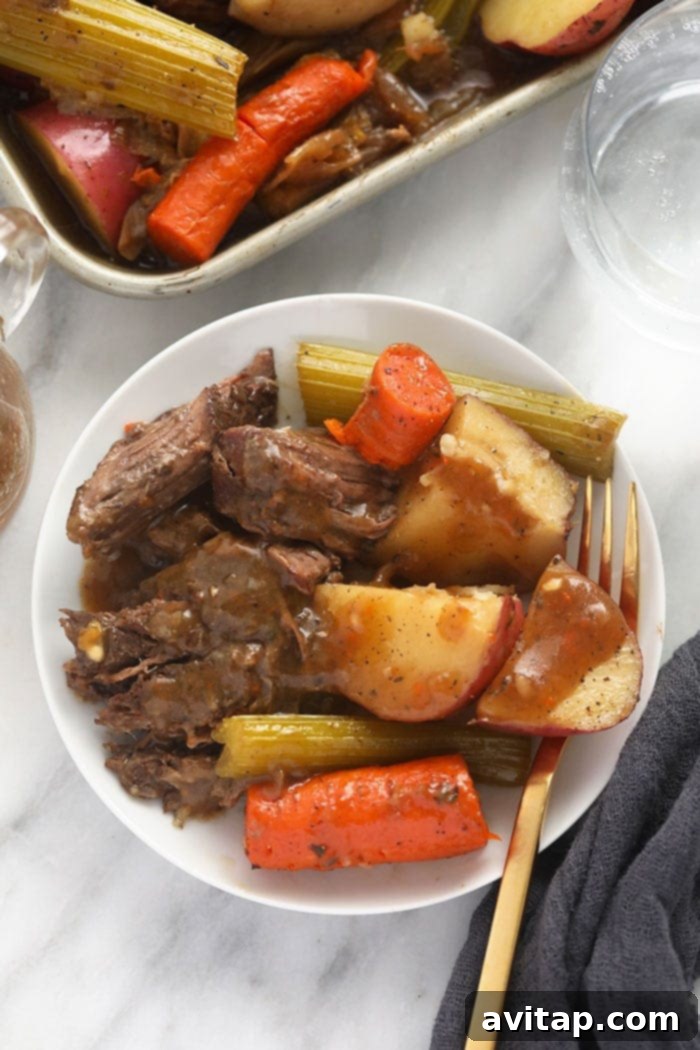
The Ultimate Instant Pot Pot Roast: A Hearty Meal for Any Occasion
As the colder months arrive, many of us find ourselves yearning for hearty, warming meals that stick to your ribs and fill your home with irresistible aromas. Here in Minnesota, where winters are long and chilly, dishes like this Instant Pot Pot Roast become staples. This recipe not only promises a kitchen filled with enticing scents but also delivers a savory, meaty meal in a fraction of the time compared to traditional oven-cooked versions, thanks to the magic of the pressure cooker. It’s the perfect solution for busy weeknights or comforting Sunday dinners, offering a convenient way to enjoy a classic comfort food.
What is Chuck Roast and Why It’s Perfect for Pot Roast?
Chuck roast is a versatile cut of beef taken from the shoulder of the animal. It’s highly prized for its rich marbling and abundant connective tissue, which, when subjected to slow, moist cooking methods like pressure cooking, breaks down into succulent gelatin. This transformation results in incredibly tender, fall-apart meat bursting with deep beefy flavor. In your local grocery store, you might encounter this cut labeled as chuck roast, pot roast, or even shoulder steak. For this specific recipe, we strongly recommend using a boneless beef chuck roast, as it consistently achieves the desired melt-in-your-mouth tenderness.
Pro Tip for Choosing Your Roast: While a boneless chuck roast is ideal for the cook times outlined in this recipe, a bone-in chuck roast can certainly be used. However, it’s important to note that a bone-in cut will typically require a longer cooking time in the Instant Pot to achieve the same level of tenderization, as the bone and surrounding tissues take more time to break down. If you choose this method, consider adding an extra 10-15 minutes to the initial pressure cooking time. We’d love to hear about your experience and any adjustments you made in the comments section!
How Much Chuck Roast Do You Need?
Our recipe is perfectly calibrated for a 2.5 lb. (approximately 1.13 kg) chuck roast, designed to generously serve six people, making it ideal for family meals or providing delicious leftovers. We are confident that any chuck roast weighing between 2.5 lbs. and 3 lbs. (1.13 kg – 1.36 kg) will yield excellent results with the provided ingredient ratios and cooking times. The beauty of pot roast is its forgiving nature, allowing for slight variations in meat size.
Important Note on Size & Cook Time: Please be aware that the total cooking time in your Instant Pot may vary if your piece of meat is significantly smaller or larger than the recommended 2.5 lbs. Larger cuts might need a bit more time to reach ultimate tenderness, while smaller ones might cook slightly faster. Always adjust cooking times accordingly to ensure your pot roast achieves that perfect, shreddable consistency.
How to Make the Best Instant Pot Pot Roast
Step 1: Crafting Your Signature Pot Roast Seasoning
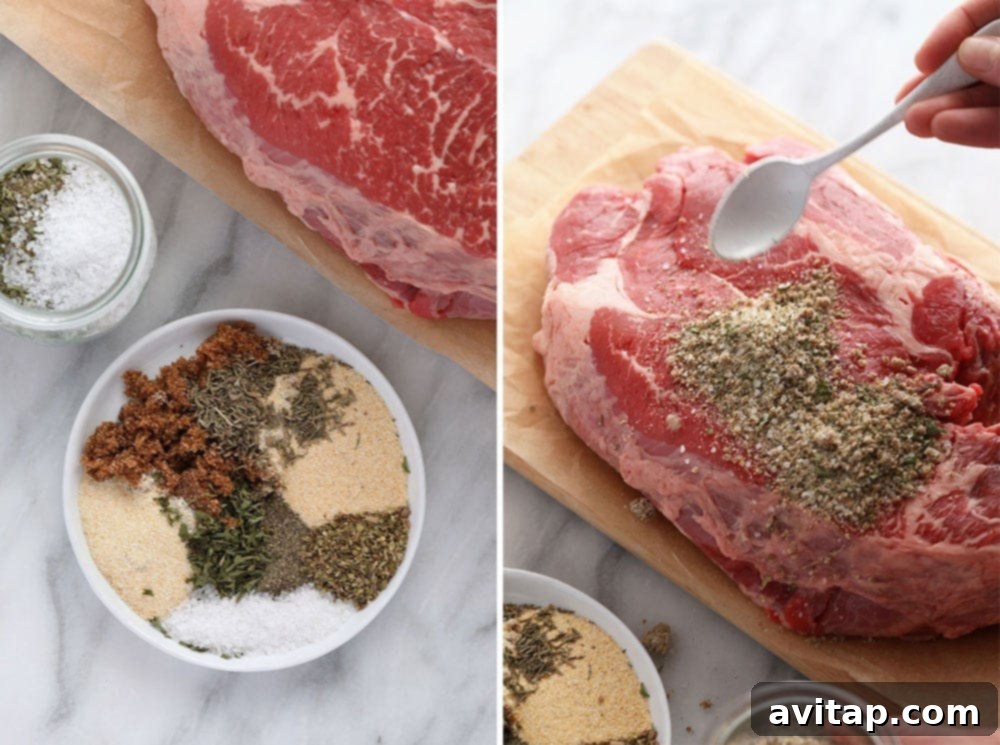
The foundation of any truly exceptional pot roast lies in its seasoning. A well-balanced and generously applied spice rub is absolutely crucial for infusing your meat with deep, savory flavor right from the start. Our carefully curated blend ensures every bite of your pot roast is bursting with deliciousness, creating a memorable meal. Here’s what you’ll need for our signature mix:
- Brown sugar: Adds a hint of sweetness and helps create a beautiful caramelized crust during searing.
- Garlic powder: A classic flavor enhancer that complements beef perfectly, providing an aromatic foundation.
- Onion powder: Delivers a savory depth without the texture of fresh onions, enhancing the overall umami.
- Dried oregano: Offers an earthy, slightly peppery note, adding complexity to the rub.
- Dried thyme: Contributes a delicate, aromatic, and savory essence that pairs wonderfully with beef.
- Dried parsley: Adds a fresh, herbaceous touch to the blend, brightening the flavor profile.
- Coarse salt: Essential for seasoning the meat thoroughly, drawing out its natural juices and enhancing all other flavors.
- Black pepper: Delivers a subtle kick and aromatic warmth, providing a well-rounded spice.
Begin by combining all these dry spices in a small bowl, mixing them thoroughly to ensure an even distribution. Once blended, generously rub this mixture all over your chuck roast, making sure to coat every surface, nook, and cranny. Don’t be shy with the seasoning – this might seem like a lot, but it’s precisely what’s needed to build those incredible layers of flavor that define a perfect pot roast. This initial seasoning sets the stage for a truly flavorful dish.
Step 2: Sautéing Aromatic Vegetables for Enhanced Flavor
One of the many fantastic advantages of the Instant Pot is its versatile sauté function. This allows you to brown ingredients and build fundamental flavors directly in the same pot before pressure cooking, significantly reducing the number of pots and pans you’ll need to wash. It’s a win-win situation: amazing flavor development with minimal cleanup!
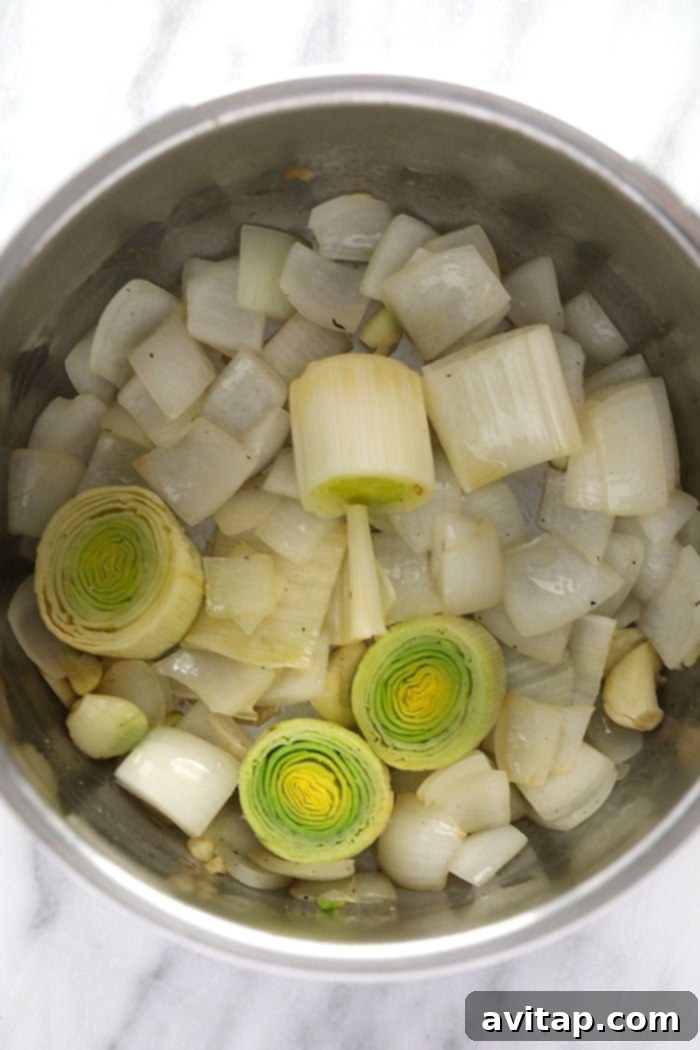
To begin this step, activate your Instant Pot’s sauté function. Allow the pot to heat up for a few minutes. Once hot, drizzle in about 2 tablespoons of olive oil. Add your prepared aromatics: the smashed garlic cloves, finely chopped white onion, and sliced leeks. Sauté these vegetables for 3-4 minutes, stirring occasionally, until they become wonderfully fragrant and slightly softened. This process of caramelization is vital as it coaxes out their delicious savory flavors, which will infuse into the chuck roast and the cooking liquid during the pressure cooking process.
After sautéing, carefully remove the onions, leeks, and garlic cloves from the Instant Pot using a slotted spoon, leaving behind the flavorful oil. Set these softened aromatics aside; they will be reintroduced later to contribute to the rich, homemade gravy.
Step 3: Achieving That Perfect Sear on Your Chuck Roast
Our trusty sauté function isn’t done working its magic just yet! After you’ve removed the aromatics, it’s time to use the same function to create a beautiful, flavorful crust on your seasoned chuck roast. This crucial step is what locks in moisture and develops a deep, rich flavor on the meat’s exterior, a process scientifically known as the Maillard reaction.
Add another tablespoon or two of olive oil to the Instant Pot. Once the oil is shimmering hot, carefully place your seasoned chuck roast into the pot. Sear each side for 3-4 minutes, aiming for a consistent, deep golden-brown crust. This browning not only enhances the flavor profile significantly but also helps kickstart the tenderization process, ensuring your pot roast is exceptionally juicy and tender once pressure cooked.
Why Searing is Essential Before Pressure Cooking: Searing the roast before pressure cooking serves multiple vital purposes. Firstly, it develops a robust flavor layer that cannot be achieved through boiling or steaming alone. Secondly, it helps the meat retain its internal juices, resulting in a more succulent final product. Moreover, by searing now, you avoid the hassle of having to remove all the cooked ingredients from the Instant Pot to sear the meat at the very end, which streamlines your cooking process and keeps all the flavorful bits in the pot for your gravy.
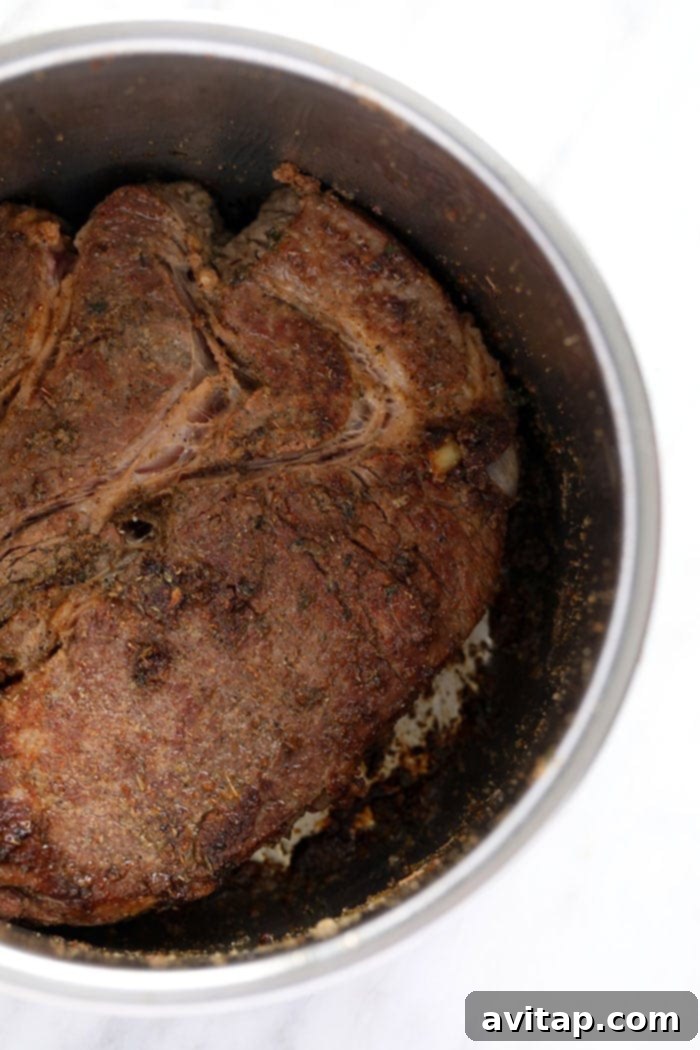
Step 4: Deglazing for Flavor and Functionality
Once your pot roast has a beautiful, deep brown sear on all sides, carefully remove it from the Instant Pot and transfer it to a separate plate. Now, it’s time for a critically important step in Instant Pot cooking: deglazing the pot!
What is Deglazing and Why is it Indispensable? Deglazing is the process of adding liquid to a hot pot and vigorously scraping up all the delicious browned bits, known as “fond,” that have stuck to the bottom during the sautéing and searing phases. This step is crucial for two primary reasons: first, it captures and incorporates all those highly concentrated, caramelized flavors into your cooking liquid, which will form the base of your incredible gravy, adding immense depth and richness. Second, and equally important for ensuring Instant Pot success, it prevents the dreaded “burn notice” error. By thoroughly scraping up all food particles from the bottom of the inner pot, you ensure even heat distribution and prevent scorching, allowing the pressure cooking cycle to proceed without interruption. For this particular recipe, we use a rich and aromatic combination of dry red wine, robust beef broth, and a splash of Worcestershire sauce to effectively deglaze the pot and lay a perfect foundation for an unforgettable gravy.
Step 5: Pressure Cooking the Meat to Perfection
Now that the Instant Pot is perfectly deglazed and ready, return the reserved sautéed onions, leeks, and garlic cloves to the pot. These aromatics will continue to infuse flavor into the cooking liquid as the meat cooks, contributing to an even richer gravy later on. Gently place the seared pot roast directly on top of this layer of vegetables.
Carefully secure the Instant Pot lid, ensuring it’s properly closed and sealed. Then, turn the steam release valve to the “Sealing” position. Select the “Manual” (or “Pressure Cook”) function on “High Pressure” and set the cooking timer for 90 minutes. It’s important to note that the timer will not start counting down immediately. This is completely normal, as the Instant Pot requires approximately 10-15 minutes to build sufficient internal pressure before the cooking cycle officially begins.
Once the 90-minute pressure cooking cycle is complete, perform a “Quick Release” of the pressure. To do this, carefully turn the steam release valve to the “Venting” position and allow all the steam to escape completely before attempting to open the lid. After this precise cooking duration, your pot roast should be incredibly tender, truly “fall-off-the-bone” soft, and effortless to shred with forks. If, for any reason, it’s not quite at your desired level of tenderness, there’s no need to worry. Simply close the Instant Pot lid again, ensure the valve is sealed, and pressure cook for an additional 5-10 minutes. A little extra time can make all the difference.
Once the meat reaches that perfect, melt-in-your-mouth texture, carefully remove it from the Instant Pot and transfer it to a large plate or cutting board. Set it aside while you prepare the remaining vegetables and finalize the delicious gravy.
Step 6: Cooking the Hearty Pot Roast Vegetables
A truly classic and wholesome pot roast isn’t complete without a vibrant medley of tender, flavorful vegetables that have cooked alongside the meat, allowing all the rich, savory flavors to meld together perfectly. Even if you’re not typically a fan of every single vegetable on this list, we strongly encourage you not to skip any; they play a crucial role in the overall flavor profile and texture of the dish. (Yes, we’re looking at you, celery skeptics! We promise the flavor combination is absolutely divine and essential for the authentic pot roast experience!)
For our signature Instant Pot Pot Roast, we recommend including these hearty vegetables:
- Carrots: For natural sweetness, a vibrant color, and an earthy flavor that complements the beef.
- Celery stalks: Adds a subtle, earthy, and aromatic crunch, contributing to the classic pot roast taste.
- Red potatoes: Hearty and satisfying, these potatoes soak up all the delicious juices and gravy, becoming incredibly flavorful. (Feel free to mash them at the end if you prefer a creamy side!)
Pro Tip for Uniform Cooking: It’s essential to slice your vegetables so they are all roughly similar in size. This ensures they cook evenly and reach the same perfect doneness without some becoming mushy while others remain raw. In the accompanying photo, you might notice our vegetables are cut a bit larger for a rustic look. If you opt for smaller cuts, you will need to slightly decrease your pressure cooking time to prevent them from becoming too soft or mushy. Uniformity is key for perfectly cooked vegetables.
Add all your prepared pot roast vegetables (the chopped carrots, celery, and quartered red potatoes) directly into the Instant Pot, layering them on top of the rich liquid and any remaining aromatics. Secure the lid once more and turn the steam release valve to the “Sealing” position. Set the Instant Pot to “Manual” (or “Pressure Cook”) on “High Pressure” and set the timer for just 2 minutes. As with the meat, the Instant Pot will take a few minutes to build pressure before the short countdown begins.
After the 2 minutes are up, perform another “Quick Release” to safely vent all the steam. Carefully open the lid. Your vegetables should be perfectly tender-crisp, maintaining a slight bite. If they feel a little too firm for your liking, it simply means they were cut slightly larger than ours. You can replace the lid and cook for an additional 0 or 1 minute on high pressure, followed by another quick release, until they reach your desired tenderness. Precision and a little patience result in perfection.
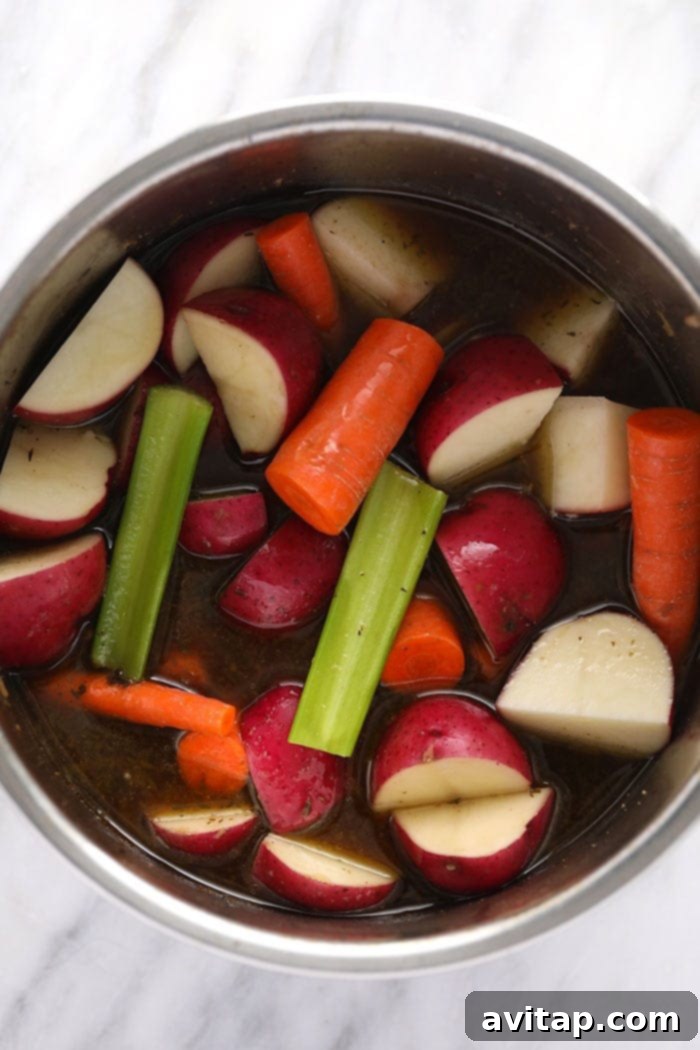
Step 7: Creating a Luscious Homemade Gravy
Now for the crowning glory of your pot roast: the rich, savory, and incredibly flavorful gravy! The excellent news is that the foundational liquid for your gravy is already waiting for you in the Instant Pot – those deeply flavored drippings and juices from cooking the meat and vegetables. All you need to do is transform them into a smooth, thick, and irresistible gravy.
First, carefully remove all the cooked meat and vegetables from the Instant Pot, leaving only the concentrated liquid behind. Then, turn on the Instant Pot’s sauté feature. The heat is absolutely essential here as it activates the starch, making this step critical for achieving proper thickening. Gradually sprinkle in 2 tablespoons of cornstarch into the simmering liquid. Immediately begin whisking continuously to create a smooth cornstarch slurry, ensuring no lumps form. Continue whisking diligently until the cornstarch is completely dissolved and the gravy has thickened to your desired luscious consistency. This process usually takes about 3-5 minutes, transforming thin drippings into a rich sauce.
Once thickened, give your homemade gravy a taste test. This is your opportunity to adjust the seasoning with additional salt and pepper as needed to enhance its flavors and bring it to perfection. Finally, transfer the rich, velvety gravy into a serving jar or bowl, ready to be generously drizzled over your tender pot roast and accompanying vegetables. This homemade gravy elevates the entire dish, tying all the flavors together beautifully.
Step 8: Shredding the Pot Roast for Serving
With your perfectly cooked vegetables, a luscious homemade gravy, and incredibly tender, melt-in-your-mouth meat, all that’s left is the final, satisfying touch: shredding the pot roast. This is the moment where you truly appreciate how the Instant Pot has transformed a hearty cut of beef into something marvelously soft and succulent.
Using two sturdy forks, gently pull apart the pot roast into large, satisfying chunks. The meat should be so incredibly tender that it practically falls apart with minimal effort, showcasing its perfect doneness. To ensure every piece of beef remains wonderfully moist and bursting with flavor, we highly recommend drizzling a little of that glorious homemade gravy over the shredded meat just before serving. This adds an extra layer of richness and juiciness that makes each bite unforgettable.
Chef’s Hint: Before serving, take a moment to inspect the shredded meat. Carefully discard any larger pieces of unrendered fat that might detract from the eating experience, ensuring every bite is pure, unadulterated deliciousness.
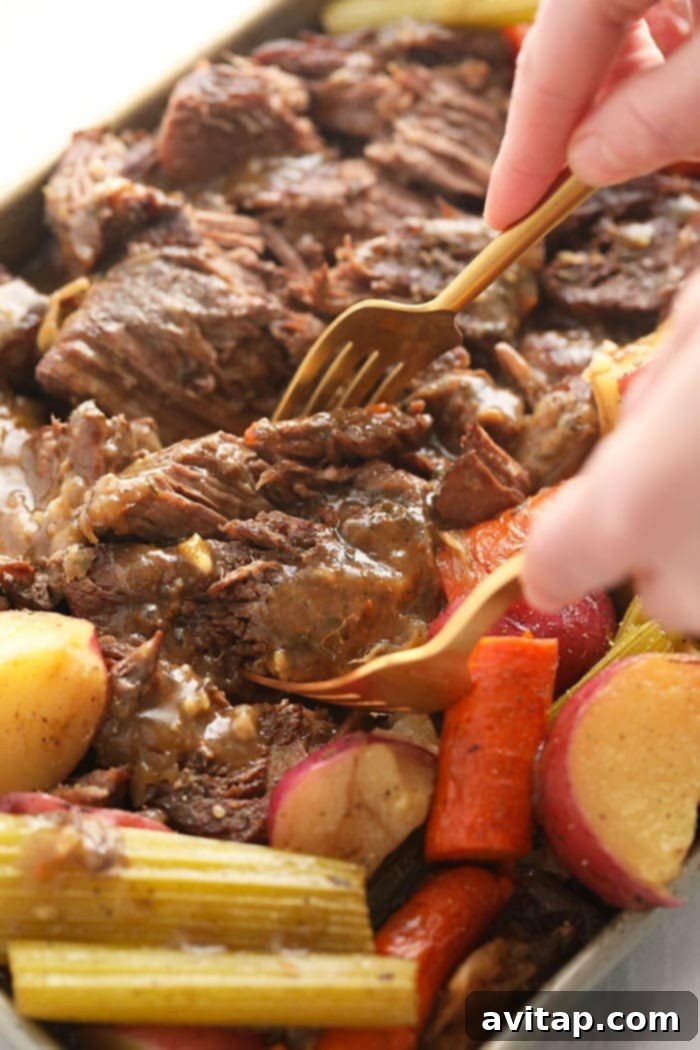
How to Store Instant Pot Pot Roast
This Instant Pot Pot Roast is not only fantastic when freshly prepared but also makes for incredibly delicious and convenient leftovers. To properly store your pot roast and vegetables, first allow them to cool completely to room temperature. Once cooled, transfer them to an airtight container and refrigerate for up to 5 days. This makes it perfect for meal prepping throughout the week.
For longer storage, this pot roast freezes beautifully, allowing you to enjoy this comforting meal whenever a craving strikes. Place the cooled pot roast and vegetables (along with any extra gravy) in an airtight, freezer-safe container or heavy-duty freezer bags. It will maintain its quality in the freezer for up to 3 months. When you’re ready to enjoy it again, simply thaw overnight in the refrigerator before reheating.
Reheating Your Pot Roast Leftovers
Bringing your leftover pot roast back to its comforting glory is a simple process. For oven reheating, place the pot roast and vegetables in an oven-safe dish. Add a splash of extra beef broth or gravy to prevent drying, then cover the dish tightly with aluminum foil. Reheat at 325°F (160°C) for 10-15 minutes, or until the entire dish is thoroughly warmed through and steaming. The foil helps to trap moisture, keeping the meat succulent.
Alternatively, to reheat on the stovetop, place your leftover pot roast and vegetables in a pan with a little olive oil or extra gravy. Sauté over medium heat, stirring occasionally, until everything is heated through and steaming. This method is quick and effective for smaller portions and ensures even reheating. Avoid microwaving if possible, as it can sometimes dry out the meat.
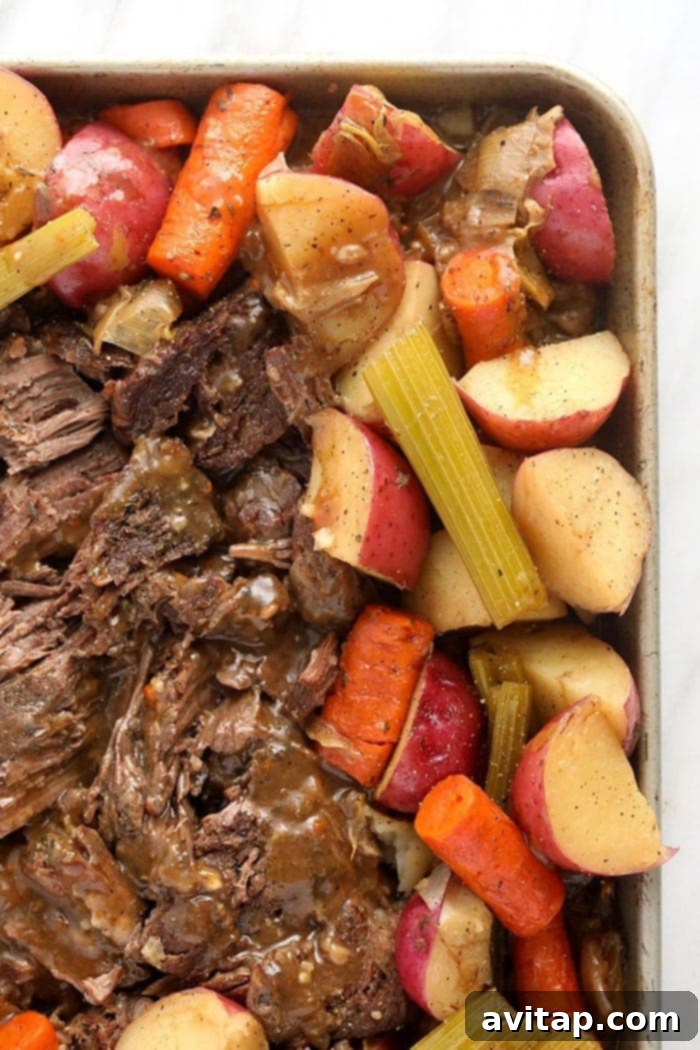
Printable Recipe Card: Instant Pot Pot Roast
Here’s a quick overview of the recipe for your convenience. While we’ve removed dynamic elements for this HTML-only version, here are the essential details to prepare your perfect Instant Pot Pot Roast:
Rating: 5 out of 5 stars from 10 votes
Instant Pot Pot Roast
This amazing Instant Pot Pot Roast recipe is made with tons of veggies and the most delicious gravy you’ve ever tasted! It’s the perfect hearty meal for any occasion.
By: Emily Richter
Prep Time: 30 minutes
Cook Time: 1 hour 32 minutes
Total Time: 2 hours 2 minutes
Servings: 8
Ingredients
Pot Roast Seasoning
- 2 tablespoons brown sugar
- 1 tablespoon garlic powder
- 2 teaspoons onion powder
- 1 teaspoon dried oregano
- 1 teaspoon dried thyme
- 1 teaspoon dried parsley
- 2 teaspoons coarse salt
- 1 teaspoon pepper
Beef Roast + Veggies
- 2.5 lb. chuck boneless pot roast
- 1/4 cup olive oil, divided (2 tablespoons for sautéing aromatics, 2 tablespoons for searing)
- 5 cloves of garlic, smashed
- 1 small white onion, chopped
- 1 leek, chopped (green part cut off, white part into 2-inch chunks)
- 6 medium carrots, chopped
- 6 medium celery stalks, chopped
- 6 medium red potatoes, quartered (about 4 cups)
- 1/2 cup dry red wine
- 1 cup beef broth
- 2 tablespoons Worcestershire sauce
- 2 tablespoons cornstarch
Instructions
- Prepare Pot Roast Seasoning: In a small bowl, thoroughly mix together the brown sugar, garlic powder, onion powder, dried oregano, dried thyme, dried parsley, coarse salt, and black pepper. Set this potent seasoning blend aside.
- Season the Roast: Generously sprinkle and rub the prepared seasoning mixture all over the boneless chuck pot roast. Ensure every side and crevice is well covered, as this seasoning is crucial for infusing deep flavor into the meat. Set the seasoned roast aside.
- Prepare Vegetables: Begin by finely chopping the small white onion. Cut off the green part of the leek and chop the white part into approximately 2-inch chunks. Chop the carrots and celery into similar-sized pieces for even cooking, and quarter the red potatoes. Keep the carrots, celery, and potatoes separate for later in the recipe.
- Sauté Aromatics: Turn on your Instant Pot’s sauté feature. Allow the pot to heat up, then add 2 tablespoons of olive oil. Once the olive oil is fragrant, add the smashed garlic cloves, chopped white onion, and leek. Sauté for 3-4 minutes, stirring occasionally, until the vegetables are fragrant and slightly softened.
- Remove Aromatics: Carefully remove the sautéed onions, leeks, and garlic from the Instant Pot using a slotted spoon, leaving the flavorful oil behind. Set these aromatics aside.
- Sear the Pot Roast: Add the remaining 2 tablespoons of olive oil to the Instant Pot, keeping the sauté feature on. Place the seasoned chuck roast in the hot pot and sear for 3-4 minutes on each side until a deep golden-brown crust forms. This step builds significant flavor.
- Remove Roast: Turn off the sauté feature and carefully remove the seared pot roast from the Instant Pot. Transfer it to a plate and set aside.
- Deglaze the Pot: Pour in the dry red wine, beef broth, and Worcestershire sauce. Use a wooden spoon to vigorously scrape all the browned bits (fond) from the bottom of the Instant Pot. This is a critical step to prevent a “burn notice” and to incorporate all the rich flavors into your gravy.
- Layer for Pressure Cooking: Add the reserved sautéed leek, onion, and garlic back into the Instant Pot, along with any leftover spices from the seasoning rub. Give it a quick stir. Place the seared pot roast directly on top of these vegetables.
- Pressure Cook Meat: Close the Instant Pot lid, ensuring it is properly secured, and turn the steam release valve to the “Sealing” position. Set the Instant Pot to “Manual” (or “Pressure Cook”) on “High Pressure” for 90 minutes. Please allow approximately 10-15 minutes for the Instant Pot to build pressure before the countdown begins.
- Quick Release Pressure: Once the timer goes off, carefully perform a “Quick Release” by turning the valve to “Venting” to release all the steam. Wait until the float valve drops before opening the lid.
- Remove Meat: Carefully remove the incredibly tender pot roast from the Instant Pot and place it on a large plate or baking sheet. Set it aside for shredding.
- Cook Remaining Veggies: Keep the flavorful liquid in the Instant Pot. Add the quartered red potatoes, chopped carrots, and chopped celery on top of the liquid.
- Pressure Cook Veggies: Close the Instant Pot lid and turn the valve to “Sealing.” Set the Instant Pot to “Manual” (or “Pressure Cook”) on “High Pressure” for just 2 minutes. Again, allow time for pressure to build before the countdown begins.
- Quick Release & Remove Veggies: After the timer sounds, perform another “Quick Release” to vent all the steam. Open the Instant Pot and carefully remove all the perfectly cooked vegetables.
- Thicken Gravy: Turn on the Instant Pot’s sauté feature. Sprinkle in 2 tablespoons of cornstarch into the simmering liquid. Use a whisk to continually whisk the cornstarch until it completely dissolves and the gravy thickens to your desired consistency. This process should take 3-5 minutes. Taste the gravy and adjust seasoning with additional salt and pepper as needed. Transfer the rich, thickened gravy to a serving jar or bowl.
- Shred Pot Roast: Using two forks, shred the cooked pot roast into large, desired chunks. Drizzle some of the rich, homemade gravy over the shredded beef to keep it moist and flavorful. Before serving, discard any larger pieces of unrendered fat.
- Serve: Serve the tender Instant Pot Pot Roast and cooked vegetables immediately, generously drizzled with the homemade gravy. Enjoy this ultimate comfort food!
Watch the Recipe Video
See this amazing Instant Pot Pot Roast come to life! This video guide will walk you through each step of the recipe, from seasoning the chuck roast to achieving that perfect homemade gravy, ensuring your success in the kitchen.
Video Title: Instant Pot Pot Roast
Description: Pot Roast lovers, this recipe is for you! It’s the most delicious and savory Instant Pot Pot Roast made with tons of veggies and a homemade gravy in just 2 hours.
Nutrition Information
Please note: Nutrition information is an estimate calculated automatically and should be considered an approximation. Individual results may vary based on exact ingredients and preparation methods.
- Calories: 447 kcal
- Carbohydrates: 37 g
- Protein: 28 g
- Fat: 19 g
- Fiber: 4 g
- Sugar: 8 g
Love this recipe? We’d be thrilled if you left a comment below to share your experience and tips with our community!
Don’t forget to tag your culinary creations on social media with the hashtag #fitfoodiefinds. We absolutely love seeing what you’re cooking up and sharing your delicious results!
More Delightful Roast Recipes to Explore
If you enjoyed preparing and savoring this incredible Instant Pot Pot Roast, you’ll surely love these other fantastic roast recipes from our extensive collection. Expand your repertoire and discover new family favorites:
- Instant Pot Pork Roast
- Slow Cooker Pork Roast
- Maple Tamari Pork Roast
More Incredible Beef Recipes to Try
Craving more delicious and satisfying beef dishes that are perfect for any occasion? Here are some fantastic recipes that are sure to please your palate and become regular features in your meal rotation:
- Instant Pot Beef Stroganoff
- Wild Rice Meatloaf
- Sous Vide Steak
- Mongolian Beef Flank Steak
- Instant Pot Beef and Broccoli