
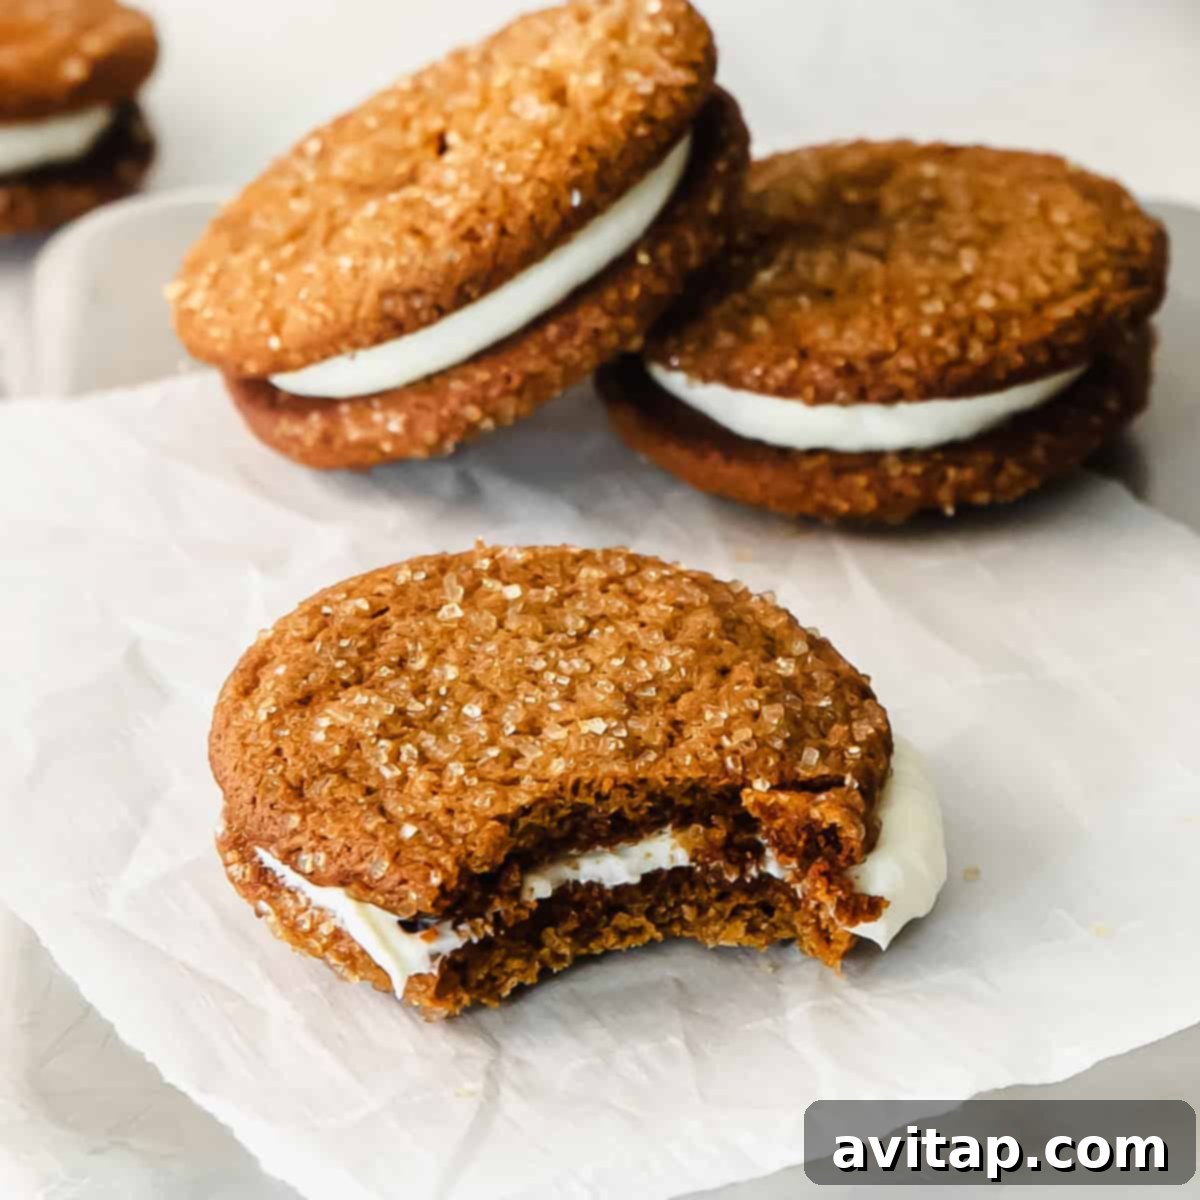
Ultimate Ginger Molasses Whoopie Pies: A Chewy & Creamy Holiday Delight
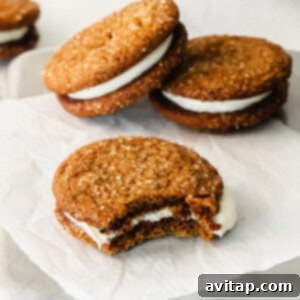
Prepare to fall in love with your new favorite cookie recipe: these incredible Ginger Molasses Whoopie Pies. Imagine perfectly spiced, soft, and chewy ginger cookies, embracing a generous swirl of luscious, fluffy cream cheese filling that’s absolutely divine. These delightful treats are more than just a dessert; they’re a celebration in every bite, making them ideal for any special occasion or a show-stopping addition to your Christmas cookie tin this holiday season.
If you’re looking to diversify your holiday baking collection or simply expand your repertoire of irresistible treats, don’t miss these other fantastic cookie recipes: our incredibly soft gingerbread cookies, elegantly simple maple sugar cookies, or these wonderfully delicious white chocolate cranberry oatmeal cookies. Each offers a unique flavor profile to perfectly complement your ginger molasses whoopie pies.
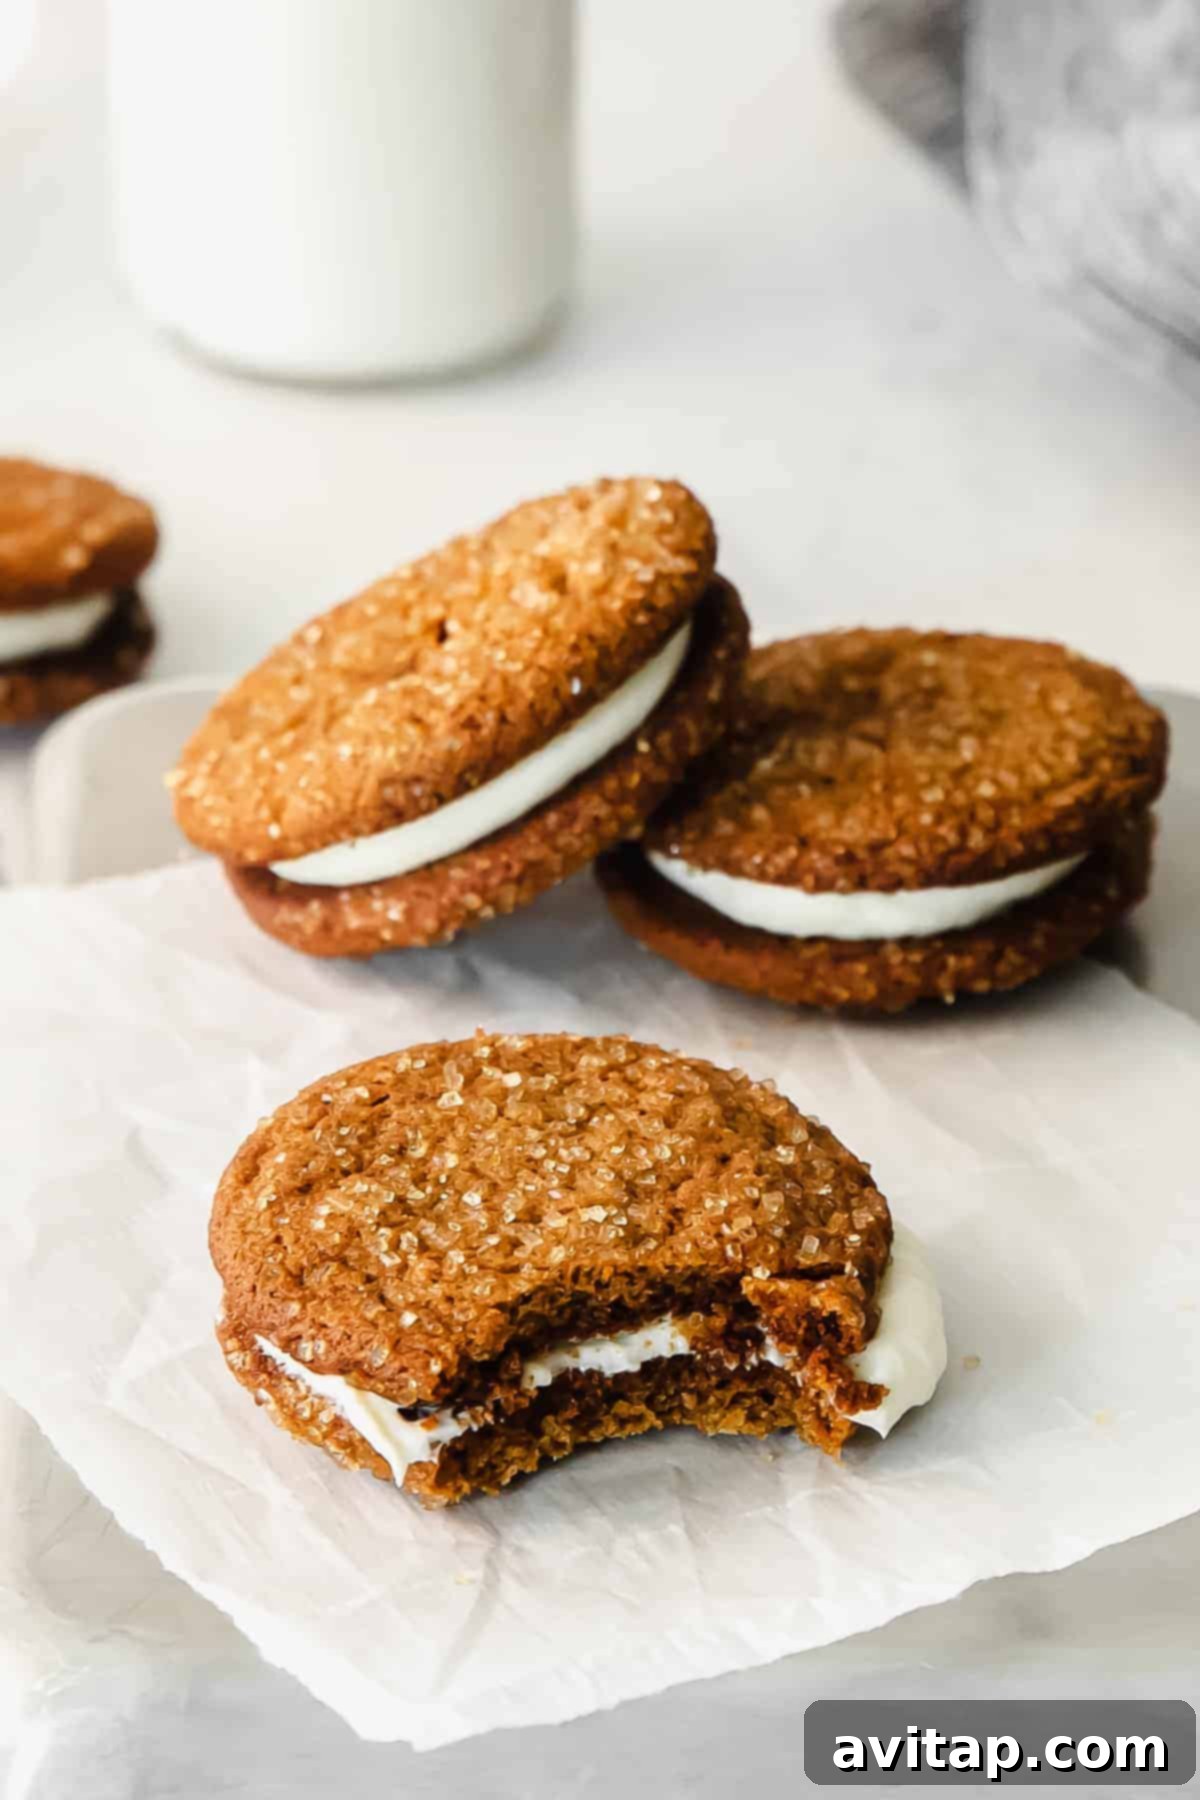
What Exactly is a Whoopie Pie? A Culinary Delight Explained
For many, the mention of “whoopie pie” instantly conjures fond childhood memories, often evoking images of school lunchboxes or cozy kitchen tables. Traditionally, a classic whoopie pie consists of two soft, often chocolate, cake-like cookies (or “rounds”) deliciously sandwiched around a sweet, pillowy marshmallow creme filling. Originating from New England and particularly popular in Pennsylvania Dutch country, these beloved dessert sandwiches boast a rich history and a timeless appeal, offering a delightfully portable and satisfying treat that’s both comforting and fun.
Our Ginger Molasses Whoopie Pies offer a sophisticated, “adult” twist on this nostalgic favorite, elevating the classic concept with a more refined flavor profile. We’ve replaced the traditional chocolate cookie with a rich, soft, and beautifully spiced ginger cookie, packed with the aromatic warmth of ginger, cinnamon, and cloves. This flavorful cookie is then perfectly complemented by an amazing, incredibly simple, yet decadent cream cheese frosting. This unique combination transforms the whoopie pie experience, making it a perfect indulgence for the holidays, an elegant addition to any dessert table, or a comforting treat to stash in your freezer for those moments when a sweet craving unexpectedly strikes.
Essential Baking Preparations: Smart Tips Before You Start
Successful baking, especially when embarking on a new recipe, often begins long before the ingredients hit the mixing bowl. A little thoughtful preparation can significantly smooth out your baking process, reduce stress, and ultimately lead to superior results. Here are some crucial tips and tricks to consider before you dive into making these delightful ginger molasses whoopie pies:
1. Read the Entire Recipe Thoroughly: This fundamental step cannot be overstated. Before you even think about grabbing your mixing bowls, take the time to read through every single instruction, from the ingredient list to the final assembly. Familiarize yourself with the ingredient quantities, specific mixing techniques, baking temperatures, and cooling times. This particular whoopie pie recipe, for instance, requires a crucial refrigeration period for the dough, which you’ll need to factor into your timeline. Understanding the entire process upfront prevents surprises, allows for proper planning, and ensures a stress-free baking adventure.
2. Practice “Mise en Place” – Measure All Ingredients in Advance: To minimize mistakes, maintain organization, and ensure a seamless workflow, adopt the French culinary practice of “mise en place” (meaning “everything in its place”). This involves measuring out all your ingredients—both wet and dry—before you even begin mixing. Imagine the frustration of being halfway through a delicate creaming process only to realize you forgot to grab the molasses or measure out your flour. Having everything portioned and ready to go eliminates frantic searching and ensures you can focus entirely on the mixing and baking steps.
3. Utilize an Electric Mixer for Optimal Texture: While it might be tempting to tackle these cookies by hand, an electric mixer is highly recommended for achieving the best results. Whether you use a powerful stand mixer with a paddle attachment or a robust handheld electric mixer, mechanical assistance will make the process significantly easier and yield superior textures. The crucial step of creaming butter and sugar to the desired light and fluffy consistency, which incorporates essential air into the dough, is far more efficient and effective with a mixer. Attempting this by hand will not only take considerably longer but may also fail to achieve the ideal airy texture, potentially resulting in denser cookies.
4. Ensure Your Cookie Dough Butter is Cold: Pay close attention to this specific instruction! Unlike many cookie recipes that call for room temperature butter, this ginger whoopie pie recipe explicitly requires *cold butter* for the cookie dough. This is a deliberate and important choice that directly influences the final texture of your cookies. Cold butter melts more slowly in the oven, creating pockets of steam that help the cookies rise and spread just enough, leading to those desirable crispy edges and a wonderfully chewy interior. Substituting with softened butter for the cookie dough will alter the texture, resulting in flatter, more uniformly spread cookies rather than the desired thick and chewy rounds.
5. Prepare Your Baking Sheets Prior to Mixing: Before you even begin the first mixing step, ensure your baking sheets are ready for action. Line them neatly with parchment paper for effortless release and simplified cleanup. Alternatively, you can spray them generously with a high-quality nonstick cooking spray. This simple preparatory step ensures that your precious cookies won’t stick, making the transfer to a cooling rack a smooth and easy process.
6. Invest in an Oven Thermometer for Accuracy: It’s a common misconception that oven dials are perfectly accurate. In reality, oven temperatures can fluctuate wildly, often differing by as much as 25-50°F from what the display indicates. Your oven’s “350°F” might be significantly different from ours. An inexpensive, reliable oven thermometer, placed inside your oven, will provide an accurate reading, allowing you to calibrate your oven dial to ensure it truly reaches and maintains the precise target temperature. This accuracy is paramount for consistent baking results, preventing scenarios of under-baked, raw-centered cookies or over-baked, dry, and brittle ones. This is the specific oven thermometer we personally use and highly recommend for its reliability.
7. Cultivate Patience Throughout the Process: Baking is often described as a meticulous blend of science and art, and patience stands as a core ingredient in achieving perfection. Avoid rushing through any step. Be patient while creaming the sugar and butter until they genuinely transform into a light and fluffy mixture. Allow the cookie dough sufficient time to firm up in the refrigerator – this step, as detailed later, is crucial for preventing excessive spread and enhancing flavor. Diligently following all instructions and allowing each stage its proper time will consistently reward you with the best possible cookies, achieving that exquisite balance of flavor and texture you crave.
8. Gather Your Piping Tools (Highly Recommended): While a simple zip-top bag with a corner snipped off can certainly work in a pinch for piping the cream cheese filling, utilizing proper piping bags and tips will significantly streamline the assembly process. It leads to a much neater application and a more professional, aesthetically pleasing finish. If you’re aiming for beautifully uniform whoopie pies with elegantly swirled or consistently smooth frosting, investing in a simple piping kit is an excellent choice. It enhances both the ease of application and the overall presentation of your finished treats.
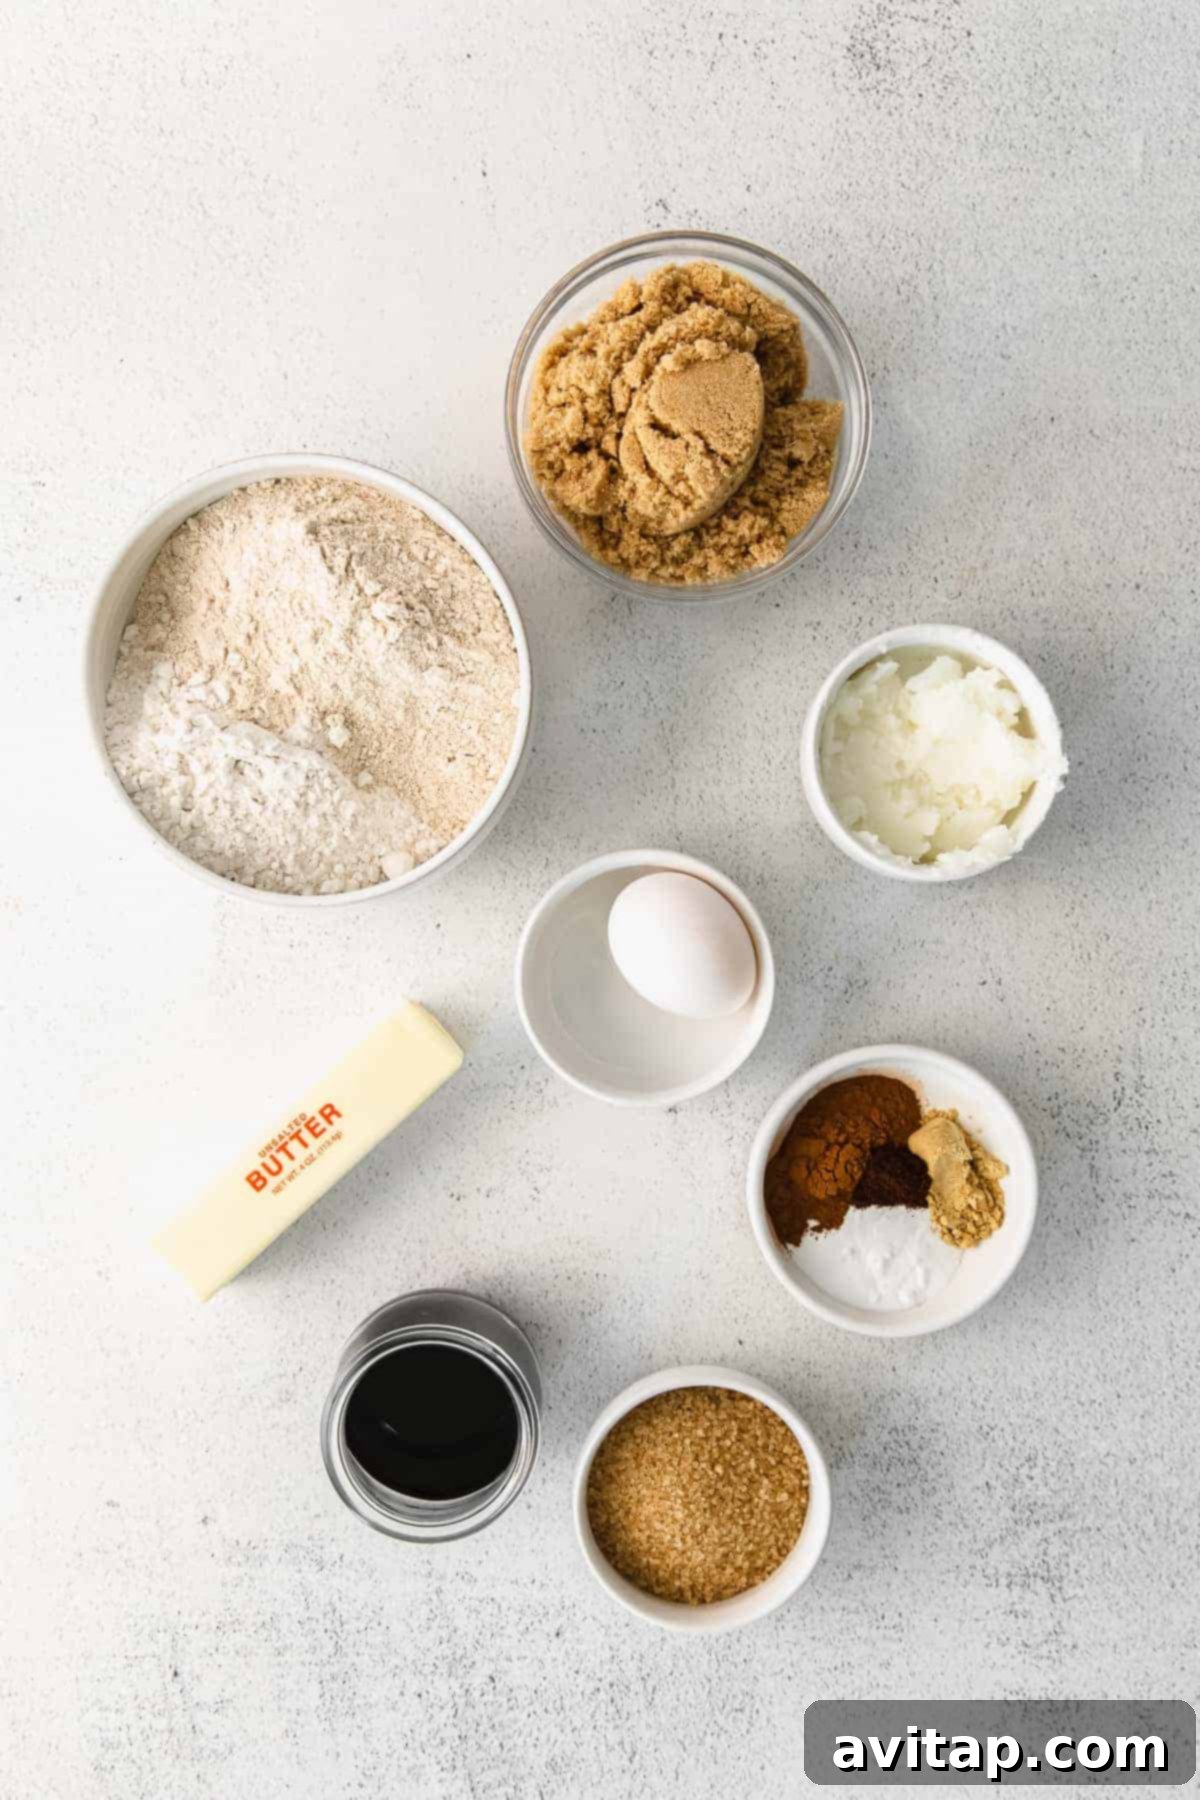
Key Ingredients for Crafting the Perfect Chewy Ginger Cookies
Baking, even more so than cooking, demands precision and the freshest, highest-quality ingredients. Each component plays a vital role in the delicate chemistry that produces a truly exceptional cookie. Here’s a detailed breakdown of the main ingredients crucial for crafting the foundational ginger cookie components of your whoopie pies, along with insights into their specific role in achieving that perfect chewy texture and intensely spicy flavor:
- Flour Blend (All-Purpose and White Whole Wheat): We’ve thoughtfully chosen a unique blend of all-purpose flour and white whole wheat flour for this recipe. This combination strikes an ideal balance: the all-purpose flour provides the necessary structure for a sturdy cookie that holds its shape, while the white whole wheat flour contributes to an incredibly soft, tender, and distinctly chewy texture. Additionally, the white whole wheat flour adds a subtle nutty depth of flavor and a touch more fiber, all without making the cookies dense or heavy. This blend ensures a robust yet tender cookie base.
- Aromatic Spices (Ground Cloves, Cinnamon, Ginger): The very heart and soul of these ginger whoopie pies reside in their generous and carefully balanced spice blend. We haven’t held back on the ground cloves, cinnamon, and, of course, ginger, and neither should you! This potent and aromatic trifecta delivers that quintessential warm, intensely fragrant, and slightly peppery ginger flavor that makes these cookies so utterly irresistible. Each bite will be a delightful burst of comforting, festive spices, truly embodying the spirit and warmth of a holiday treat.
- Butter: Every truly delicious and decadent cookie owes much of its richness and tender crumb to butter. This recipe calls for a full stick (½ cup) to ensure a luxurious mouthfeel and incredible flavor development. Crucially, when used cold in the cookie dough, butter helps create those desirable crispy edges and contributes significantly to the deeply satisfying chewy center by melting slowly and creating steam pockets.
- Coconut Oil: To introduce another nuanced layer of flavor and subtly enhance the texture, we’ve innovatively swapped out a portion of the butter for coconut oil. This thoughtful substitution introduces a delightful, subtle nuttiness that beautifully complements the robust ginger and rich molasses. It adds complexity to the cookie’s taste profile without overpowering the main spice notes. Ensure your coconut oil is softened to a creamy consistency, but not fully melted into a liquid, for proper incorporation into the dough.
- Brown Sugar (Light, Packed): We specifically utilize light brown sugar in these cookies for its inherent moisture content and its rich, subtle caramel notes. These attributes pair perfectly with the deep flavor of molasses and the warmth of the spices. Brown sugar is key to keeping the cookies wonderfully soft and delightfully chewy, preventing them from becoming dry or crumbly. For those who enjoy experimenting, we’ve successfully tested a version using a 1:1 ratio of light brown sugar and coconut sugar, which also yields excellent results, offering a slightly deeper, less overtly sweet complexity.
- Egg (Large): The large egg is an absolutely indispensable ingredient in this recipe, serving multiple critical functions. Unfortunately, we do not recommend skipping it or attempting a flax egg substitute, as its role is too vital. The egg is crucial for binding all the ingredients together, contributing significantly to the dough’s overall structure, and playing a key role in creating that signature crackly top and wonderfully soft, perfectly chewy interior that defines these exceptional whoopie pies.
- Molasses (Dark or Unsulphured): A mere ¼ cup of molasses goes a surprisingly long way in delivering the signature deep, rich, and slightly smoky sweetness that is absolutely essential to classic ginger molasses cookies. This relatively small amount is precisely what’s needed to impart that unmistakable spicy flavor profile and contribute significantly to the cookies’ characteristic chewy texture and beautiful, appealing dark color. It truly is the secret ingredient that gives these whoopie pies their profound depth and warmth.
- Turbinado Sugar (for rolling): While optional, rolling the cookie dough balls in turbinado sugar provides an exquisite finishing touch. These larger sugar crystals add a delightful textural crunch to the exterior of the baked cookies and a beautiful, sparkling visual appeal, making each whoopie pie even more enticing.
The Four-Ingredient Secret to Irresistible Whoopie Pie Filling
While the spiced ginger cookies form the delectable foundation, it’s the creamy, tangy filling that truly elevates these treats into exceptional whoopie pies. This incredibly simple yet decadent filling requires only four key ingredients, each playing a vital role in achieving its perfect cloud-like texture and bright, balanced flavor:
- Softened Butter (Unsalted): For a flawlessly smooth, airy, and lump-free filling, it is absolutely essential that your unsalted butter is properly softened to true room temperature. If your butter is too cold or hard, you’ll inevitably end up with a clumpy, uneven frosting that lacks the desired lightness. Properly softened butter creams beautifully, readily incorporating air to create a light, voluminous, and airy base for the entire filling.
- Powdered Sugar (Confectioners’ Sugar), Sifted: We exclusively use powdered sugar for this filling, and for good reason. Its incredibly finely milled texture dissolves instantly into the butter and cream cheese, ensuring a silky-smooth, melt-in-your-mouth frosting without any hint of grittiness that granulated sugar might leave behind. It provides the necessary sweetness and contributes to the perfect, stable structure of the filling. Sifting it ensures no lumps remain.
- Softened Cream Cheese (Full-Fat): Oh, baby, this is truly where the magic happens and what sets this whoopie pie apart! Softened, full-fat cream cheese is the undisputed star of this filling, lending a wonderful, irresistible tangy complexity and an unparalleled creamy richness. It perfectly balances the sweetness of the cookies and powdered sugar, creating a sophisticated and utterly addictive flavor profile that cuts through the spice of the cookies. Do not skimp on the cream cheese, and it is crucial that it is at proper room temperature for the best, lump-free, fluffy results.
- Pure Vanilla Extract: For the most authentic, vibrant, and aromatic flavor, we strongly recommend using high-quality pure vanilla extract over imitation vanilla. The deep, warm, and comforting notes of pure vanilla enhance and round out all the other flavors in the filling, adding a touch of elegance and sophistication. For an extra touch of gourmet luxury and a stunning visual, consider scraping the fragrant seeds from one vanilla bean instead – it will infuse your filling with an intense, natural vanilla aroma and delicate, beautiful speckles.
Step-by-Step Guide to Making Perfect Ginger Molasses Whoopie Pies
Creating these delightful ginger molasses whoopie pies is a straightforward and enjoyable process, but paying careful attention to each step will ensure you achieve the best possible texture and flavor for both the cookies and the luscious filling. Follow these instructions closely for a truly rewarding baking experience!
Part 1: Crafting the Chewy Ginger Cookies
- Prepare Your Baking Sheet and Preheat Oven: Begin by lining a large baking sheet with parchment paper to prevent sticking and ensure easy cleanup. Alternatively, spray it generously with a good quality nonstick baking spray. Preheat your oven to 350ºF (175ºC), allowing it ample time to fully reach and stabilize at the correct temperature (referencing an oven thermometer here is highly beneficial!).
- Whisk Dry Ingredients Thoroughly: In a medium-sized bowl, combine the white whole wheat flour, all-purpose flour, baking soda, ground cinnamon, ground ginger, ground cloves, and salt. Whisk these dry ingredients together thoroughly for at least 30 seconds until they are completely combined and there are no visible clumps of baking powder or concentrated spices. This ensures even distribution of leavening and flavor throughout every cookie. Set this bowl aside for later use.
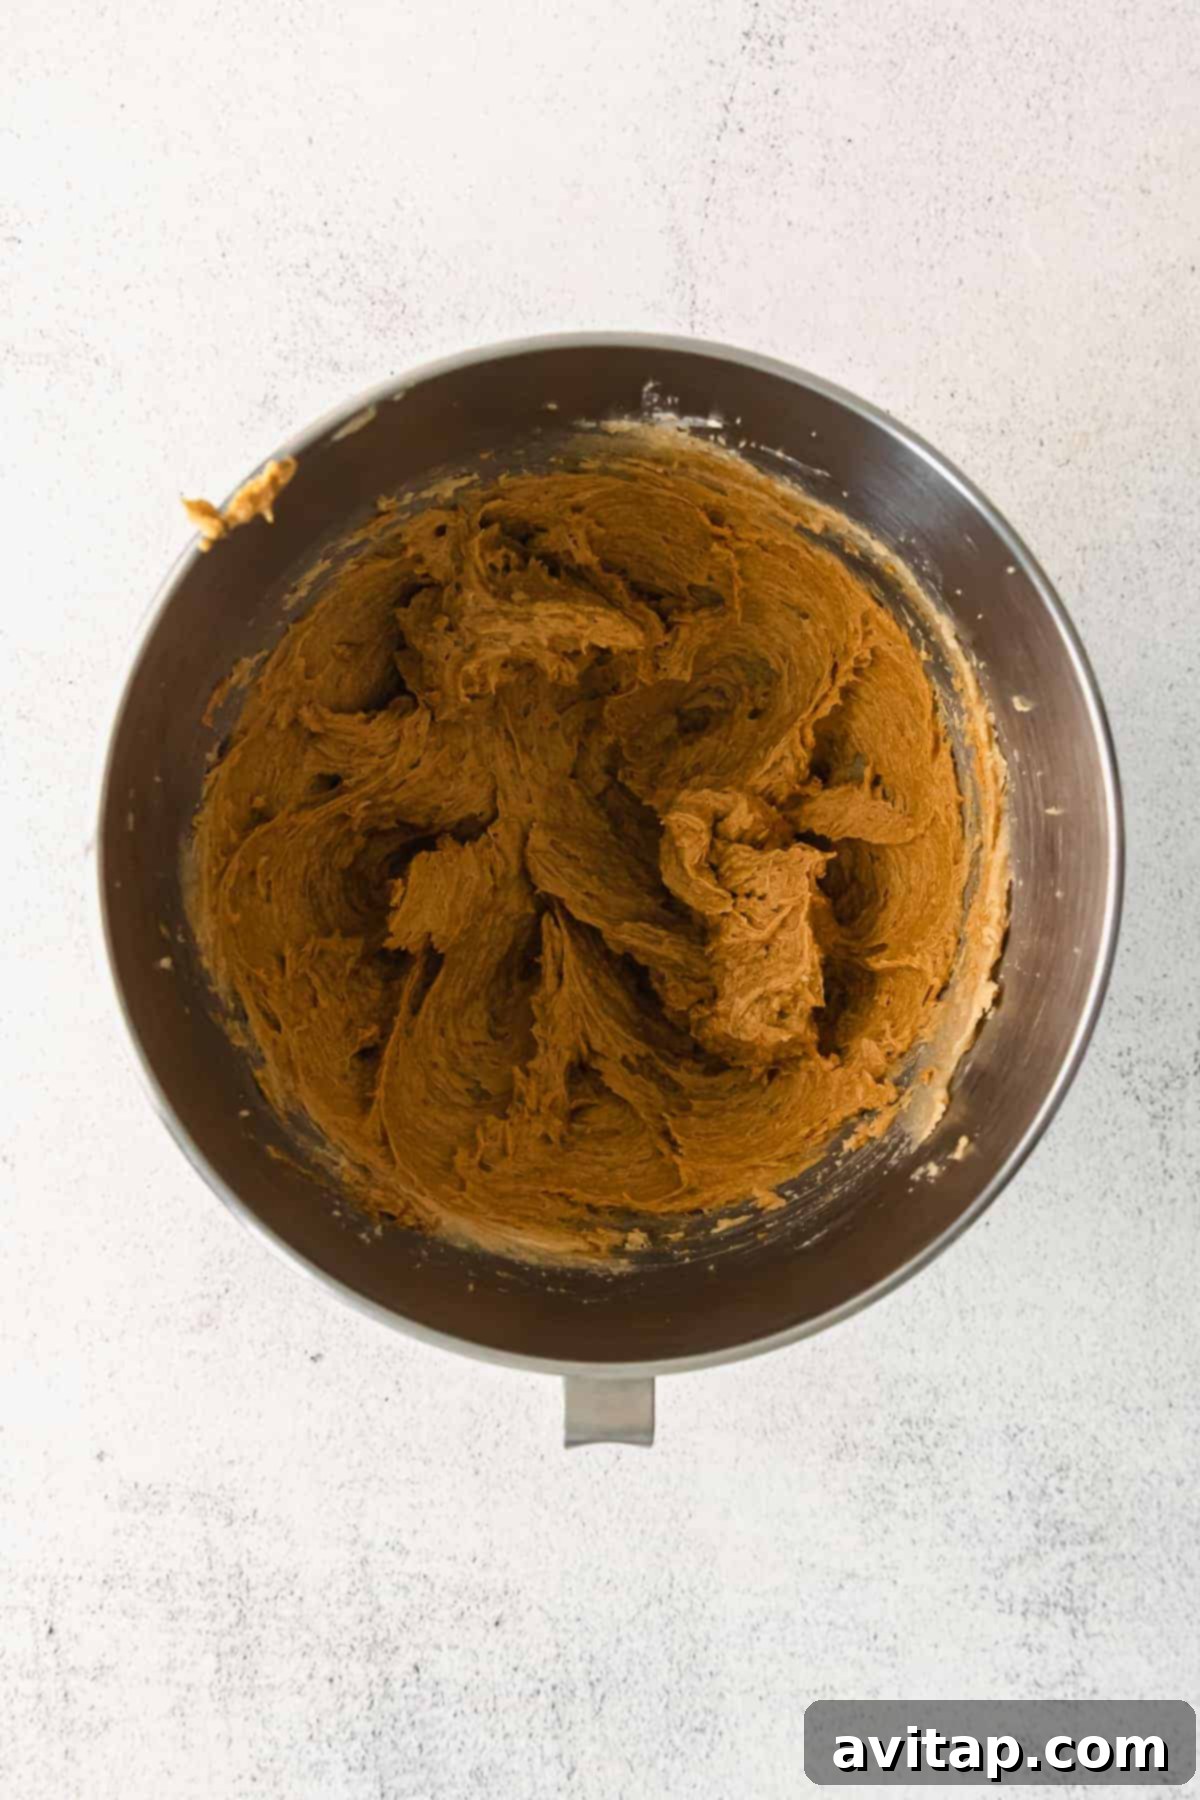
- Cream Butter, Sugar, and Coconut Oil: Add the light brown sugar (packed), the cold cubed butter, and the softened (but not melted) coconut oil to the bowl of a stand mixer fitted with the paddle attachment. Begin creaming these ingredients together on medium speed. This step is absolutely crucial: continue to beat them until the mixture becomes visibly light, fluffy, and notably pale in color. This typically takes about 3 minutes of continuous creaming. This intensive mixing process incorporates vital air into the mixture, which contributes significantly to the cookies’ final tender and airy texture. Be patient and allow sufficient time for thorough creaming, as this is a key factor in the success of your cookies.
- Incorporate Molasses and Egg: Once the butter and sugar mixture has achieved that ideal light and fluffy consistency, pause the mixer and use a spatula to scrape down the sides of the bowl. This ensures all ingredients are well combined. Then, slowly add the molasses and the large egg to the creamed mixture. Mix on low speed until they are just fully incorporated, again scraping down the sides as needed to ensure no pockets of unmixed ingredients remain.
- Gradually Add Dry Ingredients: With your mixer on its lowest speed, gradually add the whisked dry ingredients (from step 2) into the wet mixture. Mix just until the dry ingredients are fully incorporated and no streaks of flour are visible. It’s important not to overmix the dough at this stage, as excessive mixing can develop the gluten too much, leading to tougher cookies. The dough will be quite thick; this is the correct consistency. Don’t forget to scrape down the sides and bottom of the bowl one last time to ensure everything is perfectly and evenly combined.
- Chill the Dough: Remove the thick cookie dough from the stand mixer bowl. Gather it into a cohesive ball, wrap it tightly in plastic wrap, and place it in the refrigerator for a minimum of 30 minutes. This chilling period is absolutely essential for the dough’s structure; it allows the butter to firm up and the flour to fully hydrate, which prevents the cookies from spreading too much during baking, ensuring they maintain a desirable thickness. For an even chewier cookie with deeper, more complex flavors, consider chilling the dough overnight (8-12 hours).
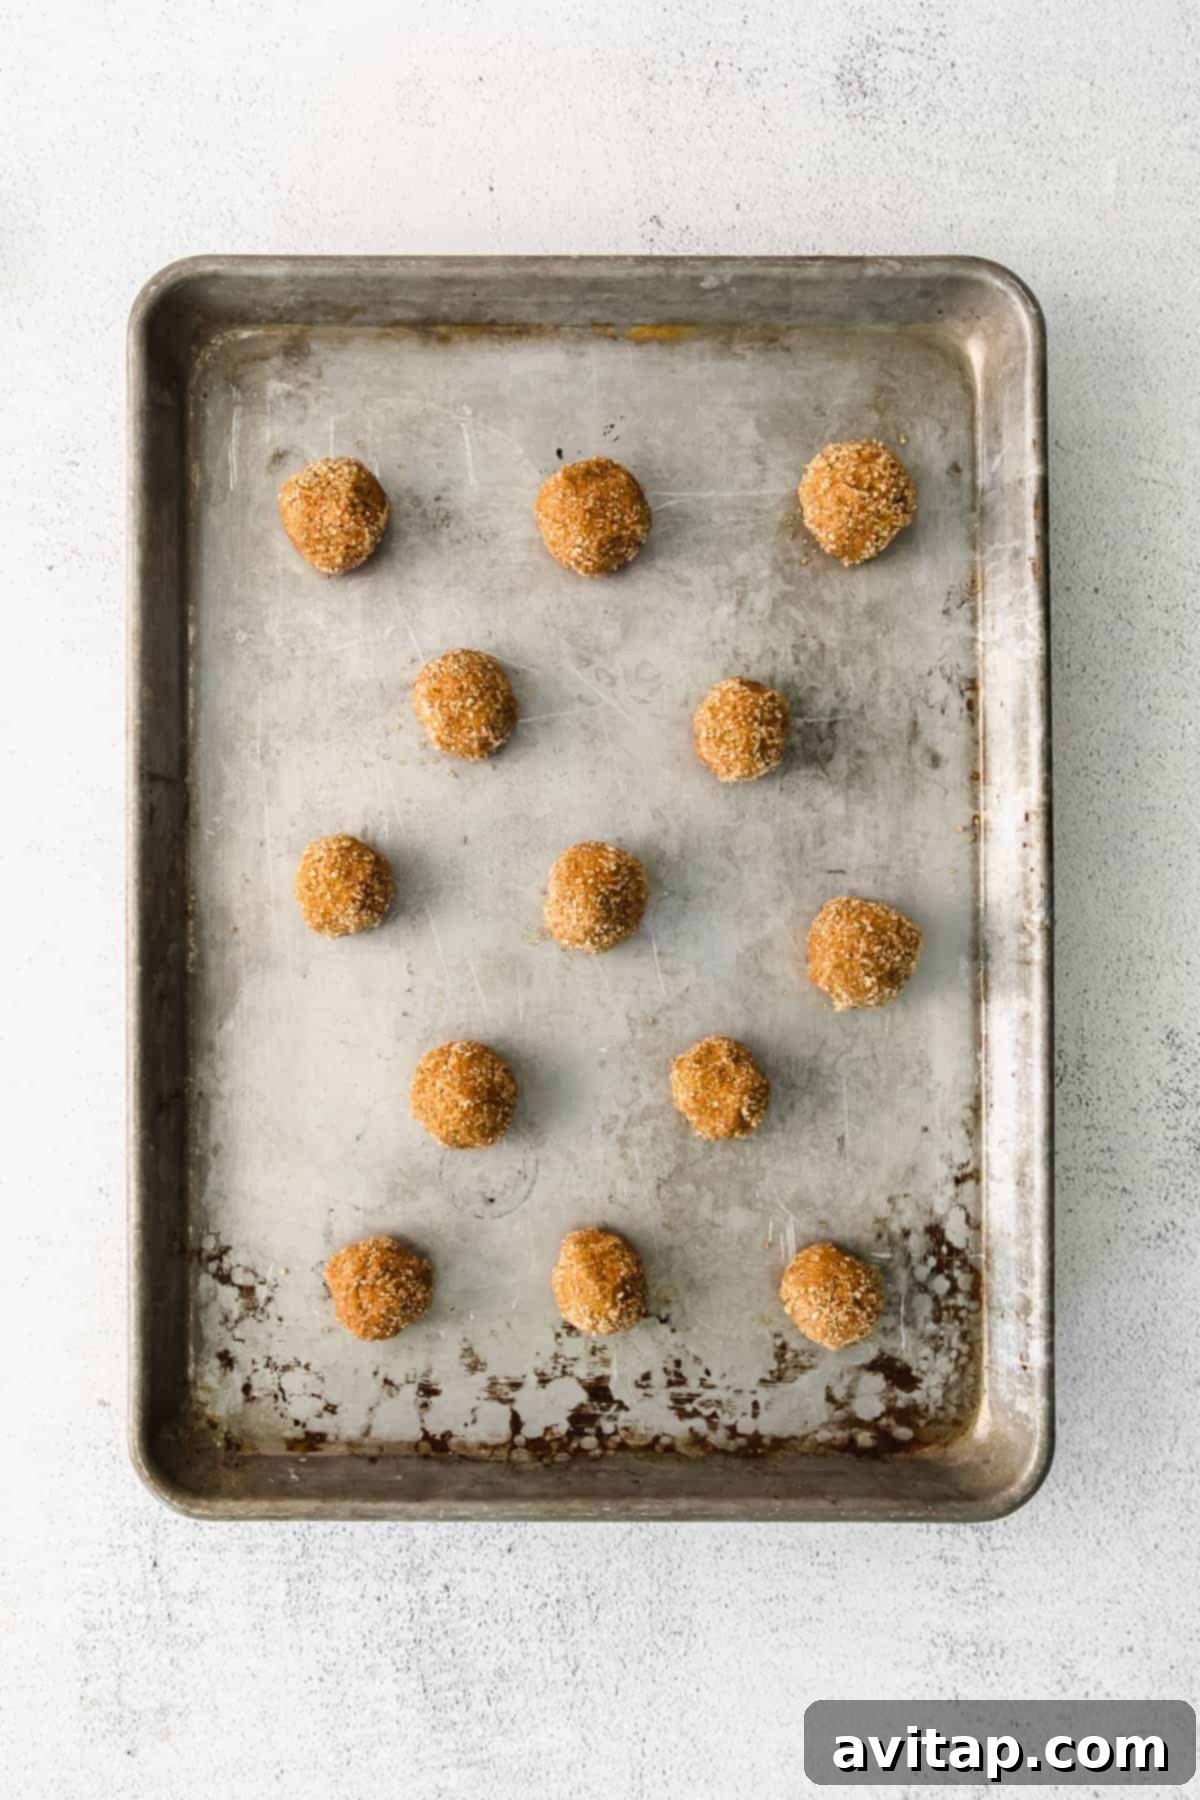
- Form Cookies and Coat in Sugar: Once the dough is sufficiently chilled and firm, use a tablespoon-sized cookie scoop to portion out the dough. Roll each scoop into a neat, smooth ball between your palms. For a delightful textural contrast—a subtle crunchy exterior and a beautiful sparkling appearance—roll each cookie dough ball generously in turbinado sugar, ensuring it’s evenly coated on all sides.
- Arrange on Baking Sheet: Carefully place the sugared cookie dough balls onto your prepared baking sheet. It is crucial to leave at least 2 to 3 inches of space between each cookie. This allows them enough room to spread properly during baking without merging into one giant, misshapen cookie. Do not overcrowd the baking sheet.
- Bake to Perfection: Transfer the baking sheet to your preheated oven. Bake the cookies for approximately 9-11 minutes. Keep a close eye on them towards the end of the baking time; they should be lightly golden at the edges and appear set in the center. Avoid the temptation to overbake, as this will result in dry, crumbly cookies rather than the desired chewy texture.
- Cool Completely: Once baked, carefully remove the cookies from the oven. Let them rest on the hot baking sheet for about 3 minutes. This crucial resting period allows them to firm up slightly before you attempt to move them. After 3 minutes, gently transfer the cookies to a wire rack using a spatula to cool completely to room temperature. It is absolutely vital that the cookies are entirely cool before you proceed to add the filling; otherwise, the warmth will cause the cream cheese filling to melt and slide off, creating a messy situation.
The Science Behind Chilling Cookie Dough: Why It’s a Must
Chilling cookie dough is a frequently recommended step in countless baking recipes, and for very good reason! When it comes to making exceptional whoopie pies, refrigerating the dough serves several vital purposes that directly and profoundly impact the final quality, texture, and flavor of your cookies:
Firstly, chilling the dough significantly prevents the cookies from overspreading and becoming disappointingly thin, flat, and crispy (like a thin crisp) rather than deliciously soft and chewy. When the cookie dough is cold, the butter within it solidifies. As these colder, firmer dough balls encounter the intense heat of the hot oven, the butter melts much more slowly. This controlled, gradual melting process reduces how quickly the cookies spread across the baking sheet, allowing the edges to set and the center to cook through more evenly. The result is a thicker, more robust, and ultimately chewier cookie with a far more desirable and satisfying texture.
Secondly, if you have the foresight and patience, refrigerating your dough overnight (or for an extended period of several hours) allows a crucial process to occur: the flour in the cookie dough fully hydrates. This process, often referred to as hydration, results in a more evenly textured dough and, crucially, contributes to an incredibly moist and wonderfully chewy cookie. Furthermore, during this chilling period, the flavors within the dough have a chance to meld, deepen, and concentrate, leading to a more complex, nuanced, and ultimately more delicious final product. It’s a seemingly small, simple step that yields surprisingly significant rewards in terms of both texture and flavor development.
Crafting the Dreamy Cream Cheese Whoopie Pie Filling
While your perfectly spiced ginger cookies are cooling to room temperature—a crucial step for proper assembly—it’s the ideal moment to whip up the luxurious cream cheese filling. This filling is incredibly quick and easy to make, and its tangy sweetness provides the perfect counterpoint to the warm, vibrant spices of the cookies, creating a harmonious flavor experience.
To prepare your whoopie pie filling, ensure you have your stand mixer (or a powerful handheld electric mixer) ready, fitted with the paddle attachment. Begin by adding the fully softened, room-temperature butter to a large mixing bowl. Beat the butter on medium speed for about 30 seconds, or until it becomes noticeably lighter in color, significantly fluffier, and appears aerated. This initial beating process is essential for creating a light and airy base for the filling.
Next, with the mixer set to a low speed, gradually add the sifted powdered sugar, a little at a time, allowing it to fully incorporate into the butter. This slow addition prevents a cloud of sugar from erupting in your kitchen. Once all the powdered sugar has been added and absorbed, increase the mixer speed to medium and continue beating for another 30 seconds, until the mixture is visibly light and fluffy again. At this point, it should be smooth, free of any lumps, and have a wonderfully uniform consistency.
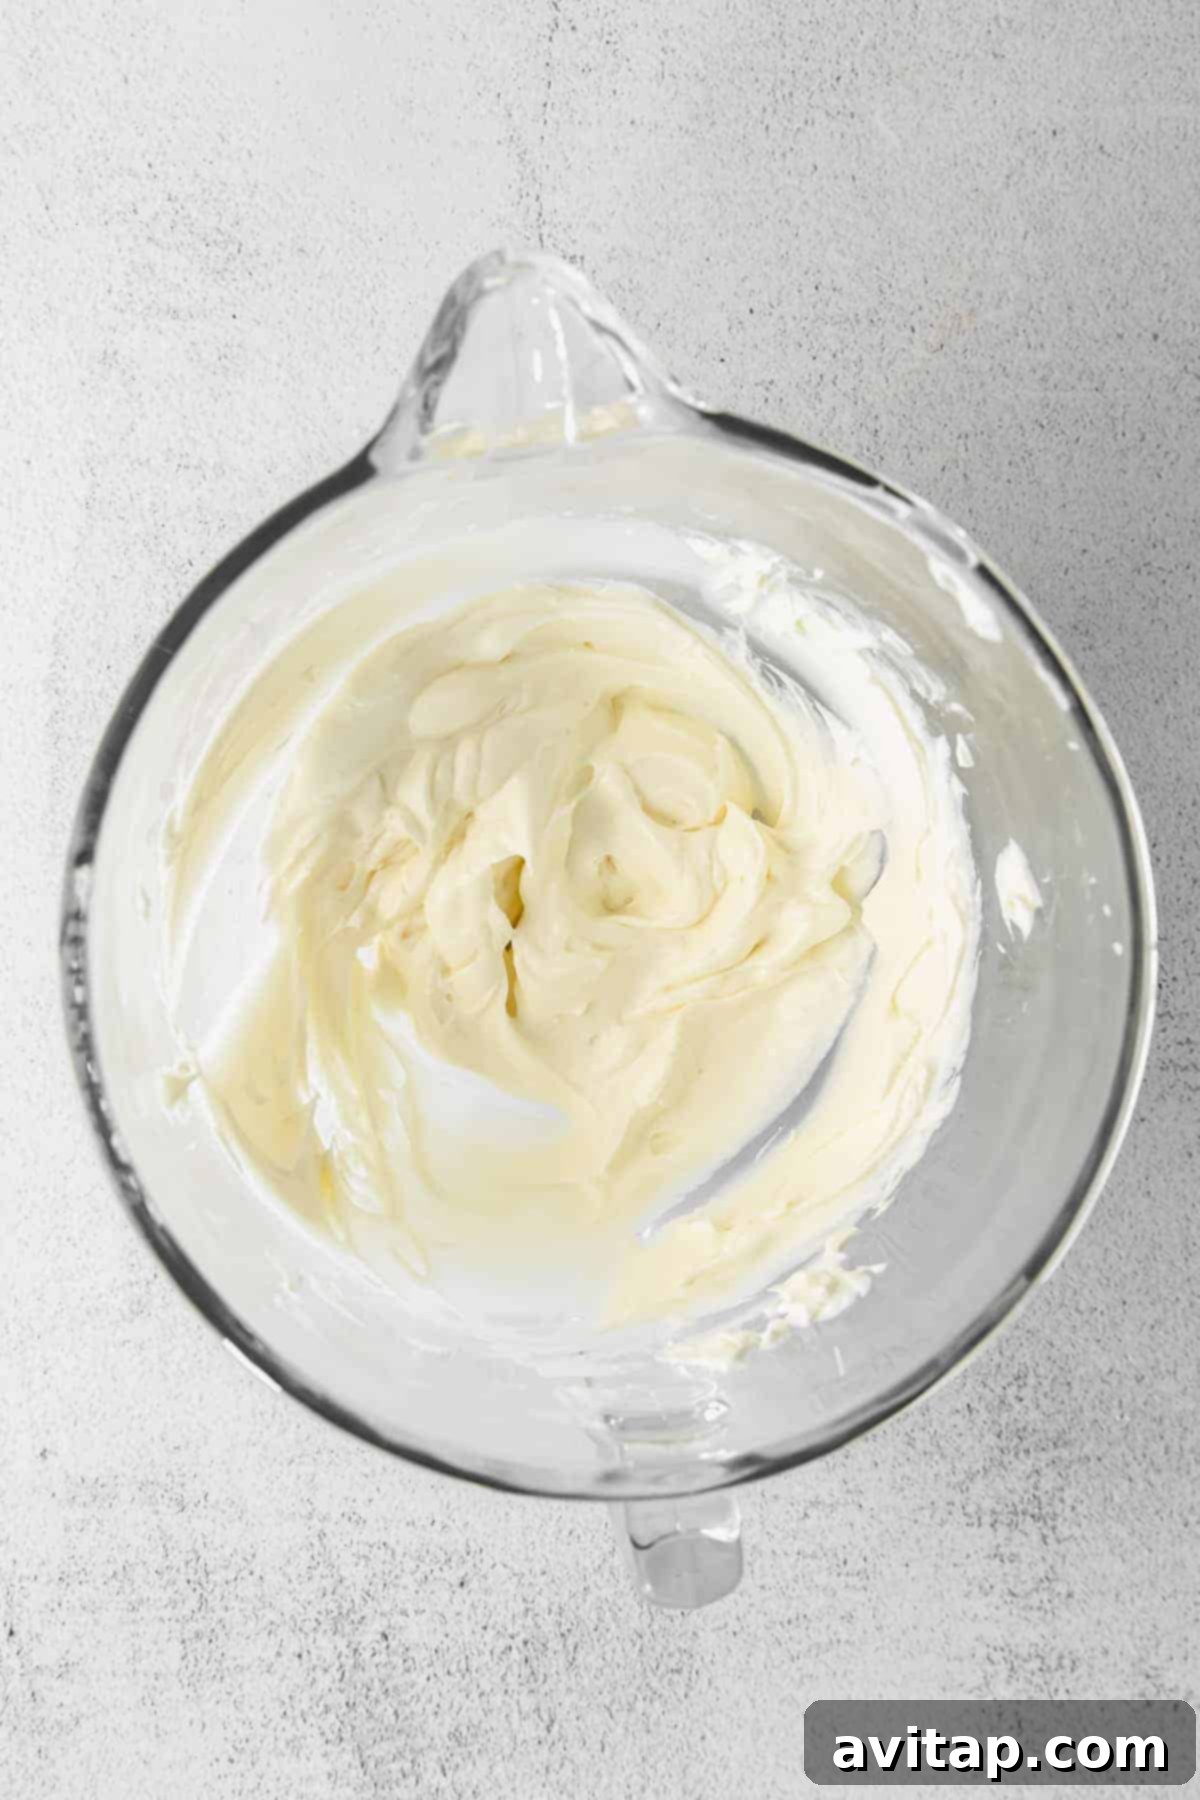
FINALLY, and this is the key to that incredible, signature tangy flavor, add the fully softened cream cheese and the pure vanilla extract. Beat the entire mixture one last time on medium-high speed for about 1-2 minutes. During this final beating, make sure to stop occasionally and meticulously scrape down the sides and bottom of the bowl with a rubber spatula. This ensures all ingredients are perfectly blended and that your frosting achieves that truly exquisite, cloud-like, incredibly fluffy, and smooth texture. You’ll know it’s ready when it’s light, airy, and utterly irresistible – truly as fluffy as the clouds themselves!
Assembling Your Masterpiece: The Ginger Molasses Whoopie Pies
With both your perfectly baked and completely cooled ginger cookies and your dreamy, fluffy cream cheese filling ready and waiting, it’s time for the most satisfying and final step: assembly! This is where your individual cookie rounds transform into magnificent, cohesive whoopie pies, ready to delight.
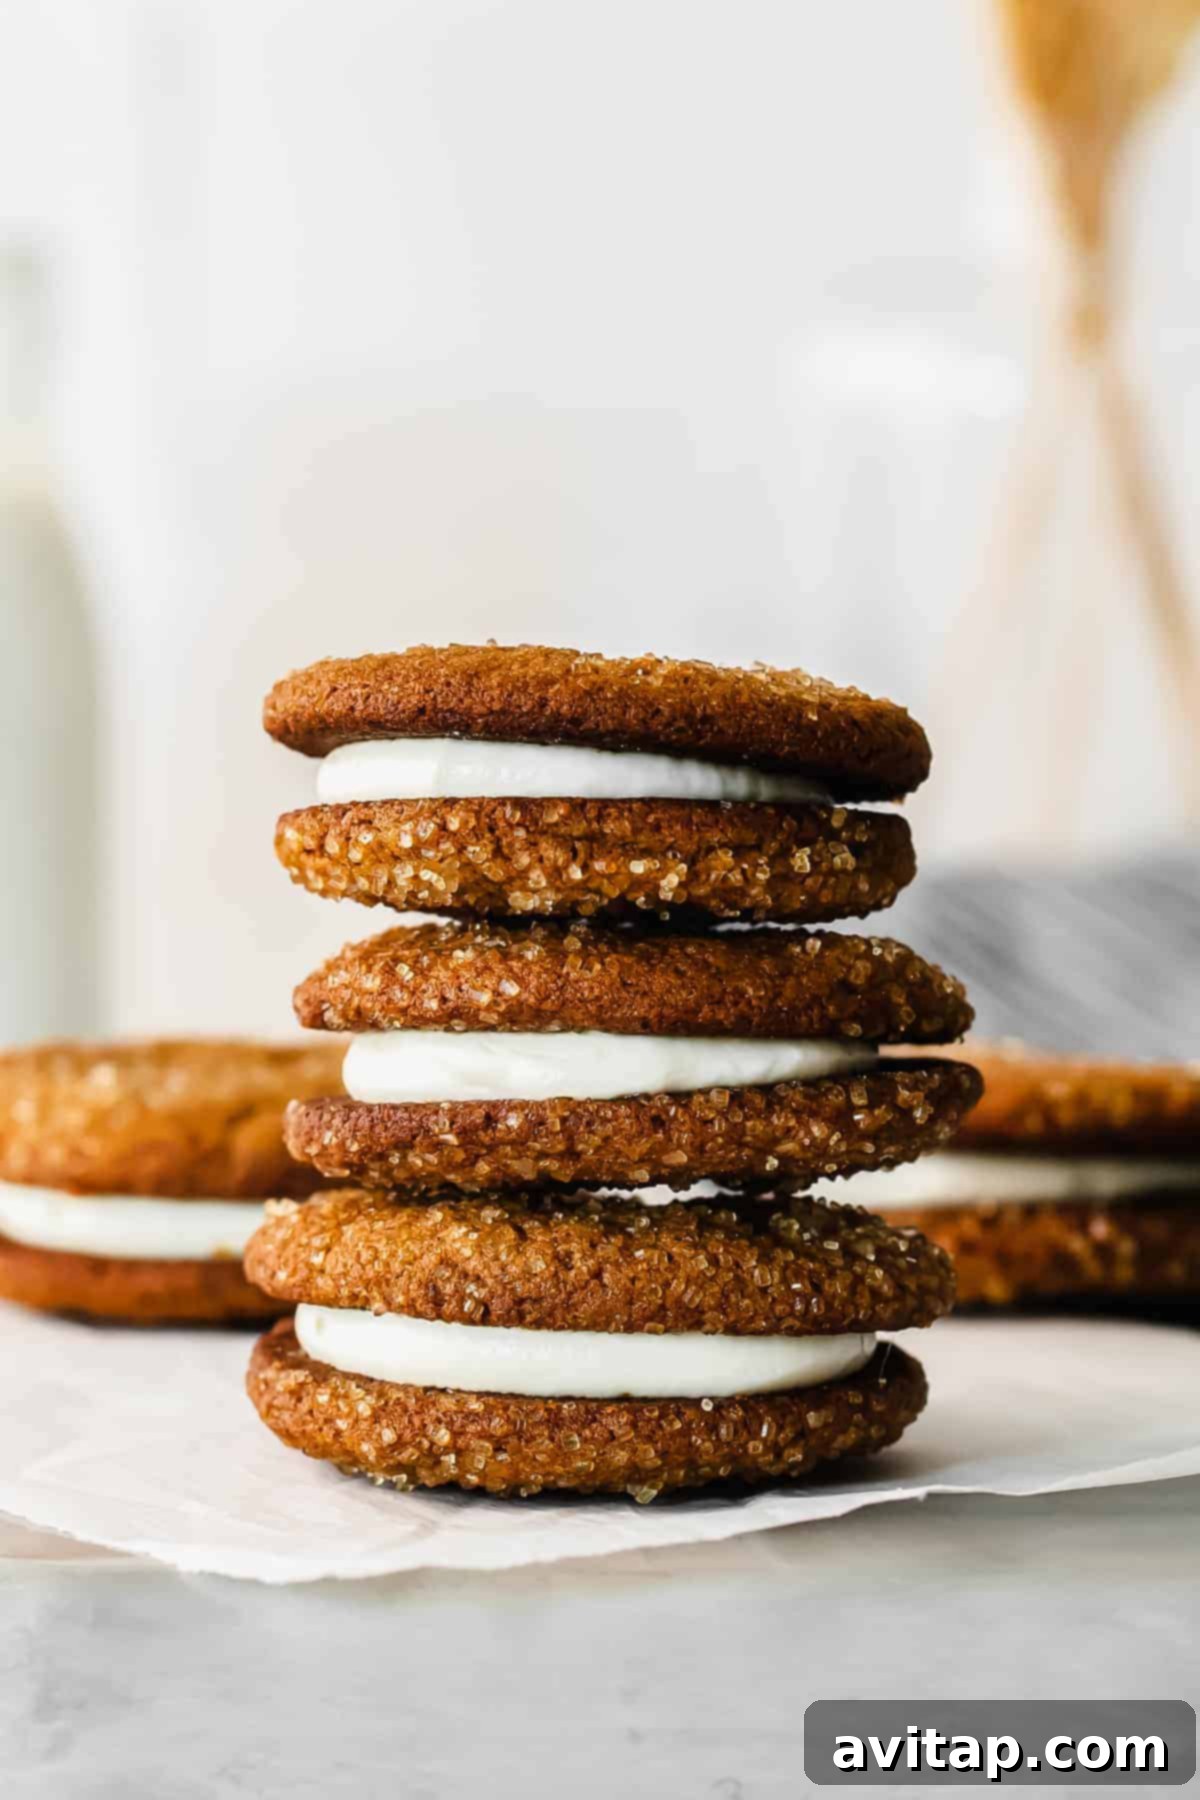
- Pair and Prepare for Filling: Carefully examine your completely cooled ginger cookies and arrange them into pairs of similar sizes. Matching them up ensures a uniform and appealing look for your finished whoopie pies. Take one cookie from a matched pair and, using a piping bag (fitted with a large round or star tip for a decorative touch) or simply a clean spoon, dollop a generous amount of cream cheese filling onto its flat underside. Aim for a mound of filling that is slightly smaller in diameter than the cookie itself, allowing for a gentle spread.
- Gently Top and Squeeze: Carefully place the flat side of the matching second cookie on top of the filling-covered cookie. Apply a light, even pressure, gently squeezing the cookies together. Continue pressing until the filling softly spreads to the edges, creating a delightful and even ring of creamy goodness around the circumference of the whoopie pie. Be mindful not to press too hard, as this can cause the filling to ooze out excessively from the sides.
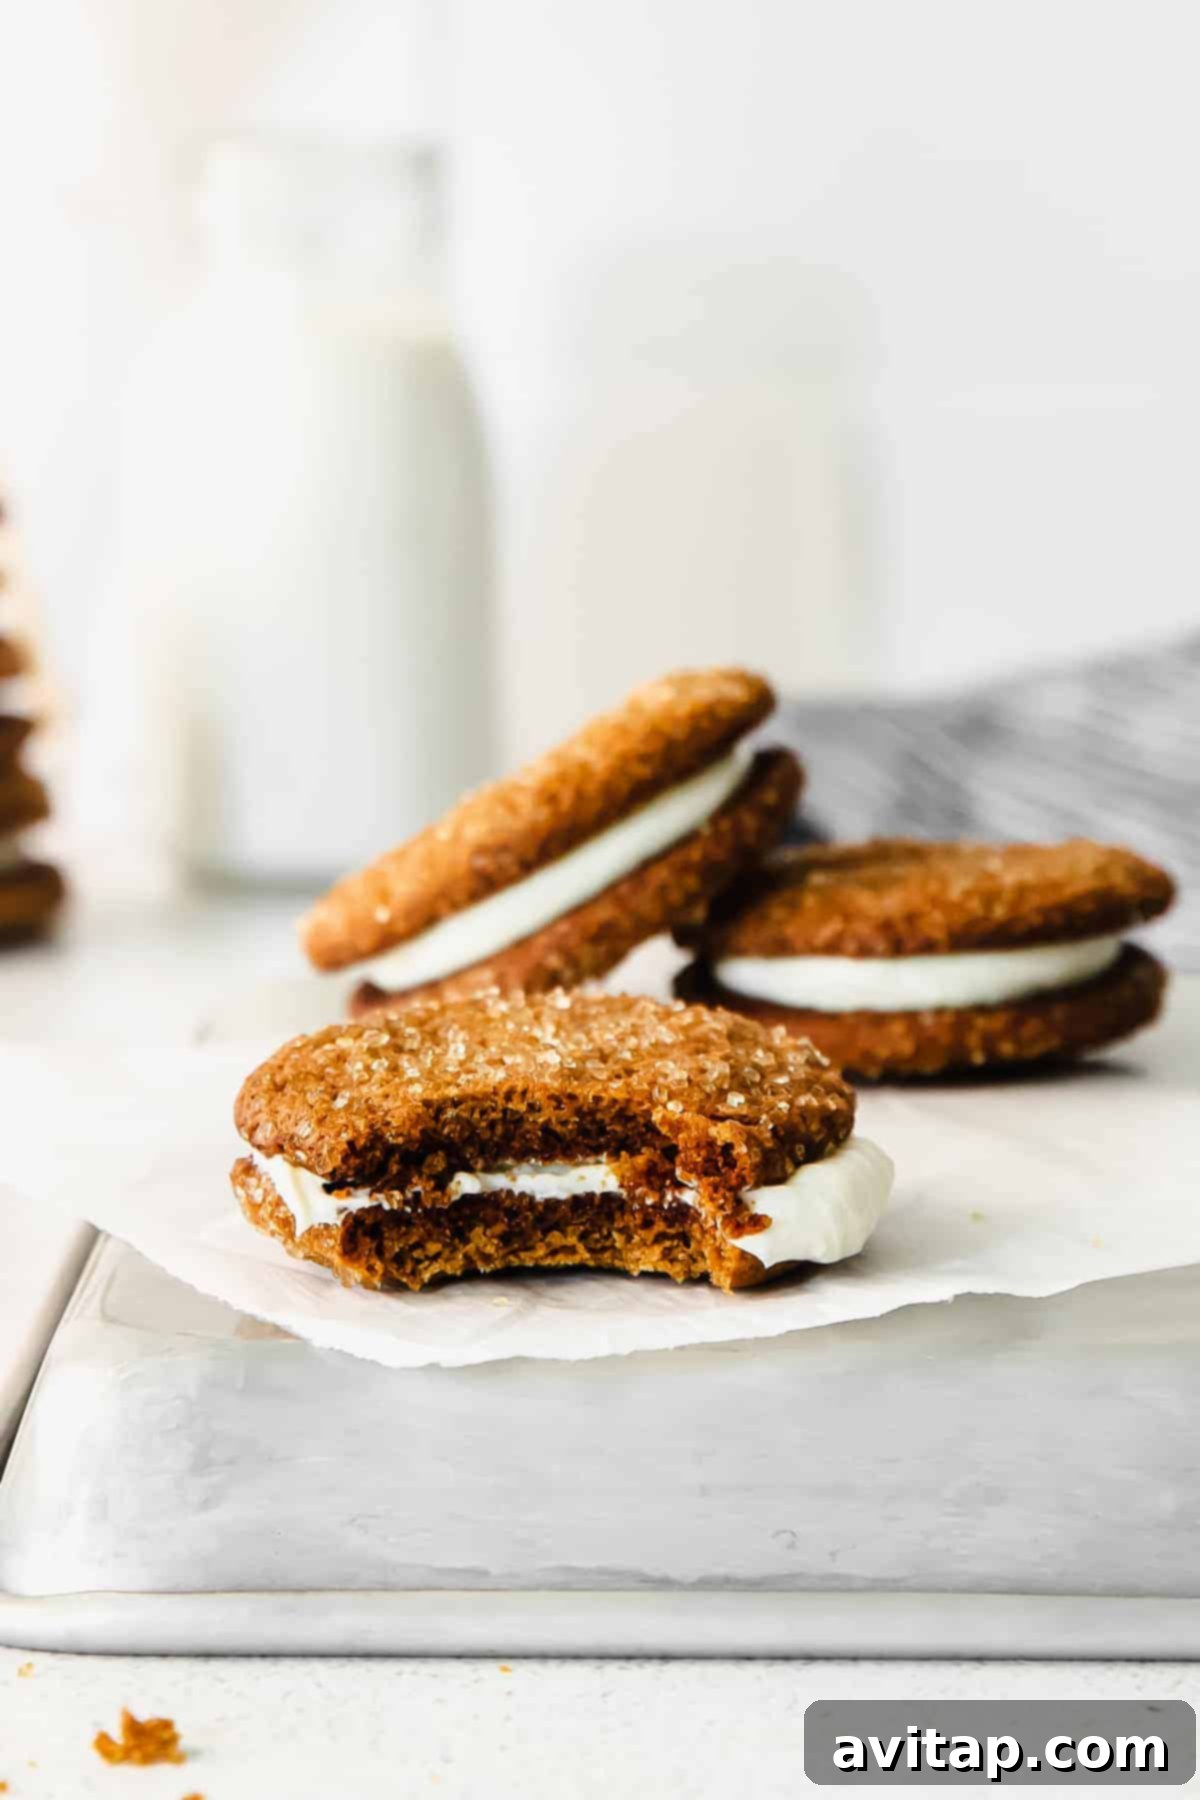
- Repeat, Store, and Enjoy: Continue this delightful assembly process with all the remaining cookie pairs and filling. Once all your ginger molasses whoopie pies are assembled, they are immediately ready to be devoured! Savor the exquisite fresh combination of the warm, spicy cookie and the cool, creamy, tangy filling. If you’re not planning to serve them all at once, store them carefully in an airtight container in the refrigerator for up to three days. This helps maintain their freshness, prevents the filling from softening too much, and keeps their perfect texture intact.
Exciting Flavor Variations for Your Whoopie Pie Filling
While the classic cream cheese filling is undeniably and deliciously perfect, these ginger whoopie pies offer a fantastic canvas for your culinary creativity! If you’re looking to “jazz up” your treats and introduce new dimensions of flavor, we highly recommend experimenting with the filling rather than altering the perfectly balanced ginger cookie. Here are a few delightful flavor variations to inspire your next batch and impress your taste buds:
- Rich Chocolate Cream Cheese Filling: For the ultimate chocolate lovers, effortlessly transform your cream cheese filling into a decadent cocoa dream. After you’ve successfully added the cream cheese and vanilla and beaten them until fluffy, sift in 2-3 teaspoons of unsweetened cocoa powder (adjusting the quantity to achieve your desired chocolate intensity). Beat again until the cocoa is fully incorporated and the filling transforms into a beautiful, rich chocolatey brown hue. This creates a wonderfully complex and comforting flavor profile, marrying the warm spice of ginger with the luxurious richness of chocolate.
- Mini Chocolate Chip Surprise: Introduce a delightful textural element and an extra touch of sweetness by folding in miniature chocolate chips. Once your cream cheese and vanilla have been perfectly beaten into the filling, gently fold in about ¼ cup of mini chocolate chips (you can choose dark, milk, or white chocolate, depending on your preference) with a spatula. The tiny chips add a playful crunch and delightful bursts of chocolate throughout the smooth, creamy filling, making each bite an exciting discovery.
- Vibrant Berry Swirl: For a bright, fruity counterpoint to the warm spices of the ginger cookies, consider adding a vibrant berry swirl. Once your cream cheese filling is completely prepared and fluffy, gently swirl in 1-2 tablespoons of your favorite high-quality raspberry, strawberry, or cranberry jam. Use a knife or a skewer to create elegant streaks of color and infuse the filling with a lovely tart and sweet fruit flavor. This variation is not only incredibly delicious but also visually stunning, adding a beautiful pop of color.
- Sweet Maple Infusion: Elevate the natural sweetness and introduce a distinct autumnal, cozy note by incorporating pure maple syrup into your filling. After the butter and powdered sugar are thoroughly combined, beat in 1-2 tablespoons of high-quality pure maple syrup along with the softened cream cheese and vanilla extract. This creates a wonderfully fragrant and subtly sweet maple-flavored filling that pairs exquisitely with the ginger molasses cookies, enhancing their warmth and making them incredibly comforting and yummy!
Optimal Storage Guidelines for Lasting Freshness
To ensure your ginger molasses whoopie pies remain as fresh, soft, and delicious as possible, proper storage is absolutely key. Once fully assembled, it is imperative to place them in an airtight container. This prevents them from drying out and helps maintain their delicate texture. The container should then be stored in the refrigerator for optimal freshness and to keep the cream cheese filling perfectly chilled. Stored correctly, these delightful treats can be enjoyed for up to 5 days, maintaining their wonderful flavor and consistency.
Can You Freeze Whoopie Pies? Yes, for Future Enjoyment!
Absolutely! Whoopie pies are excellent candidates for freezing, making them a fantastic option for holiday meal prep, batch baking, or simply having a delightful sweet indulgence ready at a moment’s notice. Freezing allows you to extend their shelf life significantly, meaning you can enjoy these wonderful treats long after you’ve baked them fresh.
To freeze them successfully and preserve their quality, follow these steps: First, arrange the fully assembled whoopie pies in a single layer on a flat baking sheet or plate. Ensure there is some space between each pie to prevent them from freezing together. Place this tray into the freezer for about 30 minutes to an hour, or until the whoopie pies are solid enough that the filling is firm to the touch and won’t stick to other pies. This crucial “flash-freezing” step prevents them from merging into one sticky mass when stored in bulk. Once firm, carefully transfer the cookies to an airtight freezer-safe bag or container. Layer them with parchment paper if stacking to prevent sticking. They can be frozen for up to 3 months without significant loss of quality. When you’re ready to enjoy them, simply take the desired number of whoopie pies out of the freezer and let them thaw at room temperature for 30-60 minutes, or you can transfer them to the refrigerator overnight. They’ll taste remarkably close to freshly made!
More of our Favorite Cookie Recipes…
Explore More Delicious Cookie Creations for Every Occasion
- Delicate Shortbread Almond Flour Cookies: A Gluten-Friendly Treat
- Classic Iced Oatmeal Cookies: A Timeless Comfort Food
- A Curated Collection of 50 Healthy Christmas Cookie Recipes
- Rich Paleo Hot Cocoa Cookies with Luscious Vanilla Bean Frosting
Ginger Molasses Whoopie Pie Recipe
This ginger whoopie pie recipe is destined to become your new go-to holiday cookie! Featuring a perfectly spiced, chewy ginger cookie paired with a dreamy, creamy, and tangy cream cheese filling, these delightful treats will make everyone who tastes them swoon with pleasure. Get ready for a truly unforgettable baking experience!
By: Lee Funke
Prep Time: 25 minutes
Cook Time: 15 minutes
Total Time: 40 minutes (active preparation and baking time, excluding dough chilling)
Yields: Approximately 11 whoopie pies (equivalent to 22 individual cookies)
Ingredients
For the Chewy Ginger Cookies:
- 1 cup white whole wheat flour
- 1 cup all-purpose flour
- 2 teaspoons baking soda
- 2 teaspoons ground cinnamon
- 1 teaspoon ground ginger
- ½ teaspoon ground cloves
- ½ teaspoon salt
- 1 cup light brown sugar, packed
- ½ cup (1 stick or 113g) unsalted butter, cold and cut into ½ tablespoon cubes
- ¼ cup (60ml) coconut oil, softened but not melted
- 1 large egg
- ¼ cup (60ml) molasses (dark or unsulphured for best flavor)
- ⅓ cup (65g) turbinado sugar, for rolling (optional, for crunch and sparkle)
For the Cream Cheese Filling:
- ½ cup (1 stick or 113g) unsalted butter, fully softened to room temperature
- ½ cup (60g) powdered sugar (confectioners’ sugar), sifted
- 8 ounces (226g) full-fat cream cheese, fully softened to room temperature
- 1 teaspoon pure vanilla extract (or seeds from 1 vanilla bean for gourmet touch)
Instructions
Part 1: Preparing the Chewy Ginger Cookies
- Prepare Baking Sheet & Preheat Oven: Line a large baking sheet with parchment paper or spray generously with nonstick baking spray. Preheat your oven to 350°F (175°C).
- Whisk Dry Ingredients: In a medium bowl, whisk together the white whole wheat flour, all-purpose flour, baking soda, ground cinnamon, ground ginger, ground cloves, and salt until thoroughly combined. Set this mixture aside.
- Cream Butter, Sugar & Coconut Oil: In the bowl of a stand mixer fitted with the paddle attachment, add the packed light brown sugar, cold cubed butter, and softened coconut oil. Cream these ingredients together on medium speed for about 3 minutes, until the mixture is light, fluffy, and noticeably pale in color. Ensure it’s well aerated.
- Add Egg & Molasses: Scrape down the sides of the bowl with a spatula. Add the large egg and molasses to the creamed mixture. Mix on low speed until just fully incorporated, scraping down the bowl as needed to ensure even blending.
- Combine Wet & Dry Ingredients: With the mixer on low speed, gradually add the reserved dry ingredients to the wet mixture. Mix only until no streaks of flour remain and the dough is just combined. Be careful not to overmix. Give the bowl a final scrape to ensure everything is evenly blended. The dough will be thick.
- Chill the Dough: Remove the dough from the mixer bowl, form it into a ball, wrap it tightly in plastic wrap, and refrigerate for a minimum of 30 minutes. For an even chewier cookie and deeper flavor, chill overnight.
- Form & Sugar Cookies: Once chilled, use a tablespoon-sized cookie scoop to portion the dough. Roll each portion into a smooth ball between your palms. If desired, roll each dough ball in turbinado sugar to coat evenly for added crunch and sparkle.
- Arrange on Baking Sheet: Place the sugared cookie dough balls onto the prepared baking sheet, ensuring at least 2-3 inches of space between each to allow for proper spreading during baking.
- Bake Cookies: Bake for 9-11 minutes, or until the edges are lightly golden and the centers are just set. Do not overbake.
- Cool Completely: Remove from the oven and let the cookies cool on the baking sheet for about 3 minutes to firm up. Then, carefully transfer them to a wire rack to cool completely to room temperature. This step is essential before adding the filling.
Part 2: Preparing the Cream Cheese Filling
- Whip Softened Butter: In the bowl of a stand mixer fitted with the paddle attachment, beat the fully softened butter on medium speed for about 30 seconds until it becomes light and fluffy.
- Incorporate Powdered Sugar: With the mixer on low speed, slowly add the sifted powdered sugar until fully incorporated. Increase the speed to medium and beat for another 30 seconds until the mixture is light, fluffy, and smooth.
- Add Cream Cheese & Vanilla: Add the fully softened cream cheese and pure vanilla extract. Beat on medium-high speed for 1-2 minutes, scraping down the sides of the bowl as needed, until the filling is incredibly fluffy, smooth, and free of any lumps. It should resemble a cloud-like texture.
Part 3: Assembling Your Whoopie Pies
- Pair Cookies: Match the completely cooled ginger cookies into similar-sized pairs.
- Fill One Cookie: Pipe or spoon a generous amount of cream cheese filling onto the flat side of one cookie from each pair. Aim for a mound that is slightly smaller than the cookie’s diameter.
- Top & Press: Gently place the flat side of the matching second cookie on top of the filling. Apply light, even pressure to gently squeeze the cookies together until the filling spreads softly to the edges, creating a consistent border.
- Enjoy or Store: Repeat with the remaining cookies. Enjoy your ginger molasses whoopie pies immediately, or store them in an airtight container in the refrigerator for up to three days.
Tips & Notes for Best Results
- Coconut Oil Consistency: If your coconut oil is solid, gently microwave it for very short bursts (e.g., 10-15 seconds) to soften it to a creamy, opaque consistency, but avoid melting it into a clear liquid. It should be pliable, not liquid.
- Mixer Recommendation: While a stand mixer provides the most efficient and consistent results, a robust handheld electric mixer can also be used for this recipe. We strongly advise against mixing by hand, particularly for the creaming stages with cold butter, as it will be significantly more challenging to achieve the desired texture.
- Turbinado Sugar: The turbinado sugar coating on the cookies is optional but highly recommended. It adds a delightful textural crunch and a beautiful, sparkling finish to the cookies, enhancing their appeal.
- Flour Alternatives: This recipe was developed using a specific blend of white whole wheat and all-purpose flours. If you choose to use all all-purpose flour, you will likely need to increase the total flour quantity by approximately ½ to ¾ cup, as all-purpose flour absorbs less fat than white whole wheat. Additionally, be aware that the baking time will also likely need to be adjusted, potentially requiring an extra 2-3 minutes in the oven. Always monitor cookies closely when making substitutions.
Nutrition Information
Calories: 485 kcal
Carbohydrates: 52 g
Protein: 5 g
Fat: 30 g
Fiber: 2 g
Sugar: 17 g
Please note: Nutrition information is automatically calculated based on the ingredients listed and should be used as an approximation. Individual results may vary based on exact ingredient brands, preparation methods, and serving sizes.
Love this recipe? We’d be absolutely thrilled if you took a moment to leave a comment and a rating below! Your valuable feedback helps us refine our recipes and assists other home bakers in their culinary adventures.
Don’t forget to tag your beautiful creations on social media with the hashtag #fitfoodiefinds – we absolutely love seeing what you’re baking and celebrating your successes!