
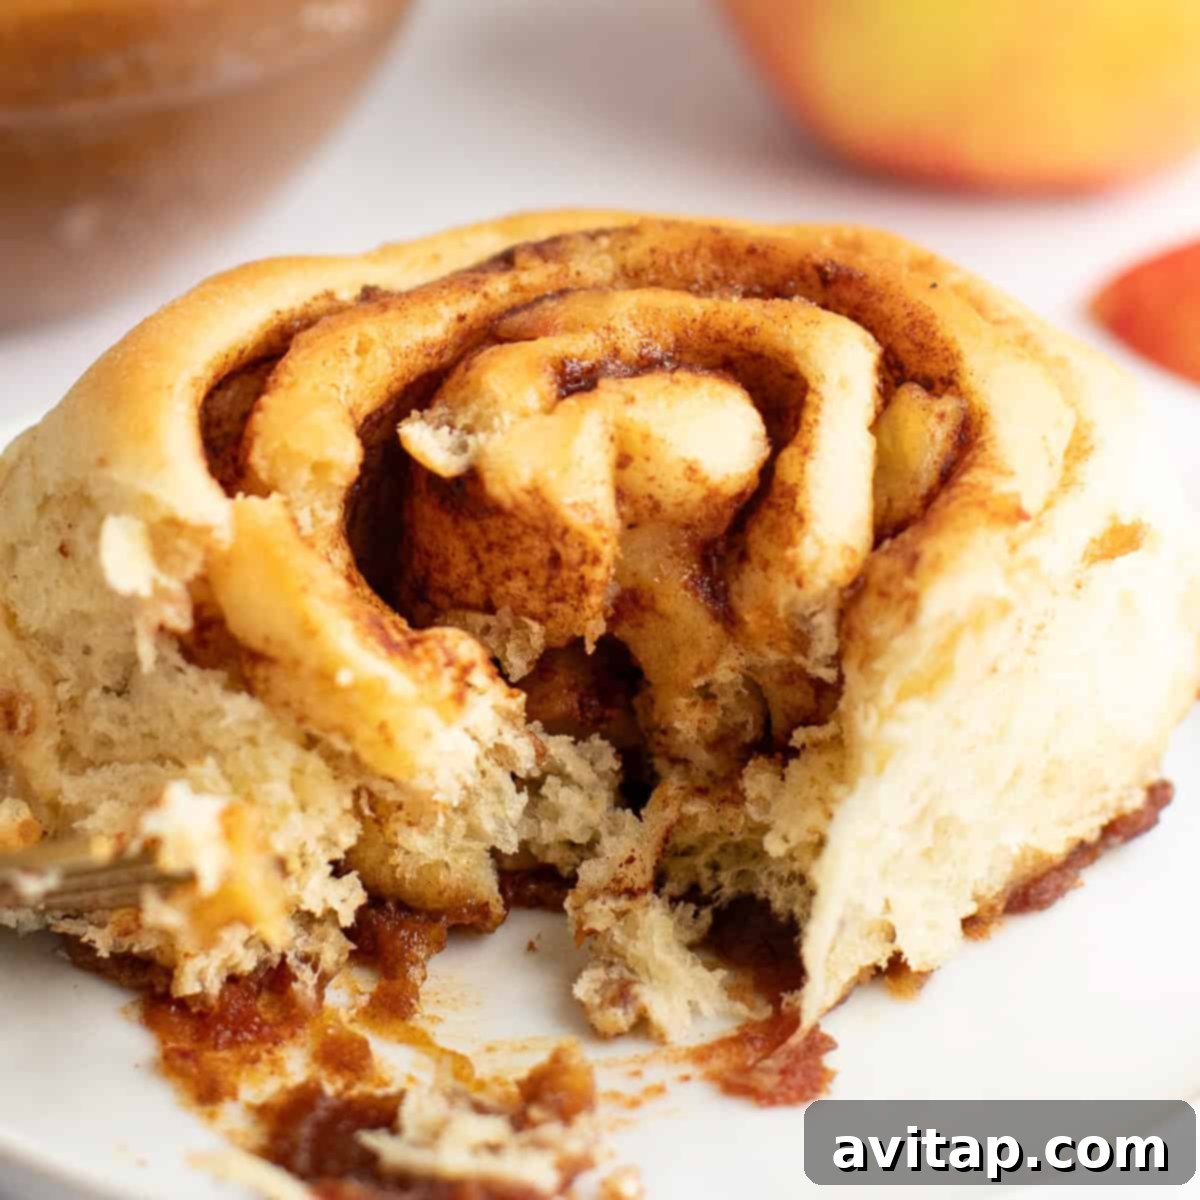
Ultimate Apple Sticky Buns with Date Caramel Glaze: Your Go-To Fall Dessert
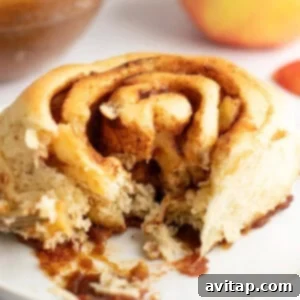
Prepare to fall in love with these irresistibly sticky, perfectly sweet, and profoundly flavorful Apple Sticky Buns. Bursting with the warm essence of autumn, these buns feature a luscious cinnamon-sugar apple filling nestled within a tender, fluffy dough. But what truly elevates them to an extraordinary level is the decadent, naturally sweetened date caramel glaze. So remarkably delicious, you’ll want to slather it on everything! Whether you’re seeking a comforting treat for a crisp autumn morning or an impressive dessert to share with loved ones, these homemade apple sticky buns promise pure delight.
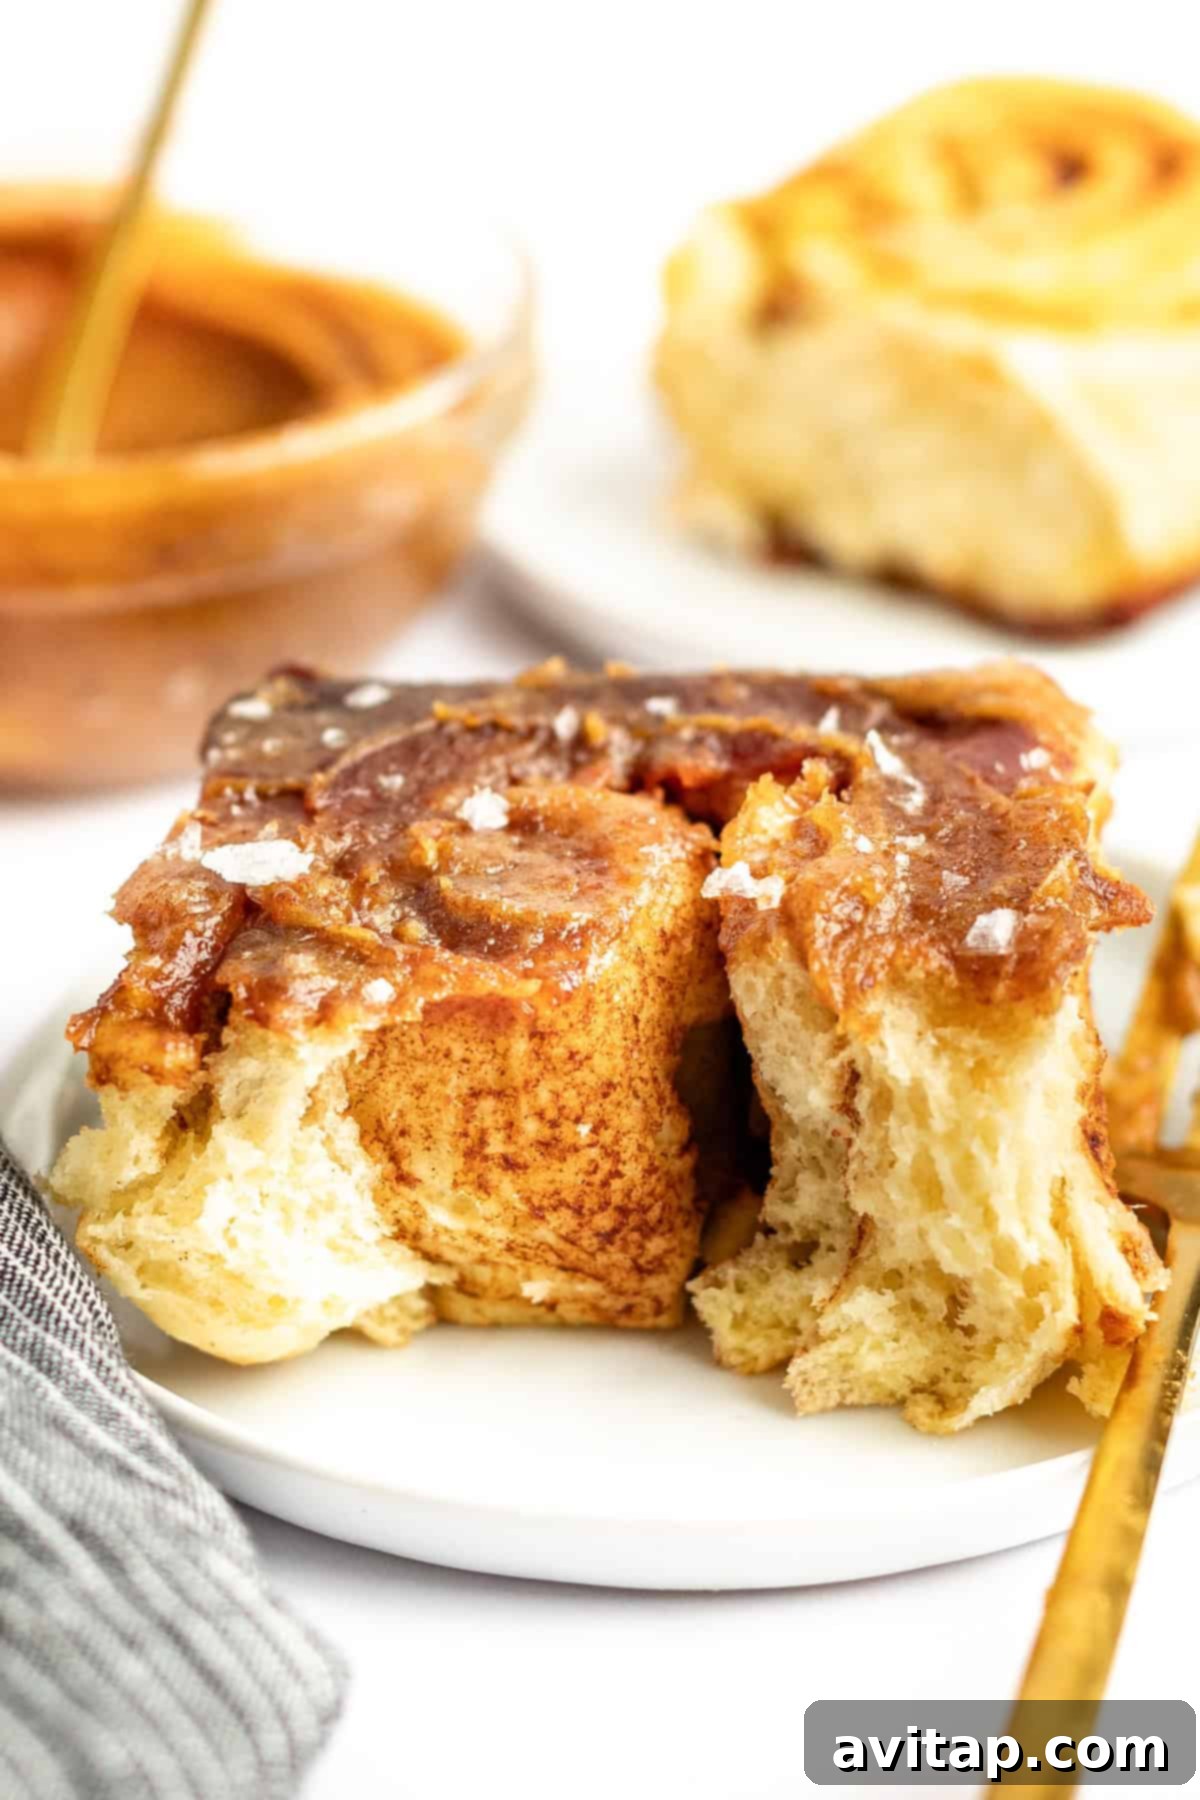
If the mere mention of “apple sticky buns” has captured your attention, you’re not alone. There’s something undeniably captivating about sticky-sweet confections, and this recipe truly stands out. While we appreciate various sticky delights, from sticky rice to sticky sesame garlic ribs and honey sticky pork, these apple sticky buns are in a league of their own. This original recipe masterfully combines comforting fall flavors with an indulgent sweetness that’s simply addictive. Beyond their incredible taste, making (and eating!) sticky buns is a joyful experience that brings warmth and cheer to any occasion.
Crafting these exquisite apple buns involves three key components: preparing a tender, elastic dough, creating a spiced apple filling, and whipping up that unbelievable date caramel glaze. Once these elements are ready, you’ll assemble and bake them to golden perfection, resulting in buns that are moist, delightfully sticky, and utterly delicious!
Essential Ingredients for Perfect Apple Sticky Buns
To embark on your journey to baking these sensational apple sticky buns, gather the following high-quality ingredients. Each plays a crucial role in achieving that perfect balance of flavor and texture.
- 2% milk: This is the foundation of our rich dough. Ensure your milk is gently warmed to between 100-110℉ (38-43℃). This optimal temperature is crucial for activating the yeast properly, leading to a beautifully risen, airy dough.
- Quick-rise yeast: We opt for quick-rise yeast for its efficiency and convenience, significantly reducing proofing time. However, if you prefer or only have active dry yeast on hand, you can certainly use it; just be prepared for a slightly longer rise.
- Maple syrup: Beyond just sweetness, maple syrup infuses the dough with a distinctive warmth and depth, complementing the autumnal apple flavors beautifully. It’s a natural sweetener that contributes to the buns’ overall richness.
- Unsalted butter: Butter is essential for achieving the melt-in-your-mouth flakiness and luxurious moisture in the dough. Using unsalted butter allows you to control the total salt content of the recipe, ensuring perfect seasoning.
- Egg: A large egg acts as a vital binder, bringing all the dough ingredients together seamlessly. It also enriches the dough, contributing to a softer texture and a golden hue upon baking.
- All-purpose flour: Our recipe is developed using all-purpose flour, which yields a tender yet structured bun. For those who enjoy a chewier texture, feel free to experiment with bread flour, which has a higher protein content and produces a chewier crumb.
- Light brown sugar: This sweetens our apple filling with a lovely molasses note, adding a caramel-like depth that enhances the apples’ natural sweetness and the cinnamon’s warmth.
- Cinnamon: The quintessential fall spice! Ground cinnamon pairs flawlessly with apples, creating that familiar, comforting aroma and taste profile that defines classic autumn baking.
- Honeycrisp apples: Our top pick for this recipe! Honeycrisp apples are celebrated for their superb crunch, delightful tartness, and balanced sweetness. They hold their shape well when cooked, providing a pleasant texture within the filling. Other firm, tart-sweet apples like Fuji or Gala can also work wonderfully.
- Dates: The star of our incredible caramel glaze. Medjool dates are highly recommended for their soft, plump texture and natural sweetness, making them ideal for blending into a smooth caramel. If your dates are firmer, you might need a touch more liquid during blending.
- Coconut cream: Crucial for the luscious consistency of the date caramel. Make sure to use the thick cream that separates and rises to the top of a can of full-fat coconut milk, not the thinner liquid. Chill the can beforehand to aid in separation.
- Stand mixer: While not strictly mandatory, a stand mixer equipped with a dough hook attachment will make the dough preparation significantly easier and more efficient, ensuring a perfectly kneaded dough without the effort of hand-kneading.
- Vanilla Extract: A splash of vanilla enhances all the other flavors, adding a fragrant and comforting note to both the dough and the date caramel, making the entire bun more aromatic.
- Sea Salt: A touch of salt balances the sweetness in both the dough and the caramel, and a sprinkle of flaky sea salt on top of the finished buns provides a delightful textural contrast and flavor boost.
Can I use pre-made dough for these Apple Sticky Buns?
Yes, absolutely! If time is of the essence, using a high-quality pre-made dough (like refrigerated biscuit dough or a frozen bread dough that has been thawed) can certainly streamline the process. While homemade dough offers an unparalleled depth of flavor and a uniquely satisfying texture, pre-made options still yield delicious results. Just ensure you follow the package instructions for rising times before rolling out the dough and filling it with our delectable apple mixture. This flexibility makes these apple sticky buns accessible to even the busiest bakers, allowing everyone to enjoy this delightful treat.
Elevate Your Apple Sticky Buns: Delicious Additions & Variations
While these apple sticky buns are divine as is, there are many ways to customize and enhance them. Consider these delicious additions to take your baking to the next level:
Pecans: For a delightful textural contrast and nutty flavor, finely chop pecans and sprinkle them generously over the butter and cinnamon-sugar filling before rolling. The heat of the oven will toast them lightly, intensifying their aroma and crunch, adding a sophisticated depth to each bite.
Raisins or Dried Cranberries: Introduce an extra burst of concentrated sweetness and chewiness by scattering a handful of plump raisins or tangy dried cranberries over the filling. They pair beautifully with the apples and cinnamon, creating a more complex flavor profile.
Cream Cheese Swirl: Before adding the apple filling, spread a thin, even layer of softened cream cheese (perhaps mixed with a touch of powdered sugar and vanilla for extra sweetness) over the dough. This creates a creamy, tangy surprise in every bite, reminiscent of a classic cinnamon roll frosting but baked right in.
Spiced Nuts: Instead of plain pecans, try tossing your chopped nuts with an additional pinch of warm spices like allspice, cardamom, or even a tiny dash of ginger before adding them to the buns for an extra layer of warmth and complexity. This infuses the nuts with even more fall flavor.
Citrus Zest: A little finely grated orange or lemon zest incorporated into the apple filling can brighten the flavors considerably, adding a subtle, refreshing counterpoint to the sweetness and rich spices. It truly lifts the overall taste experience.
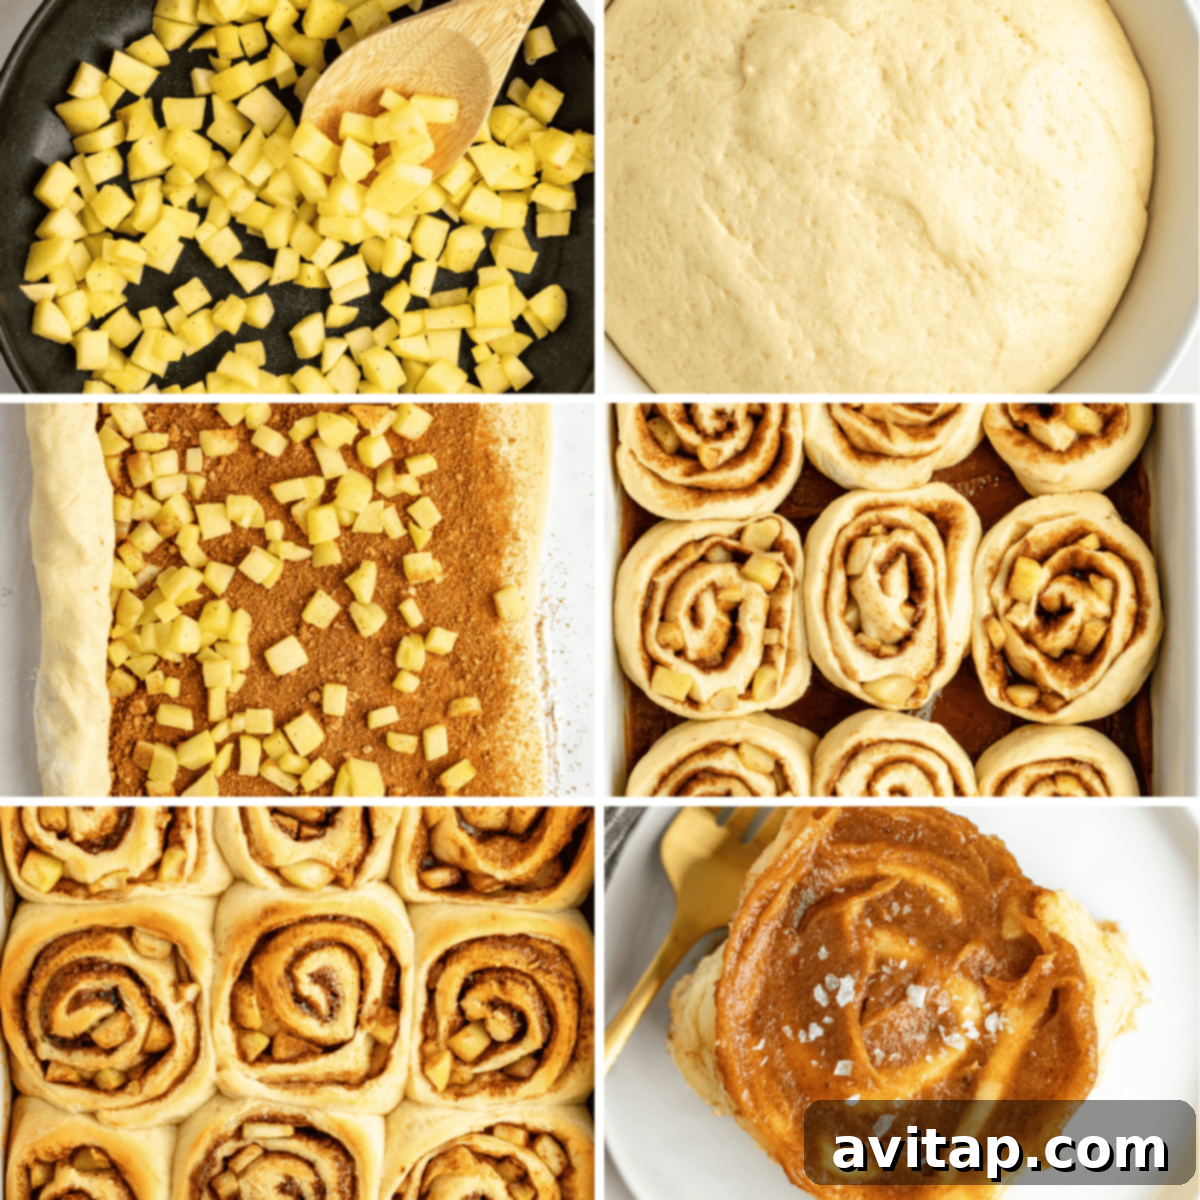
Step-by-Step Guide: How to Make Apple Sticky Buns
Creating these delightful apple sticky buns is a rewarding process that culminates in a truly spectacular homemade treat. Follow these detailed instructions meticulously to achieve bakery-quality results in your own kitchen:
- Activate the Yeast Mixture: In a spacious mixing bowl, combine your gently warmed 2% milk. The temperature is critical here – it should be comfortably warm to the touch (100-110℉ or 38-43℃) to properly activate the yeast without killing it. Sprinkle in the quick-rise yeast. Stir gently and allow it to sit undisturbed for about 5 minutes. You’ll know the yeast is active when a light, foamy layer forms on the surface, indicating it’s alive and ready to work. Next, incorporate the maple syrup, melted unsalted butter, the large egg, and vanilla extract. Whisk these wet ingredients together thoroughly until they are uniformly combined.
- Prepare and Knead the Dough: Attach the dough hook to your stand mixer. On a low-medium speed, gradually add the all-purpose flour and sea salt to the wet ingredients. Continue mixing until all the flour is incorporated and a shaggy dough begins to form, pulling away from the sides of the bowl. Increase the speed slightly and knead the dough for approximately 2-3 minutes. The goal is a smooth, elastic dough that springs back when gently poked, indicating proper gluten development. This will result in a tender, chewy bun.
- First Rise of the Dough: Lightly oil a clean, large bowl. Transfer the freshly kneaded dough into this bowl, turning it once to coat it lightly with oil. This prevents the dough from sticking as it rises. Cover the bowl snugly with plastic wrap to create a humid environment, then drape a clean tea towel over it for warmth. Place the bowl in a warm, draft-free spot (like a slightly warm oven that’s turned off, or near a sunny window). Allow the dough to rise until it has visibly doubled in size, which typically takes about 1 to 1.5 hours. This first rise is crucial for developing flavor and texture. While your dough is rising, you can efficiently prepare the apple filling and cook the apples, saving you time.
- Craft the Apple Filling: In a small bowl, thoroughly combine the light brown sugar and ground cinnamon. This will be your aromatic spice mixture for the filling, providing that classic fall flavor. Set it aside for later use. Next, meticulously peel your Honeycrisp apples (or your chosen apple variety). Remove the core and dice them into uniform small pieces. Uniformity helps them cook evenly and ensures consistent texture in your buns.
- Sauté the Apples: Heat a sauté pan over medium heat and add 1 tablespoon of unsalted butter. Once the butter has melted and is lightly shimmering, add your diced apples and a pinch of nutmeg. Cook for about 5-7 minutes, stirring occasionally, until the apples have softened but still retain a slight bite. Avoid overcooking them to mush, as you want them to hold their shape within the buns. Once soft, remove from heat and set aside to cool slightly.
- Make the Date Caramel Glaze: This is where the magic happens and our sticky buns get their incredible gooey topping! Pit your dates if they aren’t already. Place the pitted dates, the thick coconut cream (remember to use the solid, creamy part from the top of a chilled can of full-fat coconut milk), vanilla extract, and sea salt into a food processor. Blend extensively until the mixture is completely smooth and creamy, resembling a luxurious caramel. Scrape down the sides as needed to ensure everything is incorporated. If it’s too thick, add a tiny bit more coconut cream or water, one teaspoon at a time, until the desired pourable, smooth consistency is achieved. Set this incredible glaze aside.
- Assemble the Rolls – Dough Preparation: After the dough has completed its first rise (approximately 1 to 1.5 hours), gently turn it out onto a lightly floured surface. Using a rolling pin, roll the dough into a large, even rectangle. Aim for approximate dimensions of 18 inches long, 12 inches wide, and about ¼ inch thick. Try to keep the edges as straight as possible for uniform rolls and minimal waste.
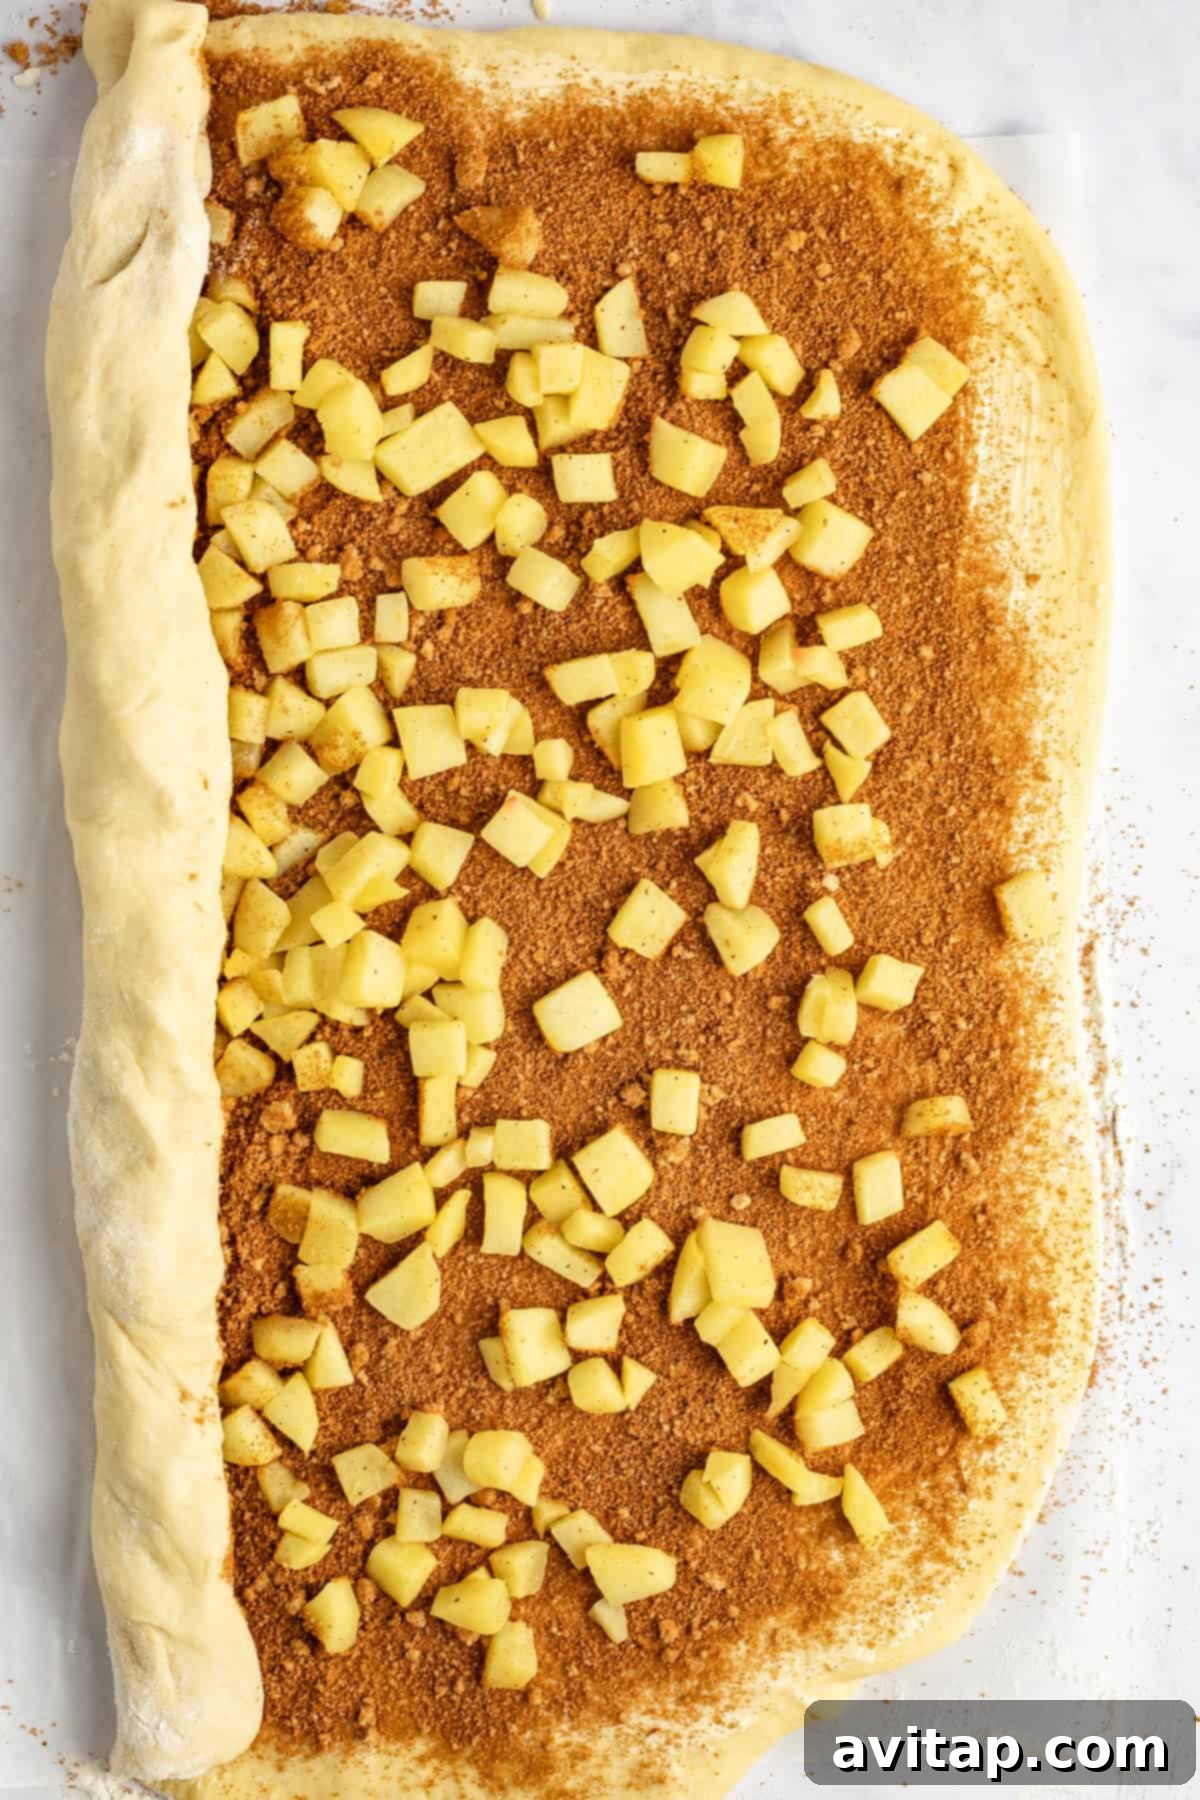
- Add Filling & Roll: Generously spread the remaining softened unsalted butter evenly over the entire surface of the rolled-out dough, leaving a small border (about ½ inch) at one of the long edges to help seal the roll. Next, sprinkle the pre-mixed cinnamon-sugar filling evenly over the butter, ensuring good coverage. Finally, scatter the sautéed diced apples over the filling. Now, carefully and gently roll the dough into a tight log. For standard-sized rolls, begin rolling from one of the longer sides. If you prefer larger, more substantial buns, start rolling from one of the shorter sides. A tight roll is key to achieving distinct, beautiful spirals in your finished sticky buns.
- Slice the Rolls: Using a sharp, un-serrated knife, or even unflavored dental floss, slice the rolled log into individual 1-inch thick rolls. This technique typically yields about 12 perfectly sized rolls. The exact number can vary slightly based on how tightly you rolled the log and whether you started rolling from a long or short side of the dough.
- Prepare for Baking: Take a 9×13-inch baking dish and butter it thoroughly, then line it with parchment paper. This aids in easy removal and makes cleanup a breeze. Evenly spread the luscious date caramel glaze across the entire bottom of the prepared baking dish. Carefully arrange the sliced rolls in the dish, ensuring they are just barely touching each other. Depending on your log’s tightness and size, you might arrange them in a 3×4 grid or a 2×4 grid, with any extra rolls placed in a separate smaller dish to avoid overcrowding.
- Second Rise & Preheat Oven: Cover the baking dish containing the rolls with plastic wrap, and then with a tea towel. Place it in a warm, draft-free location for their second and final rise. Allow them to rise for approximately 30 minutes, or until they have noticeably plumped up and are touching each other more firmly. During this crucial time, preheat your oven to 350℉ (175℃), ensuring it’s fully ready when the buns are finished their rise.
- Bake to Golden Perfection: Place the apple sticky buns in your preheated oven. Bake for approximately 18-22 minutes. Baking times can vary slightly depending on your specific oven, so it’s wise to start checking around the 18-minute mark. The buns are done when their centers are set, and the tops are beautifully golden brown and lightly caramelized. Be vigilant to avoid overbaking, as this can lead to dry buns and a less enjoyable texture.
- Cool & Serve: Once baked, remove the sticky buns from the oven. Allow them to cool in the baking dish for about 10 minutes. This brief cooling period helps the caramel set slightly and makes them easier to handle and less likely to fall apart when inverted. After 10 minutes, carefully invert the baking dish onto a large cutting board or serving platter. For an extra touch of gourmet flair and to balance the sweetness, sprinkle a generous pinch of flaky sea salt over the warm sticky buns just before serving. Enjoy these autumn masterpieces!
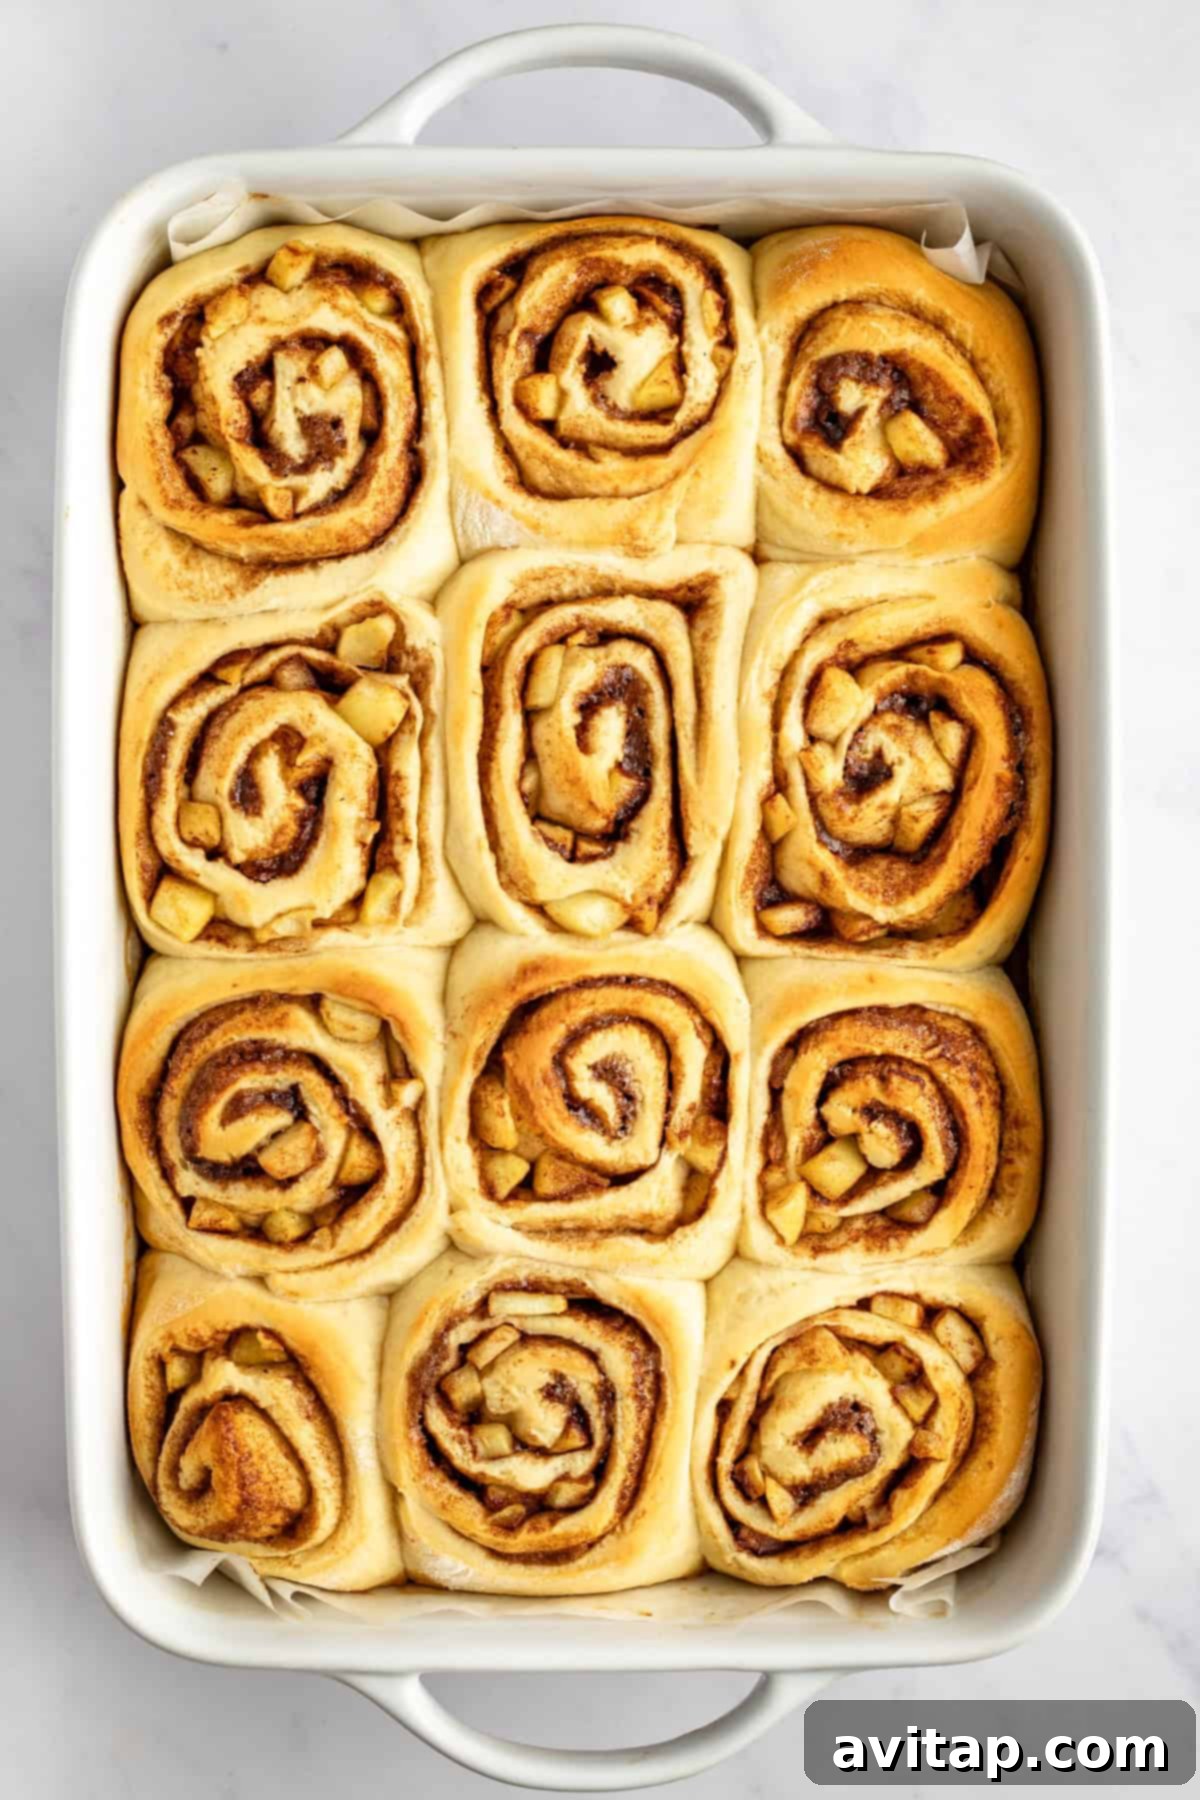
Can I make this Apple Sticky Buns recipe ahead of time?
Yes, preparing these delightful apple sticky buns in advance is a fantastic option for stress-free entertaining or a relaxed morning treat. After assembling the rolls and placing them in the baking dish (as per step 10), instead of allowing for the second rise, simply wrap the dish tightly with plastic wrap. Store them securely in the refrigerator for up to 12 hours. When you’re ready to bake, remove the dish from the fridge and let the rolls come to room temperature for about 30 minutes. This allows them to proof slightly and ensures even baking. Once at room temperature, you can then proceed directly to baking (step 12 in the detailed instructions) after preheating your oven to the specified temperature.
Another Favorite Fall Treat: Apple Cinnamon Rolls
If you adore the flavors of apple and cinnamon, you absolutely must try our Apple Cinnamon Rolls with Brown Butter Cream Cheese Frosting. They are the ultimate fall treat, perfect for any occasion. Discover how to prepare them the night before and wake up to the most incredible aroma and taste!
Get the Apple Cinnamon Rolls Recipe Here!
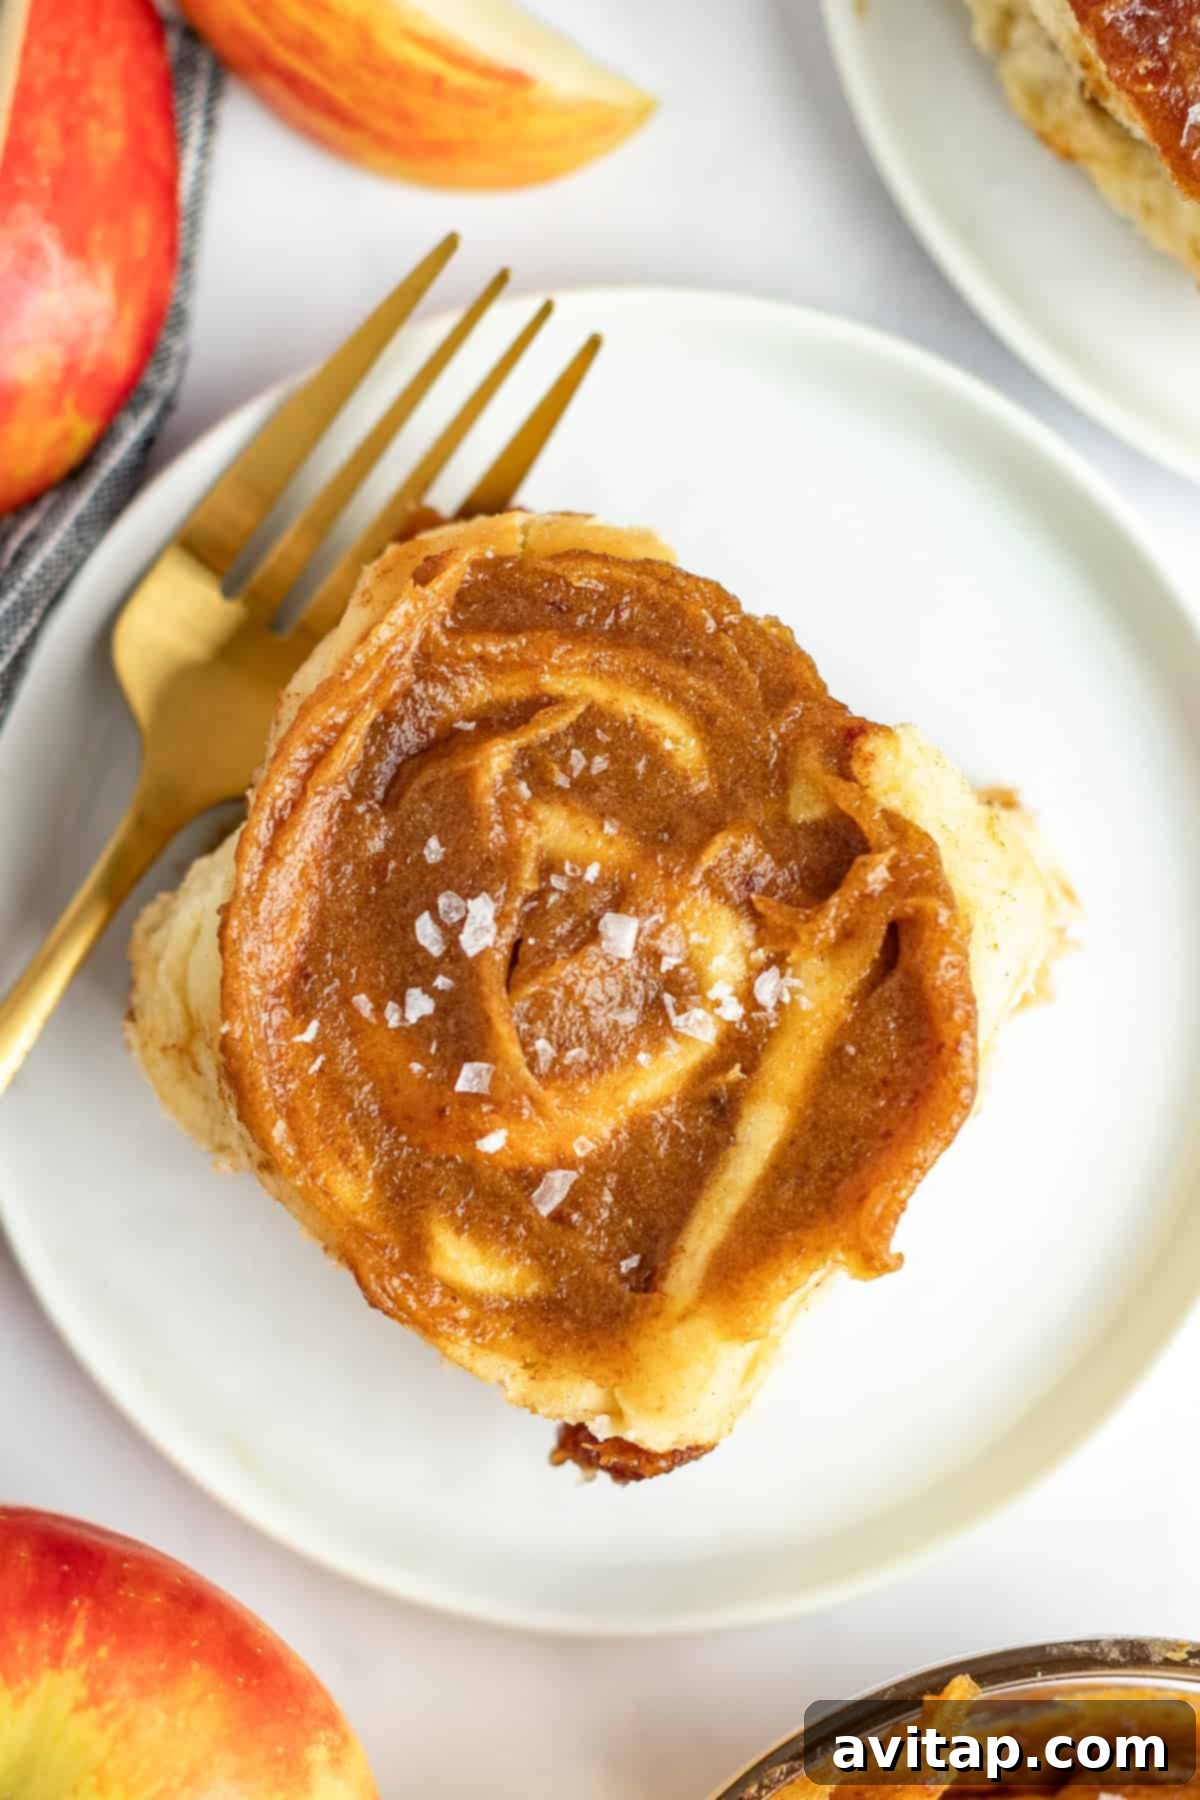
Pro Tip for Date Caramel Perfection!
Achieving a silky-smooth date caramel is key to these sticky buns. If, after blending, your date caramel still appears a bit chunky or too thick, don’t worry! This is easily remedied. Simply add a small amount of the remaining liquid from your can of coconut milk (the thinner liquid that settles at the bottom), one tablespoon at a time, and blend again until you reach a perfectly smooth and pourable consistency. Remember, the firmer your original dates, the more extra liquid you might need to achieve that ideal creamy texture. Patience in blending will reward you with an unforgettable glaze!
Storage and Reheating Directions for Apple Sticky Buns
Proper storage ensures your delicious apple sticky buns remain fresh and enjoyable for as long as possible. Here’s how to keep them at their best and how to reheat them for that fresh-baked experience:
- Room Temperature Storage: Once your apple sticky buns have cooled completely to prevent condensation, wrap them tightly in plastic wrap or place them in an airtight container. Stored this way, they will maintain their deliciousness for up to 3 days at room temperature. For optimal freshness, keep them away from direct sunlight or any heat sources that could prematurely dry them out.
- Refrigeration: For extended freshness, transfer the wrapped or containerized buns to the refrigerator. They will stay fresh and tasty for up to 1 week. The cooler temperature helps to inhibit spoilage, although the texture might become slightly firmer.
- Freezing for Longer Storage: To freeze baked sticky buns, allow them to cool completely. You can freeze them individually by wrapping each bun tightly in plastic wrap, then placing them in a freezer-safe bag or container. Alternatively, freeze the entire batch (if still in the baking dish) by wrapping the dish thoroughly with plastic wrap and then an outer layer of aluminum foil. This double layer protects against freezer burn. They can be frozen for up to 2-3 months without significant loss of quality. Thaw them overnight in the refrigerator before reheating.
- Reheating Instructions: To revive leftover sticky buns, especially those from the fridge or freezer, place them on a baking sheet. Warm them in a preheated oven at 300°F (150°C) for 10-15 minutes, or until warmed through and gooey again. The oven method is best for restoring their tenderness and melting the caramel. You can also gently warm individual buns in the microwave for 20-30 seconds, but be careful not to overheat, as this can make them tough and chewy.
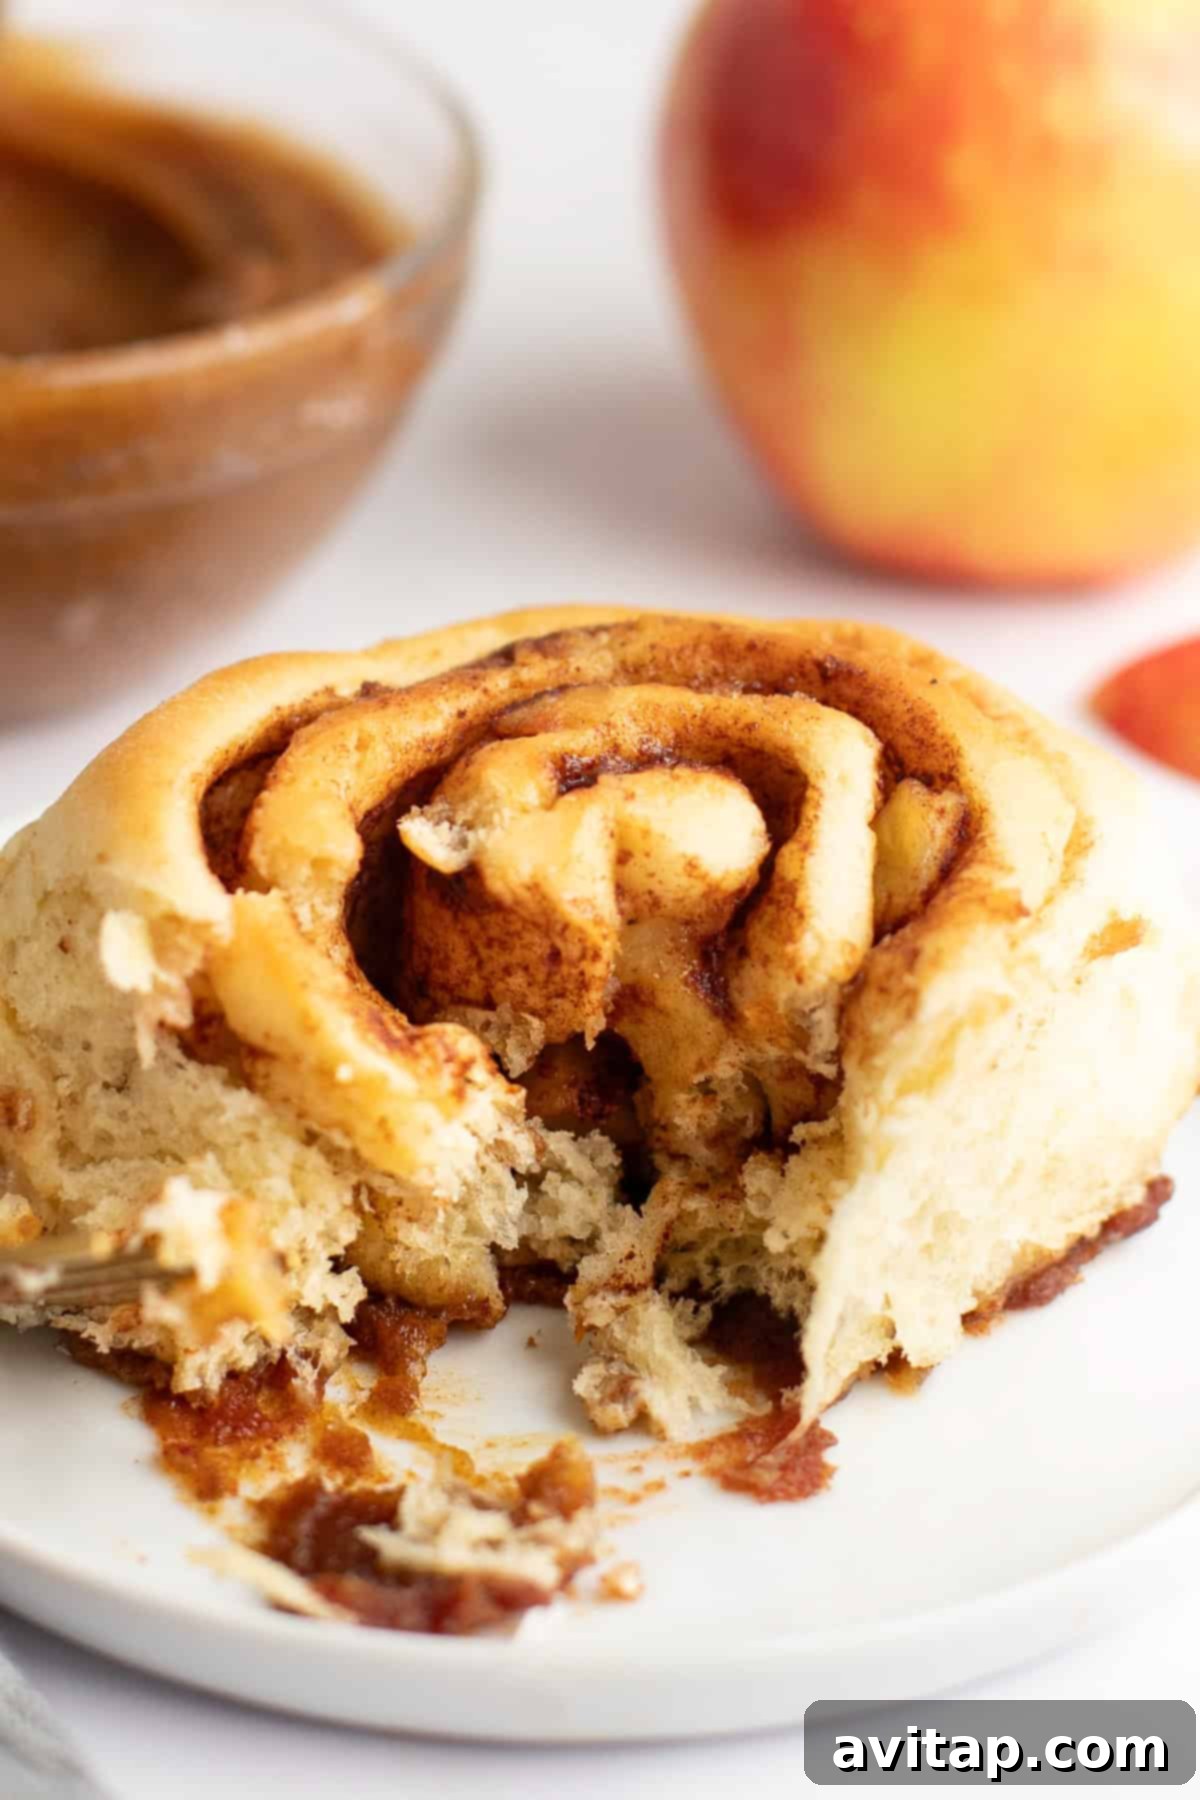
Discover More of Our Favorite…
Irresistible Fall Apple Desserts
If you’ve enjoyed these apple sticky buns, you’ll surely love exploring more of our delicious autumn apple-inspired creations. Perfect for cozy evenings, festive gatherings, or simply celebrating the flavors of fall!
- Brown Butter Apple Galette – A rustic, yet elegant dessert featuring a flaky, buttery crust and a rich, caramelized apple filling.
- Apple Cake with Cream Cheese Frosting – A wonderfully moist, warmly spiced apple cake crowned with a tangy, luscious cream cheese frosting.
- Mini Apple Crisps – Individual servings of comforting apple crisp, perfect for portion control, easy serving, or delightful entertaining.
- Soft & Chewy Apple Oatmeal Cookies – A delightful blend of wholesome oats, sweet apple pieces, and warm spices baked into a perfectly soft and chewy cookie.
- Apple Cinnamon Rolls – Another beloved take on classic rolls, featuring tender apples and a delicious cinnamon swirl, often topped with a creamy frosting.
Apple Sticky Buns Recipe
This apple sticky bun recipe is the perfect fall treat! Made with a naturally sweet date caramel and fresh, tender apples, these sticky buns are gooey, sweet, and oh-so-delicious. A must-try for autumn baking enthusiasts looking for a comforting and indulgent dessert or breakfast pastry.
By: Emily Richter
Prep Time: 2 hrs
Cook Time: 22 mins
Total Time: 2 hrs 22 mins
Servings: 12
Ingredients
Dough
- 1 cup 2% milk, warmed to 100-110℉
- 1 packet quick-rise yeast
- ¼ cup maple syrup
- 3 tablespoons unsalted butter, melted
- 1 large egg
- 1 teaspoon vanilla extract
- 4 cups all-purpose flour
- 1 teaspoon sea salt
Filling
- 5 tablespoons unsalted butter, softened and separated (1 tbsp for sautéing apples)
- ¾ cup light brown sugar
- 1 tablespoon ground cinnamon
- 3 cups diced honeycrisp apples, peeled (~4 cups before dicing)
- ¼ teaspoon nutmeg
Date Caramel
- 15 dates, pitted (Medjool dates recommended for best texture)
- 6 tablespoons coconut cream, the thick part from a chilled can
- 1 teaspoon vanilla extract
- ¼ teaspoon sea salt
Instructions
- Make the Yeast Mixture: In a large bowl, combine the warm milk and yeast. Let it bloom for about 5 minutes until foamy. Then, whisk in the maple syrup, melted butter, egg, and vanilla.
- Prepare the Dough: Using a stand mixer with a dough hook, slowly mix the flour and salt into the wet ingredients on low-medium speed. Once a shaggy dough forms, knead for 2-3 minutes until smooth and elastic.
- First Dough Rise: Transfer the dough to a lightly oiled bowl, cover with plastic wrap and a tea towel. Let rise in a warm place for 1-1.5 hours, until doubled in size. While it rises, prepare the filling and cook apples.
- Prepare Apple Filling: In a small bowl, mix brown sugar and cinnamon. Peel and dice apples into small pieces.
- Sauté Apples: Melt 1 tablespoon of butter in a sauté pan over medium heat. Add diced apples and nutmeg, cook for 5-7 minutes until soft. Set aside.
- Make Date Caramel: Combine pitted dates, coconut cream, vanilla, and salt in a food processor. Blend until completely smooth. Set aside. (Refer to the Pro Tip above if it’s chunky!)
- Assemble Rolls – Dough: After the dough’s first rise, turn it onto a lightly floured surface. Roll into an 18” long, 12” wide, and ¼” thick rectangle.
- Add Filling & Roll: Spread remaining softened butter over the dough, then sprinkle the cinnamon-sugar mixture, followed by the sautéed diced apples. Roll tightly into a log, starting from a long side for standard rolls, or a short side for larger rolls.
- Slice Rolls: Slice the log into 1” thick rolls, yielding about 12 buns.
- Arrange in Baking Dish: Butter a 9×13-inch baking dish and line with parchment paper. Spread date caramel on the bottom. Place rolls into the dish, just barely touching. Arrange as 3×4 or 2×4, using an extra dish for any overflow.
- Second Rise & Preheat: Cover the dish with plastic wrap and a tea towel. Let rise in a warm spot for about 30 minutes, until rolls are touching. Preheat oven to 350℉ (175℃) during this time.
- Bake: Bake for 18-22 minutes, or until centers are set and tops are golden brown. Avoid overbaking to keep them tender.
- Cool & Serve: Let cool for 10 minutes in the dish before inverting onto a cutting board. Sprinkle with flaky sea salt and enjoy immediately!
Tips & Notes
- For the best date caramel, use the thick cream from a 13.5 oz can of full-fat coconut milk. Chilling the can beforehand helps the cream separate from the liquid.
- If the date caramel is still chunky after blending, add some of the remaining liquid from the coconut milk can (1 tablespoon at a time) and blend until perfectly smooth. Firmer dates may require a bit more liquid.
- For make-ahead convenience: After completing step 10 (arranging rolls in the dish), wrap the dish tightly and refrigerate for up to 12 hours. When ready to bake, bring the rolls to room temperature for 30 minutes before proceeding to baking (skip directly to step 12).
Watch It
For a visual guide to making these delicious apple sticky buns, consider searching for “Apple Sticky Buns recipe video” on your preferred video platform. (Note: The original embedded video content has been removed as per instructions).
Nutrition Facts (Approximate per serving)
- Calories: 374 kcal
- Carbohydrates: 63 g
- Protein: 6 g
- Fat: 11 g
- Fiber: 3 g
- Sugar: 27 g
Nutrition information is automatically calculated and should only be used as an approximation. Actual values may vary based on specific ingredients used and preparation methods.
Loved this recipe? Share your thoughts below!
Don’t forget to tag your beautiful creations on social media with the hashtag #fitfoodiefinds – we can’t wait to see your apple sticky buns and hear about your baking success!