
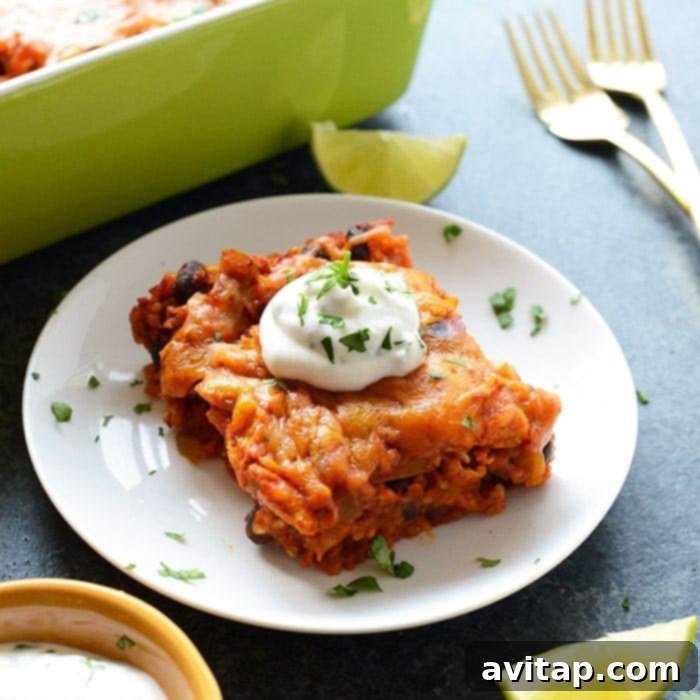
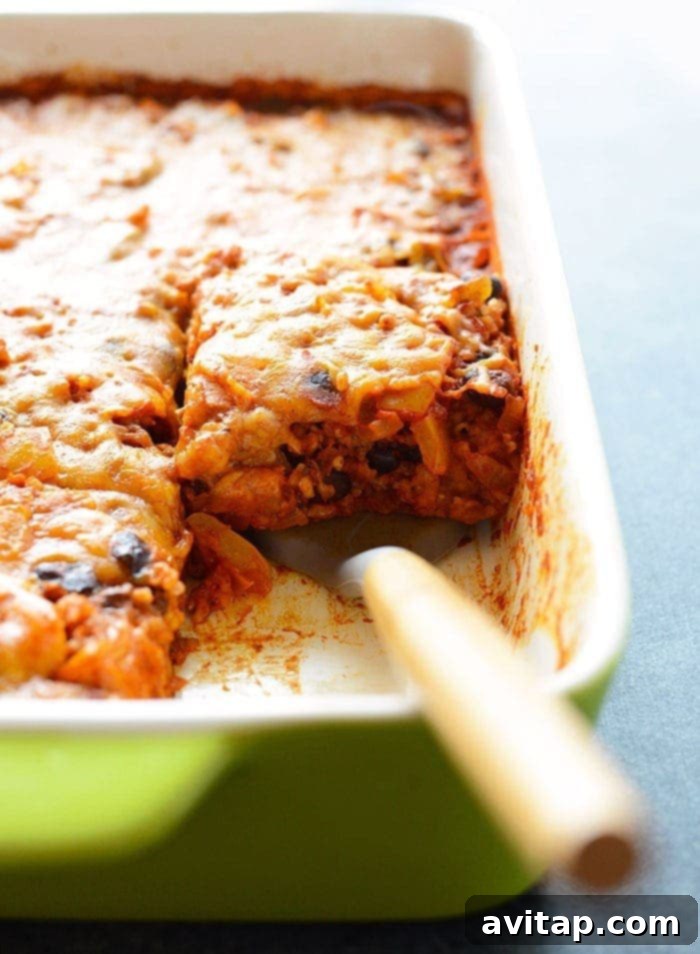
Prepare for a culinary revelation! This isn’t just another dinner recipe; it’s the **best chicken enchilada casserole** you will ever experience. Imagine throwing all your ingredients, raw, into a single casserole dish, and in just 60 minutes, pulling out a healthy, hearty, and unbelievably flavorful chicken casserole. It’s truly that simple, and utterly delicious!
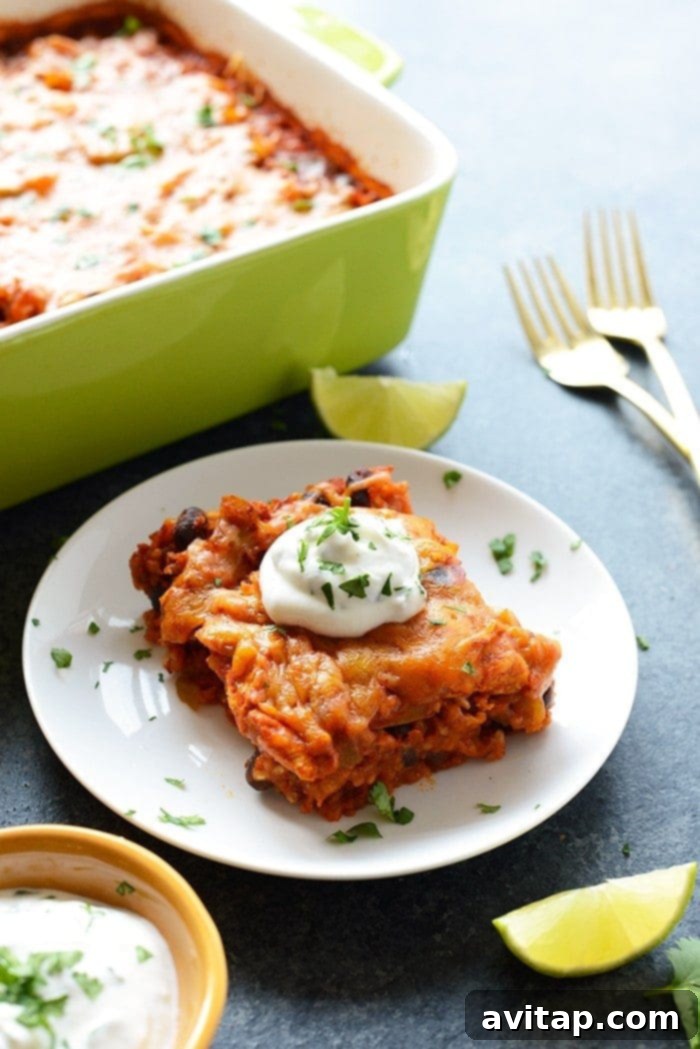
We affectionately call this dish the “**everything but the tortilla chicken enchilada casserole**.” Why skip the tortilla? Because we’ve found a way to enhance both the health profile and the texture by swapping out soggy corn or flour tortillas for wholesome brown rice. This innovative twist results in an extraordinary casserole that everyone, even the pickiest eaters, will adore. It’s a perfect solution for those seeking a gluten-friendly option or simply looking to add more whole grains to their diet without sacrificing flavor.
And here’s a bonus for those mindful of nutrition: each generous serving of this incredible casserole delivers over 30 grams of lean protein, along with a fantastic array of fresh vegetables. It’s a complete, balanced meal that fuels your body and satisfies your taste buds. This recipe isn’t just about convenience; it’s about making smart, healthy choices effortless and enjoyable.
Minimal Prep, Maximum Flavor: Everything Goes in Raw!
One of the standout features of this chicken enchilada casserole, and arguably its greatest charm, is the “set it and forget it” approach. Forget about pre-cooking chicken, sautéing vegetables, or individually rolling enchiladas. This recipe revolutionizes meal prep by requiring absolutely no prior cooking steps for most ingredients. You simply chop your fresh produce, dice your chicken, combine everything in a baking dish, and let your oven do all the hard work. This drastically cuts down on kitchen time and cleanup, making it a perfect weeknight solution for busy families or anyone looking for a stress-free cooking experience. The magic happens right in the oven, infusing all the flavors together beautifully as it bakes.
Choosing Your Chicken
For this recipe, we recommend using boneless, skinless chicken breasts or thighs. Both work wonderfully, offering lean protein and a tender texture when cooked in the sauce. Chicken breasts are a classic choice for their leanness, while thighs can offer a slightly richer flavor and stay incredibly moist. We prefer to chop the chicken into bite-sized pieces (about 1-inch cubes) to ensure even cooking throughout the casserole and make it easier to serve and eat. However, if you prefer, you can also leave the chicken breasts whole or halved; just ensure they are fully submerged in the liquid to cook thoroughly. This method infuses the chicken with rich enchilada flavor from the inside out, yielding incredibly juicy results.
Vibrant Veggies for Health and Taste
This casserole isn’t just about chicken and rice; it’s bursting with the goodness of fresh vegetables. Bell peppers (we use yellow and green for a pop of color and balanced flavor), red onions, and black beans form the flavorful foundation. These ingredients not only add essential vitamins, fiber, and nutrients but also contribute significantly to the casserole’s depth of flavor and appealing texture. But don’t stop there! This recipe is incredibly versatile. Feel free to get creative and incorporate other vegetables you have on hand or seasonal favorites. Here are some fantastic suggestions that would complement the enchilada flavors beautifully:
- **Potatoes:** Diced small, they add a hearty, comforting element.
- **Sweet Potatoes:** For a touch of sweetness and extra nutrients, especially vibrant orange varieties.
- **Butternut Squash:** Adds a creamy texture and earthy sweetness, great for fall.
- **Kale or Spinach:** Wilted into the casserole during the last stir or added raw to cook down, boosting greens.
- **Corn:** Adds a sweet crunch and traditional Tex-Mex flair.
- **Zucchini or Yellow Squash:** Diced, they cook down nicely and add moisture.
The more veggies, the merrier and healthier your casserole will be!
The Heart of the Dish: Enchilada Sauce
The enchilada sauce is truly the star that brings this casserole to life, dictating its overall flavor profile. Your choice here is paramount, so make sure you select a sauce you genuinely enjoy. Enchilada sauces vary widely in terms of spice level, richness, and depth of flavor. Some are milder and sweeter, while others pack a significant chile punch. Tasting your sauce beforehand is a simple yet crucial step to ensure your casserole aligns with your preferred taste.
While many excellent store-bought options are available, a high-quality sauce can make a noticeable difference. Our personal favorite is Frontera Red Chile Sauce, known for its authentic, robust flavor. However, feel free to use any brand you love, or even elevate the dish further by crafting your own homemade enchilada sauce. Homemade versions allow for complete control over ingredients and spice levels, ensuring a truly bespoke flavor. Consider adding a pinch of smoked paprika or a dash of adobo sauce to store-bought varieties for an extra layer of complexity.
Rice: The Game-Changer Instead of Tortillas
Finally, we arrive at the pivotal ingredient that transforms this from a typical enchilada dish into a true casserole: rice. By strategically replacing traditional tortillas with rice, we eliminate the common issue of soggy tortillas while adding a wholesome, satisfying grain that perfectly absorbs all the rich enchilada flavors. This substitution makes the casserole incredibly substantial and provides a delightful texture contrast to the tender chicken and vegetables. The rice acts as a fantastic base, binding all the ingredients together into a cohesive, comforting meal. As you’ll discover below, not all rice is created equal for this recipe, and we’ve done the testing to guide you to the perfect choice for consistent, delicious results.
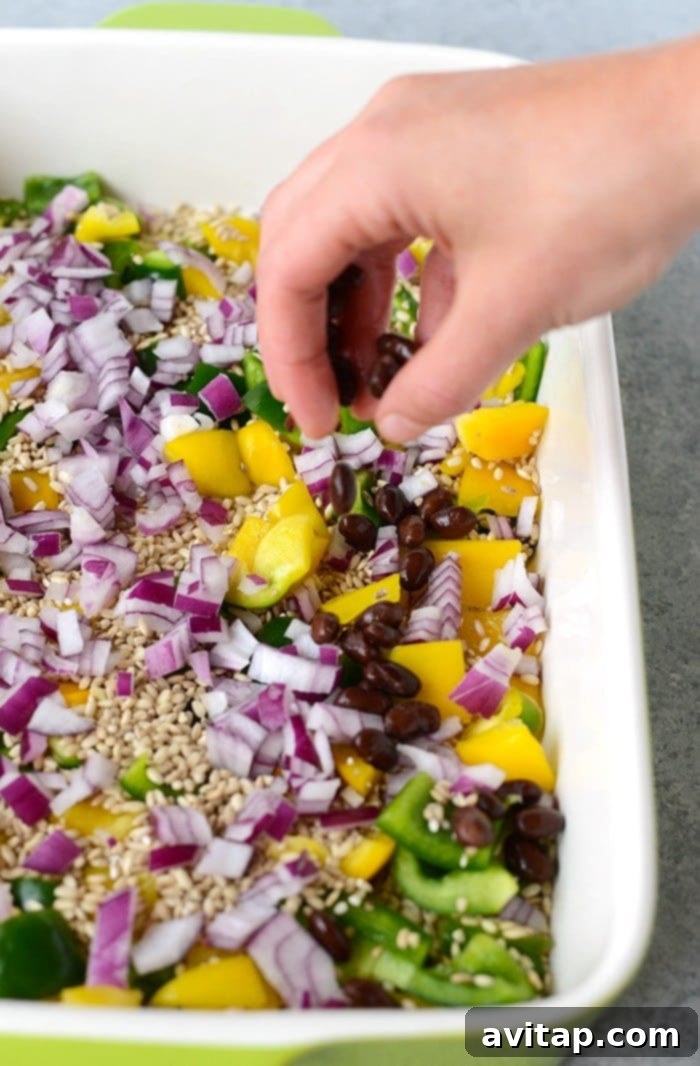
Let’s Talk About Rice Varieties for Your Casserole
Selecting the right type of rice is crucial for the success of this casserole, as it significantly impacts cooking time and final texture. When we first developed this recipe, our go-to choice was **germinated brown rice**. But what exactly is germinated brown rice?
**Germinated brown rice** (also known as GABA rice) is essentially sprouted brown rice. This process involves soaking brown rice to initiate germination, which enhances its nutritional value and, importantly for this recipe, alters its cooking properties. Sprouted rice retains its entire grain structure but undergoes very little processing, preserving its natural nutrients, including gamma-aminobutyric acid (GABA), and its satisfying chewy texture.
A key benefit of germinated brown rice is its faster cooking time compared to traditional long-grain brown rice. This characteristic makes it absolutely perfect for our 60-minute casserole, allowing it to cook tenderly alongside the other raw ingredients within the specified baking duration. It’s the secret to achieving perfectly cooked rice without any pre-boiling or extra steps.
Rice Substitutions and Adjustments
While germinated brown rice is our top recommendation, we understand it might not always be readily available. We’ve tested several alternatives to ensure you can still enjoy this incredible casserole, with a few minor adjustments:
- Long-Grain White Rice: This is by far the best and most straightforward substitution. You can swap long-grain white rice for germinated brown rice at a 1:1 ratio. We have personally tested this method extensively, and it yields excellent results, cooking thoroughly within the original 60-minute baking time. It provides a slightly softer texture than brown rice but still absorbs the rich enchilada flavors beautifully.
- Classic Long-Grain Brown Rice: If you opt for traditional long-grain brown rice, be prepared to adjust your cooking time. Standard brown rice is denser and requires a longer cooking period than its germinated counterpart. You will need to increase the casserole’s bake time by an additional 30 minutes to an hour, or until the rice is tender. To ensure even cooking, you might also consider adding an extra half cup of broth or water during the bake, especially if the casserole starts to look dry.
- Quick-Cooking Brown or White Rice: Although we haven’t personally tested quick-cooking rice for *this specific* recipe, we have successfully used it in similar casserole dishes, such as our Southwest Chicken Casserole. If you decide to use quick-cooking rice (either brown or white), you will need to significantly adjust the liquid content to prevent the casserole from becoming soupy. We recommend decreasing the amount of enchilada sauce by 1 cup and the chicken broth by 1/2 cup. Monitor the casserole closely during the bake, as quick-cooking rice absorbs liquid much faster.
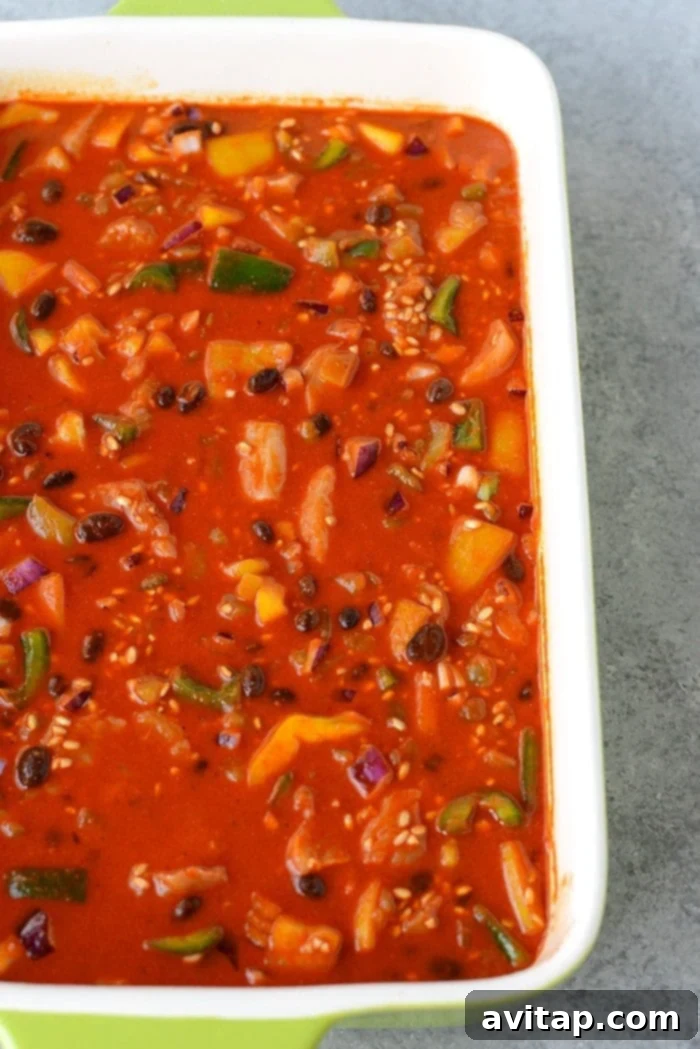
How to Reheat Chicken Enchilada Casserole for Best Results
This chicken enchilada casserole is fantastic as leftovers, making it ideal for meal prepping throughout the week. To maintain its delicious flavor and texture, here are a few options for reheating:
- Microwave: For a quick individual serving, place a portion of the casserole into a microwave-safe bowl. Heat on high for 1.5 to 2 minutes, or until thoroughly warm. For best results and to prevent drying, you can sprinkle a tablespoon of water or chicken broth over the top before heating and cover loosely with a microwave-safe lid or damp paper towel.
- Oven: If you’re reheating a larger portion or the entire casserole, the oven is your best bet for even heating. Preheat your oven to 350ºF (175ºC). Place the casserole back into its dish (or transfer to an oven-safe container) and cover it loosely with aluminum foil to retain moisture. Reheat for approximately 20-30 minutes, or until the center is piping hot. Remove the foil for the last 5 minutes if you like a slightly crisper top.
- Stove-Top: For a single serving that offers a slightly crisper texture, transfer the casserole to a large skillet with 1/2 tablespoon of olive oil or butter. Sauté over medium-high heat for about 5-7 minutes, stirring occasionally, until warmed through. This method can help revive some of the casserole’s original texture, especially the rice. Add a splash of broth if it seems too dry.
No matter the method, ensure the casserole reaches an internal temperature of 165°F (74°C) for food safety.
Can You Freeze Chicken Enchilada Casserole? Absolutely!
This chicken enchilada casserole is an excellent candidate for freezing, making it a dream come true for future meal prep or unexpected busy evenings. Freezing allows you to enjoy a homemade, wholesome meal with minimal effort later on. For optimal convenience, we highly recommend assembling and baking this casserole in a disposable aluminum casserole dish. This way, once it’s cooled, you can simply cover it and pop it straight into the freezer without worrying about tying up your everyday bakeware.
A Pro Tip for Freezing: For the best texture and flavor upon reheating, we suggest holding off on adding the shredded cheese until you are ready to reheat the casserole. Add the cheese during the last few minutes of reheating in the oven for a perfectly melted, fresh topping.
Detailed Freezing Directions:
- Allow the baked casserole to cool completely to room temperature. This is crucial to prevent ice crystal formation and maintain quality.
- Once cool, cover the casserole tightly with a layer of plastic wrap, pressing it down directly onto the surface of the casserole to remove as much air as possible. This helps prevent freezer burn.
- Follow with a layer of heavy-duty aluminum foil, sealing the edges securely around the dish.
- Label the foil with the name of the casserole and the date it was prepared. This casserole can be frozen for up to 3 months.
Reheating from Frozen: To reheat, transfer the frozen casserole to the refrigerator and allow it to thaw completely overnight (or for at least 24 hours). Once thawed, follow any of the reheating methods described above. For an even quicker reheat from frozen (if you’re short on time), you can bake it directly from frozen at 350°F (175°C), covered with foil, for 1 to 1.5 hours, or until thoroughly heated through, adding the cheese for the final 10-15 minutes.
Storage Tips for Leftovers
If you have any delicious leftovers (which is a big “if” with this recipe!), proper storage is key to keeping them fresh and safe to eat. Store the cooked chicken enchilada casserole in a glass, airtight container in the refrigerator for up to 5 days. Glass containers are preferable as they don’t absorb food odors or stains and are easily microwave-safe. For ultimate convenience and an effortless grab-and-go meal prep option, we highly recommend portioning out the casserole into single servings. This makes it incredibly easy to grab a healthy, pre-made lunch or dinner throughout your busy week, saving you time and encouraging healthy eating habits.
Explore More Delicious Chicken Casserole Recipes
If you loved the ease and flavor of this healthy chicken enchilada casserole, you’re in for a treat! We have a wide array of chicken casserole recipes designed to simplify your cooking while delivering maximum taste and nutrition. Discover your next family favorite:
- Easy Orange Chicken Casserole
- Chicken Tikka Masala Casserole
- Healthy Cashew Chicken Casserole
Best Chicken Enchilada Casserole Recipe
This is truly the best chicken enchilada casserole you will ever make! With its simple raw-ingredient assembly and just 60 minutes in the oven, you’ll have a healthy, flavorful chicken casserole ready to delight your family.
By: Lee Funke
Prep Time: 15 minutes
Cook Time: 1 hour
Total Time: 1 hour 15 minutes
Servings: 8
Ingredients
- 1.5 cups germinated brown rice* (see notes below for other options)
- 1 medium yellow bell pepper, diced (about 1 cup)
- 1 medium green bell pepper, diced (about 1 cup)
- 1 cup purple onion, finely diced
- 1 (4.5-ounce) can green chiles
- 1 (15-ounce) can black beans, drained and rinsed
- 1 lb. boneless, skinless chicken breast, cut into 1-inch chunks
- 3 cups enchilada sauce (your favorite brand, or homemade)
- 1 cup chicken broth* (or vegetable broth/water)
- 1 tablespoon garlic powder
- 1 tablespoon ground cumin
- 1/4 teaspoon salt
- 1 cup Mexican shredded cheddar cheese
Optional Toppings:
- Fresh cilantro, chopped
- A squeeze of fresh lime juice
- Greek yogurt or sour cream
- Diced avocado
Instructions
- Preheat your oven to 375ºF (190ºC). Lightly grease or spray a large ceramic casserole dish with nonstick cooking spray.
- Prepare your vegetables: dice the yellow and green bell peppers and finely dice the red onion. Spread these diced vegetables evenly into the prepared casserole dish.
- Prepare the chicken breast by cutting it into approximate 1-inch chunks. Arrange the chicken pieces on top of the vegetables in the casserole dish.
- Add the germinated brown rice, green chiles, and drained black beans directly into the casserole dish, scattering them over the chicken and vegetables.
- In a separate large bowl (a Pyrex or glass bowl works well), combine the enchilada sauce, chicken broth, garlic powder, ground cumin, and salt. Whisk everything together until well combined.
- Carefully pour the sauce mixture evenly over all the contents in the casserole dish.
- Using a large spoon, gently mix all the ingredients in the casserole dish to ensure they are well distributed and coated with the sauce. Press down on all the solid contents to ensure they are mostly submerged in the liquid. This is crucial for the rice to cook properly.
- Cover the casserole dish tightly with aluminum foil (do not skip this step, as it helps steam the rice). Bake for 30 minutes.
- After 30 minutes, carefully remove the casserole from the oven and give it a good stir. The mixture will still appear a bit soupy, which is perfectly normal at this stage. Recover the dish tightly with foil and return it to the oven for another 30 minutes.
- Once the second baking period is complete, remove the casserole from the oven. Sprinkle the shredded Mexican cheese evenly over the top. Place the casserole back into the oven, uncovered, for an additional 3-5 minutes, or until the cheese is beautifully melted and bubbly.
- Remove the casserole from the oven and let it rest for about 5-10 minutes before slicing and serving. This resting time allows the rice to fully absorb any remaining liquid and settle, ensuring perfect texture.
- Serve hot, garnished with fresh cilantro, a dollop of Greek yogurt or sour cream, and a squeeze of fresh lime juice, if desired.
Tips & Notes
- Rice Variations: Germinated brown rice cooks differently than standard short-grain or long-grain brown rice. The most successful substitution we’ve found is long-grain white rice, which can be swapped 1:1 and cooks within the same timeframe. If you choose to use classic long-grain brown rice, you will need to increase the casserole’s cooking time by an additional 30 minutes to an hour. Always check for tenderness.
- Broth Alternatives: You can easily substitute water or vegetable broth for chicken broth if preferred or for dietary reasons.
- Resting is Key: Don’t rush the resting period after baking. Allowing the casserole to sit for 5-10 minutes (covered) is essential. It helps the casserole cool slightly for safe handling and allows the rice to continue cooking through residual heat, ensuring it’s perfectly tender and not crunchy. If your rice feels a bit firm, longer resting time, still covered, can help.
Watch How to Make It
Watch this short video to see just how easy it is to assemble and bake this delicious, healthy chicken enchilada casserole. Visual instructions can help guide you through each step for perfect results every time.
Healthy Chicken Enchilada Casserole: In just 60 minutes, create this healthy chicken enchilada casserole, packed with lean chicken, beans, assorted vegetables, and brown rice. Simply combine all ingredients uncooked in your casserole dish for an effortless, full-flavored family dinner.
Nutrition Information (Approximate Per Serving)
Calories: 487 kcal
Carbohydrates: 76 g
Protein: 34 g
Fat: 8 g
Fiber: 13 g
Sugar: 6 g
Nutrition information is automatically calculated and should be used as an approximation. Actual values may vary based on specific ingredients and preparation methods.
Don’t forget to tag your beautiful creations on social media with the hashtag #fitfoodiefinds. We’d love to see what you’re cooking up!