
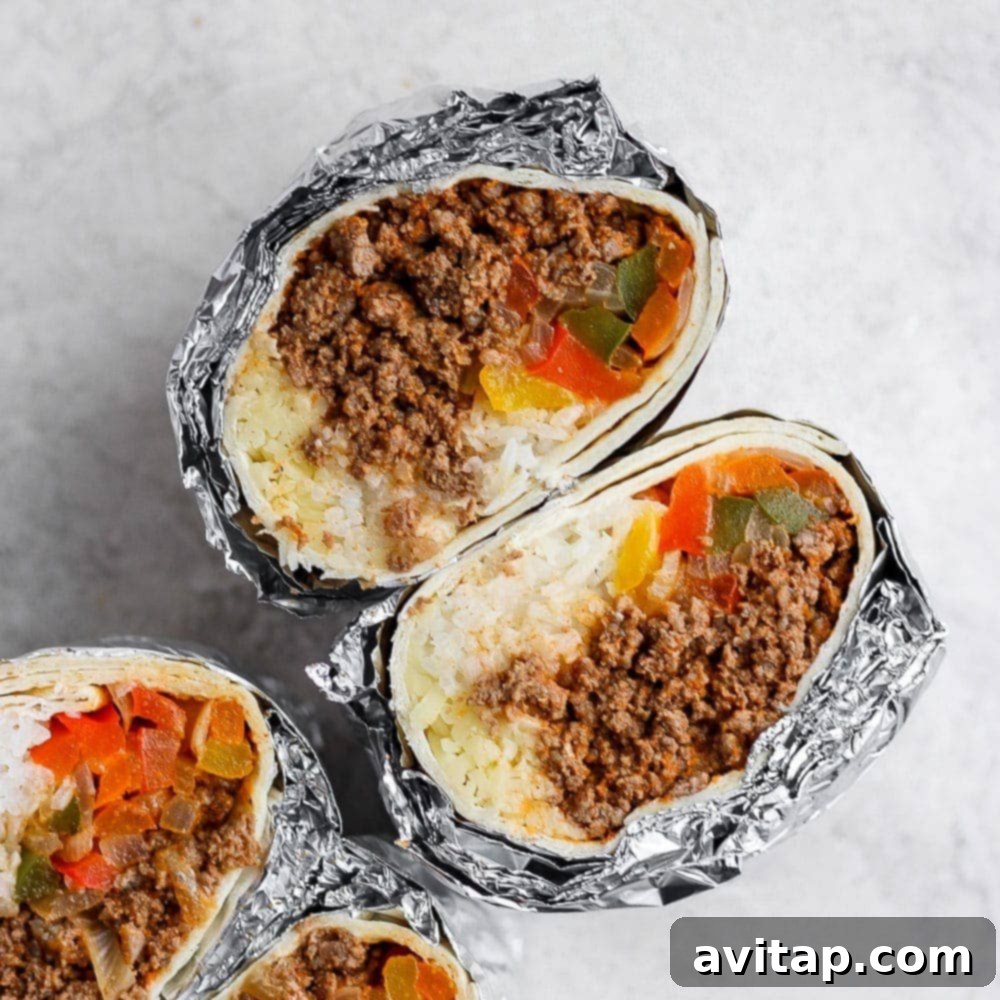
Are you tired of scrambling for lunch ideas every morning? Do you dream of delicious, wholesome meals that are ready in minutes? Look no further! These homemade frozen burritos are an absolute game-changer for anyone seeking convenience without compromising on flavor or health. Perfectly portioned and packed with goodness, they are truly a lifesaver when you need a quick, satisfying meal.
Make-ahead burritos are, without a doubt, one of the most effective forms of meal prep. They offer a fantastic solution for busy weekdays, ensuring you always have a nutritious option at hand. If you’re a fan of freezer-friendly options, be sure to explore our other popular recipes like the vibrant Fajita Breakfast Burritos and our classic Make Ahead Breakfast Burritos, designed to fuel your mornings with ease.
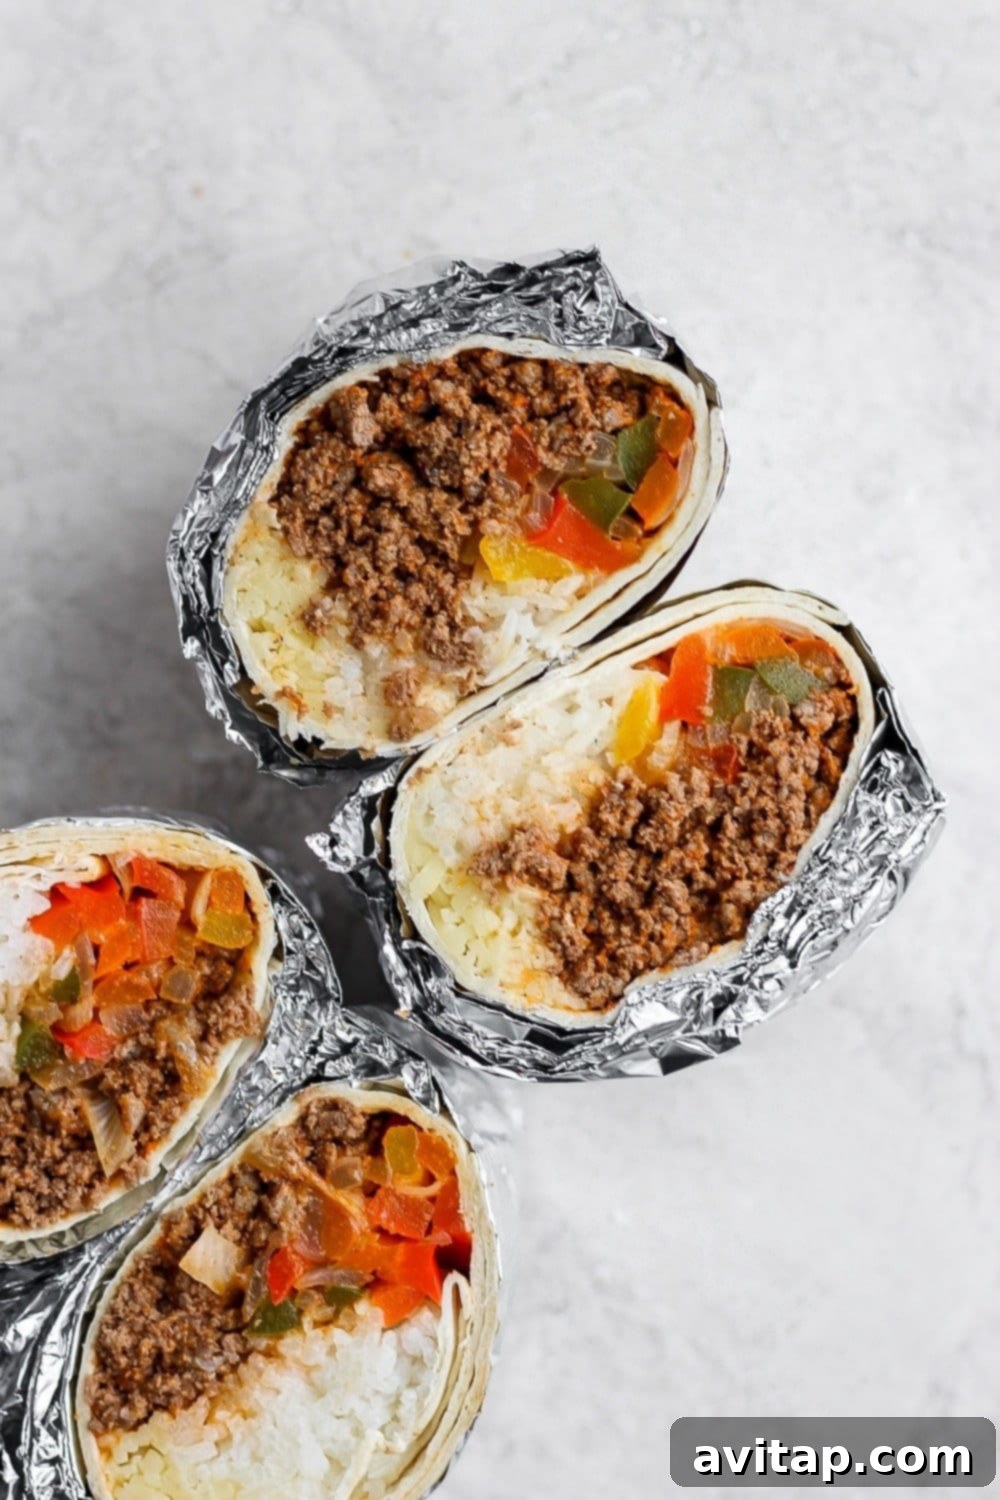
Imagine dedicating just an hour of your day to create 16 hearty, flavorful Homemade Frozen Burritos. This recipe features savory ground beef, a generous medley of colorful vegetables, and fluffy white rice, all wrapped in a soft tortilla. They’re not just easy to make; they’re quite possibly the best lunch meal prep solution you’ll ever discover!
The Ultimate Lunch Meal Prep Solution
We’ve all been there: waking up in a rush, realizing you have “nothing to pack for lunch,” and resorting to less-than-ideal options. That’s precisely why we champion meal prepping with recipes like these burritos. Their freezer-friendly nature means you can whip up a big batch once and enjoy wholesome, homemade lunches for weeks, whether you’re at work, school, or simply need a quick bite at home. Beyond burritos, many other recipes lend themselves beautifully to freezing, ensuring your meal prep efforts go a long way. Consider these fantastic freezer-friendly options:
- Hearty Beef Chili Recipe (perfect for freezing in single-serve portions!)
- Comforting Crockpot Lasagna (a family favorite that freezes wonderfully)
- Flavorful Instant Pot Sweet Potato Curry (delicious and easy to thaw)
A common question arises: “Are frozen burritos unhealthy?” The answer largely depends on where they come from. Store-bought frozen burritos often contain excessive sodium, unhealthy fats, and artificial additives. However, when you make your own make-ahead freezer burritos at home, you gain complete control over the ingredients. This allows you to craft a much healthier, more nutritious, and infinitely more delicious meal compared to their store-bought counterparts. By selecting fresh vegetables, lean proteins, and whole grains, you can create a truly balanced and wholesome meal.
Crafting the Perfect Ground Beef Burritos: A Step-by-Step Guide
Creating these delightful ground beef burritos is a straightforward process, broken down into manageable steps. The beauty of this recipe lies in its efficiency; while one component cooks, you can easily prepare another, making the entire process surprisingly quick.
Step 1: Sizzling Fajita-Inspired Veggies
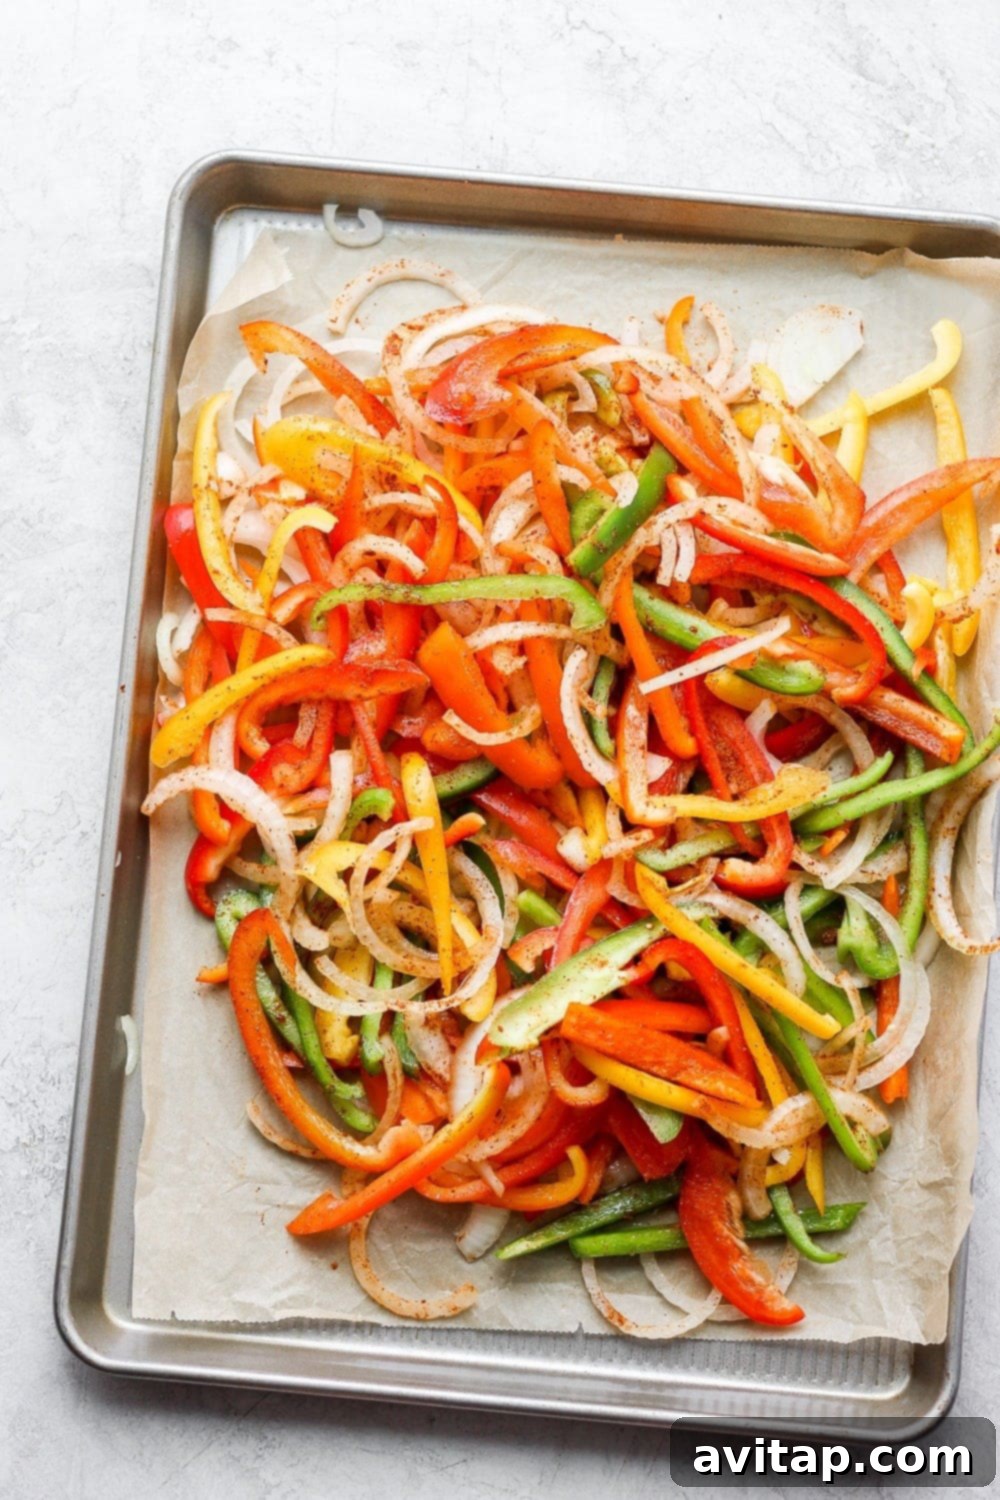
The vibrant and flavorful vegetable medley in these burritos draws inspiration from classic fajitas – think of those delicious additions you find at your favorite burrito spot! We keep things simple yet incredibly tasty with thinly sliced bell peppers and onions, seasoned perfectly with a versatile taco blend. Using a high-quality taco seasoning enhances the overall flavor profile, making these veggies truly pop.
Don’t hesitate to customize your vegetable selection. Feel free to choose your preferred colors of bell peppers – we opted for a colorful mix of three different bell peppers and a large yellow onion for maximum visual appeal and flavor depth. The more color, the more nutrients, and the more appealing your burritos will be!
Method for Perfectly Roasted Veggies: Instead of the traditional pan-frying, we discovered that roasting these vegetables on a baking sheet yields superior results with minimal effort. Roasting offers a “hands-free” approach, allowing the vegetables to caramelize beautifully, intensifying their natural sweetness and tenderness. This method is incredibly simple and efficient, as the veggies can roast in the oven while you simultaneously prepare the other key components of your burritos on the stovetop. Preheat your oven to 375°F (190°C), toss your sliced peppers and onions with a couple of tablespoons of olive oil and two tablespoons of taco seasoning, spread them evenly on a baking sheet, and roast for 20-25 minutes until tender and slightly translucent. Set them aside to cool slightly before assembling.
Step 2: Fluffy and Flavorful Rice
With your aromatic vegetables roasting in the oven, it’s time to get your rice cooking. While we’ve chosen classic long-grain white rice for this recipe due to its universal appeal and quick cooking time, this is another area where you can truly make the recipe your own. The choice of grain can significantly alter the texture and nutritional profile of your burritos.
Consider these fantastic grain options:
- **White Rice:** A classic choice, quick to cook and provides a neutral base that complements the other strong flavors.
- **Brown Rice:** For a heartier, nuttier flavor and an extra boost of fiber and nutrients. Try our delicious cilantro lime brown rice for an added zing!
- **Quinoa:** A protein-rich, gluten-free alternative that adds a pleasant texture. Learn how to make perfect quinoa in your Instant Pot.
- **Cauliflower Rice:** An excellent low-carb, vegetable-packed option for those looking to reduce their carbohydrate intake.
- **No Rice At All:** If you prefer a meat and veggie-heavy burrito, feel free to omit the rice entirely!
Method for Cooking Rice: For this recipe, we used the stovetop method, which is straightforward and reliable. Combine 1 cup of white rice with 2.25 cups of water in a small pot, bring it to a boil, then reduce heat to low, cover, and simmer for 15-20 minutes until all the water is absorbed and the rice is tender. Alternatively, you can utilize a rice cooker or an Instant Pot for even more convenience, depending on your preferred method and kitchen equipment.
Step 3: Savory Ground Beef Filling
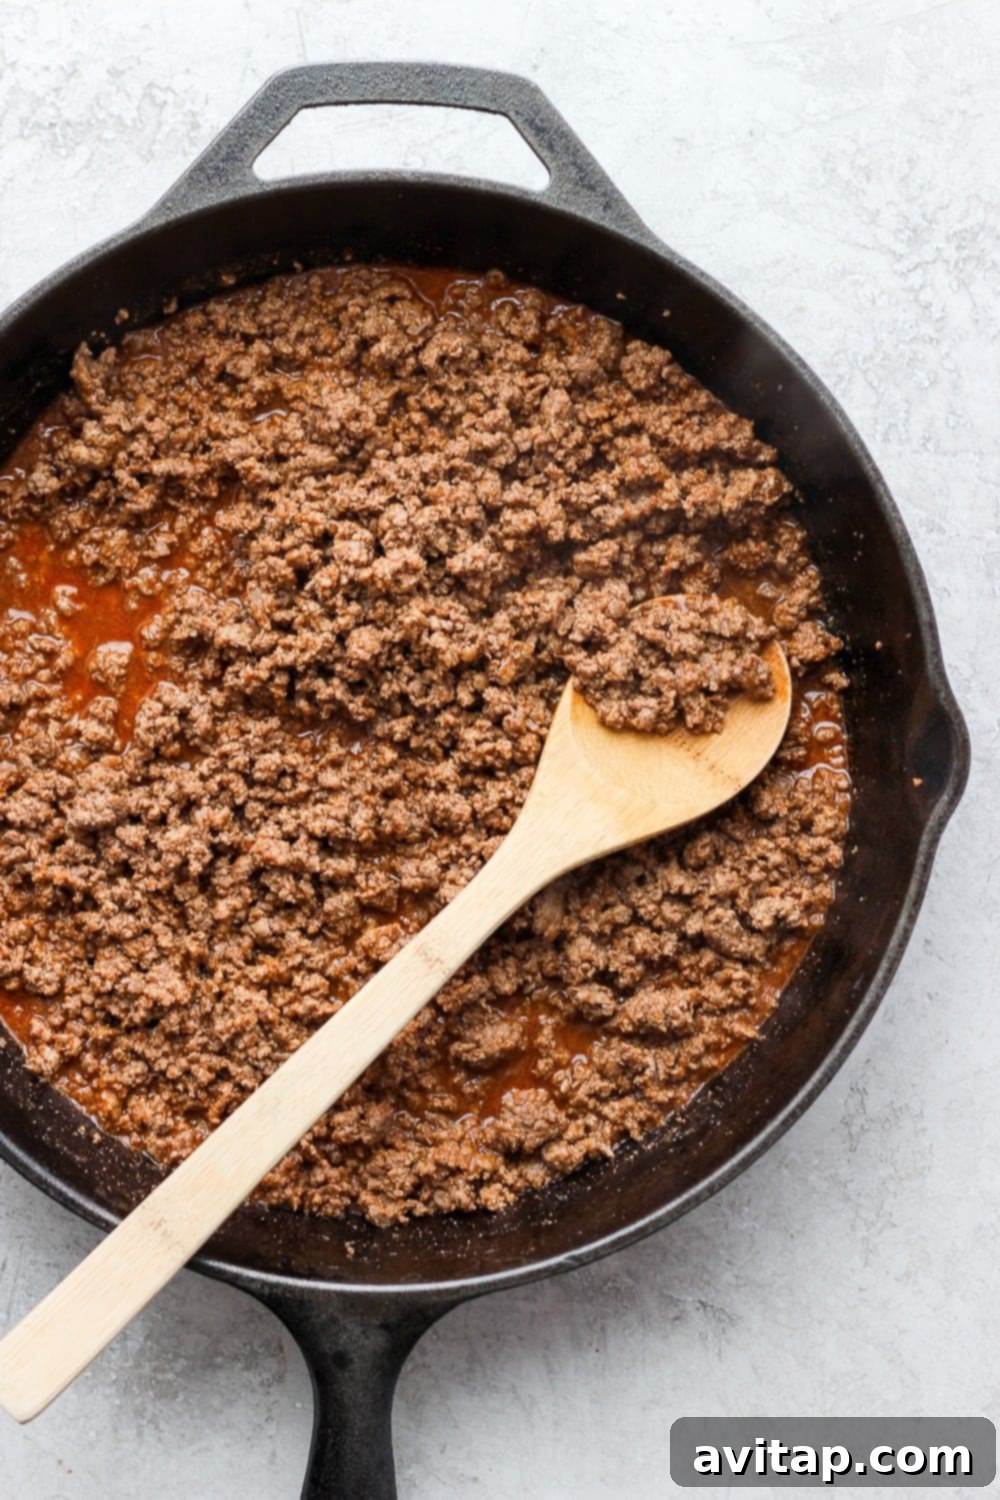
While your vegetables are roasting to perfection and your rice is gently simmering, it’s the ideal time to prepare the star of our burritos: the seasoned ground beef. We’ve taken a clever shortcut here, repurposing our incredibly popular ground beef taco meat recipe because, quite frankly, it’s just that good and perfectly suited for burritos! This flavorful filling comes together with just four essential ingredients, starting with a pound of high-quality ground beef.
Here’s what you’ll need for the ultimate taco/burrito meat:
- **High-Quality Ground Beef:** We recommend 85% lean ground beef for a good balance of flavor and leanness. You can adjust this based on your preference.
- **Tomato Paste:** This concentrated paste adds a rich, umami depth and a touch of sweetness that beautifully complements the savory beef.
- **Taco Seasoning:** The flavor backbone! We highly recommend using our homemade taco seasoning for superior flavor and control over ingredients, but your favorite store-bought blend works too.
- **Water:** To help integrate the flavors and create a slightly saucy, moist filling that won’t dry out in your burritos.
Method for Browning Ground Beef: The quickest and easiest way to prepare the ground beef is on the stovetop. Heat a large nonstick skillet over medium-high heat. Add your ground beef and break it apart with a spoon, sautéing for 7-10 minutes until it’s almost fully browned. Drain any excess fat, then stir in the tomato paste, taco seasoning, and water. Continue to cook for a few more minutes, allowing the liquid to reduce and the flavors to meld beautifully. Once done, remove from heat and set aside with your other prepared components.
Mastering the Art of Burrito Wrapping
Wrapping a burrito might seem intimidating at first, but with a few simple techniques, you’ll be a pro in no time! The goal is a tightly rolled burrito that holds all its delicious fillings securely, preventing any messy leaks. The most crucial factor here is ensuring you use a tortilla that is generously sized to accommodate all your wonderful ingredients without tearing.
Our top tortilla tip for perfect make-ahead burritos is to always opt for a large flour tortilla! While corn and whole wheat tortillas have their merits, they generally don’t hold up as well under the stress of being filled, wrapped tightly, frozen, and reheated. Flour tortillas offer superior flexibility and durability, making them the ideal choice for freezer burritos.
Here’s a step-by-step guide to wrapping your burritos:
- **Prepare Your Workspace:** Lay your large flour tortilla flat on a clean, dry surface.
- **Arrange the Fillings:** Place a portion of your cooked ground beef, roasted vegetables, rice, and a sprinkle of shredded white cheddar cheese (or your cheese of choice) in the center of the tortilla. It’s important to arrange the fillings in a compact, slightly elongated mound, leaving ample space on the sides for folding. Don’t overfill!
- **Initial Fold:** Take the bottom edge of the tortilla and fold it tightly over the fillings, tucking it snugly underneath them. This creates the essential foundation for a secure wrap.
- **Side Folds:** Next, fold in both the left and right sides of the tortilla towards the center. Press down gently to ensure everything is contained and nothing can spill out.
- **Tight Roll:** Finally, starting from the folded bottom edge, tightly roll the burrito upwards towards the top edge. Apply firm, even pressure as you roll to ensure the burrito is compact and well-sealed. You should end up with a neat, cylindrical package of deliciousness!
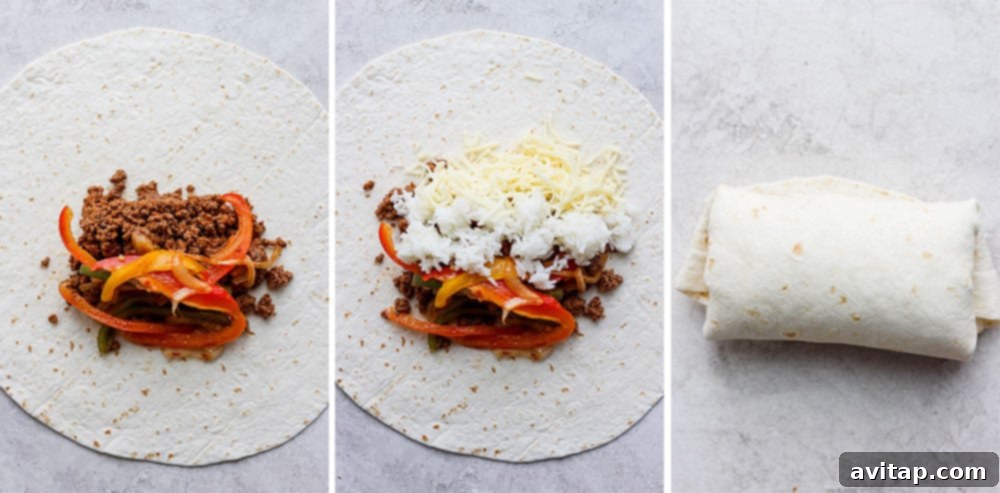
How to Properly Freeze Homemade Burritos for Long-Term Storage
Properly freezing your homemade burritos is key to maintaining their quality, flavor, and texture for weeks or even months. Follow these steps meticulously to prevent freezer burn and ensure your burritos taste as fresh as possible when reheated.
- **Cool Completely:** This is a crucial step! Allow your freshly wrapped burritos to cool down to room temperature completely before freezing. Placing warm burritos directly into the freezer can create condensation, which leads to ice crystals and ultimately, freezer burn.
- **Tight Wrapping is Essential:** Once cooled, tightly wrap each individual burrito. We recommend using a sturdy piece of aluminum foil. Ensure there are absolutely no gaps, and the burrito is fully covered from all angles. While some people opt for an initial layer of plastic wrap before foil, we’ve found that a diligent foil wrap is sufficient and often less wasteful.
- **Remove Air:** As you wrap, press out as much air as possible from between the burrito and the tin foil. Air is the enemy of frozen food, as it contributes significantly to freezer burn, causing food to become dry and less flavorful.
- **Label Clearly:** Use a permanent marker (like a Sharpie) to clearly write the name of the burrito (e.g., “Beef & Veggie Burrito”) and a “best-by date” directly on the foil. Generally, these burritos are best enjoyed within 3 months of preparation. This helps you keep track of your freezer inventory and ensures you consume them at their peak quality.
- **Strategic Freezing:** You can place the wrapped burritos directly into the freezer, either in a single layer until solid, then transfer them to a large freezer-safe bag, or immediately stack them in an airtight freezer container. Freezing them flat initially helps them hold their shape.
- **Optimal Storage:** Store your burritos in the freezer for up to 3 months. Beyond this period, they will still be safe to eat, but their quality might begin to diminish.
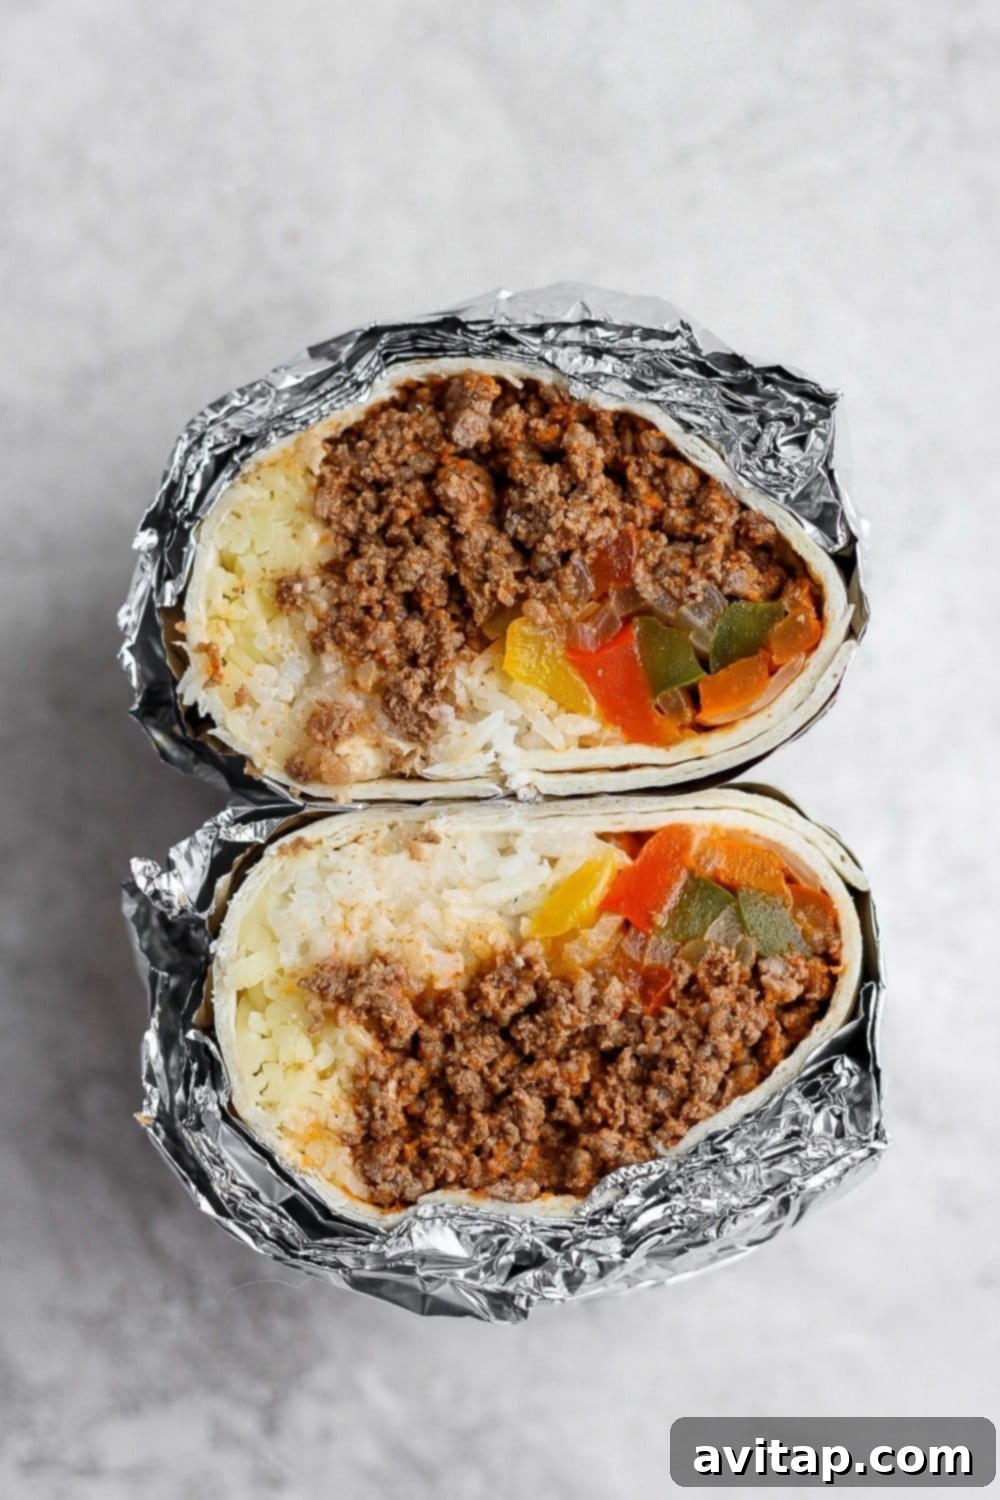
Reheating Your Frozen Burritos to Perfection
One of the greatest advantages of make-ahead freezer burritos is how simple they are to reheat, transforming from a frozen block to a hot, delicious meal in minutes. The method you choose will depend on how much time you have and your preference for texture.
How long do you cook frozen burritos? The cooking time varies, but generally, you’re aiming for the filling to be thoroughly heated through and the tortilla to be soft and pliable. Never reheat a burrito that is still wrapped in plastic wrap in the microwave, always remove the plastic!
Microwave Option (Quickest Method):
For a super quick lunch, the microwave is your best friend. First, unwrap the tin foil from your frozen burrito. Place the unwrapped burrito on a microwave-safe plate. Begin by defrosting it in the microwave on a medium power setting (around 50%) for 2-3 minutes, flipping halfway, to ensure the center thaws. Once partially defrosted, microwave on high for an additional 1-3 minutes, or until the filling is piping hot throughout. Be cautious not to overcook, as this can make the tortilla tough. If you like a slightly crispy exterior, you can finish it in a dry skillet for a minute or two after microwaving.
Oven Option (For Best Texture):
If you have a bit more time and prefer a crisper tortilla and more evenly heated filling, the oven is the way to go. This is where the tin foil comes in handy! Preheat your oven to 350ºF (175ºC). Place your frozen burrito(s), still fully wrapped in tin foil, directly onto a baking sheet. Baking them wrapped helps to steam the tortilla and keep it soft while the filling heats up. If you prefer a slightly crispier tortilla, you can remove the foil for the last 5-10 minutes of baking. Bake for 30-45 minutes, or until the burritos are completely thawed and heated through to your desired temperature.
Remember to always check the internal temperature of your burrito to ensure it’s safely heated. A food thermometer should read 165°F (74°C) in the center.
Explore More Delicious Freezer Burrito Recipes
Once you’ve experienced the convenience and deliciousness of these make-ahead burritos, you’ll likely want to expand your freezer meal repertoire. We have a variety of other fantastic freezer burrito recipes that cater to different tastes and dietary preferences:
- Spice up your morning with our savory Fajita Breakfast Burritos, packed with flavor and ready to go.
- For a classic start to your day, try our ever-popular Make-Ahead Breakfast Burritos, perfect for busy mornings.
- Looking for a plant-based option? Our delightful Vegetarian Black Bean Breakfast Burritos are a nutritious and satisfying choice.
Average Rating: 5 from 1 vote
Make Ahead Freezer Burritos
These homemade frozen burritos are so easy to make and a lifesaver when you don’t know what to pack for lunch!
By: Lee Funke
Prep Time: 30 mins
Cook Time: 25 mins
Total Time: 55 mins
Servings: 16
Print Recipe
Ingredients
Veggies
- 5 bell peppers, any color, thinly sliced
- 1 large yellow onion, thinly sliced
- 2 tablespoons olive oil
- 2 tablespoons taco seasoning
Rice
- 1 cup long-grain white rice
- 2.25 cups water
Beef
- 2 lbs. 85% ground beef
- 2 tablespoons tomato paste
- 5 tablespoons taco seasoning
- ¾ cup water
Other
- 8 oz. shredded white cheddar cheese
- 16 large flour tortillas
Instructions
Veggies
- First, preheat oven to 375ºF (190°C).
- Then, prepare bell peppers and onion by thinly slicing them.
- Place veggies on a large baking sheet and drizzle with olive oil.
- Then, season with taco seasoning and toss to coat evenly.
- Bake at 375ºF (190°C) for 20-25 minutes or until onions become translucent and peppers are tender.
- Set aside to cool slightly.
Rice
- Place 1 cup of white rice and 2.25 cups of water into a small pot.
- Bring to a boil over medium-high heat.
- Once boiling, reduce heat to low and cover tightly. Let simmer for around 15-20 minutes or until all water absorbs and rice is fluffy.
Beef
- While the veggies are cooking, heat a large nonstick skillet over medium-high heat.
- Then, add in ground beef and sauté for 7-10 minutes, breaking it apart, until almost fully browned. Drain any excess fat.
- Add in tomato paste, taco seasoning, and water, and continue cooking for a few more minutes until the liquid reduces and flavors meld.
- Set aside.
Assembling & Freezing Beef Burritos
- Prepare beef burritos by laying out all 16 large flour tortillas on a clean surface.
- Then, evenly distribute the cooked ground beef, roasted veggies, and prepared rice across the center of each tortilla.
- Finally, sprinkle a handful of shredded white cheddar cheese over the fillings.
- Tightly wrap each burrito: fold the bottom edge over the filling, fold in the outside ends, and then roll tightly from bottom to top to create a secure package.
- Once wrapped, immediately wrap each individual burrito tightly in a piece of tin foil, pressing out as much air as possible to prevent freezer burn.
- Label each wrapped burrito with its contents and the date. Store them in the freezer for up to 3 months.
Nutrition
Calories: 384 kcal
Carbohydrates: 36 g
Protein: 19 g
Fat: 18 g
Fiber: 3 g
Sugar: 3 g
Nutrition information is automatically calculated, so should only be used as an approximation.
Love this recipe? Leave a comment below!
Don’t forget to tag your posts on social media with the hashtag #fitfoodiefinds – we’d love to see your delicious make-ahead burritos!