
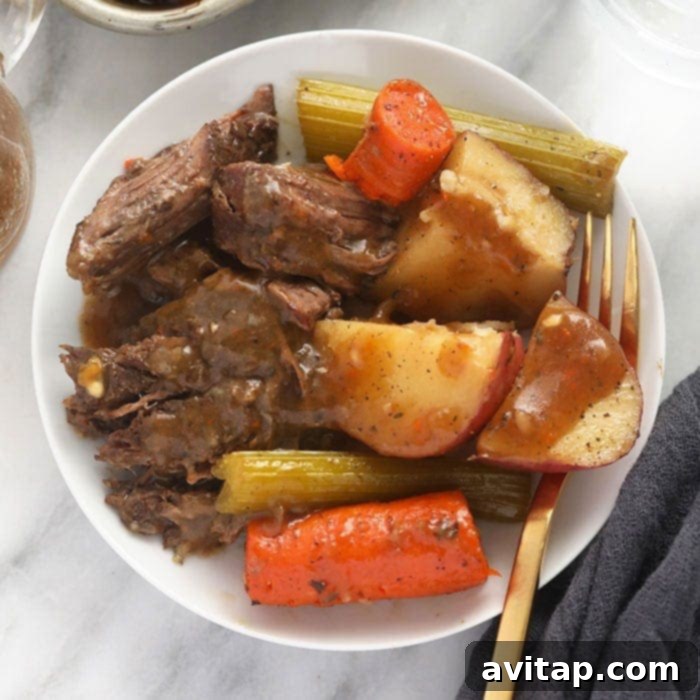
For all pot roast enthusiasts, this recipe is a true game-changer! Prepare to indulge in the most delicious and savory Instant Pot Pot Roast, loaded with vibrant vegetables and a rich, homemade gravy, all ready in less than two hours. Forget long hours in the oven; your pressure cooker unlocks incredible flavor and tenderness with remarkable speed.
Craving more amazing roast recipes? Don’t miss our equally delightful Instant Pot Pork Roast for another tender, flavorful meal!
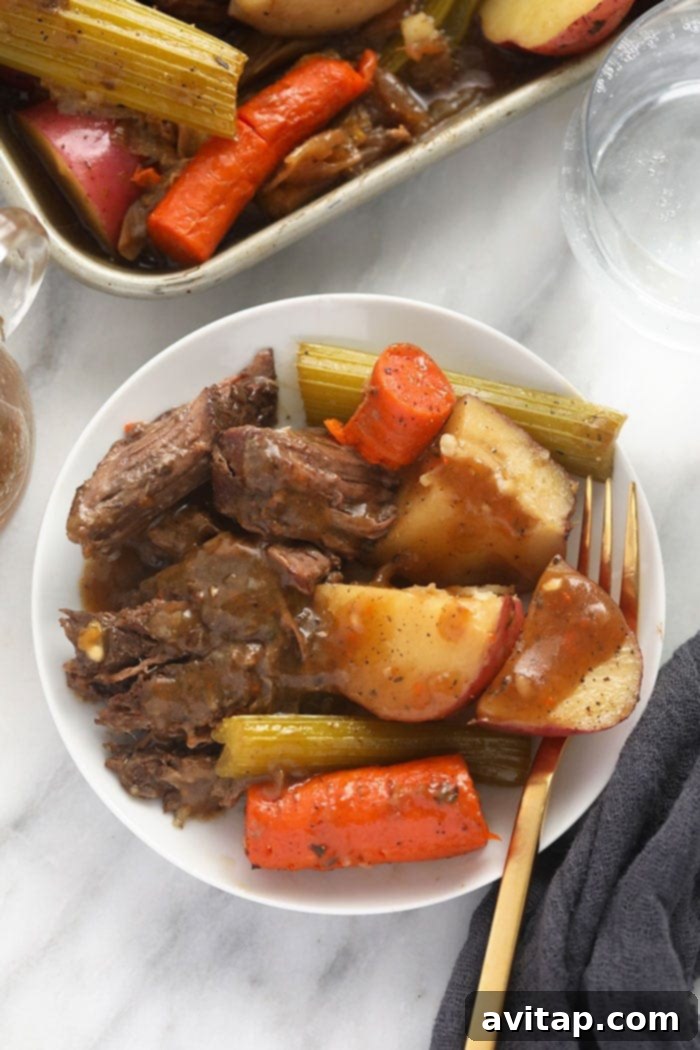
The Ultimate Instant Pot Pot Roast: A Hearty, Flavorful Family Meal
As the colder months arrive, there’s nothing quite like a hearty, comforting meal to warm you from the inside out. Here in Minnesota, we embrace these savory, meaty dishes, and this Instant Pot Pot Roast stands out as a true family favorite. It fills your kitchen with an irresistible aroma and delivers a perfectly tender, flavorful meal in a fraction of the time compared to traditional oven-cooked versions, thanks to the magic of pressure cooking.
This comprehensive guide will walk you through every step, ensuring your pot roast is not just cooked, but perfected. From selecting the ideal cut of beef to creating a velvety homemade gravy, we’ve got you covered. Get ready to impress your family and friends with a dish that tastes like it’s been simmering all day, but comes together with surprising ease.
Understanding Chuck Roast: The Ideal Cut for Pot Roast
At the heart of any great pot roast is the right cut of meat. A chuck roast, also commonly labeled as pot roast or shoulder steak in grocery stores, comes from the shoulder of the animal. This cut is celebrated for its rich marbling and connective tissues, which, when slow-cooked or pressure-cooked, break down beautifully to create incredibly tender, melt-in-your-mouth beef. For this specific recipe, we recommend using a boneless beef chuck roast, ensuring consistent tenderness and easier shredding.
Pro Tip: While this recipe is optimized for a boneless chuck roast, a bone-in chuck roast can also be used. However, be aware that the presence of the bone will generally increase the required cooking time in your Instant Pot. The bone adds extra flavor, but it takes longer for the meat to fully break down and reach that desired tender consistency. If you choose this method, consider adding an additional 10-15 minutes to the pressure cooking time and always check for tenderness before concluding the cook.
Selecting the Right Size Chuck Roast
For this recipe, we achieved fantastic results with a 2.5 lb. chuck roast, which comfortably serves 6 people. We’ve found that any chuck roast weighing between 2.5 and 3 lbs. will work perfectly with the cooking times and ingredient ratios provided. This range ensures enough meat for a generous family dinner while allowing the Instant Pot to cook it efficiently.
Size & Cook Time: It’s important to note that if your chuck roast is significantly smaller or larger than the recommended 2.5-3 lbs., your Instant Pot cook time may need to be adjusted. Smaller roasts might cook slightly faster, while larger ones will require more time to become fork-tender. Always ensure the meat is easily shreddable before proceeding to the next steps.
Crafting the Perfect Instant Pot Pot Roast: Step-by-Step Guide
Creating an extraordinary Instant Pot Pot Roast involves a series of carefully executed steps, each contributing to the rich, complex flavors and melt-in-your-mouth texture that defines this classic dish. Follow these instructions closely for a truly unforgettable meal.
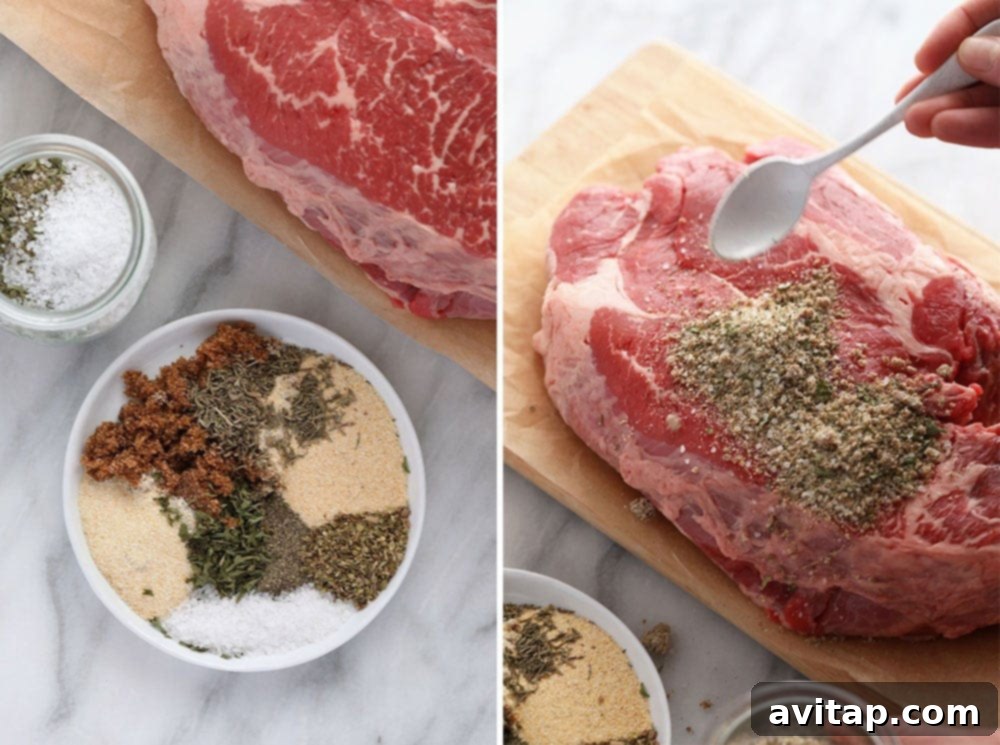
Step 1: Mastering the Pot Roast Seasoning
The foundation of a truly exceptional pot roast lies in its seasoning. A well-balanced spice rub not only infuses the meat with incredible flavor but also helps create that beautiful crust during the searing process. Our signature blend is designed to complement the rich beef perfectly, offering a savory depth with a hint of sweetness. You’ll need:
- Brown sugar (for a subtle sweetness and caramelization)
- Garlic powder (for aromatic depth)
- Onion powder (to enhance savory notes)
- Dried oregano (for an earthy, slightly peppery kick)
- Dried thyme (for a classic, savory herb essence)
- Dried parsley (for freshness and color)
- Coarse salt (essential for drawing out moisture and seasoning the meat throughout)
- Black pepper (for a touch of warmth and spice)
Begin by combining all these spices in a small bowl. Once mixed, generously rub this blend all over your chuck roast, ensuring every surface and crevice is thoroughly coated. Don’t be shy; it might seem like a lot of seasoning, but this liberal application is crucial for developing the robust flavor profile that will permeate your entire pot roast.
Step 2: Sautéing Aromatics for Deep Flavor
One of the Instant Pot’s greatest advantages is its “Sauté” function, which allows you to brown ingredients directly in the pot before pressure cooking. This not only builds layers of flavor but also significantly reduces cleanup, making it a true one-pot wonder!
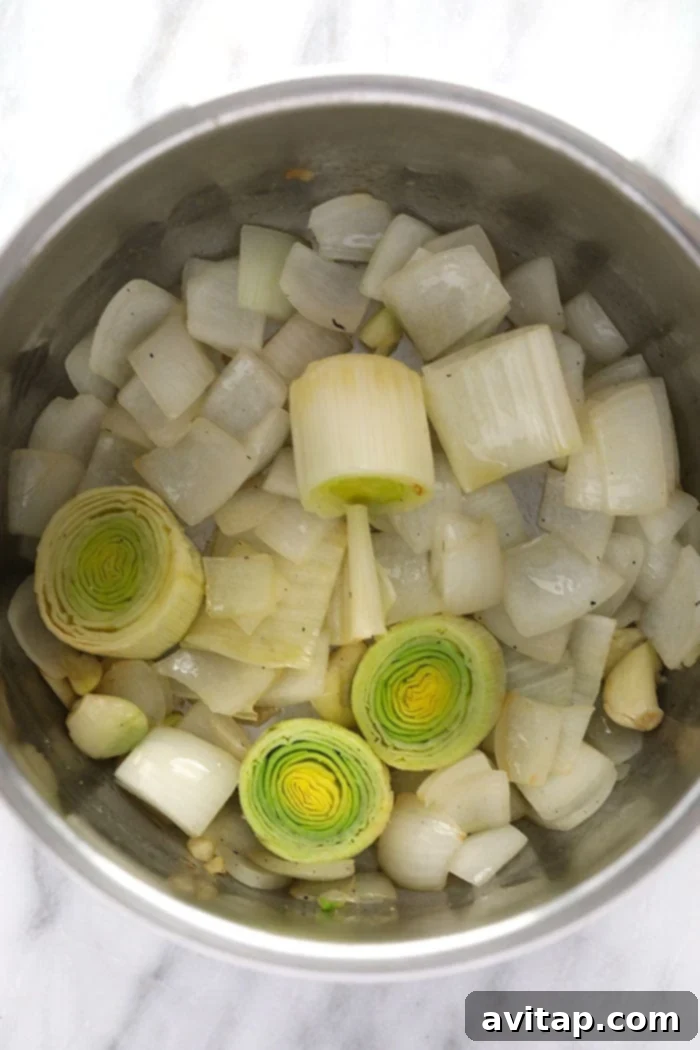
Activate your Instant Pot’s sauté function. Once heated, add a drizzle of olive oil, then stir in your chopped onions, smashed garlic cloves, and leeks. Sauté these aromatics for 3-4 minutes until they become fragrant and slightly softened. This step is vital as it extracts their delicious savory essences, which will then infuse into the chuck roast as it pressure cooks. Once softened, carefully remove the sautéed onions, leeks, and garlic from the Instant Pot and set them aside. We’ll add them back later to mingle with the beef and gravy.
Step 3: Achieving the Perfect Sear on Your Chuck Roast
The sauté function isn’t done yet! After removing your aromatics, it’s time to give your chuck roast a beautiful, flavorful sear. This step is non-negotiable for a truly exceptional pot roast.
Add another tablespoon or two of olive oil to the Instant Pot, ensuring the bottom is well coated. Carefully place your seasoned chuck roast into the hot pot and sear each side for 3-4 minutes, until it develops a deep golden-brown crust. The goal here is to create a rich, caramelized exterior, not to cook the meat through.
Why is searing so important before pressure cooking? Searing achieves several critical things: it locks in the natural meaty juices, creating a more succulent final product; it develops complex, savory flavors through the Maillard reaction, which can’t be achieved through boiling alone; and it kickstarts the meat tenderization process by beginning to break down surface proteins. By searing now, you also save yourself the hassle of having to remove everything from the pot to sear at the end, streamlining your cooking process.
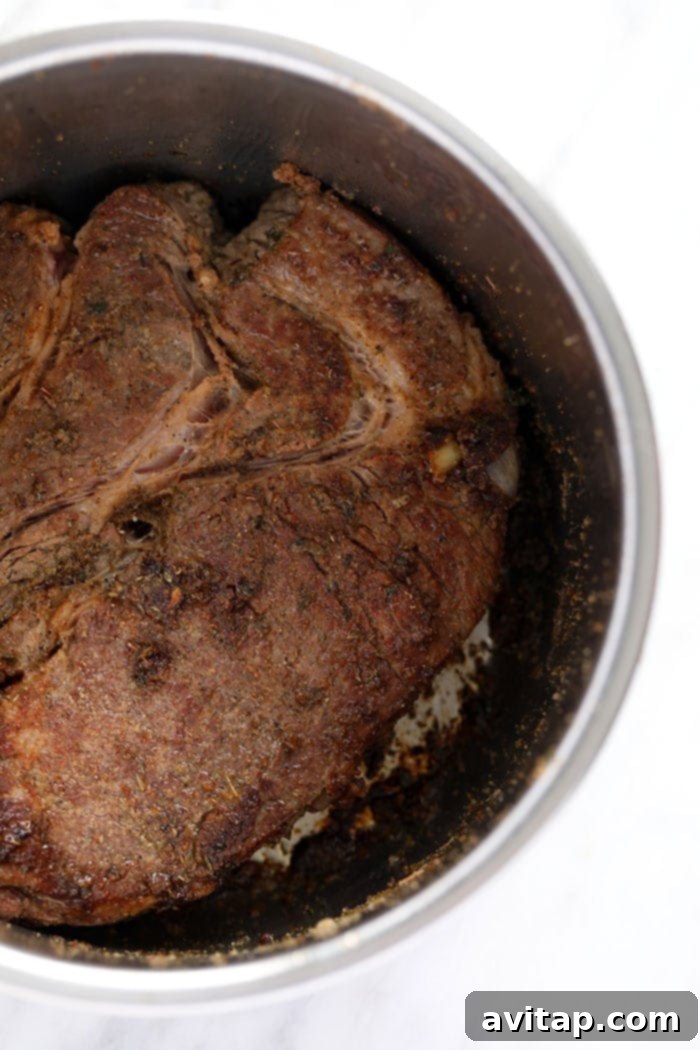
Step 4: Deglazing – Unlocking Hidden Flavors and Preventing Burn
Once your pot roast has a beautiful brown sear, remove it from the Instant Pot and set it aside. Now comes a crucial step: deglazing the pot.
What is deglazing and why is it essential? Deglazing involves adding a liquid to the hot pot and scraping up all the flavorful browned bits (fond) that have stuck to the bottom during searing. This process is absolutely vital for two main reasons: it prevents the dreaded “burn notice” on your Instant Pot by ensuring no bits are scorched, and it incorporates all those caramelized, concentrated flavors back into your dish, forming the delicious base for your gravy. For this recipe, we’ll use a rich combination of dry red wine, robust beef broth, and a splash of Worcestershire sauce to effectively deglaze the pot and build a powerful flavor profile.
Step 5: Pressure Cooking for Unbelievably Tender Meat
With the pot deglazed, it’s time to assemble for pressure cooking. Return the sautéed onions, leeks, and garlic back into the Instant Pot, spreading them evenly at the bottom. These aromatics will continue to infuse the cooking liquid, contributing immensely to the final gravy. Carefully place the browned pot roast on top of the vegetables.
Secure the Instant Pot lid and turn the steam release valve to the “Sealing” position. Set your Instant Pot to “Manual” or “Pressure Cook” mode on “High Pressure,” and set the timer for 90 minutes. It’s normal for the Instant Pot to take about 10-15 minutes to build pressure before the countdown begins. Once the 90 minutes are complete, perform a “Quick Release” by carefully moving the steam release valve to the “Venting” position to release the pressure rapidly.
After 90 minutes, your pot roast should be incredibly tender, practically falling apart at the touch of a fork. If it’s not quite there yet, don’t worry! Simply close the lid, set the valve to “Sealing,” and pressure cook for another 5-10 minutes. Once the meat reaches your desired “fall-off-the-bone” texture, carefully remove it from the Instant Pot and set it aside for shredding.
Step 6: Incorporating Hearty Root Vegetables
No pot roast is complete without a medley of tender, flavorful root vegetables that have absorbed all the rich cooking juices. Even if you’re not a fan of every single vegetable, we strongly encourage including them as they contribute significantly to the overall depth and complexity of the dish and the final gravy. Trust us, the combination is truly perfect!
- Carrots (for sweetness and color)
- Celery stalks (for a savory, aromatic base – yes, even you celery skeptics!)
- Red potatoes (these become wonderfully tender and can be mashed at the end if you prefer)
Pro Tip: Consistency in size is key for evenly cooked vegetables. Make sure to slice your carrots, celery, and potatoes into roughly similar-sized chunks. In our photos, the veggies are left a bit larger for presentation. If you prefer smaller cuts for faster cooking or a softer texture, you may need to decrease the subsequent pressure cooking time to prevent them from becoming too mushy.
Add all your prepared vegetables into the Instant Pot, placing them on top of the flavorful drippings that remain. Close the lid and turn the valve to “Sealing.” Set the Instant Pot to “Manual” or “Pressure Cook” on “High Pressure” for just 2 minutes. After the timer goes off, perform another “Quick Release.” Your vegetables should be perfectly tender-crisp. If they feel a little too firm, simply close the lid again, set the timer for 0 or 1 minute, and let the residual heat or a quick burst of pressure finish them off.
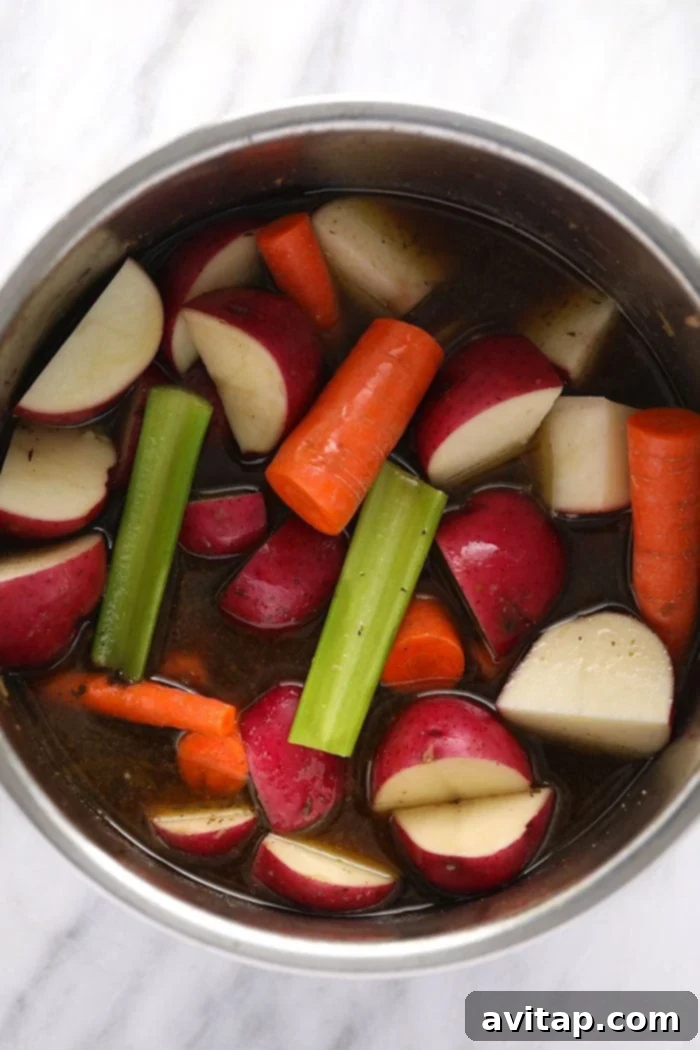
Step 7: Creating a Rich, Homemade Gravy
Now for the pièce de résistance: the gravy! The wonderful news is that the foundation for your gravy is already in your Instant Pot – those flavorful drippings are gold. All that’s left to do is thicken them to a luscious, spoonable consistency.
Carefully remove any remaining large solid pieces from the Instant Pot, leaving only the liquid. Turn on the “Sauté” function again. The heat is crucial here, as it activates the starch. Sprinkle in the cornstarch, then immediately use a whisk to continuously whisk it into the hot liquid until it fully dissolves and the gravy begins to thicken. This process typically takes 3-5 minutes. Once your gravy has reached a beautiful, rich consistency, taste and adjust seasoning with additional salt and pepper as needed. Transfer the velvety gravy into a serving jug or bowl.
Step 8: Shredding Your Perfect Pot Roast
With your vegetables cooked, your gravy perfected, and your beef unbelievably tender, it’s time to bring it all together. Using two forks, easily shred the pot roast into large, succulent chunks. We love to drizzle a little of that incredible homemade gravy over the shredded beef to keep it wonderfully juicy and enhance its rich flavor. This also helps to further integrate the beef into the overall dish.
Pro Tip: Before serving, take a moment to discard any large pieces of fat that might be present in the shredded meat. This ensures a cleaner, more enjoyable texture in every bite.
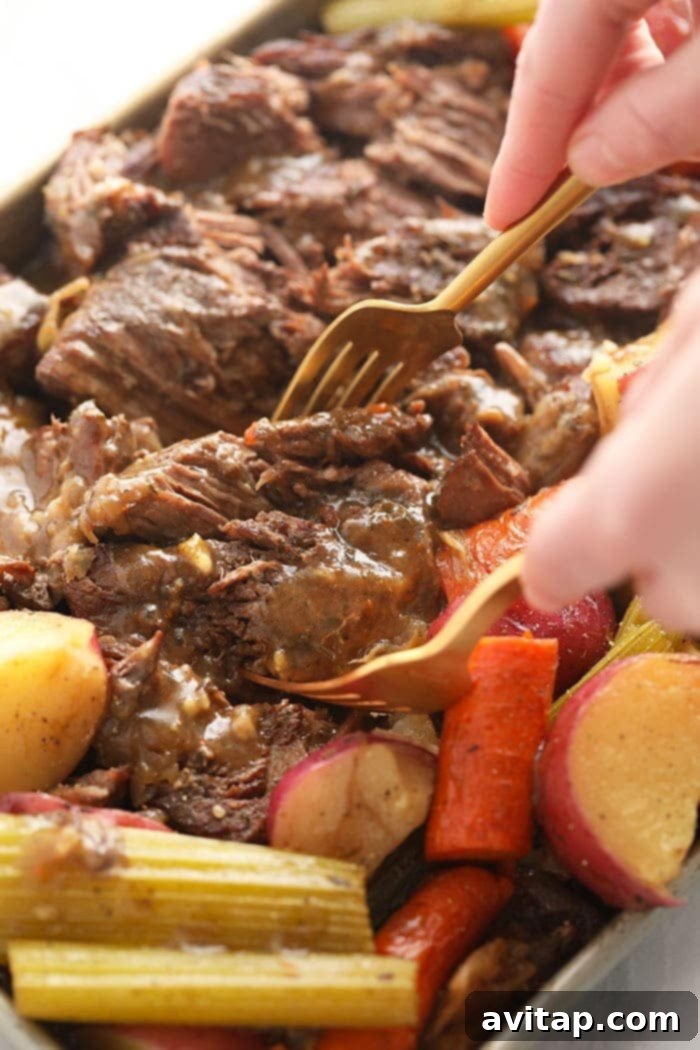
Storing and Reheating Leftover Pot Roast
This Instant Pot Pot Roast is just as delicious the next day! To store, place any leftover pot roast, vegetables, and gravy in an airtight container. It will keep beautifully in the refrigerator for up to 5 days. For longer storage, you can freeze it for up to 3 months, also in an airtight, freezer-safe container. Thaw overnight in the refrigerator before reheating.
To reheat in the oven, place your leftover pot roast and veggies in an oven-safe dish, add a splash of beef broth or water to keep it moist, and cover tightly with foil. Reheat at 325°F (160°C) for 10-15 minutes, or until thoroughly warmed through. Alternatively, for stovetop reheating, place the leftovers in a heated pan with a tablespoon of olive oil or broth and sauté on medium heat until warm, stirring occasionally to ensure even heating.
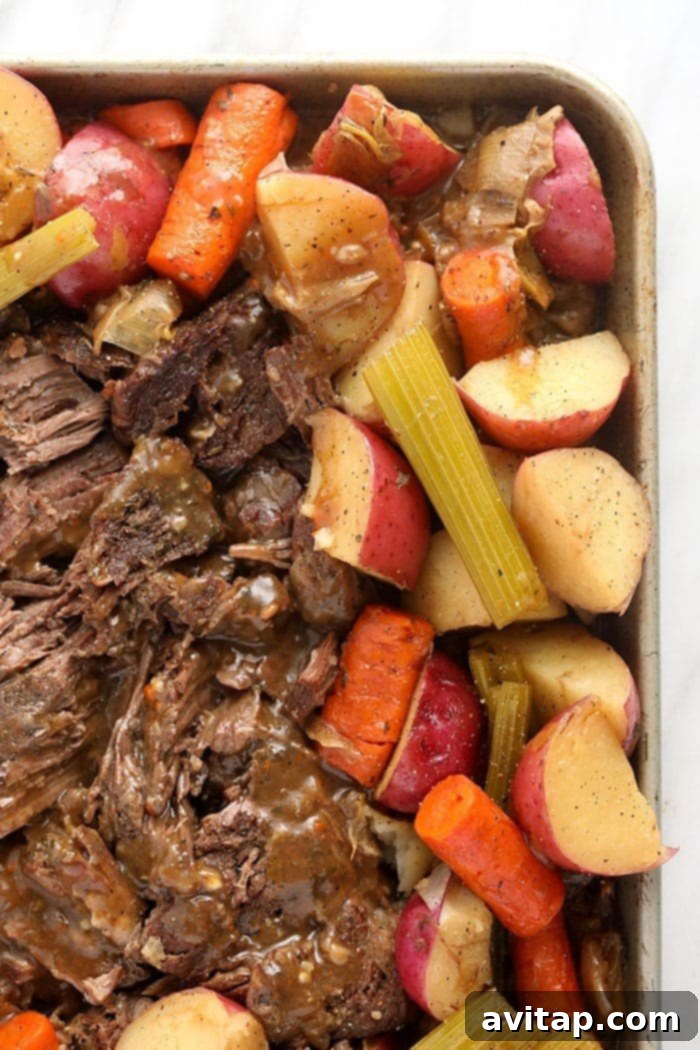
More Delicious Roast Recipes to Explore
If you loved this Instant Pot Pot Roast, you’re in for a treat! We have a collection of other fantastic roast recipes that are equally comforting and flavorful:
- Instant Pot Pork Roast: Another incredibly tender and quick roast option for your pressure cooker.
- Slow Cooker Pork Roast: For those days when you prefer a set-it-and-forget-it approach.
- Maple Tamari Pork Roast: A unique and delightful flavor combination for a special meal.
Discover More Irresistible Beef Recipes
Beyond roasts, explore our other amazing beef creations that are perfect for any occasion:
- Instant Pot Beef Stroganoff: A classic comfort food, made quick and easy in your Instant Pot.
- Wild Rice Meatloaf: A hearty and satisfying twist on traditional meatloaf.
- Sous Vide Steak: Achieve perfectly cooked, restaurant-quality steak every time.
- Mongolian Beef Flank Steak: Sweet, savory, and tender beef, perfect for an Asian-inspired dinner.
- Instant Pot Beef and Broccoli: A takeout favorite, made healthier and faster at home.
Instant Pot Pot Roast Recipe Card
This amazing Instant Pot Pot Roast recipe features tender chuck roast, hearty vegetables, and the most delicious homemade gravy you’ve ever tasted!
By: Emily Richter
Prep time: 30 mins
Cook time: 1 hr 32 mins
Total time: 2 hrs 2 mins
Servings: 8
Ingredients
Pot Roast Seasoning
- 2 tablespoons brown sugar
- 1 tablespoon garlic powder
- 2 teaspoons onion powder
- 1 teaspoon dried oregano
- 1 teaspoon dried thyme
- 1 teaspoon dried parsley
- 2 teaspoons coarse salt
- 1 teaspoon pepper
Beef Roast + Veggies
- 2.5 lb. chuck boneless pot roast
- 1/4 cup olive oil, divided (2 tablespoons for sautéing aromatics, 2 tablespoons for searing)
- 5 cloves of garlic, smashed
- 1 small white onion, chopped
- 1 leek, chopped (green part cut off)
- 6 medium carrots, chopped
- 6 medium celery stalks, chopped
- 6 medium red potatoes, quartered (about 4 cups)
- 1/2 cup dry red wine
- 1 cup beef broth
- 2 tablespoons Worcestershire sauce
- 2 tablespoons cornstarch
Instructions
- First, prepare the pot roast seasoning by mixing together all the listed spices in a small bowl. Set aside.
- Generously sprinkle the seasoning mix over the chuck roast, rubbing it into all surfaces and crevices. Ensure the entire roast is well covered to maximize flavor. Set aside.
- Prepare veggies: Chop the small white onion. Cut off the green part of the leek and chop the white part into 2-inch chunks. Chop carrots and celery into similar-sized pieces and quarter the red potatoes. Keep carrots, celery, and potatoes separate for later.
- Next, sauté aromatics: Turn on your Instant Pot’s “Sauté” function. Add 2 tablespoons of olive oil. Once hot, add the smashed garlic cloves, chopped white onion, and leek. Sauté for 3-4 minutes until fragrant and slightly softened.
- Remove the sautéed aromatics from the Instant Pot and set aside.
- Then, sear the pot roast: Add 2 more tablespoons of olive oil to the Instant Pot, keeping the “Sauté” function on.
- Place the seasoned pot roast into the Instant Pot and sear for 3-4 minutes on each side until a deep brown crust forms.
- Turn off the “Sauté” feature and carefully remove the browned pot roast from the Instant Pot.
- Deglaze the Instant Pot: Pour in the dry red wine, beef broth, and Worcestershire sauce. Use a wooden spoon to scrape all the browned bits (fond) from the bottom of the pot. This is crucial for preventing a “burn” notice and adding deep flavor.
- Add the previously sautéed leek, onion, and garlic back into the Instant Pot, along with any leftover seasoning from the rub. Give it a quick stir. Place the seared pot roast on top of the vegetables.
- Close the Instant Pot lid and turn the steam release valve to the “Sealing” position.
- Pressure cook the meat: Set the Instant Pot to “Manual” or “Pressure Cook” on “High Pressure” for 90 minutes. The Instant Pot will take approximately 10-15 minutes to build pressure before the countdown begins.
- Once the timer goes off, perform a “Quick Release” to release all the steam.
- Carefully remove the tender meat from the Instant Pot and transfer it to a large baking sheet or plate. Set aside.
- Add other veggies: Keep the drippings and any remaining aromatics in the Instant Pot. Add the quartered potatoes, carrots, and celery on top of the liquid.
- Close the Instant Pot and turn the valve to “Sealing.” Set the Instant Pot to “Manual” or “Pressure Cook” on “High Pressure” for 2 minutes. Again, the Instant Pot will take some time to build pressure.
- After the 2 minutes, perform a “Quick Release” and let all the steam escape. Open the Instant Pot and remove all the cooked vegetables.
- Thicken the gravy: Turn on the Instant Pot’s “Sauté” feature. Sprinkle in the 2 tablespoons of cornstarch. Use a whisk to continuously whisk the cornstarch into the hot liquid until it fully dissolves and the gravy thickens to your desired consistency. This typically takes 3-5 minutes. Once thickened, taste and adjust seasoning, then transfer the gravy to a serving jar or bowl.
- Finally, use two forks to shred the pot roast into large chunks. Serve the pot roast and vegetables drizzled generously with the homemade gravy.
Watch It
A video demonstration of this Instant Pot Pot Roast recipe would typically be found here.
Nutrition
Calories: 447 kcal
Carbohydrates: 37 g
Protein: 28 g
Fat: 19 g
Fiber: 4 g
Sugar: 8 g
Nutrition information is automatically calculated and should only be used as an approximation.
Love this recipe? We’d love to hear from you!
Leave a comment below!
Don’t forget to tag your culinary creations on social media with the hashtag #fitfoodiefinds – we can’t wait to see your delicious results!