
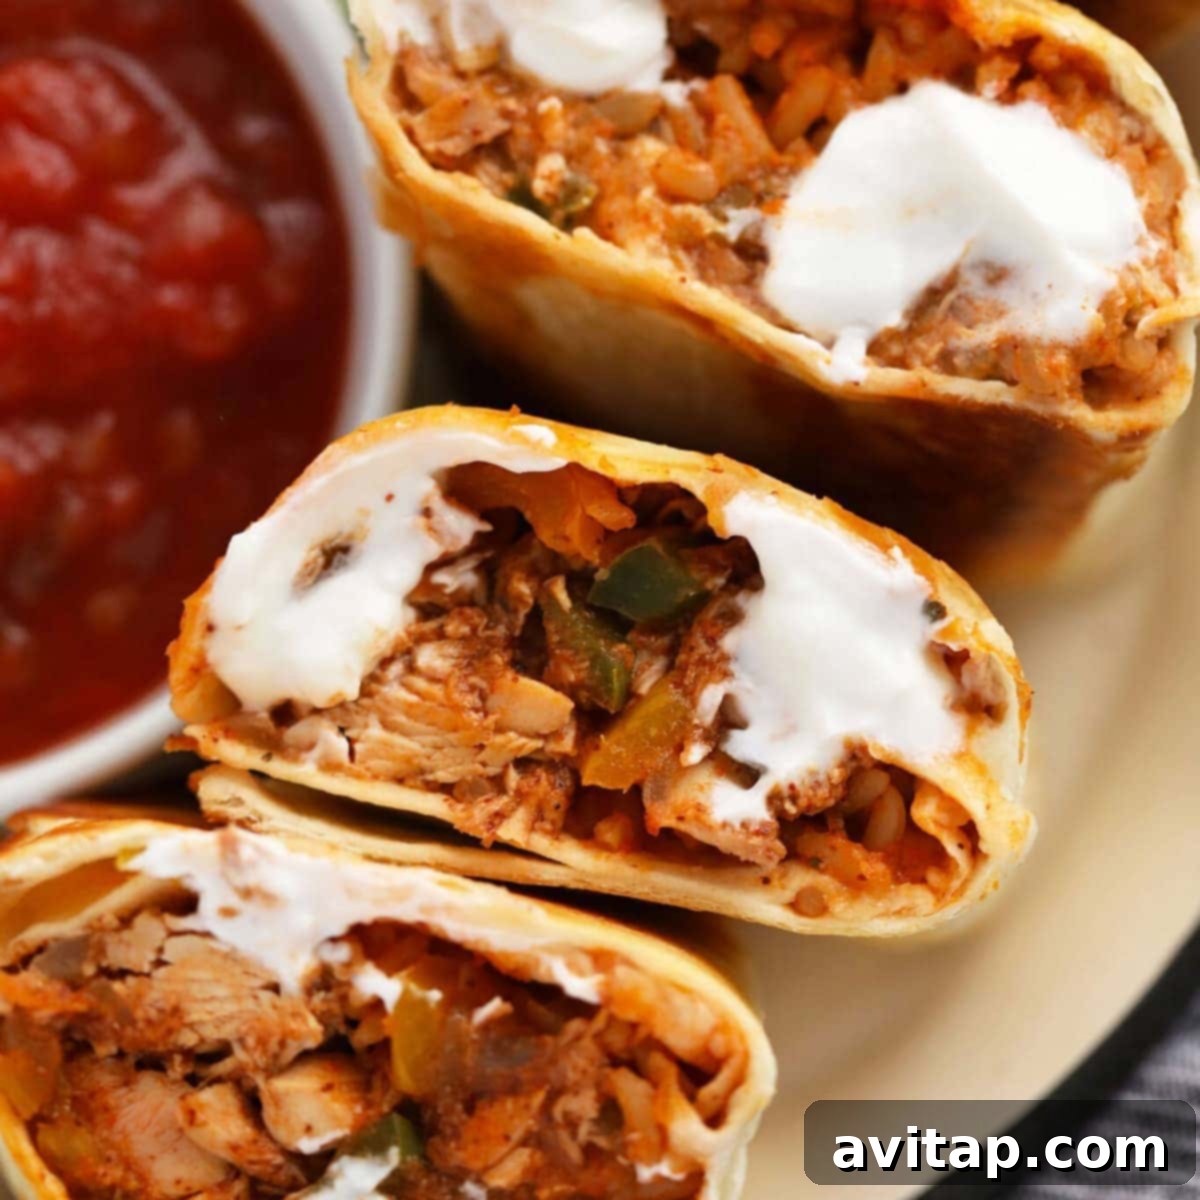
Discover the ultimate solution for delicious and convenient meals with these easy shredded chicken burritos. Packed with rich, flavorful smothered chicken, vibrant fajita vegetables, creamy refried beans, and fluffy Spanish rice, these burritos are a true culinary delight. Whether you’re looking for a quick dinner tonight or planning ahead for a week of hassle-free lunches, this recipe offers incredible versatility. Enjoy them fresh, or follow our simple freezer instructions to create a batch of ready-to-eat meals perfect for any busy schedule.
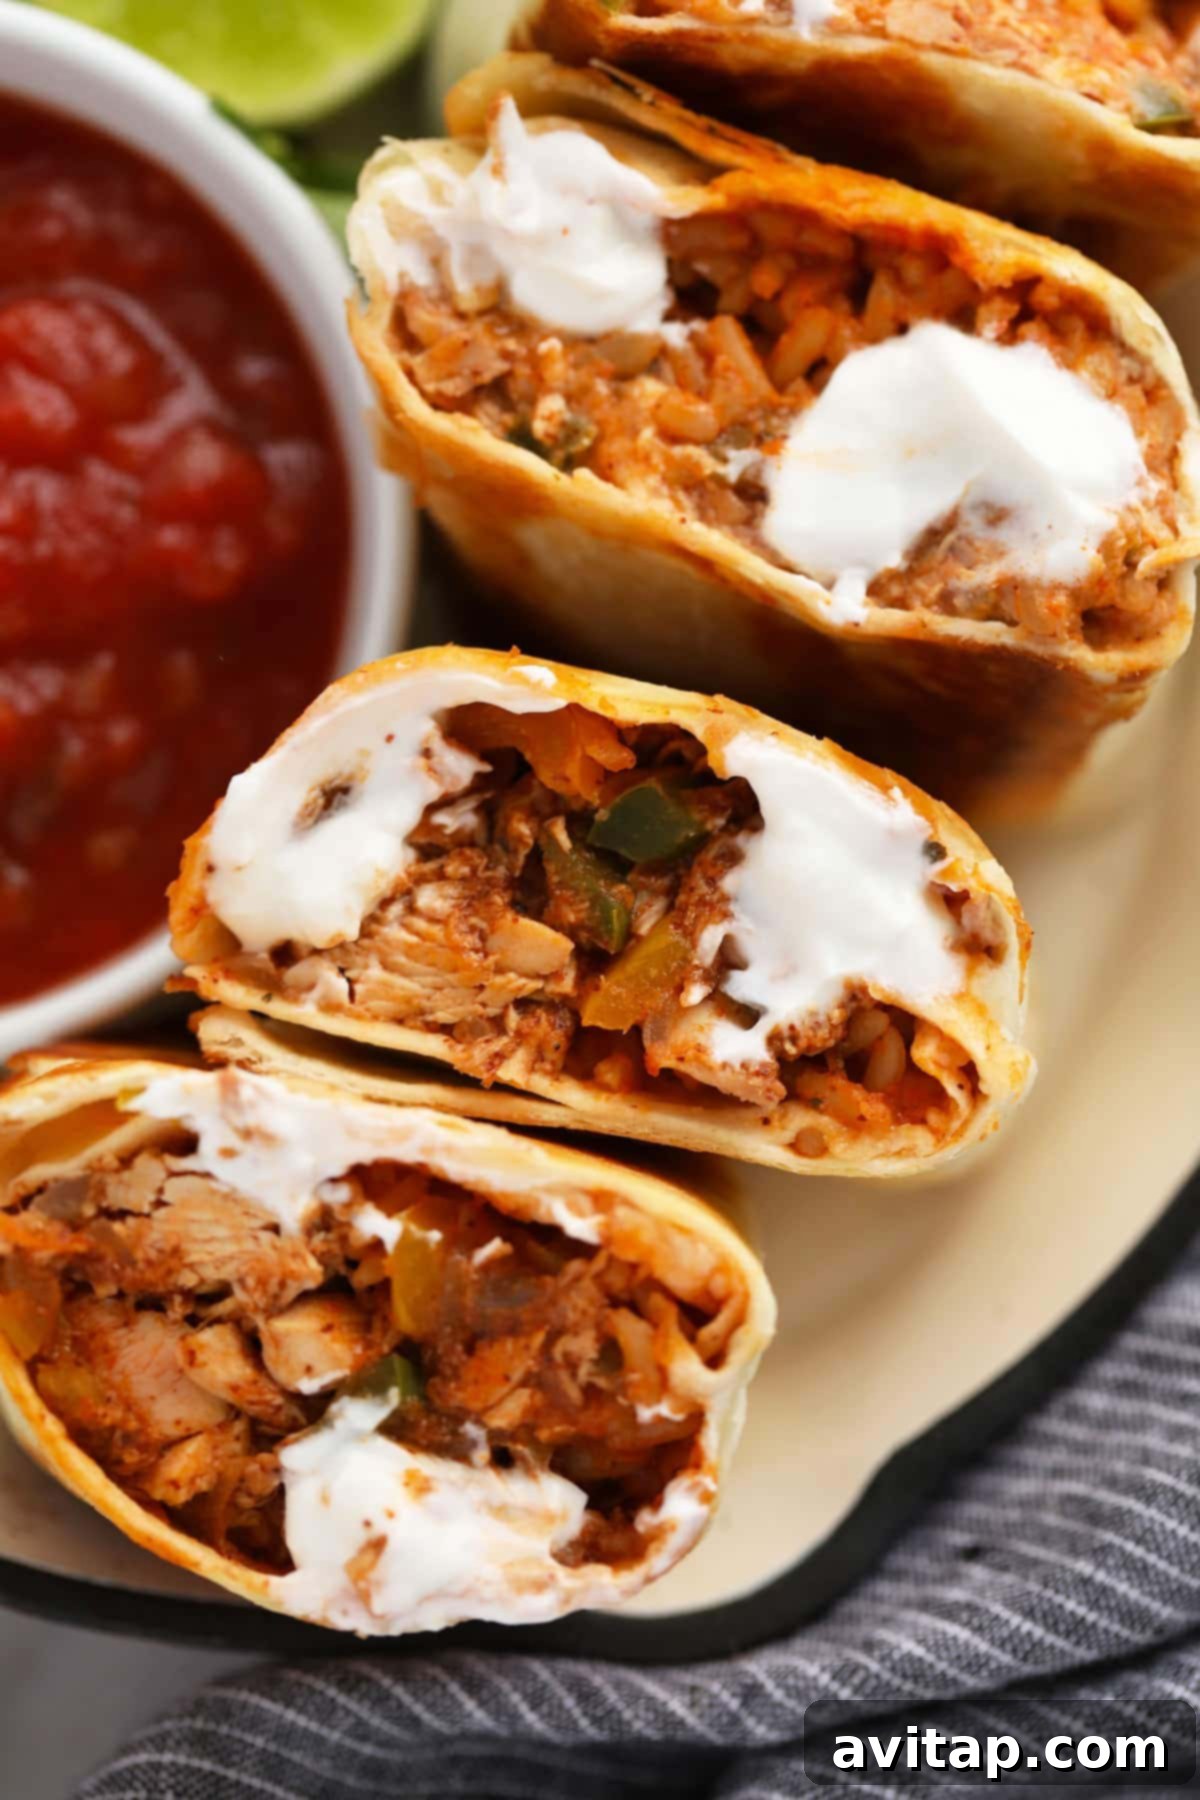
Easy Chicken Burritos: Your Secret to Stress-Free Meal Prep!
When it comes to balancing a busy lifestyle with healthy, satisfying meals, these easy shredded chicken burritos are an absolute game-changer. More than just a recipe, they’re a convenient strategy for ensuring you always have a wholesome, homemade option at hand. This recipe stands out as one of our absolute favorites for meal preparation due to its incredible flavor profile and remarkable flexibility. You can prepare a batch and serve them immediately for a satisfying family dinner, or effortlessly wrap and freeze them to have quick, delicious lunches and dinners ready for weeks to come.
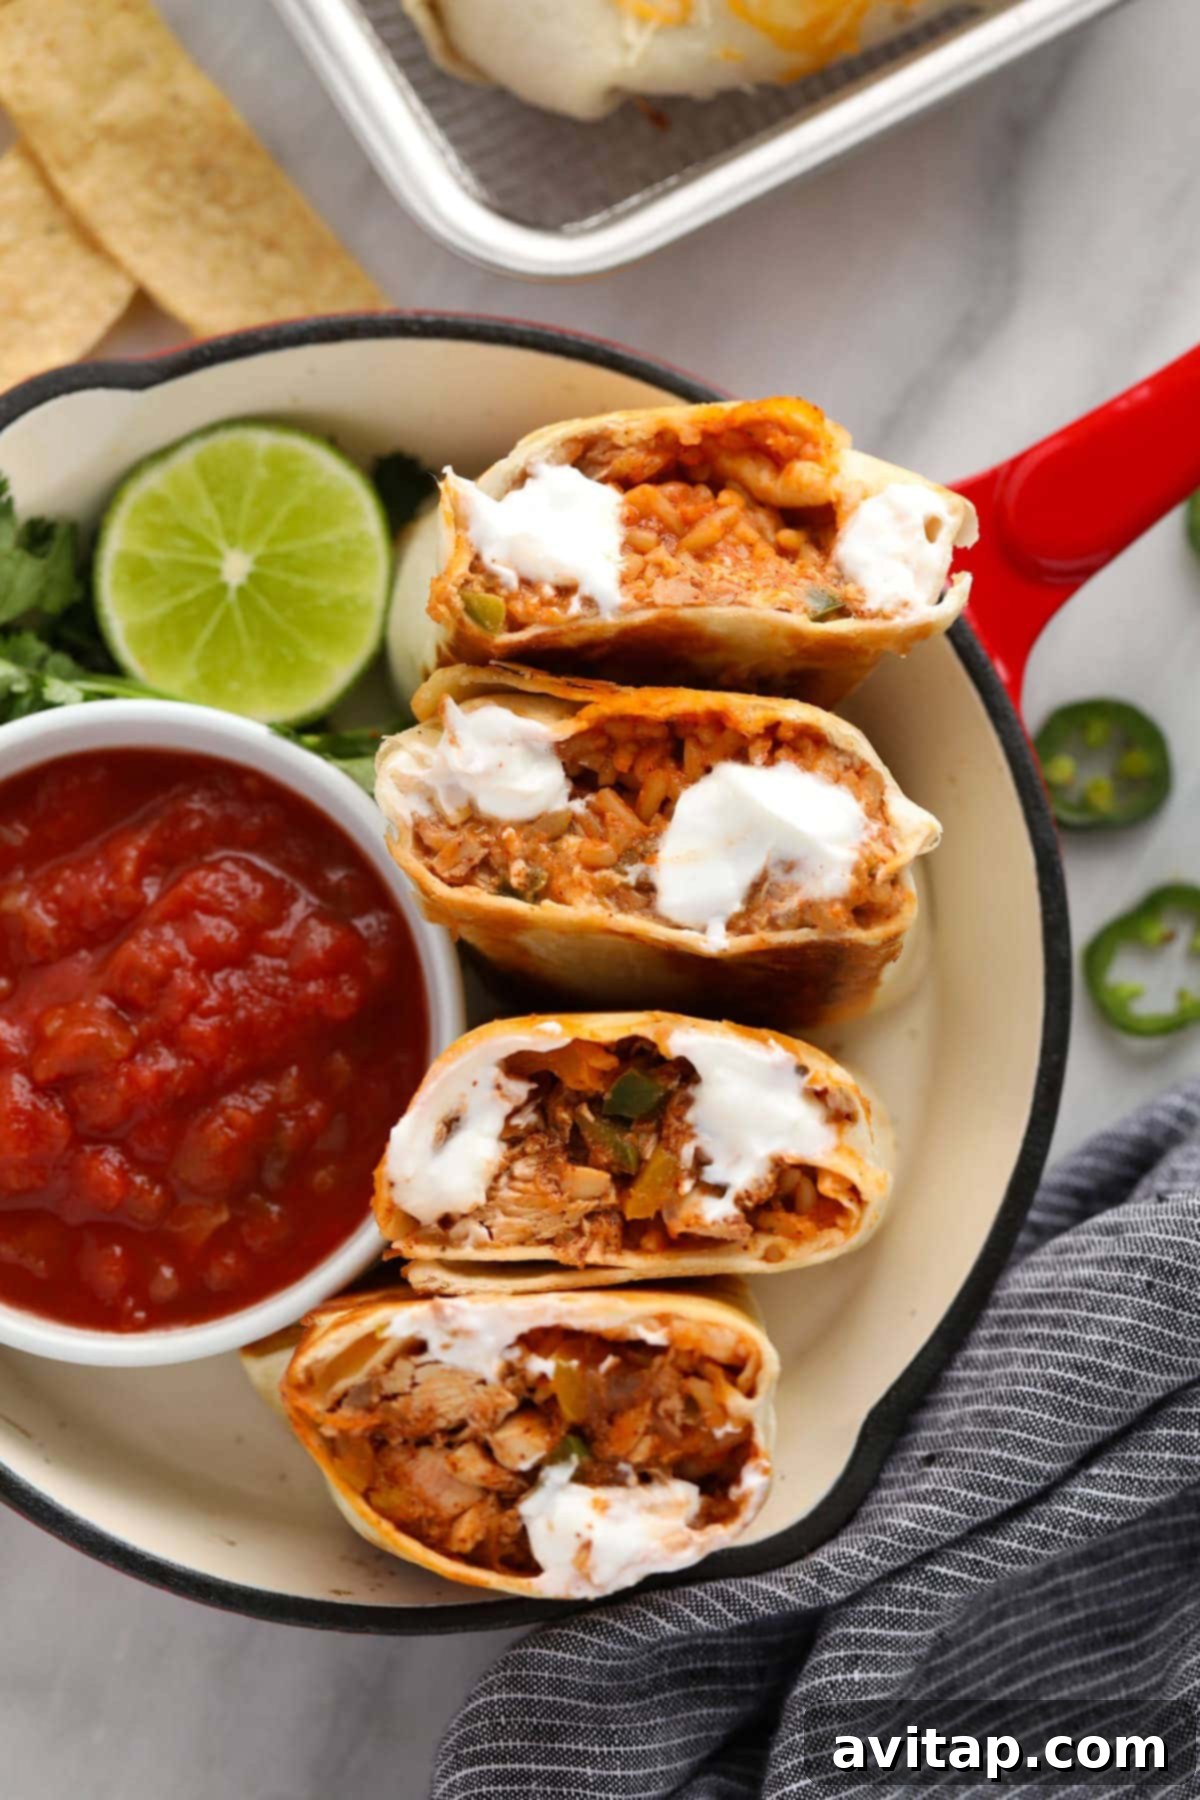
Each bite of these hearty burritos delivers a symphony of tastes and textures. They feature a generous filling of tender, perfectly seasoned shredded chicken breast, vibrant sautéed bell peppers and onions (fajita-style!), creamy refried beans, and a simple yet flavorful Spanish rice, all bound together with irresistibly gooey melted cheddar cheese. This combination creates a comforting and robust meal that everyone, from busy professionals to hungry families, will adore.
Throughout this comprehensive guide, we will walk you through every step: from preparing the rich and flavorful components to expertly assembling your burritos, and finally, offering detailed instructions on how to enjoy them fresh, or freeze and reheat them for maximum convenience. Get ready to transform your mealtime routine and discover the joy of effortless, delicious eating with these fantastic shredded chicken burritos!
What Makes a Classic Chicken Burrito So Delicious?
A classic chicken burrito is beloved for its harmonious blend of flavors and satisfying textures, making it a staple in Mexican-inspired cuisine. At its core, a chicken burrito typically contains succulent shredded or diced chicken, often infused with a rich blend of spices. This savory chicken is usually complemented by fluffy Spanish or Mexican rice, which not only adds a crucial carbohydrate component but also beautifully absorbs the surrounding flavors.
Creamy refried beans are another essential ingredient, contributing a satisfying richness, protein, and a smooth counterpoint to the other fillings. Melty cheese, often a Mexican blend or cheddar, is then added to bind all the ingredients together with its irresistible gooeyness, creating a cohesive and delightful bite. Beyond these foundational elements, the possibilities for enhancement are truly endless. Our recipe, for instance, incorporates vibrant sautéed bell peppers and onions, offering a delightful crunch and a hint of sweetness that evokes classic fajita flavors. Other popular inclusions might be zesty salsa, fresh guacamole, tangy sour cream, or a sprinkle of fresh cilantro, all of which contribute to a dynamic and truly satisfying culinary experience. This recipe embraces these traditional elements while prioritizing ease and exceptional flavor, ensuring every homemade burrito is a delightful journey for your taste buds.
Shredded Chicken Burritos: Essential Ingredients and Tools
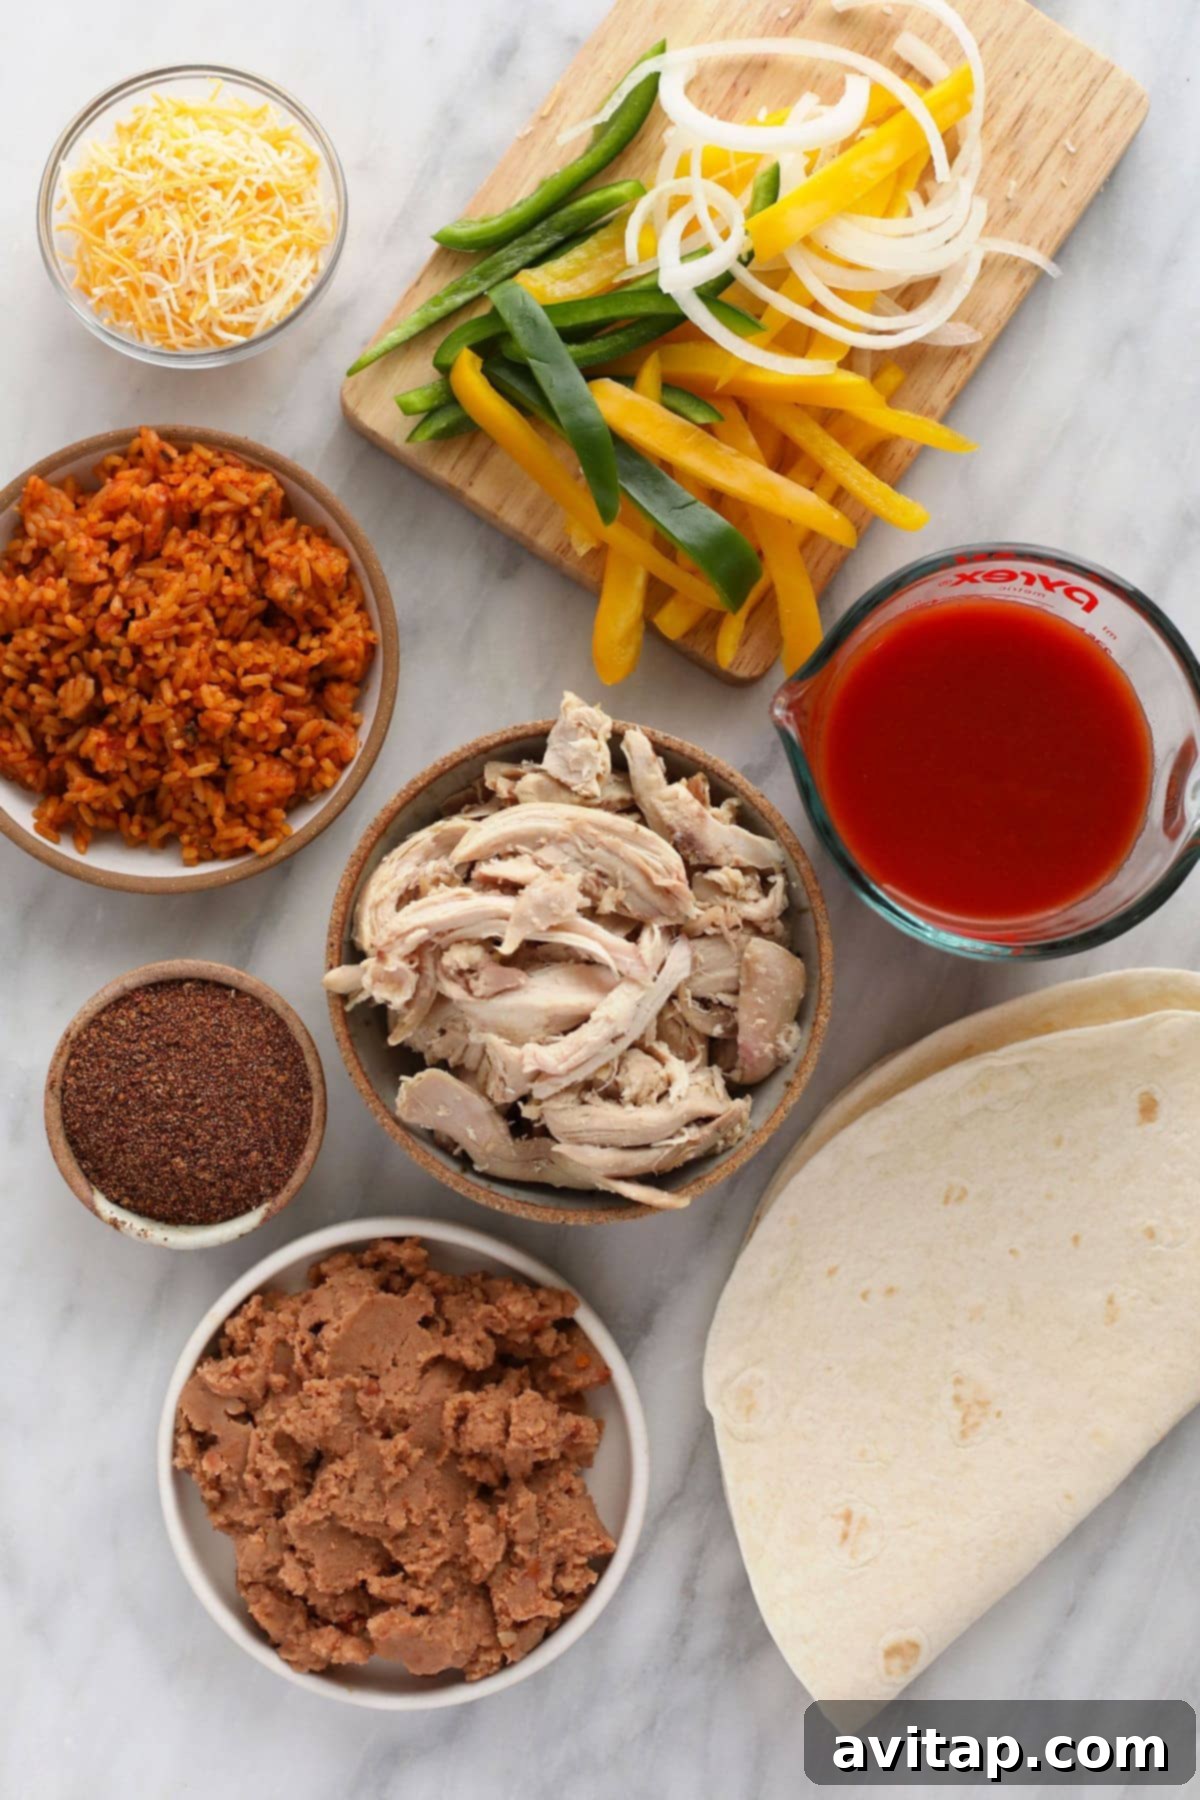
Crafting these incredibly easy shredded chicken burritos begins with gathering a selection of simple yet potent ingredients that combine to deliver maximum flavor with minimal fuss. We’ve chosen components that are readily available and versatile, allowing you to quickly whip up a batch whether you’re a seasoned chef or a beginner in the kitchen. Here’s what you’ll need to gather:
Ingredients List:
- For the Smothered Chicken & Fajita Veggies:
- 2 tablespoons olive oil: The foundation for sautéing, adding a rich flavor base.
- 1/2 large white onion, sliced: Provides an aromatic sweetness that builds the flavor profile.
- 1 large yellow bell pepper, sliced: Contributes bright color, natural sweetness, and classic fajita flair.
- 1 large green bell pepper, sliced: Adds a slightly more robust, earthy note, complementing the other vegetables.
- 1 (15-oz.) can tomato sauce: Forms the rich, savory base for our smothered chicken mixture.
- 1 (15-oz.) can diced green chiles: For a mild, tangy kick and an authentic Tex-Mex depth of flavor.
- 1/2 cup chicken broth, or water: Helps to achieve the perfect sauce consistency and infuses moisture.
- 3 tablespoons taco seasoning: A critical spice blend to elevate the overall flavor (feel free to use homemade or a good quality store-bought packet).
- 1 lbs. shredded chicken: The star protein. Rotisserie chicken is an excellent time-saver, or you can prepare your own.
- For Assembly & Filling:
- 8 (12-inch) flour tortillas: Large, soft, and flexible tortillas are crucial for accommodating generous fillings and ensuring easy, tight wrapping.
- 1 (15-oz.) can refried beans: Adds a layer of creamy texture and a hearty, satisfying base.
- 2 cups Spanish rice: Pre-cooked or boxed Spanish rice makes assembly quick and contributes a distinct, savory flavor.
- 1.5 cups Mexican shredded cheddar cheese: Melts beautifully to bind all the vibrant flavors and ingredients together.
Essential Kitchen Tools:
Having the right tools at hand ensures a smooth cooking and assembly process:
- Large skillet or Dutch oven (for cooking the chicken and veggies)
- Cutting board and a sharp knife (for slicing vegetables)
- Measuring cups and spoons (for accurate ingredient portions)
- Spatula or stirring spoon (for sautéing and mixing)
- Baking sheet or casserole dish (if you plan to heat burritos in the oven)
- Aluminum foil or plastic wrap (for freezing individual burritos)
- Microwave-safe plate (for reheating)
Add-Ins and Swaps to Customize Your Chicken Burritos
One of the most delightful aspects of this shredded chicken burrito recipe is its incredible adaptability. Feel empowered to get creative with add-ins and swaps, tailoring these burritos to perfectly suit your personal taste preferences, dietary needs, or simply to utilize whatever ingredients you have readily available in your pantry. Here are some fantastic ideas to inspire your culinary exploration and make these burritos uniquely yours:
- Roasted Sweet Potato: For a delightful touch of natural sweetness, added fiber, and a more robust texture, consider mixing in some roasted sweet potato cubes. Their earthy-sweet flavor beautifully complements the savory chicken and vegetables.
- Alternate Beans: Don’t feel limited to refried beans! Explore different textures and flavors by swapping them out for protein-packed black beans, hearty kidney beans, flavorful chili beans, or even mild northern white beans. Each option offers a unique twist and nutritional profile.
- Cilantro Lime Rice: Elevate your grain component by replacing Spanish rice with a bright and zesty homemade cilantro lime rice. The refreshing citrus notes from the lime and the fresh aroma of cilantro pair wonderfully with the seasoned chicken.
- Amplify the Spice: If you crave a little more heat, don’t hesitate to add a pinch of cayenne pepper, a dash of your favorite hot sauce, or even some finely diced jalapeños (fresh or pickled) to the chicken mixture. A sprinkle of taco seasoning on the outside of each rolled burrito before heating also adds an extra layer of flavor and can contribute to a beautifully crisp exterior.
- Make it Breakfast-Friendly: Transform these savory burritos into a hearty and convenient breakfast option by incorporating fluffy scrambled eggs into the filling. It’s an unexpected but incredibly satisfying twist, perfect for a substantial weekend brunch or a grab-and-go morning meal prep.
- Different Cheeses: While Mexican shredded cheddar is a classic choice, experiment with other melty cheeses like Monterey Jack, pepper jack for an added spicy kick, or even a blend of Oaxaca cheese for an authentic touch.
- Fresh Herbs: A generous handful of freshly chopped cilantro or parsley mixed into the filling, or as a vibrant garnish, can significantly brighten the overall flavors.
- Additional Veggies: Boost the nutrient content and add more textural variety with extra sautéed vegetables such as corn kernels, thinly sliced zucchini, or wilted spinach.
- Avocado or Guacamole: For an extra layer of creamy richness and healthy fats, a dollop of mashed avocado or homemade guacamole inside the burrito, or as a topping, is always a welcome addition.
Pro Tip: How to Make Perfect Shredded Chicken
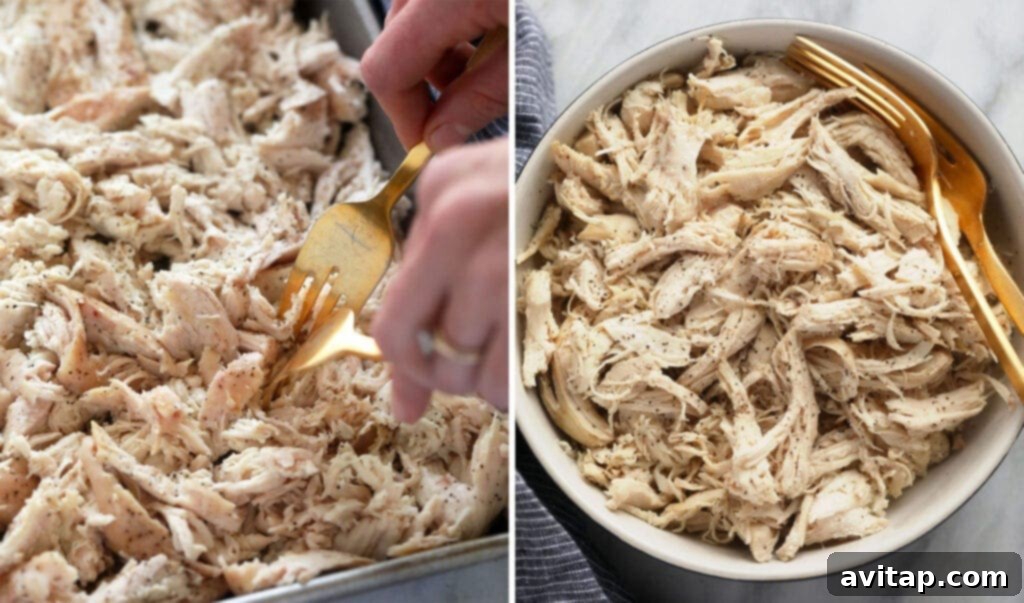
While using a pre-cooked rotisserie chicken offers fantastic convenience and saves valuable time, knowing how to prepare tender, perfectly shredded chicken from scratch is an invaluable skill for any home cook. It’s incredibly easy to make ahead and versatile enough to be used in countless dishes, including these delightful burritos. Here are a few popular methods to achieve flawless shredded chicken:
- Oven Baked: A simple, hands-off method that yields tender, juicy chicken breasts or thighs, easily shredded with two forks once cooked.
- Slow Cooker: Ideal for busy days, this method produces incredibly moist, fall-apart chicken that practically shreds itself, infusing it with flavor over a longer cooking period.
- Instant Pot: For the quickest results, the Instant Pot can cook and tenderize chicken breast or thighs in minutes, making it incredibly fast and efficient to shred.
Preparing your shredded chicken in advance means that the assembly process for these burritos will be even faster and more streamlined, moving you closer to enjoying your delicious meal prep creation!
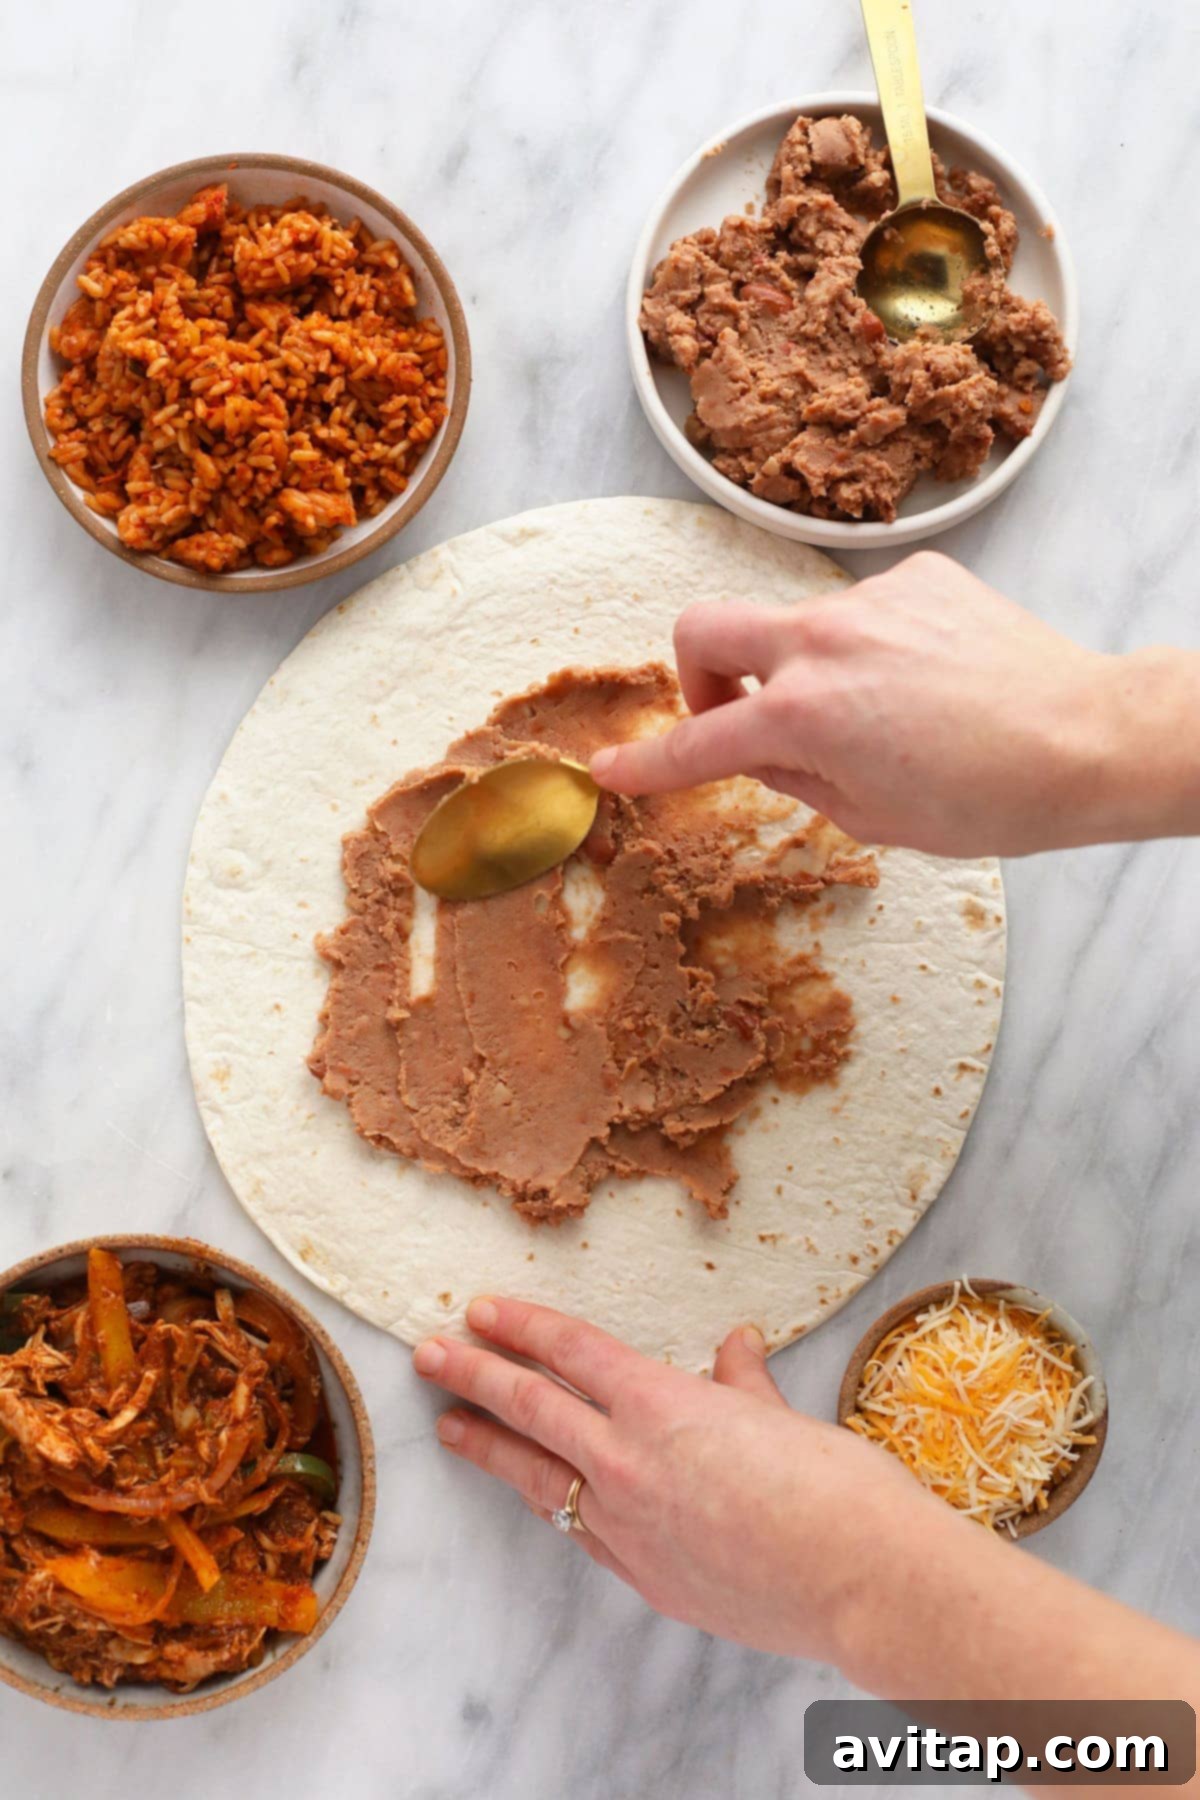
How to Make Shredded Chicken Burritos: A Step-by-Step Guide
For the full recipe, including precise measurements and nutritional information, please refer to the detailed recipe card at the bottom of this post.
Step 1: Prepare the Smothered Chicken & Fajita Veggies
- Begin by heating a large skillet or a Dutch oven over medium-high heat. Once the pan is hot, add the olive oil. Allow the oil to become fragrant, indicating it’s ready for the vegetables.
- Add the sliced white onion to the pan. Sauté for about 2-3 minutes until it starts to soften and turn translucent, releasing its sweet aroma. Stir frequently to prevent burning.
- Reduce the heat to medium. Introduce the sliced yellow and green bell peppers to the pan. Continue to sauté the peppers and onions together for an additional 4-5 minutes, or until the vegetables are tender-crisp. You want them cooked through but still retaining a slight bite, adding texture to your burritos.
- Pour in the tomato sauce, diced green chiles, and chicken broth (or water). Stir everything together thoroughly, ensuring all the vegetables are coated, and a vibrant, thick tomato sauce begins to form.
- Now, add your pre-shredded chicken to the pan. Toss the chicken generously with the vegetables and the rich tomato sauce until every piece of chicken is completely coated in the flavorful mixture. This ensures every bite of your burrito will be bursting with taste.
- Bring the tomato sauce mixture to a gentle boil, then immediately reduce the heat to low. Allow the chicken and veggie mixture to simmer for about 5-7 minutes, or until the sauce has slightly thickened and reduced by approximately one-quarter. This simmering step deepens the flavors beautifully. Once done, remove the chicken mixture from the heat and set it aside. It’s almost time for assembly!
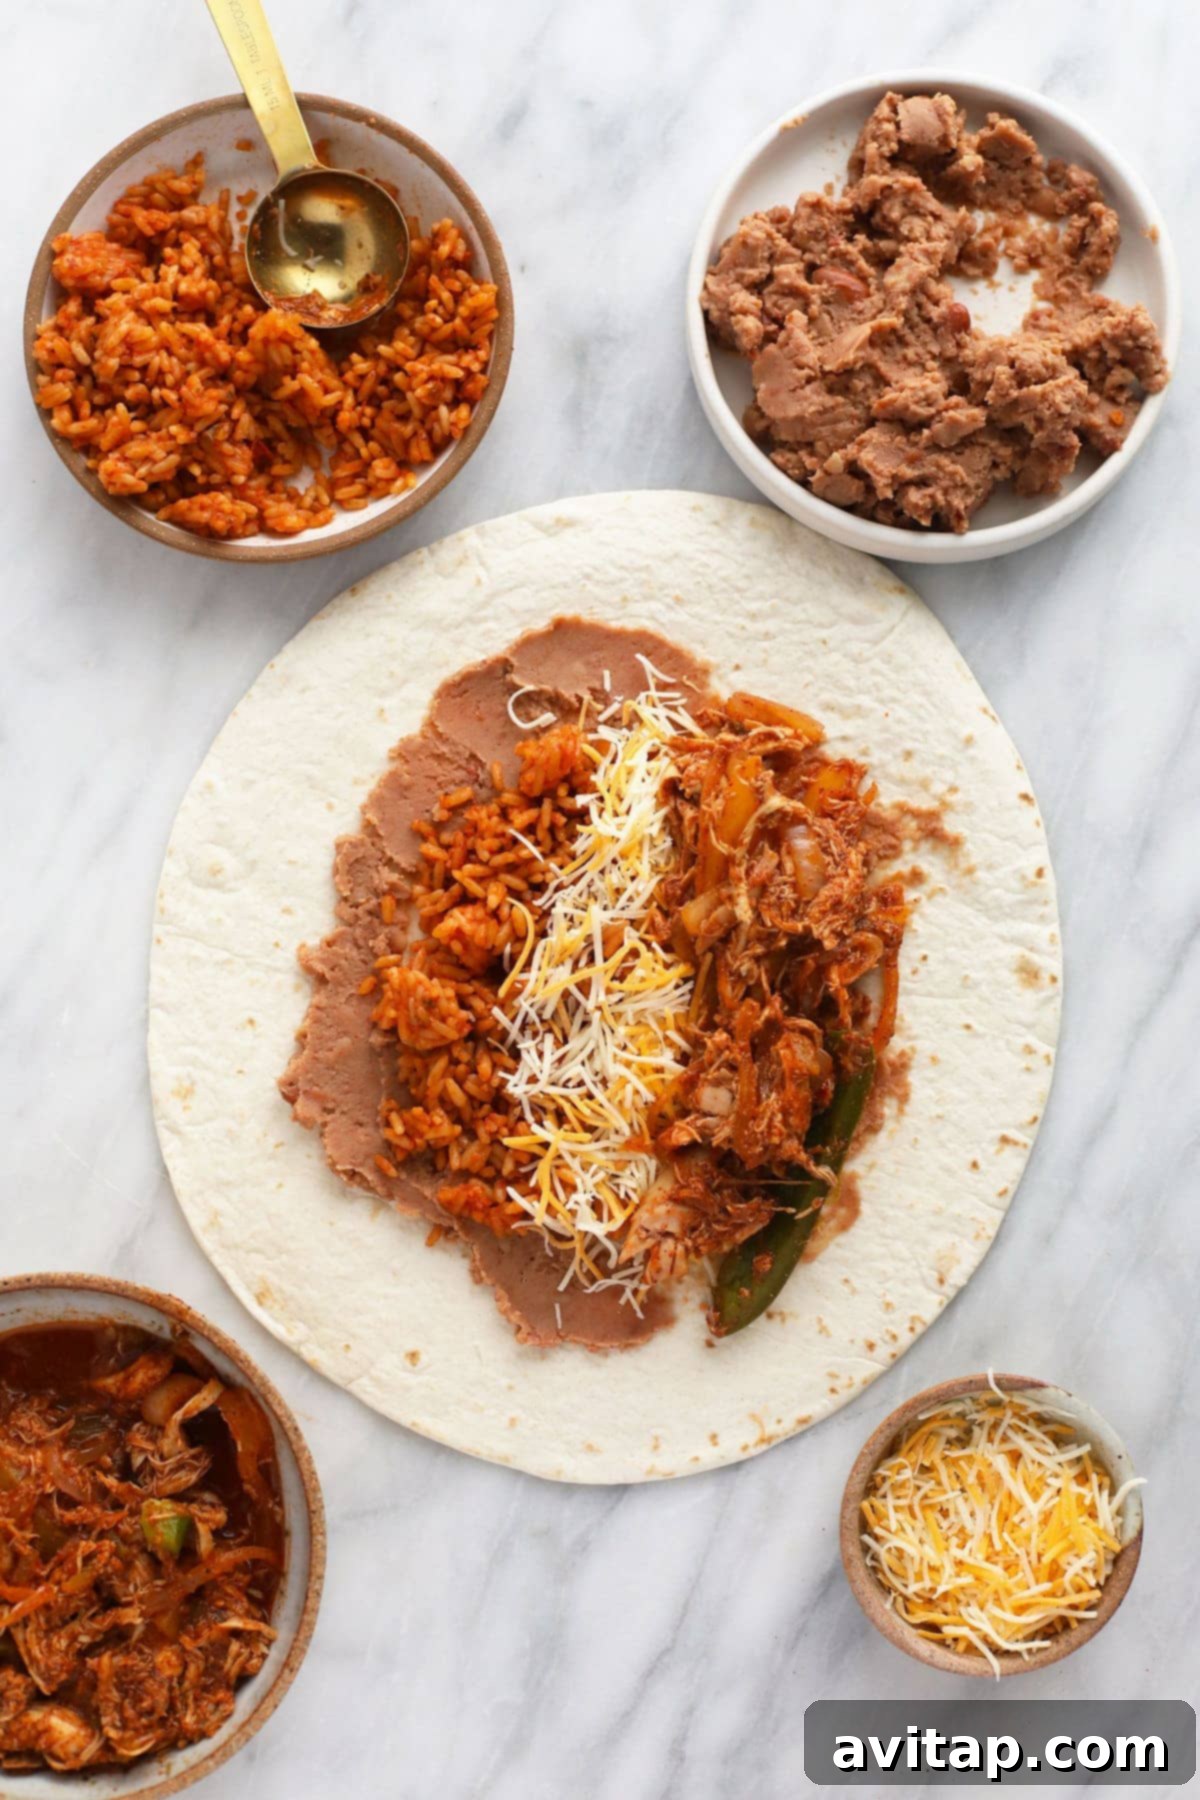
Step 2: Assemble Your Shredded Chicken Burritos
Now for the fun and rewarding part – assembling your delicious burritos! Proper layering and tight wrapping are key to a well-structured and satisfying burrito. It’s helpful to have all your prepared ingredients laid out methodically for easy and efficient assembly.
- Lay a large, warm 12-inch flour tortilla on a clean, flat surface. Warming your tortillas slightly (in the microwave for 15-20 seconds or a dry skillet) can make them more pliable and much easier to fold without tearing.
- Spread approximately 3 tablespoons of refried beans evenly across the center of the tortilla, leaving a border around the edges. This creamy layer acts as a delicious “glue” to hold other ingredients and adds essential moisture and flavor.
- Next, spoon about 1/4 cup of Spanish rice over the refried beans. Distribute it evenly but avoid pushing it too far to the edges.
- Sprinkle 2 tablespoons of Mexican shredded cheddar cheese on top of the rice. This cheese will melt and bind the filling together.
- Finally, add an 1/8 portion of your rich chicken and veggie mixture to the center of the tortilla. Be mindful not to overfill, as this can make wrapping difficult and lead to burst burritos.
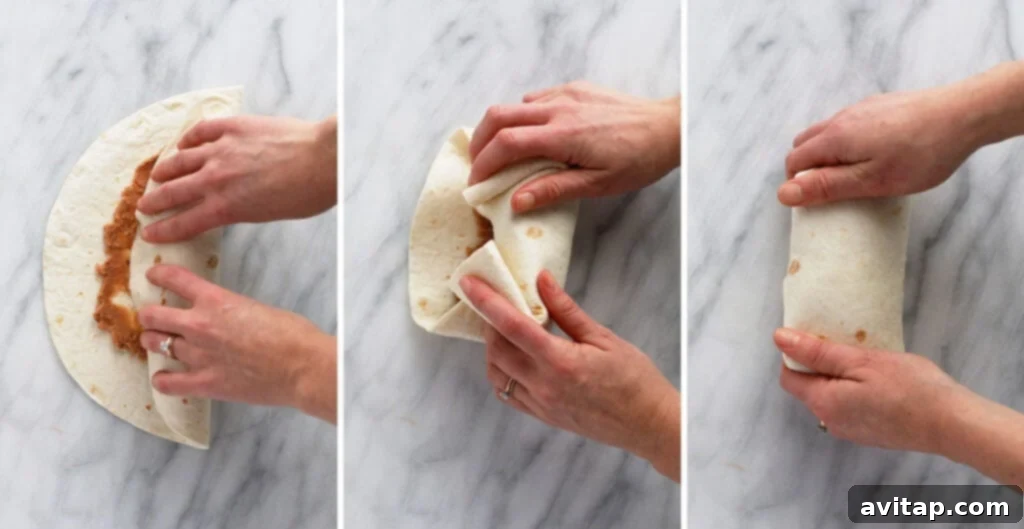
- To tightly wrap each burrito, first fold the two opposite sides of the tortilla inwards, covering a small portion of the filling. Then, starting from the bottom edge closest to you, roll the tortilla up tightly and evenly towards the top, tucking in the filling as you go. Ensure it’s snug and firm to keep all the delicious contents securely inside.
- Repeat these steps until all your tortillas are filled and perfectly rolled. Congratulations, you’re now ready to enjoy your magnificent burritos immediately, heat them up for a warm meal, or prepare them for future freezing!
Step 3: Enjoy Immediately or Prepare for Later
Once your irresistible shredded chicken burritos are assembled, you have several wonderful options to choose from:
- Immediate Gratification: If you’re eager to dig in right away, you can absolutely enjoy the burrito as is. The flavors are already wonderfully combined, and it makes for a quick and satisfying meal.
- Warm & Crispy Perfection: For a truly irresistible experience, heating your burritos is highly recommended. You can do this in the oven or on the stovetop to warm the filling through and achieve that desirable golden-brown, slightly crispy tortilla exterior. This enhances both flavor and texture.
- Ultimate Meal Prep: For future meals and maximum convenience, proceed directly to our comprehensive freezing instructions below. These burritos are specifically designed to be freezer-friendly, making them an ideal and delicious component of any efficient meal prep strategy.
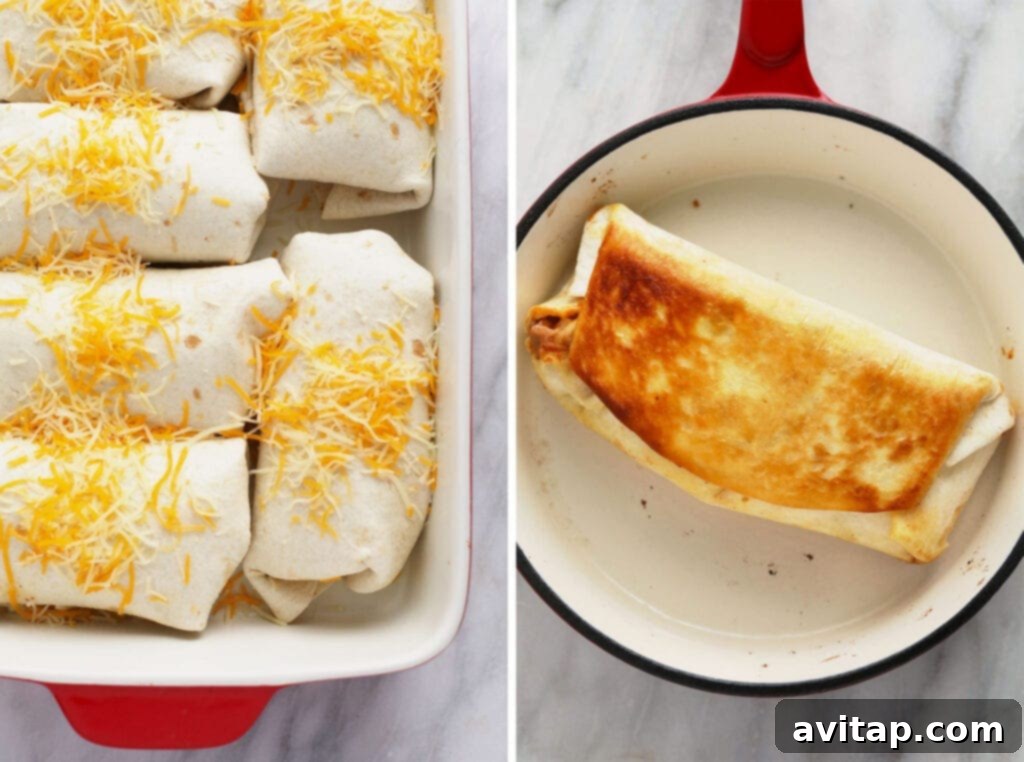
Heating Shredded Chicken Burritos to Perfection
Now that your delicious shredded chicken burritos are assembled, it’s time to bring them to a warm, melt-y, and utterly satisfying state. You can achieve this perfection using either your stovetop for a delightful crispy exterior or your oven for a more uniformly heated and cheesy result. Both methods are straightforward and deliver fantastic results, catering to different preferences and needs.
Stovetop Heating Instructions (for a crispy finish)
This method is ideal if you love a slightly crispy tortilla and a quick individual reheat:
- Heat a large skillet or frying pan over medium-high heat. Add about 1 tablespoon of olive oil. The oil helps to crisp the tortilla.
- Once the olive oil is fragrant and shimmering, carefully place your burrito(s) in the pan. Avoid overcrowding the pan; work in batches if necessary to ensure even browning.
- Allow the burrito to brown for 2-3 minutes on each side over medium heat. This creates a beautiful golden-brown crust and ensures the tortilla is heated through and slightly crispy.
- Remove the burrito(s) from the stovetop. For easier eating and to allow the hot filling to cool slightly, we highly recommend cutting your burritos in half before serving.
- Serve immediately with your favorite toppings like fresh salsa, creamy guacamole, tangy sour cream, or extra cheese!
Oven Heating Instructions (for even heating and perfectly melted cheese)
The oven method is excellent for heating multiple burritos at once and achieving beautifully melted cheese inside and out, with a slightly softer, yet still warm, tortilla.
- Preheat your oven to 425ºF (220ºC). Lightly spray a casserole dish or a baking sheet with non-stick cooking spray to prevent the tortillas from sticking.
- Arrange the burritos on the prepared baking sheet or in the casserole dish. You have the flexibility to bake a single burrito or a whole pan if you’re feeding a larger group!
- For an extra indulgent touch and a lovely golden finish, sprinkle additional Mexican shredded cheese over the tops of the burritos and drizzle lightly with olive oil. This promotes beautiful browning and a delicious exterior.
- Bake for 10-15 minutes, or until the tortillas begin to turn golden brown and the cheese inside is thoroughly melted and bubbly. The exact cooking time may vary slightly depending on your oven and whether the burritos were at room temperature.
- Carefully remove the burritos from the oven. Just like with the stovetop method, cutting them in half can help them cool down to a safe eating temperature more quickly before enjoying.
- Serve hot with your preferred garnishes and savor the warm, cheesy goodness!
Freeze for Later: Your Ultimate Meal Prep Strategy
The true brilliance of these shredded chicken burritos lies in their excellent freezer-friendliness, making them an unparalleled choice for efficient meal preparation. By dedicating a little time to prepare and freeze a batch, you unlock the convenience of having wholesome, homemade meals ready whenever hunger strikes, without the need for extensive last-minute cooking. Here’s how to properly freeze your burritos to ensure they retain their quality, flavor, and texture for weeks to come:
- Allow to Cool Completely: This is a crucial step! Before you begin wrapping, ensure your assembled burritos have cooled down completely to room temperature. Wrapping warm burritos will create condensation inside the wrapper, which can lead to soggy tortillas and an increased risk of freezer burn.
- Individual Wrapping: For the best results and ultimate convenience in portioning, wrap each individual burrito tightly in a piece of heavy-duty aluminum foil. Ensure there are no gaps, tears, or exposed areas of the tortilla. The foil acts as a protective barrier against freezer burn and helps maintain the burrito’s shape and moisture.
- Remove Excess Air: As you wrap, press out as much air as possible from around the burrito. Air is the primary enemy of frozen food, contributing to the formation of ice crystals and accelerating the degradation of food quality.
- Label and Date: This step is critical for organized meal prep! Using a permanent marker, clearly write “Chicken Burritos” and the date you prepared them directly on the foil. This prevents any guesswork later on and ensures you consume them within their optimal freshness timeframe.
- Secondary Storage (Optional but Recommended): For even better protection against freezer burn and to prevent the burritos from getting crushed, consider placing the individually wrapped burritos into a large freezer-safe zip-top bag or an airtight freezer container. This adds an extra layer of defense.
- Freeze: Store the properly wrapped and labeled burritos in the deepest part of your freezer for up to 3 months. While they are still safe to eat beyond this period, their quality, taste, and texture may begin to decline.
How to Reheat Frozen or Thawed Chicken Burritos
Reheating your delicious shredded chicken burritos is just as simple and straightforward as making them, whether you’re starting with them frozen solid or if they’ve had a chance to thaw in the refrigerator. We’ll cover both microwave and oven methods to ensure you get perfectly warm and satisfying results every time.
Reheating from Frozen (Microwave Method):
This is the fastest method when you’re short on time and need a quick meal solution.
- Remove the frozen burrito from its aluminum foil wrapping.
- Place the unwrapped burrito on a microwave-safe plate.
- Utilize the defrost setting on your microwave. Heat the burrito for 2 to 3 minutes, making sure to flip it every minute to ensure even thawing.
- Once partially defrosted, switch to high power. Continue to microwave for an additional 60-90 seconds, or until the burrito is thoroughly heated through and the cheese is delightfully melted. Be cautious when handling, as the filling will be very hot.
Reheating from Frozen (Oven Method for Best Texture):
This method takes a bit longer but yields a superior texture, especially for the tortilla, which will be wonderfully crisp rather than soft.
- Preheat your oven to 375°F (190°C).
- Remove the burrito from the aluminum foil and place it directly on a baking sheet.
- Bake for 30-40 minutes, flipping halfway through, or until the center is hot, and the tortilla is lightly crisped to your liking. For an extra crispy exterior, you can unwrap it completely for the last 10-15 minutes of baking.
Reheating from Thawed (Microwave or Oven Method):
If you’ve planned ahead and allowed your burrito to thaw in the refrigerator overnight, reheating is even quicker and easier.
- Microwave: Remove from foil (if applicable) and place on a microwave-safe plate. Microwave on high for 60 to 90 seconds, or until thoroughly heated through.
- Oven: Preheat oven to 350°F (175°C). Remove from foil and place on a baking sheet. Bake for 10-15 minutes, or until warmed through and the tortilla is lightly crisp. This will generally give you a better texture than the microwave.
Always ensure the internal temperature of the filling reaches a safe 165°F (74°C) before consuming. Enjoy your perfectly reheated, homemade chicken burrito, ready to satisfy your cravings any time!
Frequently Asked Questions (FAQs) About Shredded Chicken Burritos
Can I make these burritos vegetarian?
Absolutely! To easily adapt these burritos for a vegetarian diet, simply omit the chicken. You can double the amount of beans (black beans or pinto beans work wonderfully!), or incorporate a hearty plant-based protein substitute like seasoned tofu or tempeh. Alternatively, load them up with extra roasted vegetables such as sweet potatoes, corn, or zucchini. Remember to replace chicken broth with vegetable broth or water for a fully vegetarian meal.
How long do shredded chicken burritos last in the refrigerator?
Freshly made and properly cooled burritos can be stored in an airtight container in the refrigerator for up to 3-4 days. For longer storage beyond this timeframe, freezing them is the best option to maintain freshness and quality.
What are good toppings for chicken burritos?
The best toppings can truly elevate your burrito experience! Popular and delicious choices include a dollop of sour cream or lighter Greek yogurt, fresh chunky salsa or pico de gallo, creamy homemade guacamole or sliced avocado, crisp shredded lettuce, a sprinkle of fresh chopped cilantro, a squeeze of fresh lime juice for zest, or even a dash of your favorite hot sauce for an extra kick of heat.
Can I use different types of meat?
Yes, this recipe is incredibly versatile and forgiving! You can easily substitute the shredded chicken with other meats such as seasoned ground beef, tender shredded pork (carnitas style works beautifully), or even lean seasoned ground turkey. Just adjust the seasoning as needed to complement your chosen meat.
Is Spanish rice necessary? Can I use regular rice?
While Spanish rice adds a wonderful authentic flavor and a distinct color to the burritos, it is not strictly necessary. You can certainly use regular cooked white or brown rice as a substitute. To infuse more flavor into plain rice, consider cooking it with a pinch of cumin, chili powder, and a touch of tomato paste or sauce, or try our suggested cilantro lime rice swap for a vibrant alternative.
Discover More of Our Favorite…
Delicious & Easy Burrito Recipes
- Fajita Breakfast Burritos
- Freezer-Friendly Bean Burritos
- Make Ahead Beef Burritos
- Vegetarian Black Bean Breakfast Burritos
- Make Ahead Breakfast Burritos
Easy Shredded Chicken Burritos
Emily Richter
Prep:
20 minutes
Cook:
15 minutes
Total:
35 minutes
8

Ingredients
Smothered Chicken & Fajita Veggies
- 2 tablespoons olive oil
- 1/2 white large onion, sliced
- 1 large yellow pepper, sliced
- 1 large green pepper, sliced
- 1 15-oz. can tomato sauce
- 1 15-oz. can green chiles
- 1/2 cup chicken broth, or water
- 3 tablespoons taco seasoning, or a store-bought packet
- 1 lbs. shredded chicken, we used rotisserie
Other
- 8 12-inch flour tortillas
- 1 15-oz. can refried beans
- 2 cups Spanish rice, 8 oz. store-bought Spanish rice
- 1.5 cups Mexican shredded cheddar cheese
Instructions
-
Heat a large skillet pan or dutch oven over medium/high heat. Add olive oil.
-
When olive oil is fragrant, add the onion to the pan and sauté the onion for 2-3 minutes.
-
Turn heat to medium and add the sliced bell peppers to the pan and sauté the peppers and onions for an additional 4-5 minutes.
-
Add tomato sauce, green chilis, water, and taco seasoning to the pan and stir until a thick tomato sauce is created.
-
Next, add the shredded chicken to the pan and toss the chicken with the vegetables and tomato sauce until the chicken is coated in sauce.
-
Bring the tomato sauce to a boil and then turn heat to low and simmer the chicken until the sauce has reduced by 1/4. Remove chicken from heat and set aside.
-
To assemble the burritos, lay a large tortilla on a flat surface and spread 3 tablespoons refried beans out on the tortilla and then add 1/4 cup Spanish rice, 2 tablespoons shredded cheese and an 1/8 of the chicken mixture to the burrito.
-
Tightly wrap each burrito by folding the sides in and rolling. Repeat steps 7 and 8 until all the burritos are made.
-
If you are going to eat the chicken burritos right away, feel free to eat the burrito as is, freeze the burritos or heat the burritos up in the oven or on the stop top.
Stovetop Instructions
-
Heat a large skillet over medium/high heat and add 1 tablespoon of olive oil.
-
When the olive oil is fragrant, place the burrito in a pan and let the burrito brown for 2-3 minutes on each side over medium heat.
-
Remove from the stove top and enjoy.
Oven Instructions
-
Preheat the oven to 425ºF and spray a casserole dish or baking sheet with non-stick cooking spray.
-
Place the burritos on the baking sheet or casserole and sprinkle with cheese and drizzle with olive oil.
-
Bake the burritos for 10-15 minutes or until the burritos begin to brown and the cheese is melted.
-
Remove from the oven and enjoy.
Freeze for Later
-
Wrap each individual burrito in a piece of tin foil and remove as much air as possible.
-
Store in the freezer for up to 3 months.
Reheating Burritos
-
If heating from frozen, unwrap and place on a plate and then into the microwave. Use the defrost setting on your microwave for 2 to 3 minutes, flipping every minute. Then microwave on high for 60-90 seconds or until hot.
-
If heating from thawed, microwave on high for 60 to 90 seconds.
Nutrition
Carbohydrates: 50 g,
Protein: 27 g,
Fat: 16 g,
Fiber: 7 g,
Sugar: 5 g
Nutrition information is automatically calculated, so should only be used as an approximation.
Love this recipe? Leave a comment below!
Don’t forget to tag your posts on social media with the hashtag #fitfoodiefinds, we’d love to see what you’re up to!