
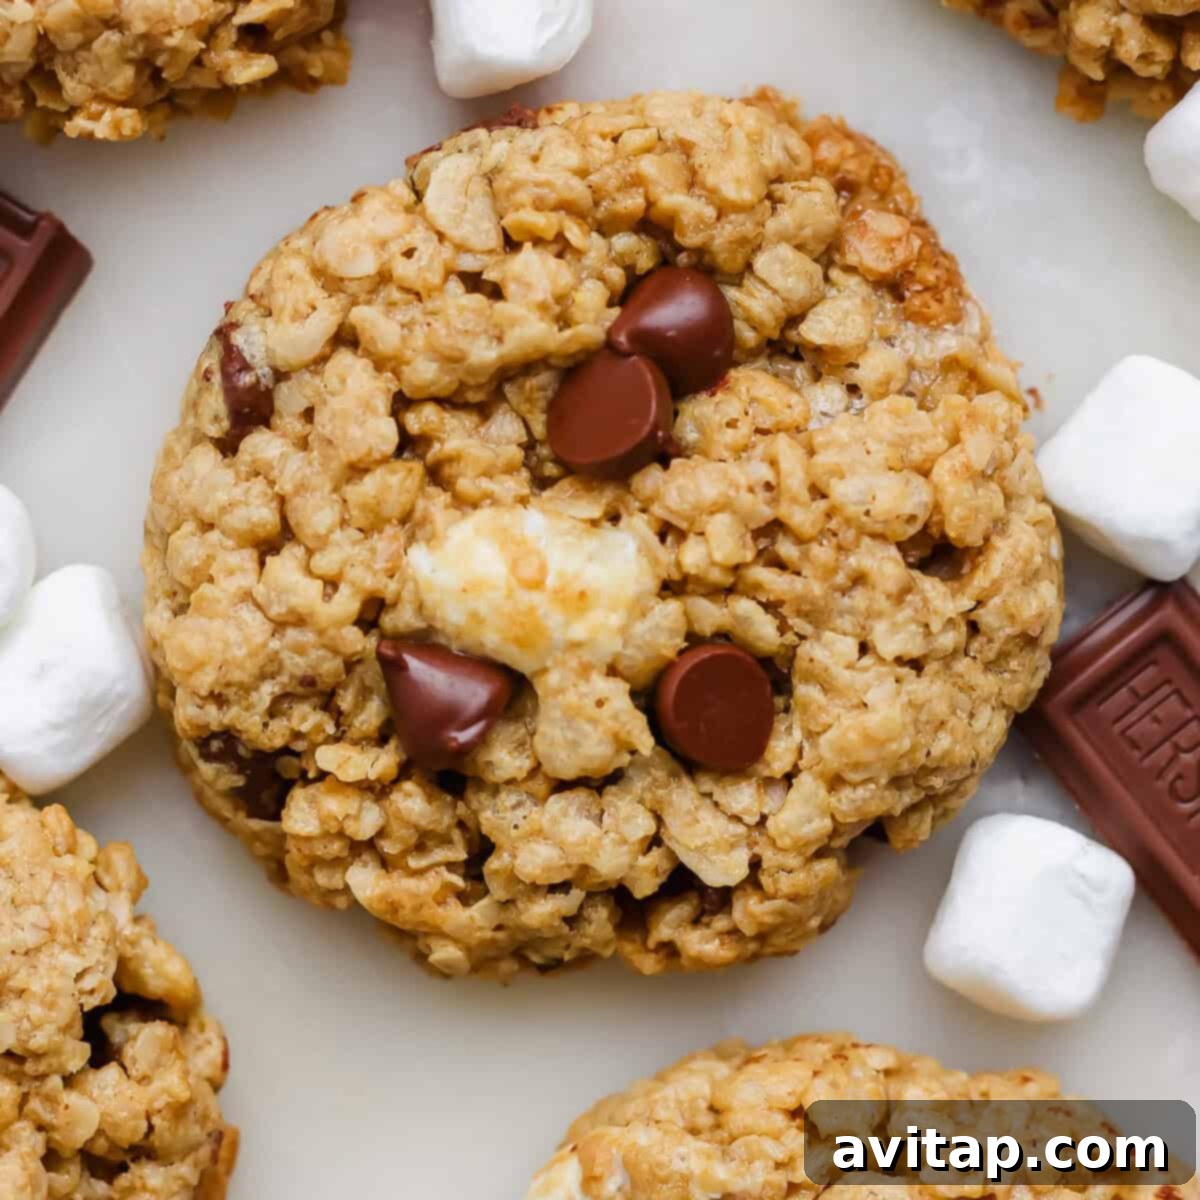
Ultimate Crunchy Peanut Butter S’mores Cookies: Your Year-Round Indulgence
Prepare for an unforgettable taste experience with these crunchy peanut butter s’mores cookies – a truly decadent, sweet, salty, and delightfully gooey twist on the beloved campfire classic. Who doesn’t adore a perfectly toasted s’more? If there’s a backyard bonfire, you can bet s’mores will be on the menu. Inspired by this timeless treat, I set out to create cookies that capture all the magic: rich chocolate, melt-in-your-mouth mini marshmallows, and that quintessential s’mores flavor, all elevated by the irresistible combination of peanut butter and a satisfying crunch. Now, you can savor the joy of s’mores all year long, no campfire required!
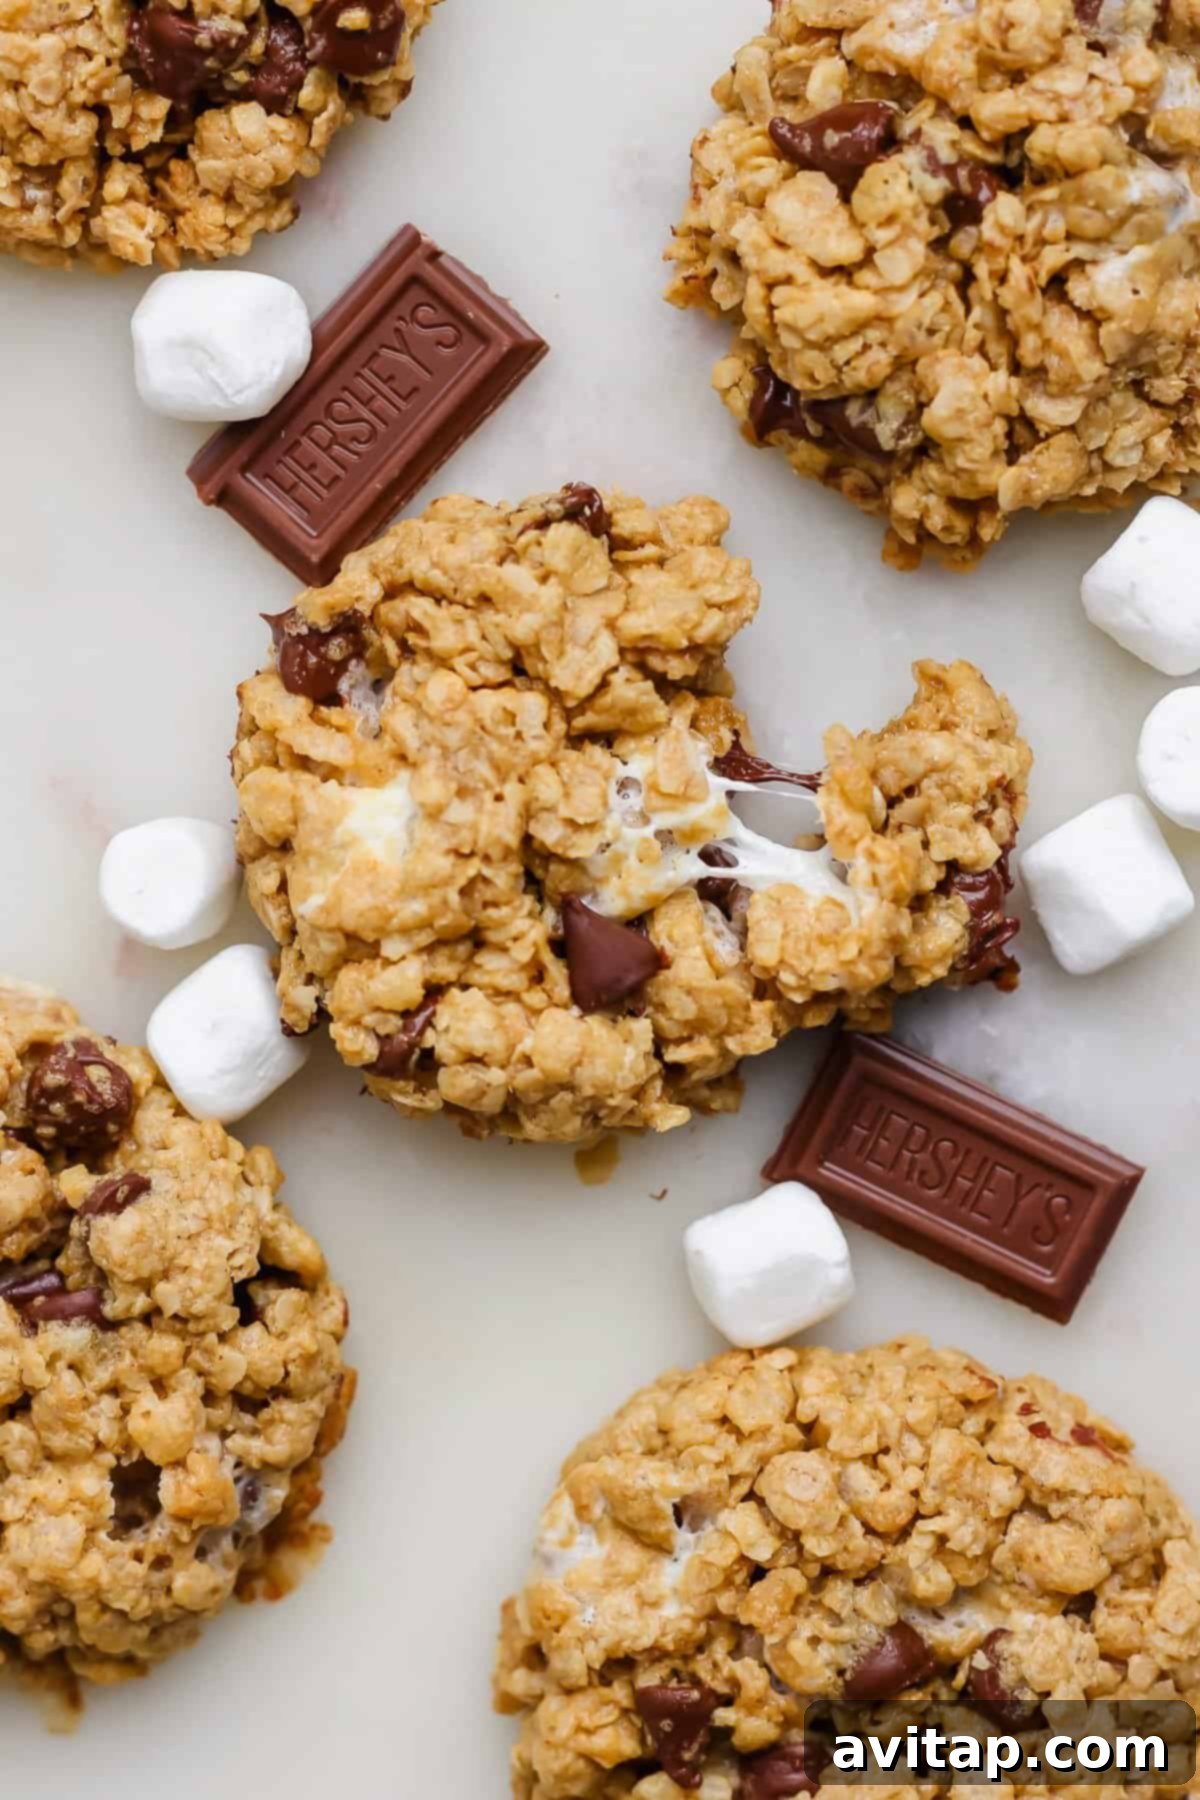
These exquisite s’mores cookies boast a fantastic texture profile: perfectly crunchy thanks to the inclusion of crisp rice krispies, wonderfully gooey from the luscious mini marshmallows, and decadently chocolate-y with every bite, thanks to generous semi-sweet chocolate chips. They’re more than just a cookie; they’re an experience, designed to bring warmth and happiness whether you’re by a fire or simply enjoying a quiet moment at home. The blend of sweet and savory notes makes them incredibly addictive, a true delight for any dessert enthusiast.
Why You’ll Fall in Love with These Peanut Butter S’mores Cookies
Beyond their incredible flavor, these peanut butter s’mores cookies offer a delightful array of benefits that make them a go-to choice for any cookie lover, ensuring they become a staple in your baking repertoire:
- Perfectly Balanced Texture: Enjoy the best of both worlds with cookies that are both satisfyingly chewy and wonderfully crispy. The quick-cooking oats provide a tender chewiness that melts in your mouth, while the rice krispies deliver that addictive, light crunch, creating a dynamic textural experience in every bite. This combination makes each cookie a delightful adventure for your palate.
- Gluten-Free Friendly Option: Catering to various dietary needs, this recipe can easily be made gluten-free. Simply opt for certified gluten-free quick-cooking oats. This simple substitution ensures that everyone can enjoy these delightful treats without compromise, making them perfect for gatherings and diverse households.
- Excellent for Meal Prep & Freezing: These cookies are ideal for making ahead! They freeze exceptionally well, allowing you to bake a large batch and store them for future cravings. Imagine having a ready supply of gourmet cookies at your fingertips – perfect for unexpected guests or a quick indulgent snack. Enjoy a fresh-tasting cookie anytime you desire.
- Kid-Approved Delight: A guaranteed hit with the little ones (and big ones too!). The fun combination of rich chocolate and gooey marshmallows, coupled with the comforting, familiar taste of peanut butter, makes these cookies an instant family favorite. They’re perfect for school lunches, after-school treats, or a fun baking project with the kids.
- Nostalgic Campfire Vibes, Indoors: Experience the cozy, nostalgic feeling of a campfire s’more without needing to venture outdoors. These cookies encapsulate all the beloved elements of s’mores – the melted chocolate, the toasted marshmallow, and the graham-cracker-like crunch – in a convenient, portable, and utterly delicious cookie form. They bring the warmth of summer nights into your home, any day of the year.
- Simple and Accessible Ingredients: Despite their gourmet taste, these cookies are made with readily available ingredients, making them an easy baking project for any skill level. No fancy equipment or exotic components required, just pantry staples transformed into something extraordinary.
Essential Ingredients for Irresistible S’mores Cookies: A Deep Dive
Crafting the perfect batch of these peanut butter s’mores cookies relies on a few key ingredients, each playing a vital role in achieving that signature taste, texture, and overall appeal. Here’s a closer look at what you’ll need and why each component is crucial for your success in the kitchen:
- Quick-Cooking Oats: These oats are a fantastic base for our cookies, contributing significantly to their soft, chewy texture and making them a delightful flourless option. Quick-cooking oats are specifically chosen because they absorb moisture faster and break down more, integrating seamlessly into the dough without creating an overly dense or gritty texture. For those following a gluten-free diet, certified GF quick-cooking oats work perfectly, ensuring everyone can enjoy these delightful treats without compromise. Ensure your oats are fresh for the best flavor and texture.
- Drippy All-Natural Peanut Butter: The type of peanut butter you use makes a significant difference in this recipe’s outcome. We specifically recommend a “drippy” all-natural peanut butter – one that is smooth, creamy, and stirs easily without a thick, hardened oil separation. This consistency helps it integrate seamlessly into the dough, contributing to the cookies’ rich, nutty flavor, moistness, and a soft chewiness that’s simply irresistible. Brands like Smucker’s or Good and Gather are excellent choices due to their natural composition and ideal texture. Avoid overly thick, crunchy, or sweetened peanut butter, as it can alter the dough’s consistency, moisture content, and final sweetness, potentially leading to drier or crumbly cookies.
- Rice Krispies: This is the secret ingredient for that wonderful, light, and airy CRUNCH! Folding rice krispies into the cookie dough provides an incredible textural contrast to the soft, chewy base. It mimics the crispiness of a graham cracker in a traditional s’more, adding an exciting, unexpected element to every bite. This crucial addition elevates the cookie from merely delicious to truly extraordinary. Don’t skip these if you love that satisfying snap and the authentic s’mores experience!
- Chocolate Chips: Chocolate is undeniably a cornerstone of any s’mores creation. While I personally lean towards semi-sweet chocolate chips for a balanced sweetness that complements the peanut butter, milk chocolate chips will also yield a deliciously sweeter result if you prefer a richer, creamier profile. For an authentic, rustic, and nostalgic s’mores touch, you can even chop up classic Hershey’s chocolate squares and mix them in. This not only provides that iconic s’mores flavor but also gives the cookies a beautiful, rustic appearance with larger pockets of melted chocolate. Dark chocolate chips are also a fantastic option for those who enjoy a deeper, less sweet chocolate experience, adding a touch of sophistication to the classic treat.
- Mini Marshmallows: The unequivocal star of the s’mores show! Mini marshmallows are perfectly sized for these cookies, ensuring you get delightful, gooey pockets of melted marshmallow in almost every bite. When baked, they transform into that ooey-gooey, slightly caramelized perfection that is synonymous with s’mores. It’s truly what makes these cookies reminiscent of a warm campfire treat, adding both sweetness and an incredible textural dimension. Larger marshmallows might be too dominant and create less even distribution.
- Melted Unsalted Butter: Butter is essential for both flavor and moisture. Melting it helps achieve a smoother, more homogeneous dough consistency, especially when combined with brown sugar. Using unsalted butter allows you to precisely control the overall saltiness of the cookies, letting the other flavors shine.
- Packed Light Brown Sugar: This provides deep, caramel-like molasses notes, contributing significantly to the cookies’ chewiness and moist texture. Packing the sugar ensures accurate measurement and the right balance of sweetness and moisture.
- Maple Syrup: A touch of pure maple syrup adds a subtle depth of flavor, a hint of natural sweetness, and helps with the cookie’s texture, giving it a delightful richness and a slight crispness to the edges. Ensure you use pure maple syrup, not pancake syrup, for the best results.
- Large Eggs: Eggs act as a crucial binding agent, helping to hold all the ingredients together and adding richness to the dough. They contribute to a tender crumb and a well-structured cookie. Using large eggs provides the ideal moisture and binding for this recipe.
- Vanilla Extract: A kitchen staple, vanilla extract is more than just an aroma; it enhances and rounds out all the other flavors, especially the chocolate and peanut butter. It adds a warm, aromatic depth that elevates the entire cookie experience.
- Pinch of Salt: Salt is often underestimated in sweet recipes, but it’s crucial here for balancing the intense sweetness and enhancing the complex flavors of the chocolate and peanut butter. It makes everything taste more vibrant and well-rounded, preventing the cookies from being cloyingly sweet.
- Baking Soda: This leavening agent is vital for the cookies’ texture. It reacts with the acidic brown sugar and helps the cookies rise slightly and spread, contributing to their soft and chewy texture and preventing them from being too dense.
Expert Tips for Baking Perfect Peanut Butter S’mores Cookies 🍪
Achieving cookie perfection is easier than you think with these professional tips and tricks. Follow these guidelines to ensure your peanut butter s’mores cookies turn out beautifully, irresistibly delicious, and consistently perfect every time:
- Mastering Sticky Dough: This cookie dough is intentionally on the stickier side; this characteristic contributes directly to its incredible chewiness and moistness. To make rolling easier and less messy, I highly recommend **moistening your hands slightly with water** before handling and shaping the dough into balls. If your hands become too sticky during the process, don’t hesitate to rinse them quickly and re-moisten between rolling each dough ball. This simple step will save you a lot of frustration and ensure a smoother baking process.
- Preventing Dome-Shaped Cookies: These cookies will naturally spread a little during baking due to their moist consistency and the melted butter. If you prefer flatter, more traditional cookie shapes rather than puffy, dome-shaped ones, it’s crucial to **gently press down on each dough ball** with the palm of your hand or a spatula before placing them in the oven. This encourages even spreading, promotes a more uniform bake, and yields that classic cookie aesthetic.
- Achieving Bakery-Style Round Cookies: For that aesthetically pleasing, bakery-perfect look, here’s a clever trick: immediately after removing the cookies from the oven (while they are still warm and pliable on the baking sheet), take a large round cookie cutter or the rim of a large, sturdy cup. Place it upside down over a cookie, ensuring the cookie is centered within the rim. Gently **move the cup in a circular motion** around the cookie. This simple swirling action will gently push any uneven edges inward, shaping the cookie into a perfectly round circle. Repeat for all cookies to achieve a professional finish.
- Do Not Overbake: This is arguably the most crucial tip for chewy cookies. Keep a very close eye on your cookies during the last few minutes of baking. They are done when the edges are lightly golden brown and the centers still look slightly soft and slightly underbaked. The residual heat from the baking sheet will continue to cook them as they cool. Overbaking can quickly lead to dry, crumbly cookies, so it’s always better to underbake slightly for that ultimate gooey, chewy texture that everyone loves.
- The Importance of Cooling: While it’s incredibly tempting to dive right into these warm, fragrant cookies, allowing them to cool completely on a wire rack is essential. This crucial step not only allows them to set properly and prevents them from crumbling when handled but also lets the flavors fully meld and develop. Cooling for at least 20 minutes before transferring them will ensure they firm up to the perfect consistency and maintain their integrity.
- Room Temperature Eggs: While the butter is melted, ensure your eggs are at room temperature. Room temperature eggs emulsify better with other ingredients, creating a smoother, more uniform dough. This leads to a more consistent texture and a better overall baked cookie. If you forget to take them out ahead of time, simply place them in a bowl of warm water for 5-10 minutes.
- Parchment Paper or Silicone Mats Are Essential: Always line your baking sheets with parchment paper or a silicone baking mat. This simple step is a game-changer: it prevents the cookies from sticking to the pan, ensures more even baking by creating a non-stick surface, and makes for incredibly easy cleanup. You’ll thank yourself later!
- Chill Time Matters: Don’t skip the refrigeration step for the dough. Chilling allows the fats to solidify, preventing excessive spreading during baking and concentrating the flavors. It makes the dough much easier to handle and results in a thicker, chewier cookie with more defined edges.
Storage, Freezing, and Thawing Your Peanut Butter S’mores Cookies
Proper storage is key to enjoying your delicious peanut butter s’mores cookies for as long as possible. Whether you’re making a big batch to last through the week or preparing some for a future treat, here’s how to keep them fresh, flavorful, and ready to enjoy whenever a craving strikes:
Keeping Baked Cookies Fresh at Room Temperature
Once your peanut butter s’mores cookies have cooled completely – and this is a critical step to prevent condensation and subsequent sogginess – store them in an airtight container at room temperature. They will remain wonderfully fresh, soft, and chewy for up to 5 days. To extend their softness and prevent them from drying out, a classic trick is to place a half-slice of plain bread or a small piece of paper towel in the container with the cookies; the bread will absorb excess moisture, helping the cookies retain their desirable texture.
Can You Freeze Peanut Butter S’mores Cookies? Absolutely!
Yes, these cookies are fantastic for freezing, making them perfect for future treats, spontaneous dessert needs, or when you simply want to portion control your indulgence. They will maintain their excellent quality and flavor in the freezer for up to 3 months when stored correctly. Freezing both baked cookies and raw dough is an option:
Freezing Baked Cookies:
- Cool Completely: Ensure the baked cookies are entirely cool before freezing. Any residual warmth can lead to ice crystals forming, which can degrade texture and cause freezer burn.
- Flash-Freeze for Convenience: For best results and to prevent the cookies from sticking together in a clump, arrange the cooled cookies in a single layer on a baking sheet. Place the baking sheet in the freezer for about 30 minutes to an hour, or until the cookies are firm. This step is known as flash-freezing.
- Transfer to Airtight Container: Once flash-frozen, transfer the cookies to an airtight freezer-safe container or heavy-duty freezer bags (large Ziploc bags work exceptionally well for this purpose, squeezing out as much air as possible).
- Label Clearly: Don’t forget to label the container or bag with the date you made the cookies and the type of cookie. This helps you keep track of freshness and easily identify them later from your freezer stash.
Freezing Raw Cookie Dough:
- Portion and Shape: Scoop the cookie dough into individual balls, just as you would for baking. You can also slightly press them down if you prefer flatter cookies.
- Flash-Freeze Dough Balls: Place the dough balls on a parchment-lined baking sheet and flash-freeze until solid (about 1-2 hours).
- Store in Freezer Bag: Transfer the frozen dough balls to an airtight freezer-safe bag or container. Label with the date and baking instructions.
- Baking from Frozen: When ready to bake, place the frozen dough balls on a prepared baking sheet and bake as directed, adding an extra 2-4 minutes to the baking time.
How to Thaw Your Frozen Cookies
When a craving strikes, thawing these delectable treats is simple and offers a few convenient options:
- Overnight Room Temperature Thaw: For the best texture and flavor that’s closest to freshly baked, remove the cookies from the freezer and let them **thaw at room temperature overnight** in their airtight container. This gradual thawing helps maintain their moisture, prevents them from becoming dry, and allows the flavors to fully re-integrate.
- Quick Thaw (Microwave Method): If you’re in a pinch and need a warm, chewy cookie right away, you can quickly thaw an individual cookie in the microwave. Remove it directly from the freezer and place it on a microwave-safe plate. Heat on the **defrost setting for about 30-60 seconds**, or until it’s soft, chewy, and deliciously warm through the center. Keep a close eye on it to avoid over-microwaving, which can make the marshmallows overly hot and sticky, or the cookie tough and rubbery.
- Oven Reheat (for a ‘Freshly Baked’ feel): For a more ‘freshly baked’ experience, preheat your oven to 300°F (150°C). Place frozen cookies on a baking sheet and heat for about 5-10 minutes, or until warmed through and the marshmallows are gooey again. This method is great for a few cookies at a time.
Enjoying freshly baked-tasting cookies has never been easier, even straight from the freezer!
Peanut Butter Crunch S’mores Cookies Recipe
Peanut Butter Crunch S’mores Cookies Recipe
Linley Hanson
Prep:
15
Cook:
15
Total:
30
16
Pin Recipe
Print Recipe
Ingredients
- 1/2 cup melted unsalted butter
- 1 cup packed light brown sugar
- ¼ cup maple syrup
- 2 large eggs
- 1 cup drippy, all-natural peanut butter
- 2 teaspoons vanilla extract
- pinch salt
- 4 cups quick-cooking oats, gluten-free if desired
- 1 teaspoon baking soda
- 1 cup semi-sweet chocolate chips
- 2 cups rice krispies
- 1 cup mini marshmallows
Instructions
-
First, preheat your oven to 350ºF (175ºC). Prepare a baking sheet by lining it with parchment paper or spraying it generously with nonstick cooking spray. This crucial step will prevent sticking and ensure easy cleanup after baking.
-
In a large mixing bowl, combine the melted unsalted butter and packed light brown sugar. Stir them together thoroughly with a spatula or spoon until the mixture is completely smooth and no lumps of sugar remain. Then, add the maple syrup, large eggs, drippy all-natural peanut butter, and vanilla extract. Mix again until all the wet ingredients are well combined and the mixture appears creamy and uniform.
-
Now, it’s time to incorporate the dry ingredients. Add the pinch of salt, quick-cooking oats (gluten-free if desired), and baking soda to the wet mixture in the bowl. Mix until everything is just combined, being careful not to overmix, as this can lead to tougher cookies. Finally, gently fold in the semi-sweet chocolate chips, rice krispies, and mini marshmallows until they are evenly distributed throughout the dough.
-
Cover the cookie dough bowl with plastic wrap and refrigerate it for 20 minutes. This chilling period is important as it helps the dough set, making it much easier to handle and preventing excessive spreading during baking, which ultimately results in a chewier, more substantial cookie.
-
After chilling, scoop about 2 tablespoons of the dough into your hands for each cookie. Lightly moisten your hands with water before rolling to prevent the sticky dough from adhering too much (refer to our pro tips section above for more details!). Form the dough into a cohesive ball, then place it onto the prepared cookie sheet. Gently press down on each dough ball slightly to create a flatter, more traditional cookie shape. Don’t worry if the batter still feels a bit wet or soft; this is precisely what contributes to their incredibly soft and chewy texture after baking!
-
Continue this process, placing the dough balls onto the baking sheet. Ensure you leave enough space (about 2 inches) between each cookie for spreading during baking. Aim for about 6 cookies per standard baking sheet to avoid overcrowding.
-
Bake the cookies in the preheated oven at 350ºF (175ºC) for 11-14 minutes, or until the edges are lightly golden brown and the centers appear just set but still look slightly soft. Remember, it’s crucial to avoid overbaking to maintain their signature soft, gooey interior. They will continue to cook slightly on the hot baking sheet.
-
Remove the cookies from the oven and let them cool on the baking sheet for a couple of minutes. This brief cooling period helps them firm up slightly before handling. Then, carefully transfer them to a wire rack to continue cooling for at least 20 minutes to fully set. For perfectly round cookies, use a large cup or cookie cutter to gently shape them while they are still warm, as explained in our expert tips section.
Additional Tips & Notes for Success
- Dough Handling: As reiterated in our expert tips, the dough is naturally sticky. Always moisten your hands slightly before rolling each cookie ball and rinse them as needed to prevent sticking and ensure uniform shaping.
- Cookie Shape: For flatter, chewier cookies, gently press down on the dough balls before baking. If you prefer a slightly thicker, more puffed cookie, you can leave them as balls, though they will still spread a bit.
- Flavor Enhancements: For an extra layer of deliciousness, consider sprinkling a tiny bit of flaky sea salt on top of the warm cookies immediately after they come out of the oven. This further enhances the delightful sweet and salty balance.
- Recipe Variations: Feel free to experiment with different types of chocolate chips, such as dark chocolate for a richer flavor, or even a blend of different chocolates. For an added textural element and nutty flavor, you could also fold in a handful of chopped roasted peanuts or pecans.
- Serving Suggestion: These cookies are absolutely divine on their own, but for an extra special treat, serve them warm with a scoop of vanilla bean ice cream or a drizzle of chocolate fudge sauce.
Nutrition Information (Approximate per Serving)
Carbohydrates: 39 g,
Protein: 7 g,
Fat: 20 g,
Fiber: 3 g,
Sugar: 25 g
Nutrition information is automatically calculated and provided for estimation purposes only. It may vary based on specific ingredient brands, portion sizes, and preparation methods. Please use it as a general guide.
Frequently Asked Questions About These Peanut Butter S’mores Cookies
Got questions about baking these delightful cookies? Here are answers to some common inquiries that might help you achieve perfect results every time:
- Can I use regular rolled oats instead of quick-cooking oats?
- While quick-cooking oats are specifically recommended for their ability to blend seamlessly and provide a tender chew without being too dense or noticeably grainy, you can technically use old-fashioned rolled oats. However, be aware that this substitution will result in a chewier, more textured cookie, and the overall consistency of the dough and the final product might be slightly different. For the intended soft and chewy texture with a light crunch, sticking to quick-cooking oats as specified is highly recommended.
- Can I make these cookies without peanut butter due to allergies or preference?
- This recipe heavily relies on peanut butter for its unique flavor profile, its rich fat content, and its structural contribution to the dough. Substituting it with another nut butter (like almond butter, cashew butter) or a seed butter (like sunflower seed butter) might work in terms of consistency, but it will significantly alter the taste and overall cookie experience. If you have a severe peanut allergy, always ensure all other ingredients (including oats, chocolate chips, and marshmallows) are certified peanut-free to avoid cross-contamination.
- What if I don’t have rice krispies, or can I substitute them?
- The rice krispies provide a distinct, light crunch that is integral to the “crunchy” aspect of these s’mores cookies and mimics the texture of graham crackers. While you could omit them, the cookies would be softer and lack that desired crispy texture. There isn’t a direct substitute that provides the exact same airy, crunchy effect. If you skip them, the cookies will still be delicious but will have a different textural profile.
- Can I use different types of chocolate chips or other mix-ins?
- Absolutely! Feel free to experiment with your favorite type of chocolate. Dark chocolate chips will offer a richer, less sweet flavor profile, which can be a wonderful contrast to the sweet marshmallows and peanut butter. Milk chocolate chips will make the cookies even sweeter and creamier. White chocolate chips could also be an interesting addition for a different flavor profile. Beyond chocolate, you could also add a handful of chopped nuts (like pecans or walnuts) for extra crunch, or even a sprinkle of toffee bits for added caramel notes.
- How do I prevent marshmallows from burning or becoming too hard?
- Since the mini marshmallows are folded into the cookie dough, they are mostly protected from direct heat, which helps prevent burning. However, any marshmallows exposed on the surface might brown quickly. Baking at 350°F and keeping a close eye on your cookies during the last few minutes will help. If you notice the exposed marshmallows getting too dark too fast, you can loosely tent the baking sheet with aluminum foil for the last few minutes of baking to shield them.
- Can I prepare the cookie dough ahead of time?
- Yes, absolutely! The cookie dough can be prepared ahead of time and stored in an airtight container in the refrigerator for up to 2-3 days. Chilling the dough actually enhances the flavors, allows the oats to fully hydrate, and can lead to a better-textured cookie with less spreading during baking. Just make sure to let the dough sit at room temperature for about 10-15 minutes before scooping if it’s too firm directly from the fridge, to make it more pliable.
- What is the best way to ensure uniform cookie size?
- To ensure all your cookies bake evenly and look consistent, use a cookie scoop (about 2 tablespoons size is ideal for this recipe). This will help you get uniformly sized dough balls every time, leading to consistent baking and a professional-looking batch of cookies.
Time for the Next Batch: More Delicious Cookie Recipes!
Loved these peanut butter s’mores cookies? Don’t stop the cookie adventure there! Explore more incredible recipes to satisfy your sweet tooth and keep your kitchen filled with delightful aromas:
- Chocolate Peanut Butter Protein Cookies
- Favorite Peanut Butter Cookies
- Healthy Monster Cookies
- Classic Oatmeal Raisin Cookies
- White Chocolate Cranberry Oatmeal Cookies
- Peanut Butter Protein Cookies
- Explore ALL Our Irresistible Cookie Recipes
Love this recipe? Leave a comment below!
Don’t forget to tag your delicious creations on social media with the hashtag #fitfoodiefinds – we can’t wait to see what you’re baking and share your culinary successes!
Photography by: The Wooden Skillet