
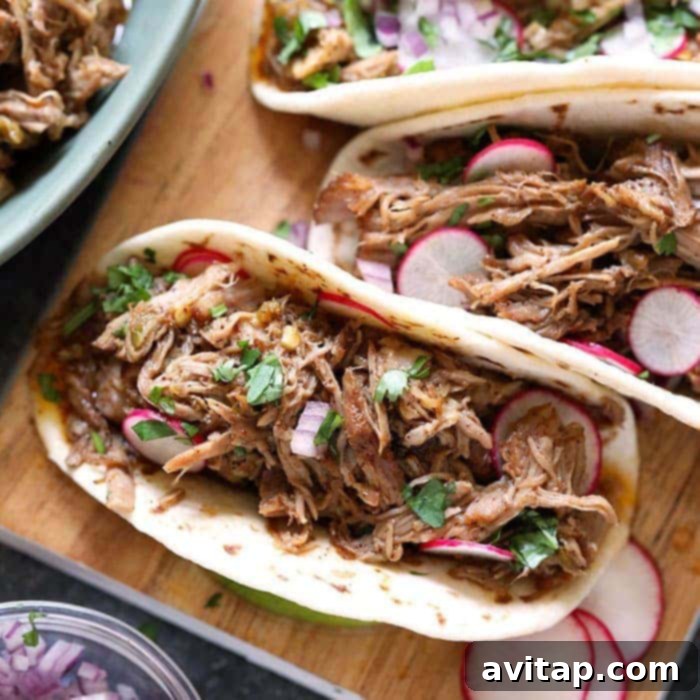
Embark on a culinary journey to create the most succulent and flavor-packed Instant Pot Carnitas right in your kitchen. This recipe delivers incredibly tender, fall-off-the-bone pork with those irresistible crispy edges, making it the ultimate weeknight hero or a crowd-pleasing centerpiece for any gathering. Forget lengthy cooking times; your pressure cooker transforms a simple cut of pork into a Mexican feast, guaranteeing delicious leftovers for days.
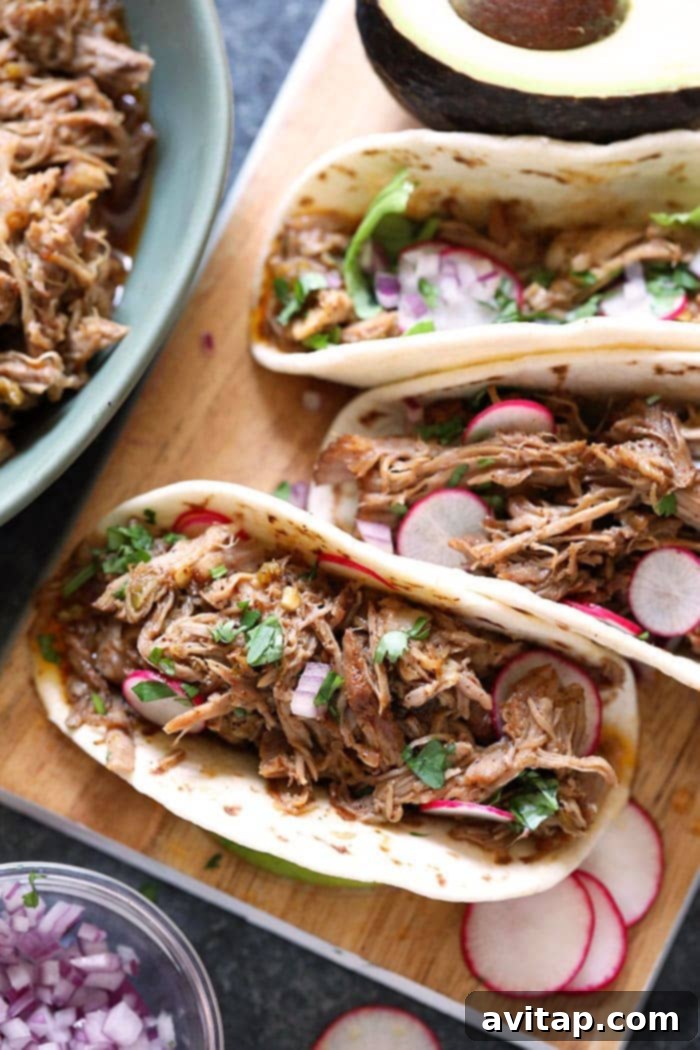
Carnitas, a beloved Mexican dish meaning “little meats,” traditionally involves simmering pork in lard until incredibly tender, then crisping it up. While the classic method is undeniably delicious, it’s often a labor of love that takes hours. Thanks to the magic of the Instant Pot, we can achieve that same melt-in-your-mouth tenderness and satisfying crispiness in a fraction of the time. If you’ve enjoyed our Slow Cooker Carnitas, you’re going to adore this expedited pressure cooker variation, perfect for busy schedules without compromising on authentic flavor.
Why the Instant Pot is Perfect for Carnitas
The Instant Pot truly shines when it comes to dishes like carnitas. Its ability to pressure cook significantly reduces the cooking time, transforming tough cuts of meat into incredibly tender, shreddable perfection in a fraction of the traditional time. The sealed environment locks in moisture and infuses flavors deep into the pork, resulting in a juicy, aromatic final product. Plus, the sauté function allows you to sear the meat directly in the pot, building foundational flavors and creating those coveted crispy bits, all with minimal cleanup. It’s a culinary multitasker that makes complex dishes approachable for any home cook.
Selecting the Best Meat for Instant Pot Carnitas
The foundation of exceptional carnitas lies in choosing the right cut of pork. This recipe specifically calls for a 2.5 – 3 lb. boneless pork shoulder roast. Let’s delve into why this cut is superior for carnitas and how to ensure you pick the best one:
- Pork Shoulder (also known as Pork Butt or Boston Butt): This cut, despite its name, comes from the shoulder of the pig. It’s the ideal choice for slow-cooking methods because it contains a generous amount of marbling (intramuscular fat) and connective tissue. During the pressure cooking process, this fat renders down, and the connective tissue breaks apart, resulting in an exceptionally moist, tender, and flavorful pulled pork. The collagen in the connective tissue converts to gelatin, providing that rich, melt-in-your-mouth texture that defines great carnitas.
- Fat Content is Key: Don’t be afraid of the fat! It’s absolutely essential for achieving that characteristic juicy texture and rich flavor of carnitas. As the pork cooks, the fat bastes the meat from within, preventing it from drying out. A well-marbled pork shoulder ensures a tender and flavorful result, so look for a piece with visible streaks of fat throughout.
- Boneless vs. Bone-in: While bone-in pork shoulder can add extra depth of flavor, a boneless roast is often more convenient for the Instant Pot as it’s easier to handle, season, and cut if needed to fit. If you opt for bone-in, ensure it fits your Instant Pot comfortably and consider adding a little extra cooking time (typically 10-15 minutes). Always trim any excess hard fat from the exterior, but leave the marbling intact.
- Size Matters for Cooking Time: The recommended size of 2.5-3 lbs is perfect for consistent results with our suggested cooking time.
- If your pork shoulder weighs less than 2.5 lbs., you might need to slightly reduce the pressure cooking time to prevent it from becoming dry. A smaller cut may be done in 75-80 minutes.
- For a pork shoulder larger than 3 lbs., you will likely need to increase the pressure cooking time to ensure it reaches optimal tenderness. Adjust accordingly, typically adding 5-10 minutes per extra pound. A 4-5 lb roast might require 100-110 minutes.
Mastering Instant Pot Carnitas: A Step-by-Step Guide
Crafting perfect Instant Pot Carnitas is a straightforward process when you follow these key steps. Each stage is designed to build layers of flavor and achieve that desirable tender and crispy texture that makes carnitas so irresistible.
Step 1: Create a Flavorful Pork Dry Rub
The dry rub is the secret to infusing your carnitas with deep, savory flavor right from the start. A well-balanced rub not only seasons the meat but also helps to create a delicious crust during searing and ensures every bite is bursting with taste. You’ll need the following aromatic spices for our signature blend:
- Chili Powder: Adds a mild, earthy, and slightly smoky depth that is characteristic of Mexican cuisine.
- Garlic Powder: Essential for a pungent, savory kick that complements pork beautifully, providing a rich, aromatic base.
- Paprika (Smoked Preferred): Contributes a vibrant color and a rich, smoky flavor profile that enhances the overall taste. Smoked paprika adds an extra layer of complexity.
- Cayenne Pepper: For a subtle hint of heat that awakens the palate without overpowering the other flavors. Adjust the amount to your preference for a spicier carnitas.
- Salt: Crucial for seasoning the meat, drawing out its natural juices, and tenderizing it. Do not skimp on the salt; it’s a fundamental component of great carnitas, bringing all the flavors into harmony.
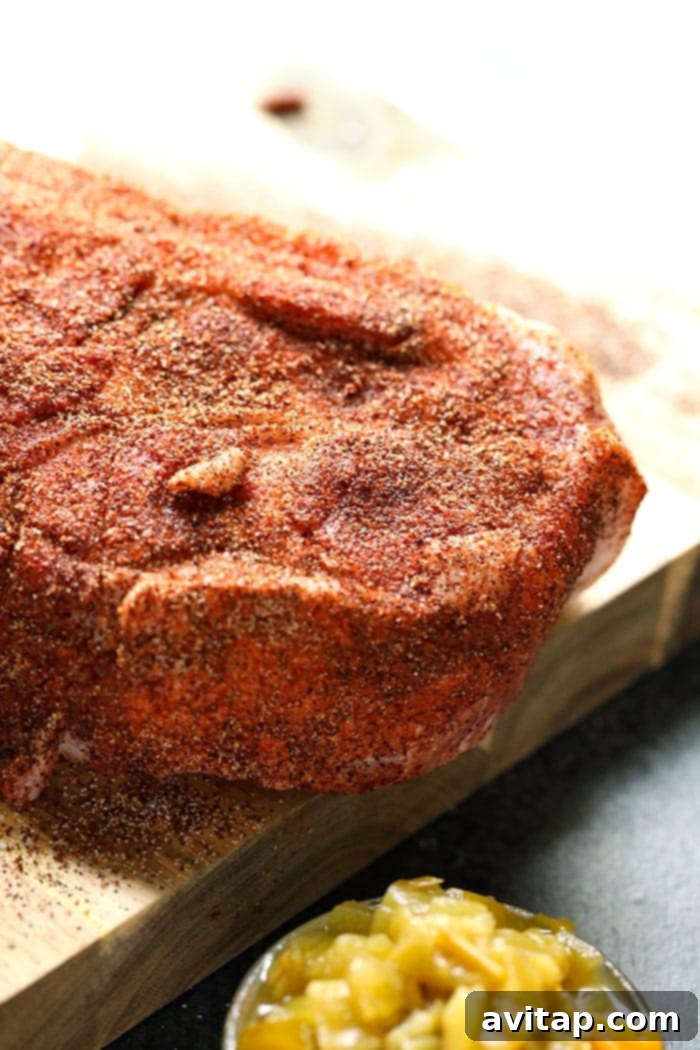
In a medium bowl, combine all the dry rub ingredients. Mix them thoroughly until they are evenly distributed. Place your pork shoulder on a large plate or cutting board. Generously sprinkle the spice mixture over the pork shoulder, using your hands to massage the rub into every crevice and across all surfaces of the meat. This ensures maximum flavor penetration. Alternatively, if you have a favorite blend on hand, feel free to use 3 tablespoons of our homemade pork dry rub recipe for a convenient and equally delicious option. Set the seasoned pork aside while you prepare your Instant Pot.
Step 2: Sear the Pork for Enhanced Flavor
Searing is a non-negotiable step for truly exceptional carnitas. This process, known as the Maillard reaction, creates a deeply flavorful brown crust on the exterior of the meat. It locks in juices, develops a complex taste that cannot be achieved through pressure cooking alone, and contributes significantly to the overall deliciousness of the dish. Fortunately, your Instant Pot’s powerful “Sauté” function makes this incredibly easy, allowing you to build flavor directly in the cooking pot, reducing cleanup.
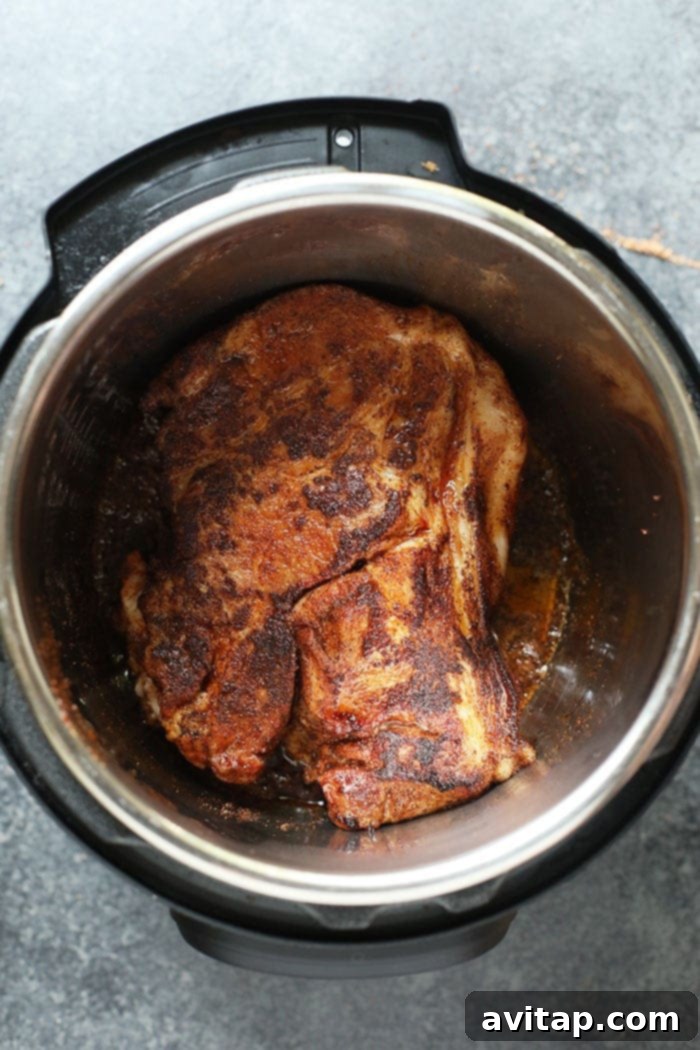
Add a good amount of olive oil (approximately 3 tablespoons) to the inner pot of your Instant Pot and select the “Sauté” function on “Normal” or “More.” Allow the oil to heat up until it’s shimmering and just starting to smoke lightly, indicating it’s hot enough for proper searing. Carefully place your seasoned pork shoulder into the hot pot. Given that a 3 lb. pork shoulder is quite substantial, ensure you use enough oil to prevent sticking and promote even browning. Sear each of the four sides (top, bottom, and two longer sides) for 2-3 minutes per side, aiming for a rich, golden-brown crust. Don’t rush this step – it’s crucial for developing that deep, caramelized flavor that forms the backbone of fantastic carnitas!
Step 3: Pressure Cook to Tender Perfection
After searing, it’s time for the Instant Pot to work its magic and transform that seasoned pork into incredibly tender carnitas. Turn off the sauté function to prevent any burning. Now, add a few additional ingredients to the pot: one 4 oz. can of green chiles and 2 tablespoons of water. These liquids are essential for building pressure and creating a moist cooking environment that will tenderize the pork beautifully.
How Long to Cook Instant Pot Carnitas
Secure the lid onto your Instant Pot, ensuring it’s properly sealed. Before starting, double-check that the pressure release valve is set to the “Sealing” position. Select the “Manual” or “Pressure Cook” setting on High Pressure and set the timer for 90 minutes. It’s important to understand that your Instant Pot will take some time to build pressure before the actual cooking countdown begins. This pre-heating phase usually takes between 10-15 minutes, depending on the volume and temperature of the contents. Be patient during this time; the countdown timer will only begin once full pressure is achieved. Once the 90 minutes are complete and your Instant Pot beeps to signal the end of the cooking cycle, it’s time for a quick release. Carefully turn the pressure release valve to the “Venting” position (use tongs or a long spoon to protect your hands from the steam). Allow all the steam to escape completely before attempting to open the lid. This method ensures your pulled pork is incredibly tender and ready for the next delicious step.
Step 4: Shred and Prepare for Serving
Once the pressure cooking is complete and the steam has fully released, your pork should be exceptionally tender – a true sign of perfectly cooked carnitas! Shredding it should be an effortless task, as the meat will be falling apart. If you find the pork still tough or resistant to shredding, it simply indicates it needs a little more time under pressure. Don’t worry, pork shoulder is very forgiving! Simply reseal the Instant Pot and cook for an additional 10-20 minutes on High Pressure, then perform another quick release.
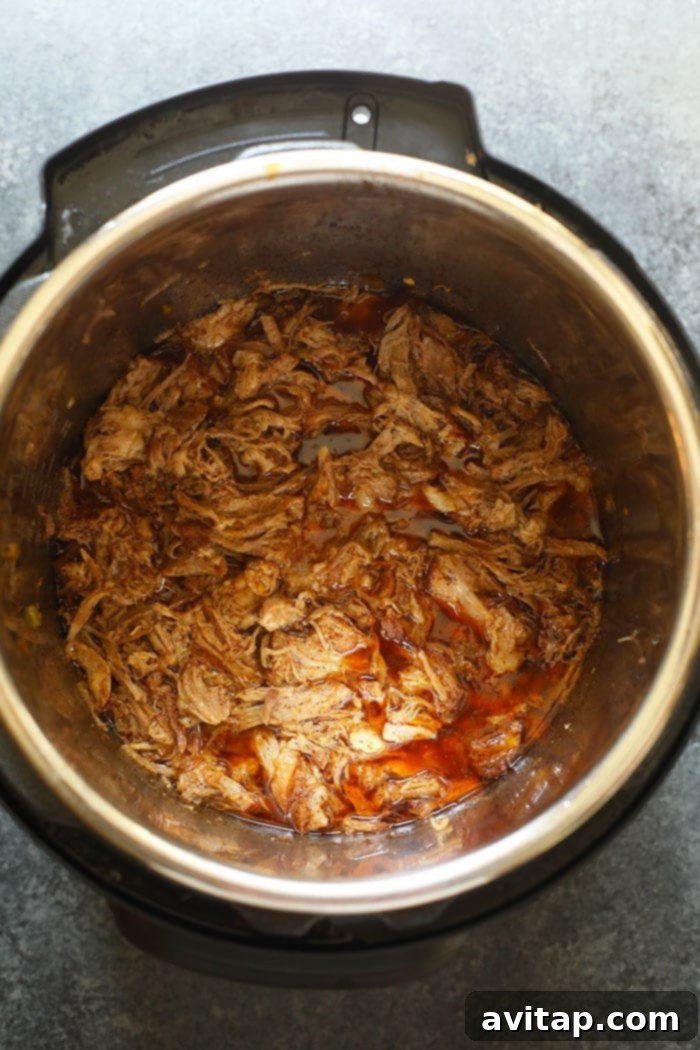
Carefully remove any large, undesirable fatty pieces from the pork and discard them. Then, using two forks (or even a stand mixer with a paddle attachment for larger batches, if you prefer), begin to shred the meat directly in the pot. It should easily pull apart into succulent strands. We highly recommend keeping all the cooking liquid and sauce in the pot, as it’s packed with incredible flavor and moisture. This flavorful liquid will keep your carnitas moist and add a profound depth to your dishes. Finally, squeeze the fresh juice from half a lime over the shredded pork and mix well. The lime brightens the flavors and adds a zesty finish. If you choose to drain some of the liquid, you might want to adjust the seasoning with a little more pork dry rub or an extra squeeze of lime to boost the flavor.
Pro Tip: How to Achieve Extra Crispy Carnitas
The signature of truly amazing carnitas is that perfect contrast of tender, juicy pork with irresistible crispy, caramelized edges. To achieve this, after shredding, follow these simple steps:
- Preheat your oven broiler to high. Position an oven rack about 6-8 inches from the heat source.
- Lightly spray a large baking sheet with nonstick cooking spray or line it with parchment paper for easy cleanup.
- Evenly spread the shredded pork in a single layer across the prepared baking sheet. It’s crucial to avoid overcrowding, as this will steam the meat rather than crisp it. If necessary, use two baking sheets.
- Broil on high for 3-5 minutes, keeping a close eye on it to prevent burning. Broilers can vary greatly, so watch constantly! The edges should start to caramelize and become crispy.
- Carefully remove the baking sheet, use tongs to toss the carnitas, flipping them to expose new surfaces, and return to the broiler for another 2-3 minutes, or until you achieve your desired level of crispiness and a beautiful golden-brown color. This step is transformative and adds an incredible textural dimension to your carnitas!
Alternatively, for smaller batches or if you prefer stovetop cooking, you can crisp the shredded carnitas in a hot cast-iron skillet with a little oil until golden and crunchy. This method also works wonderfully for reheating leftovers while adding back that desired crispy texture.
Versatile Serving Suggestions for Instant Pot Carnitas
One of the best things about these Instant Pot Carnitas is their incredible versatility. While they’re fantastic for feeding a crowd, they’re also a dream come true for meal prep, as they can be incorporated into countless delicious dishes throughout the week. Here are some creative and popular ways to enjoy your perfectly cooked carnitas:
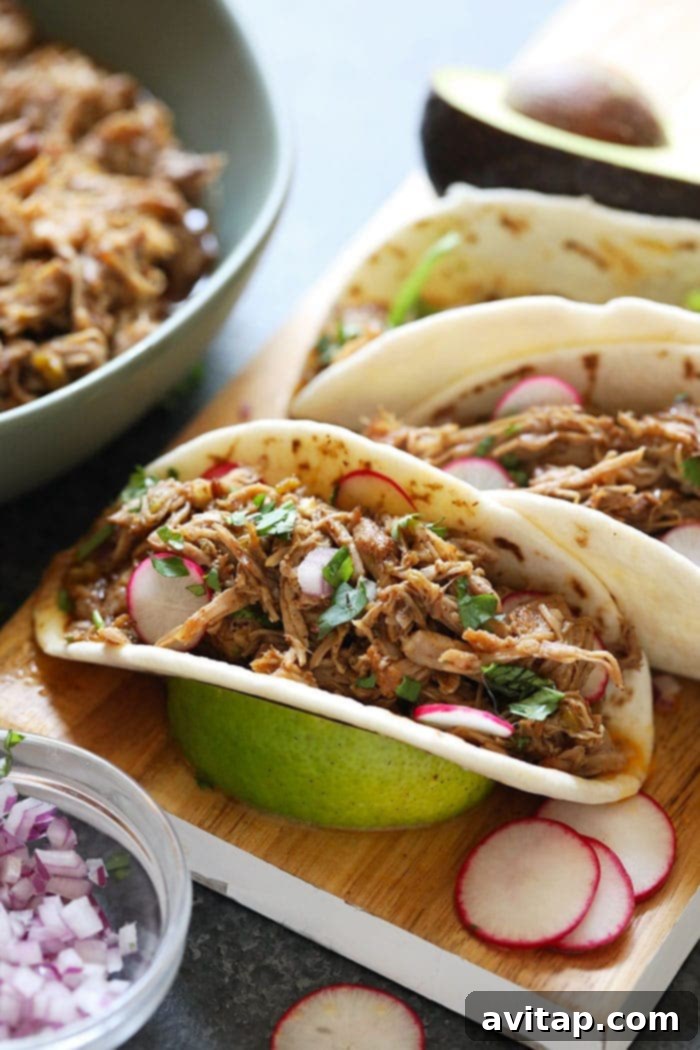
- Carnitas Tacos: The quintessential choice! Serve your crispy carnitas in warm corn or flour tortillas with your favorite fresh toppings like diced white onion, fresh cilantro, a generous squeeze of lime, creamy avocado or guacamole, salsa verde or roja, or tangy pickled red onions.
- Hearty Meal Prep Bowls: Build wholesome and satisfying meal prep bowls by pairing carnitas with fluffy brown rice, nutrient-rich quinoa, or low-carb cauliflower rice. Add colorful fajita-style vegetables (sautéed bell peppers and onions), black beans, corn, and a drizzle of your favorite creamy sauce or a spicy vinaigrette. Get inspired by this recipe for a complete and balanced meal.
- BBQ Pulled Pork Sandwiches: Transform your carnitas into an American comfort food classic! Simply toss the shredded pork with your favorite smoky and tangy BBQ sauce (similar to the method in this recipe) and pile it high on toasted brioche buns or slider rolls. Serve with a crisp coleslaw for the perfect balance.
- Nachos Supreme: Layer crispy tortilla chips with generous amounts of warm carnitas, a blend of melted cheeses, spicy jalapeños, black beans, a dollop of sour cream or crema, and a scoop of fresh guacamole for an unforgettable appetizer or hearty main dish.
- Enchiladas or Burritos: Use the flavorful carnitas as a delicious and tender filling for cheesy enchiladas, smothered in your favorite red or green sauce, or for hearty, satisfying burritos packed with rice, beans, and fresh veggies.
- Carnitas Salad: For a lighter, yet equally flavorful option, serve warm carnitas over a bed of crisp romaine lettuce and mixed greens, topped with corn, black beans, cherry tomatoes, avocado slices, and a vibrant lime vinaigrette.
Creative Ways to Enjoy Leftover Carnitas
One of the many joys of making Instant Pot Carnitas is the generous yield, often leaving you with delicious leftovers. Don’t let them go to waste! Carnitas are incredibly versatile and can elevate almost any savory dish, transforming familiar meals into something exciting and new. Here are some fantastic ideas to reinvent your leftovers and make the most of every delicious shred:
- Carnitas Chili: Give your favorite chili recipe an incredible flavor boost by stirring in shredded carnitas during the last 30 minutes of cooking. The tender pork adds a wonderful richness and texture.
- Carnitas Mac and Cheese: Take comfort food to the next level by folding tender carnitas into our homemade mac and cheese. The savory, slightly spicy pork perfectly complements the creamy, cheesy pasta for an unforgettable meal.
- Loaded Nachos: A fan favorite! Layer carnitas generously over crispy tortilla chips with melted cheese, black beans, corn, pickled jalapeños, and a dollop of sour cream or crema. Top with fresh salsa and cilantro for an irresistible appetizer or a fun dinner (inspired by this chicken nacho recipe).
- Breakfast Skillet or Burritos: Start your day with a hearty, flavorful meal! Mix leftover carnitas with crispy breakfast potatoes, scrambled eggs, and a sprinkle of cheese for a satisfying skillet breakfast. Or, wrap them in tortillas for quick breakfast burritos.
- Quesadillas or Tostadas: Create quick and easy quesadillas by filling tortillas with carnitas and cheese, then cooking until golden and melted. For tostadas, simply pile the carnitas onto crispy corn tortillas with your favorite toppings.
- Carnitas Pizza: For a unique twist, use carnitas as a flavorful topping for homemade pizza. Pair it with a smoky BBQ sauce base, red onion, cilantro, and Monterey Jack cheese for a truly gourmet experience.
- Stuffed Bell Peppers: Mix carnitas with rice, beans, and a bit of cheese, then stuff into bell peppers and bake until tender for a wholesome and satisfying dinner.
Can You Freeze Carnitas for Later?
Absolutely! Carnitas freeze beautifully, making them an excellent choice for meal prepping and ensuring you always have a delicious protein on hand for quick meals. To properly freeze your leftover carnitas and maintain their quality:
- Cool Completely: Allow the cooked carnitas to cool completely to room temperature before freezing. This prevents condensation and ice crystal formation, which can affect texture.
- Package with Liquid: Transfer the shredded pork along with some of its flavorful cooking liquid into a freezer-safe gallon-size bag or an airtight container. The liquid is crucial as it helps keep the meat moist and flavorful during freezing and reheating.
- Remove Air: If using a freezer bag, press out as much air as possible before sealing to prevent freezer burn. If using a container, ensure it has a tight-fitting lid.
- Label and Date: Clearly label the bag or container with the contents and the date it was frozen.
- Freeze: Freeze for up to 3 months for optimal taste and texture.
When you’re ready to enjoy them, thaw the frozen carnitas in the refrigerator overnight. Reheat gently on the stovetop over medium-low heat with a little extra broth or water, or in the oven until warmed through. For crispy carnitas, spread them on a baking sheet and broil for a few minutes after reheating, or crisp them in a hot skillet.
Instant Pot Cooking Tips and Troubleshooting
While the Instant Pot simplifies cooking, sometimes minor issues can arise. Here are some common tips and troubleshooting advice to ensure your carnitas always turn out perfectly:
- Preventing the “Burn” Notice: If your Instant Pot displays a “Burn” notice, it usually means there isn’t enough liquid at the bottom of the pot, or food bits are stuck. To avoid this, always ensure you have at least 1 cup of liquid (like water, broth, or the juices from the green chiles) in the pot. After searing, make sure to scrape any browned bits from the bottom of the inner pot with a wooden spoon before adding liquids and sealing. If you do get the notice, carefully quick release the pressure, open the lid, stir the contents, add a little more liquid if needed, and resume cooking.
- Tough Meat After Cooking: If your carnitas aren’t falling apart easily after the initial cooking time, it simply needs more time under pressure. Pork shoulder is a tough cut that benefits from longer cooking to break down its connective tissues. Reseal the Instant Pot and pressure cook for an additional 10-20 minutes on High Pressure, then perform another quick release. It’s much better to overcook pork shoulder slightly than to undercook it.
- Don’t Overfill: Always adhere to the maximum fill line of your Instant Pot’s inner pot. Overfilling can lead to safety issues and improper cooking.
- Natural Release vs. Quick Release: For this recipe, we recommend a quick release to stop the cooking process promptly. However, for even more tender results, a natural pressure release (allowing the pressure to drop on its own) can sometimes be beneficial, though it adds significant time.
Explore More Instant Pot Recipes
The Instant Pot is a game-changer for preparing delicious meals quickly and efficiently. If you love how easily these carnitas came together, be sure to check out some of our other favorite Instant Pot creations that save time without sacrificing flavor:
- 42 Healthy Instant Pot Recipes You Need in Your Life
- Instant Pot Moroccan Chicken Bowls
- Instant Pot Korean Beef Bowl
- Instant Pot Shredded Chicken
- Instant Pot Pork Chops
More Delicious Instant Pot Pork Recipes
If pork is your protein of choice, the Instant Pot offers fantastic ways to cook it to perfection, ensuring tender and flavorful results every time. Discover more mouth-watering pork recipes from our collection that harness the power of pressure cooking:
- Instant Pot Pork Chops
- Instant Pot Pork Roast
Watch Our Instant Pot Carnitas Recipe Video!
Prefer to learn by watching? Our detailed video guide walks you through each step of making these incredible Instant Pot Carnitas. Visual instructions can make all the difference in mastering the technique and ensuring your dish turns out perfectly!
Instant Pot Pork Carnitas
Ingredients
Spice Rub*
- 1 tablespoon chili powder
- 2 teaspoons garlic powder
- 1 teaspoon smoked paprika
- 1/2 teaspoon cayenne pepper
- 2 teaspoons salt
Carnitas
- 2.5-3 lb. boneless pork shoulder roast
- 3 tablespoons olive oil
- 1-4 oz. can green chilis
- 2 tablespoons water
- 1/2 lime, juiced
Instructions
- First, place the pork shoulder on a large plate or cutting board.
- Prepare the pork dry rub by combining all spices in a medium bowl. Mix until thoroughly combined.
- Generously pour the spice mixture over the pork shoulder and massage it into the meat, ensuring all surfaces are well-coated. This step is key for building deep flavor. Set aside.
- Turn on the Instant Pot’s “Sauté” feature and add olive oil. Once the olive oil is fragrant and hot, carefully sear the pork shoulder for 2-3 minutes on each of its four sides. The goal is to achieve a beautiful, even brown crust on all sides.
- Turn the Instant Pot’s “Sauté” feature off. Pour the canned green chilis over the seared pork shoulder and add the water. Securely cover the Instant Pot with its lid.
- Turn the pressure valve to “Sealing,” then select “High Pressure” and set the timer to 90 minutes. Allow up to 15 minutes for the Instant Pot to build sufficient pressure. The countdown timer will begin once full pressure is reached.
- When the Instant Pot beeps, signaling the end of the cooking cycle, perform a quick release of pressure by carefully turning the pressure valve to “Venting.” Allow all steam to escape before attempting to open the lid.
- Remove the lid from the Instant Pot. Carefully remove any large chunks of visible fat from the pork and discard them.
- Using two forks, shred the remaining pork directly in the pot. It should be incredibly tender and easily fall apart. If the pork still feels tough, reseal the Instant Pot and pressure cook for an additional 10-20 minutes until tender.
- Once shredded, squeeze the fresh lime juice over the carnitas and mix well to incorporate.
- Serve immediately, or proceed to the next step to make them extra crispy!
- To achieve extra crispy carnitas, preheat your oven broiler to high. Spray a baking sheet with nonstick cooking spray. Transfer the shredded carnitas onto the baking sheet, spreading them out in a single, even layer. Broil on high for 3-5 minutes until the edges are nicely browned and crispy. Toss the carnitas and continue broiling for another 2-3 minutes, or until your desired level of crispiness is achieved.
Tips & Notes
- Spice Rub Variation: For convenience, you can substitute the individual spices with 3 tablespoons of our pre-mixed homemade pork dry rub.
- Burn Notice Prevention: If your Instant Pot displays a “Burn” notice, it means there’s not enough liquid or something is sticking to the bottom. Add a few more tablespoons of water or chicken broth to the pot and ensure the bottom is scraped clean before resuming pressure cooking.
- Flavorful Liquid: The cooking liquid in the Instant Pot is packed with flavor. While you have the option to remove some before shredding, be aware that you’ll be sacrificing a significant amount of the delicious taste and moisture. We recommend keeping it to enhance your carnitas.
Nutrition
Calories: 373 kcal
,
Carbohydrates: 4 g
,
Protein: 23 g
,
Fat: 30 g
,
Fiber: 1 g
,
Sugar: 2 g
Note: Nutrition information is automatically calculated and should be used as an approximation.
Shop This Post
Green Chiles
Smoked Paprika
Loved this recipe? Share your thoughts below!
Don’t forget to tag your posts on social media with the hashtag #fitfoodiefinds – we’d love to see your delicious creations!
Conclusion: Your New Favorite Carnitas Recipe
You’ve now unlocked the secret to making incredible Instant Pot Carnitas that rival any restaurant version, all from the comfort of your home. With its tender, juicy pork and perfectly crispy edges, this recipe is a testament to the power of the Instant Pot for creating authentic Mexican flavors quickly and efficiently. Whether you’re serving them in tacos, vibrant bowls, or reinventing leftovers into new exciting dishes, these carnitas are guaranteed to become a cherished addition to your recipe repertoire. Enjoy the rich, savory taste of Mexican cuisine with this easy-to-follow, satisfying dish that promises to impress every time!