

Healthy Cherry Cobbler Bars with Almond Flour Crust: Your New Favorite Summer Treat
Welcome to cherry season! And what better way to celebrate the abundance of this vibrant fruit than with these incredible Cherry Cobbler Bars? Crafted with sweet, fresh cherries and a wholesome, gluten-free almond flour crust, this recipe offers a delicious and healthier twist on a beloved classic. These bars are not just a dessert; they’re a perfect fusion of a traditional cherry crumble and a classic cherry pie, designed to satisfy your sweet cravings while keeping mindful of the ingredients. Get ready to fall in love with a dessert so good, you might even enjoy it for breakfast!
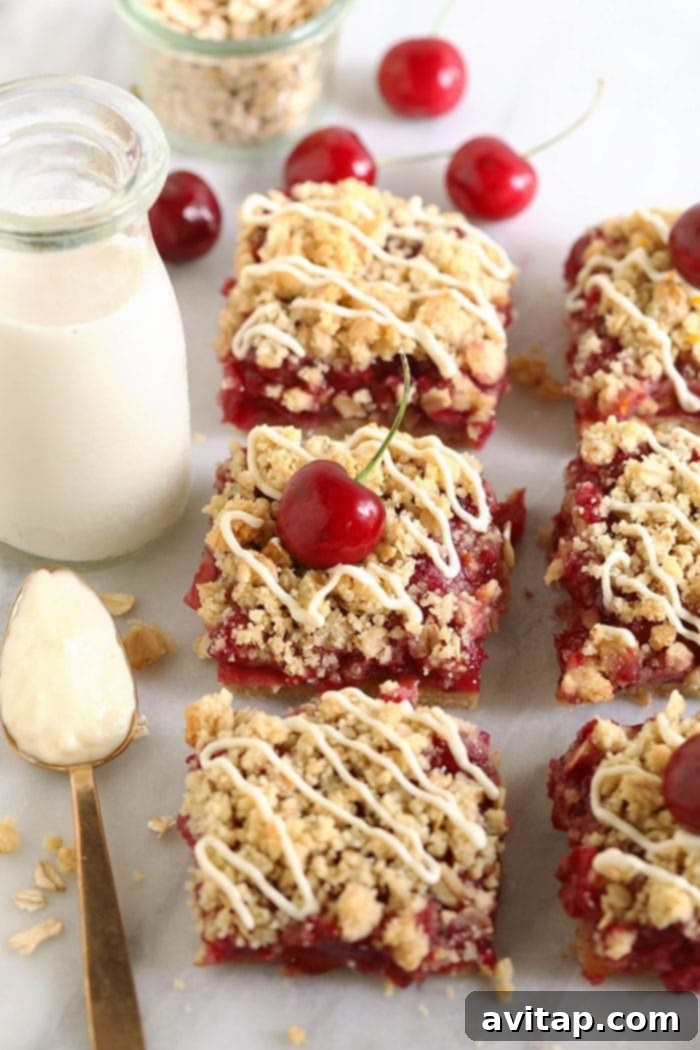
Imagine a dessert that brings together the best of all worlds: the juicy, tender filling of a cherry pie, the delightful crumbly topping of a cobbler, all nestled into a sturdy, flavorful bar. That’s exactly what these healthy cherry cobbler bars deliver. Made with readily available, healthier pantry staples, you can indulge in this cherry-filled delight feeling fantastic about every bite. Personally, I found them absolutely dreamy when paired with a dollop of vanilla Greek yogurt for a truly luxurious breakfast. It’s the perfect sweet start to any day!
If you’re a fan of convenient and delicious dessert bars, you’re in for a treat. These cherry cobbler bars join the ranks of other popular bar recipes that are both wholesome and incredibly tasty. Be sure to explore our strawberry oatmeal bars or these bright and tangy healthy lemon bars for more delightful creations from our kitchen.
Featured Comment
“Delicious and soooo much fun to make! I used black cherries since I am making this out of season.” – Lynnann
Essential Ingredients for Your Cherry Cobbler Bars
Crafting these delectable cherry cobbler bars requires a few key ingredients, each playing a vital role in creating the perfect texture and flavor profile. Here’s a closer look at what you’ll need and why each component is so important:
- Tapioca Flour: Don’t let the name intimidate you! Tapioca flour is a fantastic natural thickener, essential for achieving that beautifully gooey, yet firm, cherry filling. It expertly absorbs the excess juices released by the cherries during cooking, preventing your bars from becoming watery and ensuring a luscious, thick consistency that holds its shape when sliced.
- Almond Flour & Rolled Oats: These two ingredients form the wholesome backbone of our crust and crumble topping. Almond flour not only provides a wonderful nutty flavor that complements cherries exceptionally well but also keeps the recipe naturally gluten-free. Rolled oats contribute a delightful chewiness, heartiness, and rustic texture, making the crust satisfyingly robust and flavorful.
- Maple Syrup: We prefer using pure maple syrup as a natural and healthier alternative to refined white sugar in this recipe. Its rich, nuanced sweetness enhances the fruit’s flavor without being overly sugary. However, feel free to use your preferred natural sweetener if maple syrup isn’t available.
- Almond Extract: If you ask me, cherries and almond extract are a match made in culinary heaven! The delicate, slightly bitter, and fragrant notes of almond extract truly elevate the sweet and tart profile of cherries to an “out of this world” experience. We’ve incorporated about a teaspoon into the crust, and the result is magnificent – a crunchy, aromatic crust that perfectly frames the naturally sweetened, cherry-heaven filling.
- Fresh Cherries: The star of the show! These cherry cobbler bars truly shine when made with FRESH cherries. Skip the canned, jarred, or maraschino varieties for this recipe. When cherries are in season, they are incredibly accessible, bursting with natural sweetness, and offer an unparalleled flavor and texture that no processed alternative can replicate. Their vibrant color and juicy bite are simply irresistible.
- Powdered Sugar, Cream Cheese, Orange Juice: This trio comes together to create an exquisite, creamy, citrus-infused glaze. This sweet and tangy topping is the ultimate finishing touch for your bars, adding a refreshing brightness and an extra layer of decadence that perfectly balances the rich cherry filling.
Can I use frozen cherries instead of fresh?
Absolutely! While fresh cherries are highly recommended during peak season for their superior flavor and texture, you can certainly use frozen cherries as a convenient alternative, especially when fresh ones are out of season. Just be sure to thaw them completely before you begin the simmering process to ensure they release their juices properly and cook evenly. Draining any excess liquid after thawing can also help maintain the perfect consistency of your filling.
Can I swap the almond flour for all-purpose flour?
Unfortunately, swapping almond flour directly for all-purpose (AP) flour is not recommended in this recipe. Almond flour behaves very differently from traditional wheat flour due to its lack of gluten and higher fat content. This difference significantly impacts the texture and structure of the crust. If you don’t have almond flour on hand, you can easily make your own by finely grinding raw, blanched almonds in a food processor until a flour-like consistency is achieved. This ensures you maintain the desired taste and gluten-free nature of the bars.
How to Make Irresistible Cherry Cobbler Bars
Creating these delightful cherry cobbler bars is a straightforward process, broken down into easy-to-follow steps. Precision and a little patience will ensure you achieve the perfect blend of crunchy crust and juicy, sweet-tart filling.
Step 1: Prep the Pan and Crust Base
- Preheat and Prepare: Begin by preheating your oven to 350°F (175°C). This optimal temperature ensures an even bake for both your crust and filling. While the oven warms up, grab an 8×8 inch baking pan and line it with parchment paper, leaving an overhang on the sides. This simple trick will make lifting the cooled bars out of the pan and cleanup incredibly easy later on.
- Mix the Crumbly Dough: In a spacious mixing bowl, combine the superfine almond flour, rolled oats, unsweetened almond milk, softened coconut oil (it should be pliable but not fully liquid), pure maple syrup, fragrant almond extract, and a delicate pinch of salt. The softened coconut oil is key here, as it allows the ingredients to come together into a crumbly yet cohesive dough.
- Form the Dough: Using your clean hands or a sturdy spoon, gently mix all the ingredients until they are thoroughly combined and form a crumbly dough. The texture should be somewhat loose but capable of being pressed together.
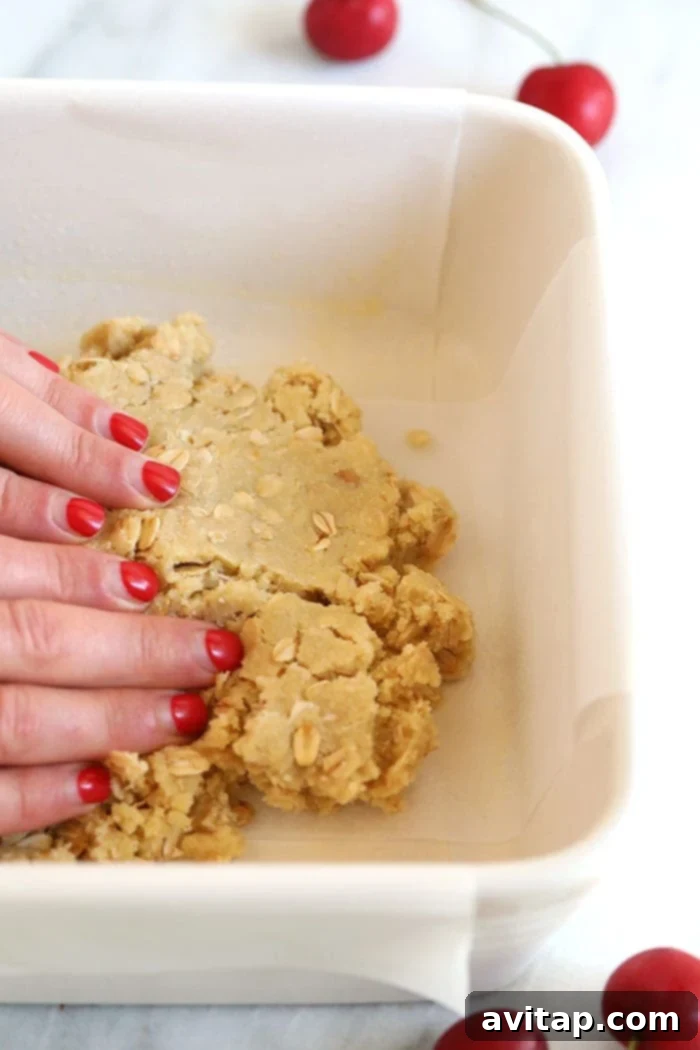
- Press the Base Layer: Take approximately two-thirds of this delicious crumble mixture and press it evenly and firmly into the bottom of your prepared baking pan. This will form the sturdy, flavorful base that supports all that wonderful cherry filling. Set the remaining one-third of the crumble mixture aside; this will be used for the top layer.
- Pre-bake the Crust: Carefully transfer the pan with the pressed crust into your preheated oven and bake for 10 minutes. This crucial pre-baking step helps to set the crust, giving it a head start and preventing it from becoming soggy once the juicy cherry filling is added.
Step 2: Simmer the Luscious Cherry Filling
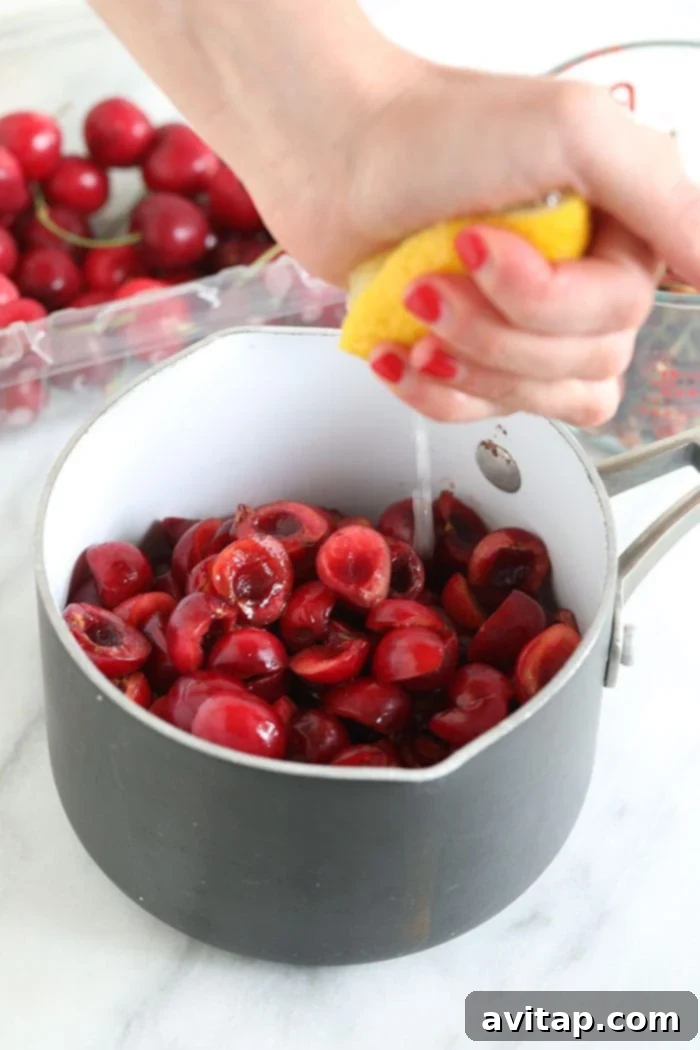
- Combine Cherry Ingredients: While your crust is pre-baking, it’s time to prepare the star of the show: the cherry filling! In a medium saucepan, combine the pitted, quartered fresh cherries (remember, fresh is always best!), fresh lemon juice for a bright tang, additional maple syrup for sweetness, and a pinch of salt to enhance the flavors.
- Bring to a Boil: Place the saucepan over medium-high heat and bring the cherry mixture to a gentle boil, stirring frequently. As it heats, use your spoon to break up some of the cherries, releasing their vibrant juices and creating a more integrated filling.
- Simmer to Perfection: Once the mixture reaches a boil, reduce the heat to low and let it gently simmer for 20 minutes. Patience is a virtue in this step! Simmering allows the cherries to soften beautifully, release their full flavor, and develop a rich, syrupy consistency. Do not be tempted to skip or shorten this step – it’s absolutely vital for a perfectly textured filling and prevents a mushy crust later on.
- Thicken the Filling: After 20 minutes, when the cherry filling has become wonderfully liquidy with tender cherry chunks, add the tapioca flour. This is where the magic happens!
- Stir Until Thickened: Stir the tapioca flour into the cherry mixture thoroughly until there are no clumps visible and the filling visibly thickens. This thickening action is crucial to ensure your bars hold together beautifully when sliced and aren’t overly runny.
Why is Simmering the Cherries So Important?
You might be wondering if two cooking steps for the cherries are really necessary, but trust us, it is SO crucial! Cherries naturally have a high water content. If you were to skip simmering them down before baking the bars, that excess moisture would seep into your crust, resulting in a soft, mushy, and altogether disappointing texture. Simmering concentrates the flavors and reduces the water, ensuring a firm, delicious crust and a perfectly set filling.
Step 3: Assemble and Final Bake
- Layer the Filling: Carefully remove your pre-baked crust from the oven. Pour the warm, thickened cherry filling evenly over the top, spreading it gently to cover the entire crust.
- Add the Crumble Topping: Now, take the remaining one-third of the crumble mixture you set aside earlier and generously sprinkle it over the cherry filling. This creates that iconic, rustic crumbly topping that adds both a delightful texture and an extra layer of almond-oat flavor to your bars.
- Final Bake: Return the pan to the oven and bake for another 20 minutes, or until the crumbly topping is a beautiful golden brown and the cherry filling is visibly bubbly around the edges. This indicates that the filling is perfectly set and cooked through.
Step 4: The Finishing Touches – Creamy Citrus Drizzle
While your cherry cobbler bars are enjoying their final bake, you can quickly whip up a simple yet elegant drizzle to add an extra layer of sweetness and creaminess. In a small bowl, combine the powdered sugar, softened cream cheese, and a splash of fresh orange juice. Whisk until the mixture is completely smooth and free of lumps. If you don’t have orange juice, a teaspoon of milk or a few drops of vanilla extract would also work wonderfully to thin and flavor the glaze. Transfer this luscious drizzle to a small Ziploc bag and snip off a tiny corner for easy application, or use a pastry bag for a more professional finish. Set it aside until the bars are ready for their grand finale.
Step 5: Chill, Slice, and Savor!
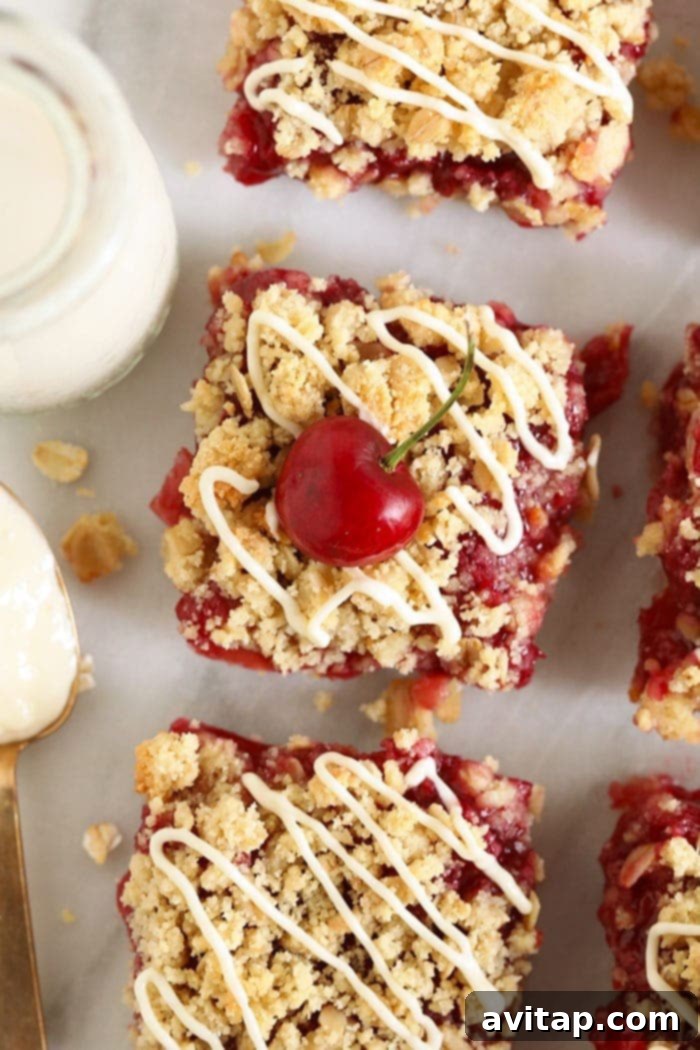
- Cool and Drizzle: Once the baking time is complete, take the heavenly smelling bars out of the oven. Place the pan on a wire rack and let them cool for at least 20 minutes. This initial cooling period is crucial as it allows the hot cherry filling to begin setting. After 20 minutes, drizzle your prepared cream cheese glaze over the slightly cooled bars. Resist the urge to cut into them immediately!
- Chill for Perfection: For the absolute best results – both in terms of texture and flavor – cover the pan and transfer the bars to the refrigerator. Chill them for a minimum of 2 hours, or ideally, overnight. This extended chilling time allows the flavors to fully meld together and the cherry filling to firm up completely, ensuring clean, perfect slices every time. Once thoroughly chilled, simply slice your homemade cherry cobbler bars into squares, grab a fork, and enjoy this peak of dessert perfection!
Storing Your Delicious Cherry Cobbler Bars
Proper storage ensures you can enjoy these delightful cherry cobbler bars for days to come! Once the bars have completely cooled down and been drizzled, transfer them to an airtight container. They will keep beautifully in the refrigerator for up to 7 days, making them perfect for meal prepping your desserts or enjoying a sweet treat throughout the week. For longer storage, you can also freeze these bars. Allow them to cool completely, then place them in a freezer-safe bag or an airtight freezer-safe container. They will maintain their deliciousness in the freezer for up to 3 months. When you’re ready to enjoy, simply thaw them in the refrigerator overnight or at room temperature for a few hours.
More of our Favorite…
Healthy & Delicious Dessert Bar Recipes
- Gluten-Free Triple Berry Crumble Bars
- Lemon Vegan Cheesecake Bars
- Healthy Carmelita Bars
- Healthy Banana Oatmeal Bars
Cherry Cobbler Bars
Prep: 20 minutes
Cook: 50 minutes
Total: 1 hour 10 minutes
Ingredients
Crust and Crumble Topping
- 3 cups superfine almond flour
- 1 cup rolled oats
- 2 tablespoons unsweetened almond milk
- 1/4 cup softened coconut oil
- 1/4 cup maple syrup
- 1 teaspoon almond extract
- 1/8 teaspoon salt
Cherry Filling
- 3 cups quartered pitted, fresh cherries
- 3 tablespoons fresh lemon juice
- 2 tablespoons maple syrup
- pinch of salt
- 2 tablespoons tapioca flour
Drizzle
- 2 teaspoons powdered sugar
- 3 tablespoons cream cheese
- 1 teaspoon orange juice
Instructions
-
First, preheat oven to 350ºF and line an 8×8-inch pan with parchment paper and set aside.
-
Next, create your crust and crumble. Mix all crumble ingredients together. You’re going to want to make sure that the coconut oil is slightly melted, but not liquid. This ensures the dough forms a crumble texture, but can still be pressed together into a crust.
-
Then, take 2/3 of the mixture and press it evenly onto the bottom of your pan. Set the rest of the crust/crumble mixture aside. This is what you will use for the crumble topping.
-
Bake crust at 350ºF for 10 minutes. Remove crust and set aside.
-
Next, place all ingredients for the cherry filling (except for the tapioca flour) into a medium saucepan. Turn heat to medium/high and bring the filling to a boil, stirring often and breaking up the cherries. Once boiling, turn the heat down to low and let simmer for 20 minutes (don’t skimp on this! It’s important to break down the cherries or your bars will be too wet.). Continue stirring.
-
Once the filling has cooked for 20 minutes and has become liquidy with cherry chunks, add in 2 tablespoons of tapioca flour and stir until there are no more clumps and the cherry filling has thickened.
-
Pour filling on top of the crust and spread out evenly. Then, sprinkle the rest of the crumble mixture over the top of the cherry filling.
-
Bake for another 20 minutes at 350ºF.
-
While bars are baking, mix everything together for the drizzle into a small bowl. Transfer the smooth mixture to a Ziploc bag or a pastry bag. If using a Ziploc bag, snip a tiny corner off the tip of the bag. The smaller the hole, the finer the drizzle. Set aside.
-
Let cool for 20 minutes before drizzling the cherry cobbler bars with the glaze. Place into the fridge for at least 2 hours (or for best results, overnight) to let the filling set completely. Slice and enjoy your perfectly firm and flavorful bars!
Nutrition
Protein: 11 g,
Fat: 22 g,
Fiber: 6 g,
Sugar: 10 g
Nutrition information is automatically calculated, so should only be used as an approximation.
Love this recipe? Leave a comment below!
Don’t forget to tag your posts on social media with the hashtag #fitfoodiefinds, we’d love to see what you’re up to!