
Are you short on time but dreaming of a perfectly cooked Thanksgiving turkey? Look no further! Our revolutionary spatchcock turkey recipe promises a show-stopping bird that’s not only incredibly juicy and flavorful but also cooks in a fraction of the time. While it does require a simple turkey dry brine the night before, you’ll be amazed that a 13-pound turkey can be roasted to golden perfection in less than 2 hours on Thanksgiving Day! Say goodbye to dry breasts and undercooked legs, and hello to the most delicious turkey your family has ever tasted.
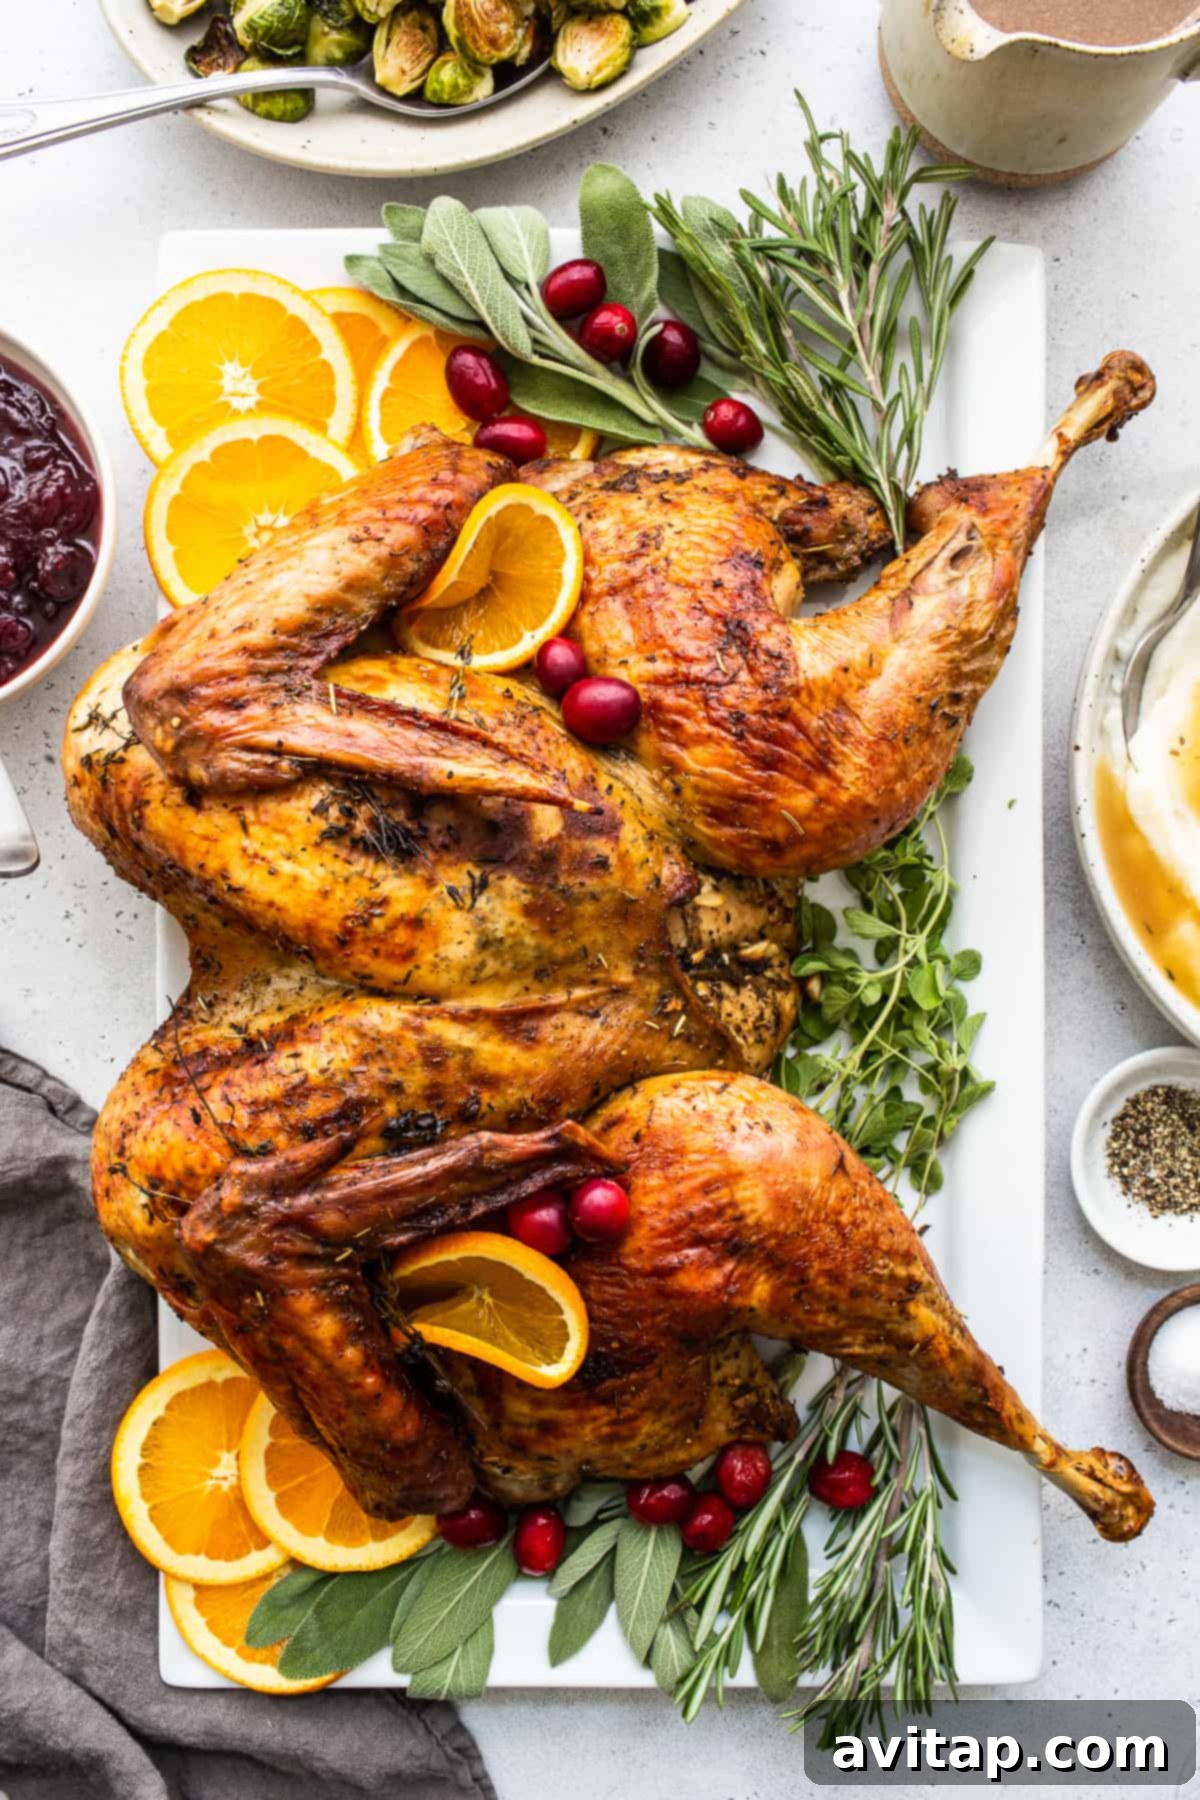
For many, Thanksgiving is the ultimate culinary holiday, centered around a magnificent turkey. While a traditional roasted turkey is a classic, we’re always searching for methods that enhance flavor and efficiency. This year, we’re thrilled to share a turkey recipe that delivers all the incredible taste of a classic roast but with significantly reduced cooking time. Enter the spatchcock turkey – a close cousin to our popular spatchcock chicken, guaranteeing impressive results with less stress.
Quick Overview: Your Path to a Perfect Spatchcock Turkey
Achieving this succulent spatchcock turkey is simpler than you might imagine. Here’s a brief rundown of the process:
- **Overnight Dry Brine:** First, the turkey is seasoned with a simple dry brine and refrigerated overnight. This crucial step locks in moisture and infuses deep flavor.
- **Morning Preparation:** On the big day, the turkey is seasoned with our acclaimed turkey seasoning.
- **Spatchcocking:** The turkey is then “spatchcocked” (butterflied) by removing the backbone, allowing it to lay flat.
- **Aromatic Stuffing:** Onion, garlic, and fresh herbs are tucked under the skin for maximum aroma and flavor.
- **Elevated Roasting:** The bird roasts on a wire rack set over a baking sheet, ensuring even heat distribution and crisp skin.
- **Regular Basting:** Throughout the 1.5 to 2-hour roasting period, the turkey is basted every 20 minutes, keeping it moist and building a rich crust.
This method ensures every bite is bursting with herby goodness, and the skin is wonderfully crispy – a true holiday triumph!
Why Spatchcock Your Turkey? The Benefits Explained
Spatchcocking, also known as butterflying, is a game-changing technique for cooking a whole turkey. Removing the backbone allows the bird to lie flat, exposing more surface area to the heat and providing several distinct advantages that elevate your holiday meal:
- Unparalleled Even Cooking: By removing the spine and flattening the turkey, the breast and thigh meat are exposed to heat more uniformly. This means the delicate breast meat cooks at the same rate as the darker, tougher thigh meat, significantly reducing the risk of a dry breast or undercooked leg. Every part of the turkey comes out perfectly cooked and incredibly juicy.
- Dramatically Quicker Cooking Time: A traditional roasted turkey can take many hours in the oven, often causing holiday hosts considerable stress. Spatchcocking slashes the cooking time almost in half! A 14-pound bird can be fully cooked in less than 90 minutes to 2 hours, freeing up your oven and your time for other essential holiday preparations. This efficiency is a major benefit when juggling multiple dishes.
- Extra Crispy, Golden Skin: Roasting a spatchcocked turkey on a wire rack ensures that hot air circulates all around the bird, including underneath. This “air frying” effect results in gloriously crispy, golden-brown skin across the entire turkey, not just the top. Imagine a holiday feast where every guest gets a piece of that irresistible crackling skin!
- Enhanced Flavor Penetration: With the turkey flattened, there’s more surface area for seasonings and brines to penetrate, leading to a more flavorful bird from the inside out. When you tuck aromatics like onions, garlic, and herbs directly under the skin, their flavors infuse into the meat beautifully during roasting.
- Easier Carving: A flattened turkey is much easier to carve into uniform portions, making serving a breeze and presenting a beautiful platter for your guests.
These advantages make spatchcocking an ideal method for anyone looking to simplify their holiday cooking without compromising on flavor or texture. It’s a technique that guarantees a moist, tender, and incredibly delicious turkey every single time.
Essential Ingredients for a Perfect Spatchcock Turkey
Crafting this phenomenal spatchcock turkey requires a thoughtful selection of ingredients, divided into three key components: the dry brine, the turkey and its aromatics, and the basting liquid. Each plays a crucial role in achieving the ultimate flavor and texture.
The Flavor-Boosting Dry Brine
A dry brine is an indispensable step for injecting incredible flavor and ensuring a moist turkey. Our blend is simple yet highly effective, featuring:
- Kosher Salt: The star of the dry brine, it draws moisture out, then reabsorbs it, tenderizing the meat and enhancing flavor. It also actively contributes to crispier skin.
- Black Pepper: Adds a classic, subtle warmth and bite.
- Dried Thyme: Earthy, savory, and aromatic, thyme is a natural partner for poultry.
- Dried Rosemary: Pungent and piney, rosemary infuses a distinct holiday aroma.
We absolutely adore how a dry brine helps create that coveted crispy skin. It’s a simple overnight step that yields extraordinary results!
Wet Brine vs. Dry Brine: Your Choice!
While we prefer the dry brine for its superior crispy skin, you can certainly use our wet brine recipe if you’re accustomed to that method. Both brining techniques excel at locking in moisture and flavor, but the dry brine truly delivers on that desirable, golden, crispy skin.
The Turkey and Its Aromatics
The star of the show, along with the fresh aromatics that bring it to life:
- 12-14 lb. Untreated Turkey: We strongly recommend a turkey no larger than 14 pounds for this recipe. Larger birds can be more challenging to spatchcock and may dry out more easily with this fast-roasting method. Ensure it’s completely thawed before beginning.
- White Onion and Garlic Cloves: Just because you’re spatchcocking doesn’t mean you skip the stuffing! These aromatics are tucked under the skin, infusing the meat with deep, savory notes as it roasts.
- Fresh Herbs (Thyme and Oregano): Fresh herbs, bundled and placed under the skin, release their fragrant oils directly into the turkey, imparting a vibrant, fresh flavor profile. Feel free to experiment with other favorites like sage or marjoram.
- Turkey Seasoning: Our signature turkey seasoning blend is truly exceptional. We highly encourage you to prepare and use this recipe for an unparalleled depth of flavor that internet reviews consistently rave about!
- Olive Oil: A light coating of olive oil on the skin helps the seasoning adhere, promotes browning, and contributes to that irresistible crispy finish.
The Flavorful Basting Liquid
Basting is crucial for maintaining moisture and building a beautiful, flavorful crust. This liquid also forms the delicious base for your Thanksgiving gravy! You’ll need:
- White Wine (Sauvignon Blanc recommended): Adds acidity and a complex layer of flavor that complements the turkey.
- Broth (Chicken, Turkey, or Vegetable): Provides a savory foundation and keeps the turkey moist.
- Unsalted Butter: Contributes richness and helps the skin crisp up beautifully.
- Fresh Thyme Sprig: Further enhances the herbaceous notes.
- A Touch More Turkey Seasoning: Ties all the flavors together and ensures consistency.
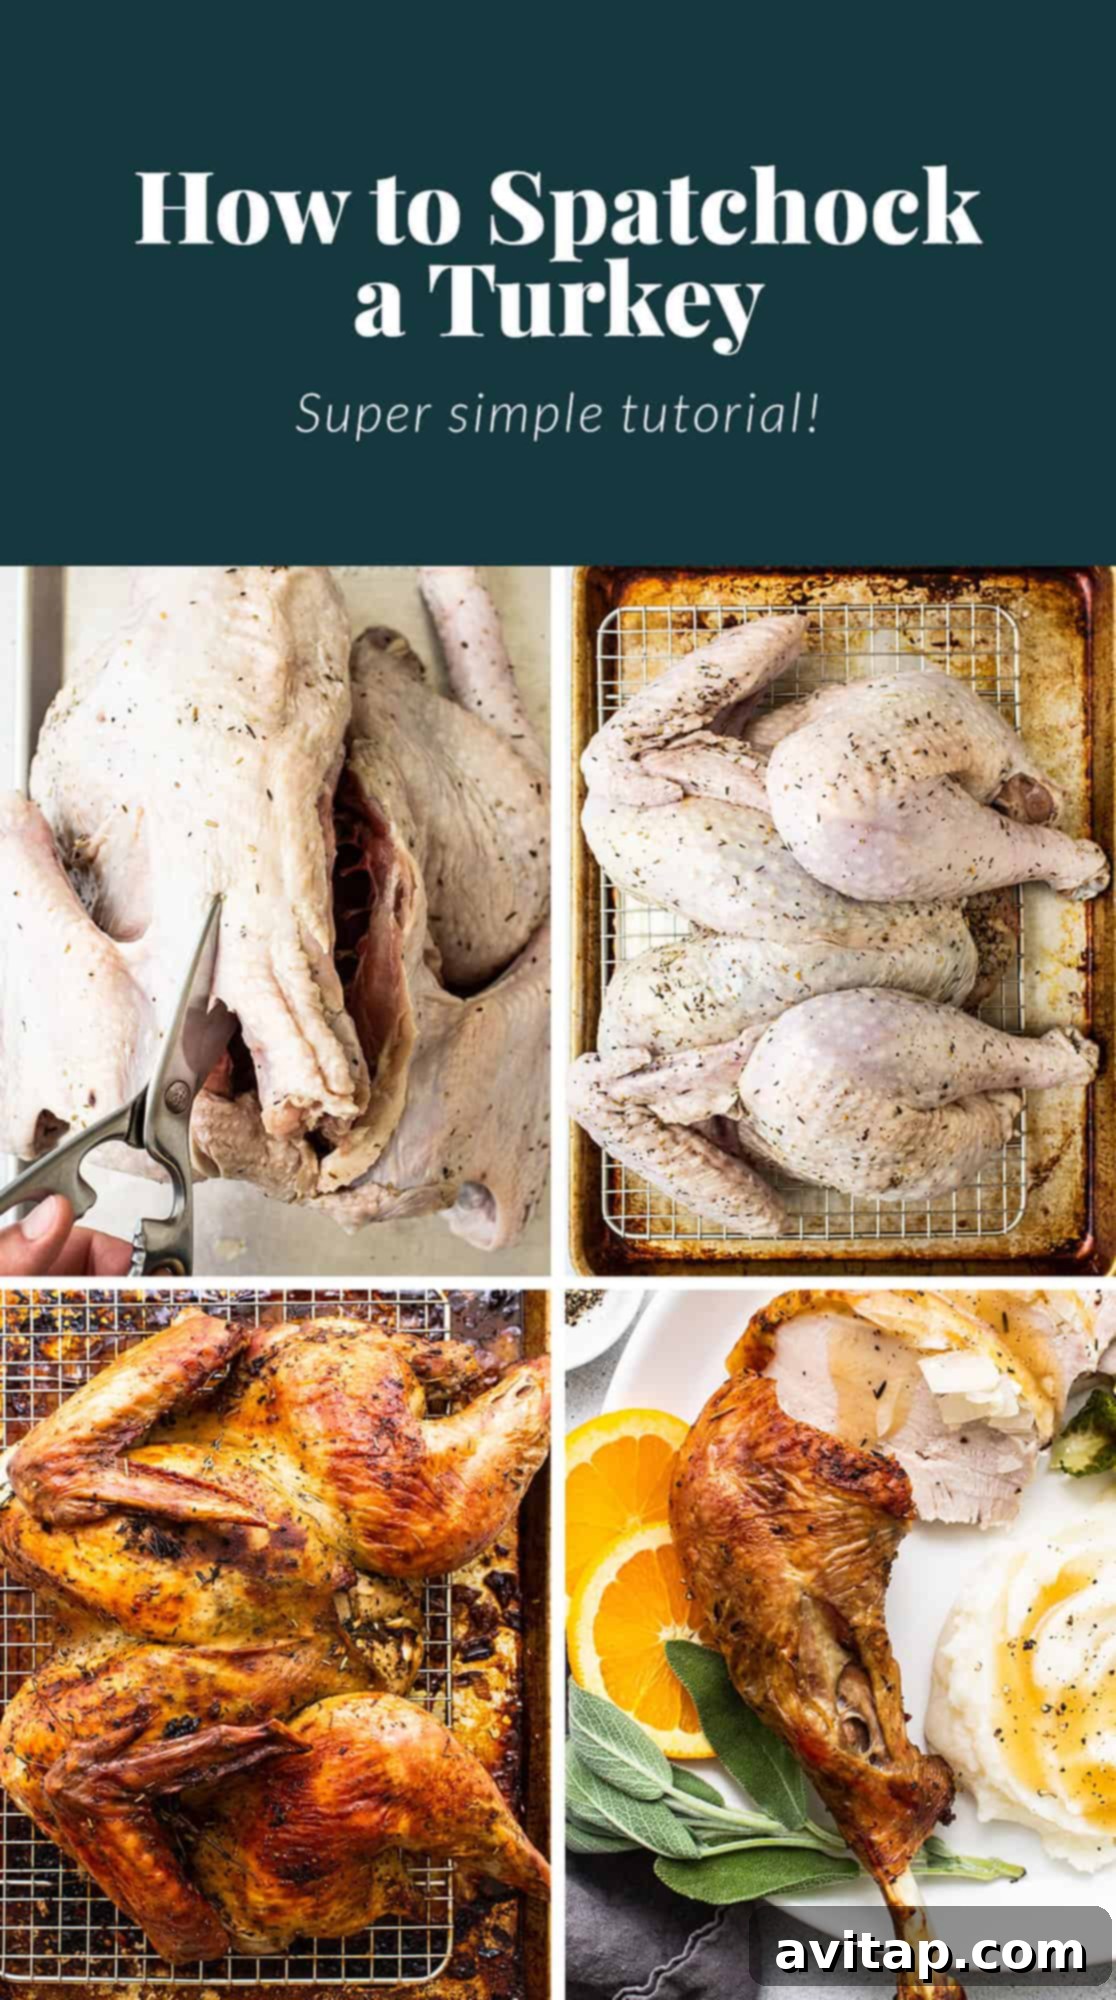
Spatchcock Turkey in the Oven: Step-by-Step Instructions
Step 1: Prep and Dry Brine Your Turkey
This initial step is foundational for a moist and flavorful turkey.
- Unwrap and Clean: Carefully unwrap your turkey from its packaging. Reach inside both cavities and remove any giblets or the neck. You can reserve these for gravy or discard them.
- Prepare the Dry Brine: In a small bowl, combine the kosher salt, ground black pepper, dried thyme, and dried rosemary. Mix thoroughly to create an even spice blend.
- Apply the Brine: Gently lift the turkey skin, particularly over the breast, legs, and thighs, to create pockets. Generously rub the salt mixture directly onto the turkey meat, under the skin, ensuring even coverage across the breasts, legs, and wings. Also, apply a lighter coating on the exterior skin.
- Refrigerate Overnight: Transfer the seasoned turkey to a large plastic bag (like a brining bag) or an airtight container. Refrigerate it for at least 12 hours, ideally up to 24 hours. This allows the brine to work its magic, drawing out moisture and then reabsorbing it, resulting in a more flavorful and succulent bird.
How long should I dry brine my turkey? We recommend dry brining for a minimum of 12 hours (overnight) for optimal flavor and moisture retention, but you can extend this to 24 hours for even deeper infusion.
Step 2: How to Spatchcock a Turkey (Butterfly Technique)
Spatchcocking is easier than it sounds and makes all the difference in cooking time and evenness.
- Position the Turkey: Once brined, remove the turkey from the refrigerator and pat it thoroughly dry with paper towels – this is crucial for crispy skin! Place the turkey breast-side down on a sturdy cutting board.
- Remove the Spine: Using very sharp kitchen shears (a good quality pair makes this task much easier!), carefully cut down one side of the turkey’s backbone, starting from the tail end and cutting through the ribs. Repeat this process on the other side of the spine. Once both sides are cut, remove the backbone entirely and discard it (or save it for stock!).
- Flatten the Turkey: Flip the turkey over so it’s breast-side up. Using the palms of your hands, firmly press down on the center of the breastbone. You should hear a crack as the breastbone flattens, allowing the turkey to lay completely flat. For a 14-lb. turkey, you’ll need to apply considerable pressure.
- Prepare for Roasting: Place the flattened turkey onto a wire rack set inside a large baking sheet or roasting pan. This setup is essential for promoting air circulation and achieving that desirable crispy skin. Your turkey is now ready for seasoning!
The Best
Kitchen Shears
These OXO Kitchen Shears are renowned for their sharpness and affordability. Invest in a pair for effortless kitchen cutting, especially when spatchcocking!
Step 3: Stuff with Aromatics and Season
Infusing flavor from the inside out is key to a delicious turkey.
- Preheat Oven: Preheat your oven to 400°F (200°C).
- Arrange Turkey: Ensure the flattened turkey is positioned breast-side up on the wire rack over the baking sheet.
- Aromatic Stuffing: Gently lift the skin over the turkey breasts and legs. Tuck the diced white onion and minced garlic cloves evenly underneath the skin.
- Herb Placement: Wedge the fresh herb sprigs (thyme and oregano) under the wings or into any crevices of the turkey.
- Season Generously: Drizzle the olive oil over the turkey skin, then liberally sprinkle your turkey seasoning all over the oiled skin. Use your hands to massage the oil and seasoning into the skin, ensuring full coverage for maximum flavor and crispy texture.
Step 4: Prepare the Basting Liquid
This flavorful liquid will keep your turkey moist and contribute to a rich gravy.
While the turkey begins to roast, combine all the ingredients for the basting liquid – white wine, broth, unsalted butter, a sprig of fresh thyme, and turkey seasoning – in a small saucepan. Bring the mixture to a gentle boil over medium-high heat. Once boiling, reduce the heat to low and let it simmer. This allows the flavors to meld and the butter to fully incorporate, creating a fragrant liquid perfect for moisturizing the turkey as it roasts.
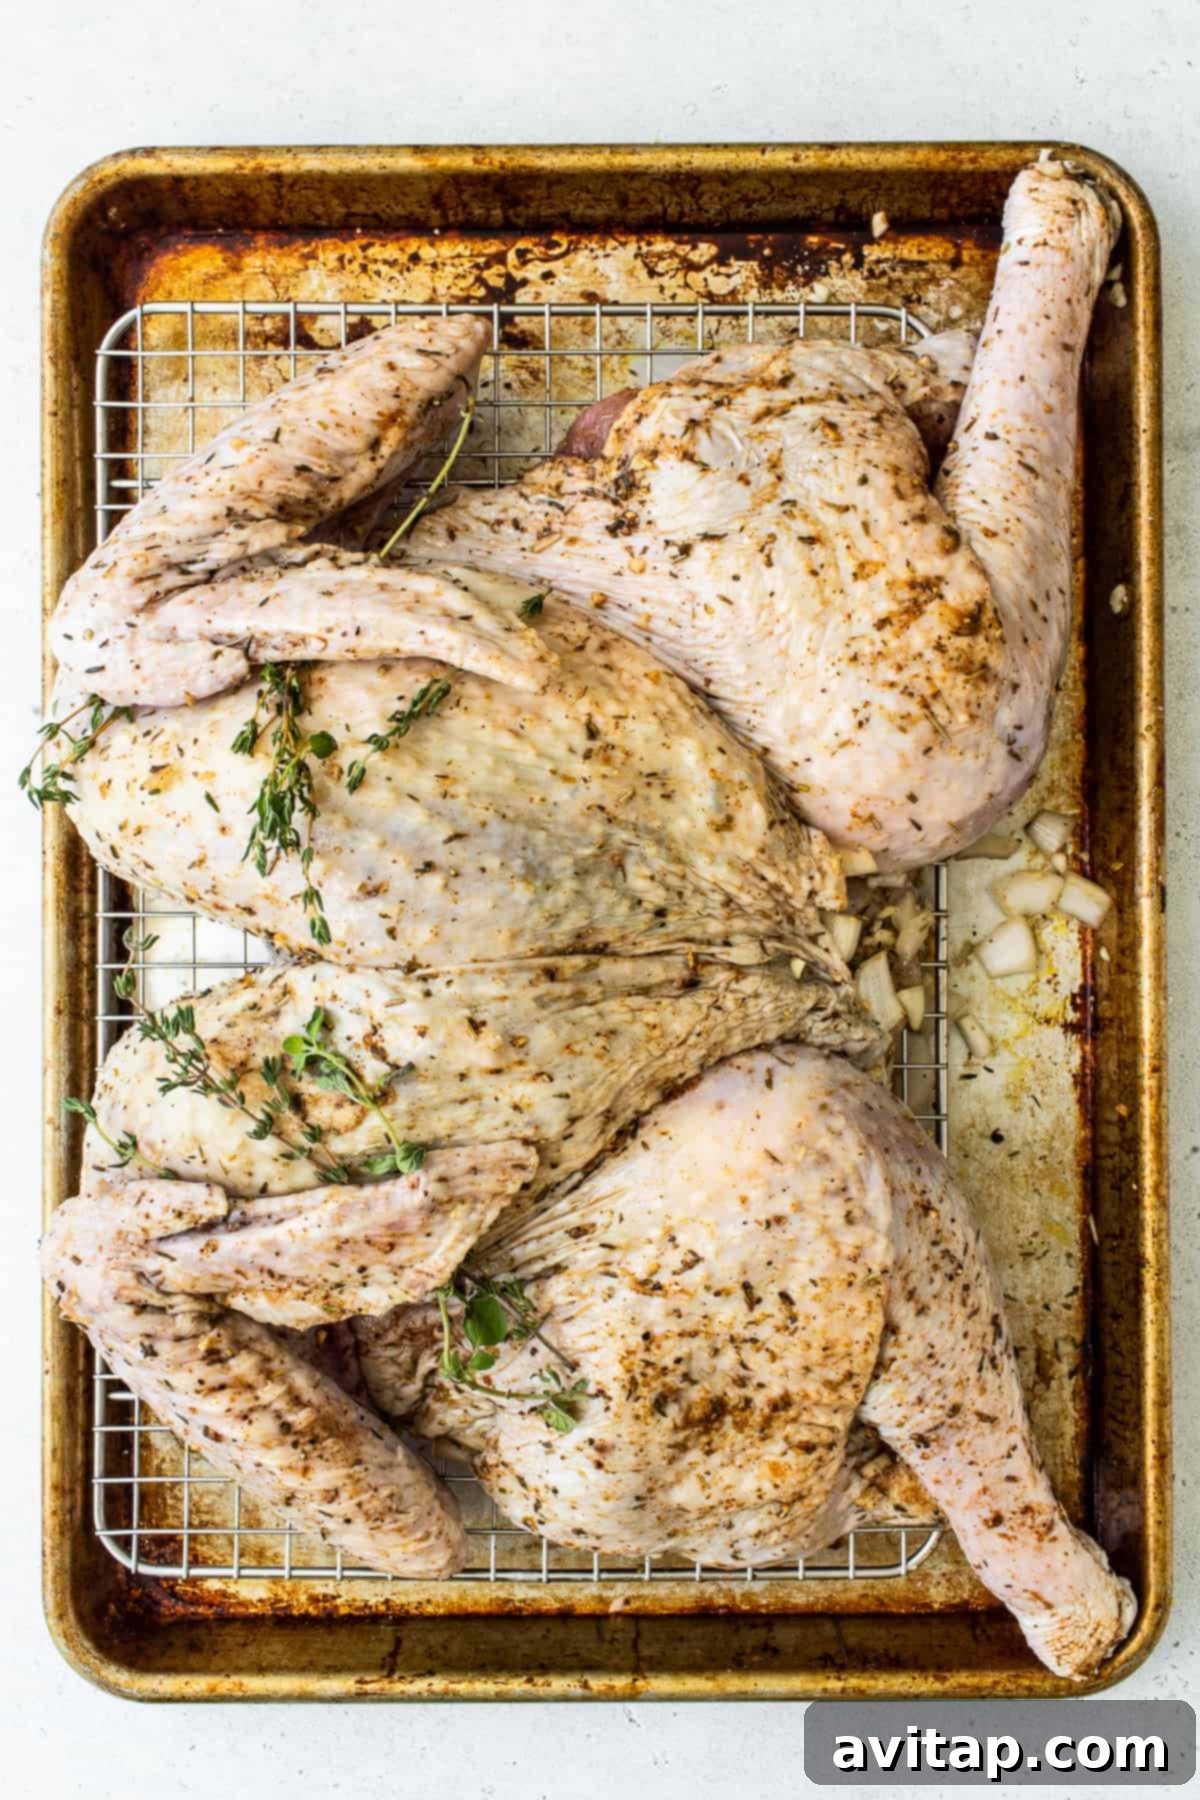
Step 5: Roast Your Spatchcock Turkey to Perfection
The final step brings all the preparation to a delicious conclusion.
- Initial High-Heat Roast: Place the seasoned and prepared turkey into the preheated 400°F (200°C) oven. Roast for the first 20 minutes at this higher temperature to jumpstart the browning and crisping of the skin.
- Basting and Continued Roasting: After 20 minutes, lower the oven temperature to 375°F (190°C). Begin basting the turkey generously with your prepared basting liquid. Continue to roast for an additional 60-70 minutes, basting every 20 minutes. This frequent basting is essential for keeping the meat moist and contributing to a rich, golden-brown crust.
- Check for Doneness: Your turkey is fully cooked when its internal temperature reaches 165°F (74°C) in the thickest part of the thigh (without touching the bone) and also in the thickest part of the breast. The skin should be deeply golden and wonderfully crispy.
- Prevent Over-Browning: If you notice the skin browning too quickly during the last 20-30 minutes of roasting, lightly tent the turkey with aluminum foil to prevent burning while the interior finishes cooking.
- Rest Before Carving: Once the turkey reaches 165°F (74°C), remove it from the oven. Tent it loosely with foil and allow it to rest for at least 20-30 minutes before carving. This resting period is critical; it allows the juices to redistribute throughout the meat, ensuring every slice is incredibly moist and tender. Remember to save those delicious turkey drippings in the bottom of your roasting pan – they are liquid gold for homemade gravy!
Understanding the Internal Temperature for a Perfectly Cooked Turkey
Achieving the correct internal temperature is paramount for both food safety and ensuring your turkey is perfectly tender and juicy. The general rule for a whole turkey is to reach 165°F (74°C).
- Breast Meat: Aim for 160°F to 165°F (71°C to 74°C). The breast tends to cook faster and can dry out if overcooked, so monitoring it carefully is important.
- Thigh Meat: The darker thigh meat is best when it reaches 170°F to 175°F (77°C to 79°C). It benefits from the slightly higher temperature to become fork-tender.
Our golden rule of thumb is to use a reliable meat thermometer and insert the probe into the thickest part of the bird, ensuring it doesn’t touch any bone. Always confirm that all parts of the meat reach a safe temperature for consumption.

Try it!
Thermoworks Thermapen
We absolutely swear by using a high-quality meat thermometer whenever cooking any cut of meat. The Thermapen is our go-to instant-read thermometer, offering consistent and accurate readings every single time.
How to Make Homemade Turkey Gravy with Your Drippings
One of the most satisfying parts of roasting a turkey is turning the flavorful pan drippings into a rich, homemade gravy. This liquid gold is perfect for drizzling over your turkey, mashed potatoes, and stuffing. For a more detailed guide, check out our full turkey gravy post, but here’s a quick rundown of the essentials:
You’ll need: 1 cup reserved turkey drippings (from the roasting pan), 3 cups chicken or turkey broth, 2-3 tablespoons cornstarch.
Simple Directions:
- After removing the turkey from the roasting pan, pour the drippings into a fat separator, or carefully spoon off the excess fat, reserving about 1 cup of the flavorful pan juices.
- Add the reserved drippings and broth into a saucepan. Bring the mixture to a low boil over medium heat, scraping up any browned bits from the bottom of the pan for extra flavor.
- In a separate small bowl, whisk together 1 cup of the hot liquid from the saucepan with the cornstarch until it’s completely dissolved and smooth – this creates a “slurry.”
- Pour the cornstarch slurry back into the saucepan with the remaining hot liquid. Whisk continuously over medium-low heat. The gravy will begin to thicken within 3-5 minutes.
- Once your desired consistency is reached, do a taste test. Adjust seasoning with salt and black pepper as needed. If you prefer a thicker gravy, you can add a little more cornstarch slurry (made with a tablespoon of cornstarch mixed with a tablespoon of cold water) and whisk until thickened.
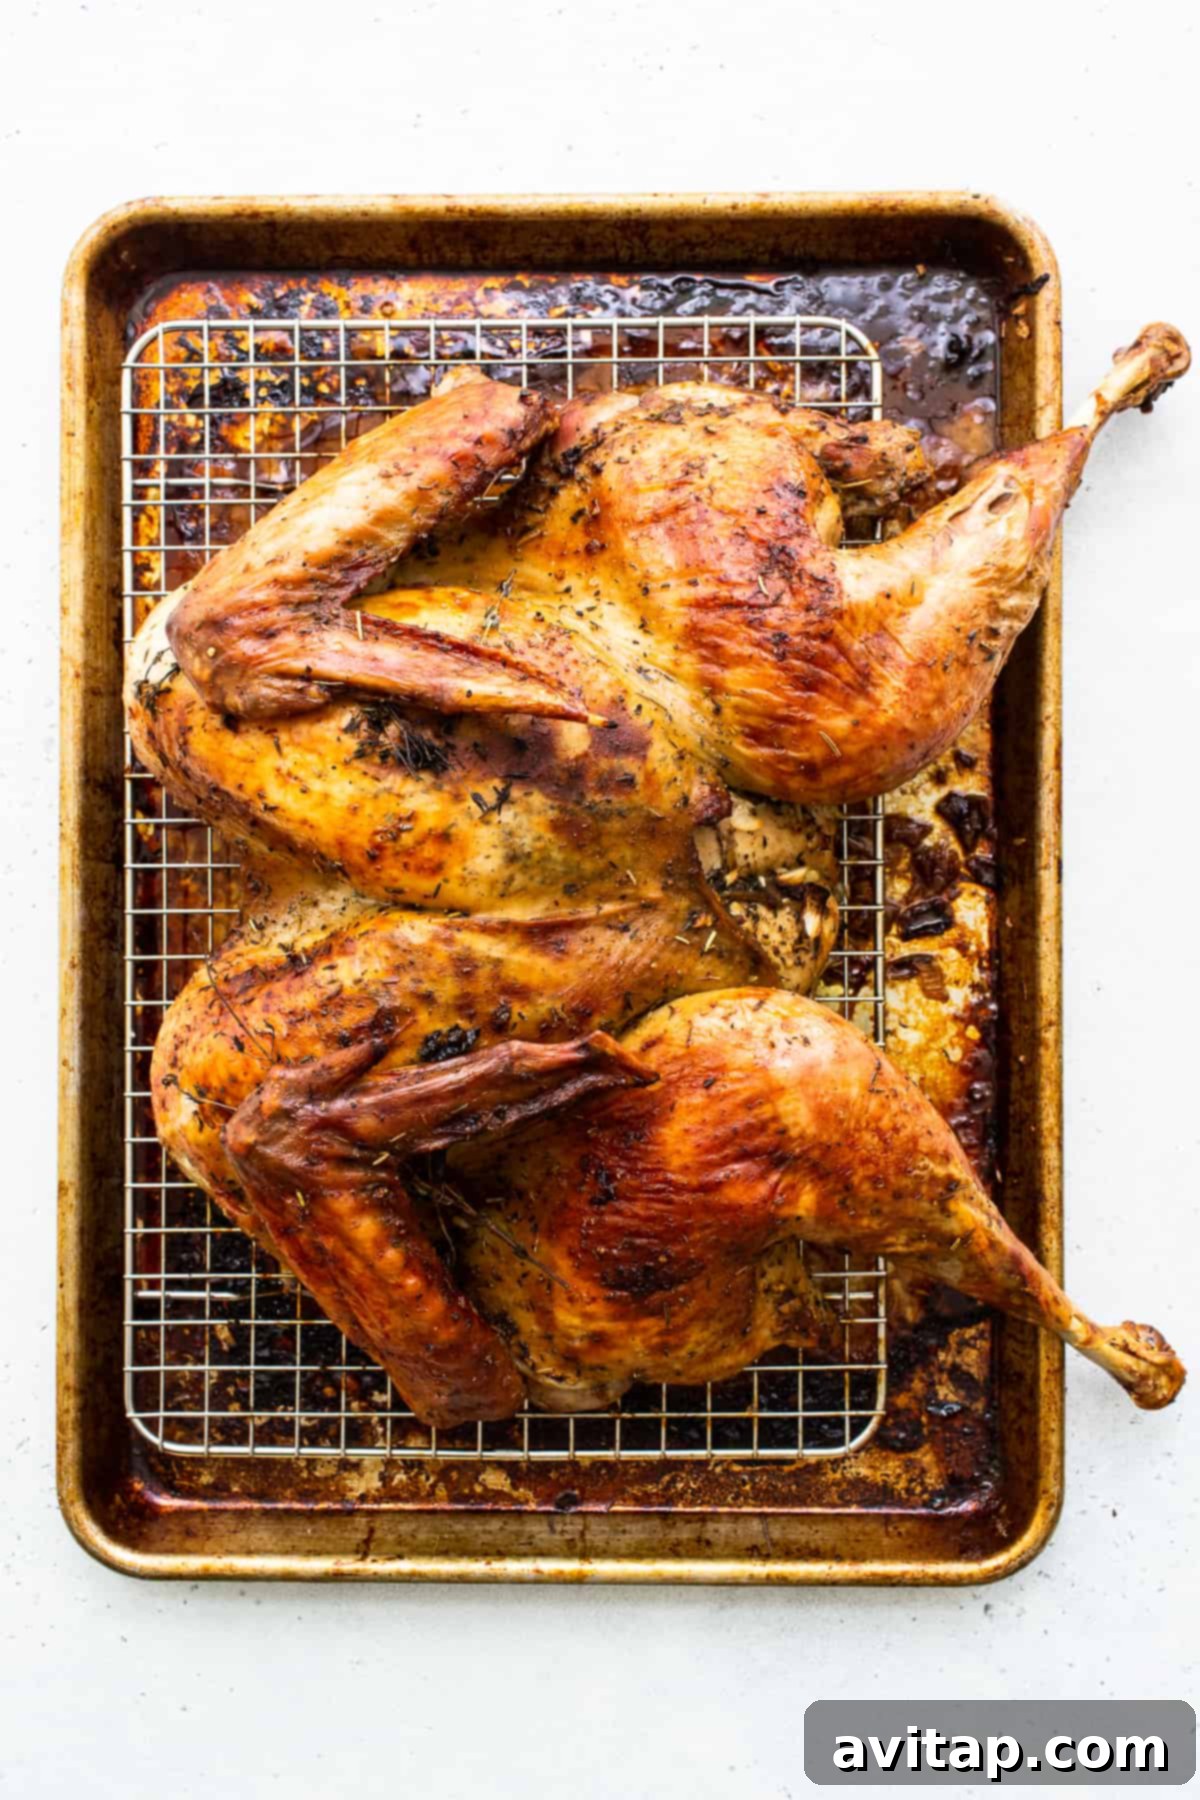
Storing Leftover Turkey: How Long Does it Last?
Leftover turkey is a holiday bonus! To ensure it remains safe and delicious, store your turkey leftovers in an airtight container in the refrigerator for up to 3-4 days. This makes it perfect for quick lunches or easy dinners. We particularly love using this succulent meat for leftover turkey salad or a comforting leftover turkey pot pie!
How to Properly Freeze Turkey Meat for Later Use
Freezing leftover turkey is an excellent way to extend its shelf life and enjoy the flavors of Thanksgiving long after the holiday. Cooked turkey can be easily frozen for use in sandwiches, soups, salads, or casseroles. Here’s how to do it effectively:
- Cool Completely: The most crucial step is to let the turkey cool completely after carving. Do not attempt to freeze warm turkey, as this can create condensation and ice crystals, affecting texture.
- Portion and Pack: Once cooled, portion the turkey meat into desired amounts for future meals. This prevents you from having to thaw a large amount when you only need a little.
- Use Freezer-Safe Bags or Containers: Place the turkey pieces into freezer-safe bags, removing as much air as possible to prevent freezer burn. Alternatively, use airtight freezer containers.
- Label and Date: Always label your frozen turkey with the date it was frozen.
- Freeze for Up to 3 Months: Frozen cooked turkey is best used within 3 months for optimal taste and quality. While it may be safe to eat for longer, its texture and flavor can degrade.
When you’re ready to use it, simply thaw the turkey overnight in the refrigerator before reheating and incorporating it into your favorite recipes.
More of Our Favorite…
Delicious Thanksgiving Turkey Recipes & Ideas
If you’re exploring other turkey options or simply love poultry, check out these fantastic recipes:
- Classic Roasted Thanksgiving Turkey
- Ultimate Smoked Turkey
- Elegant Thanksgiving Turkey Roulade
- Quick Baked Turkey Tenderloin
- More on Spatchcock Turkey
- Flavorful Smoked Turkey Breast
- Sous Vide Turkey for Precision Cooking
- Hearty Smoked Turkey Legs
- Herby Ranch Roasted Turkey Breast
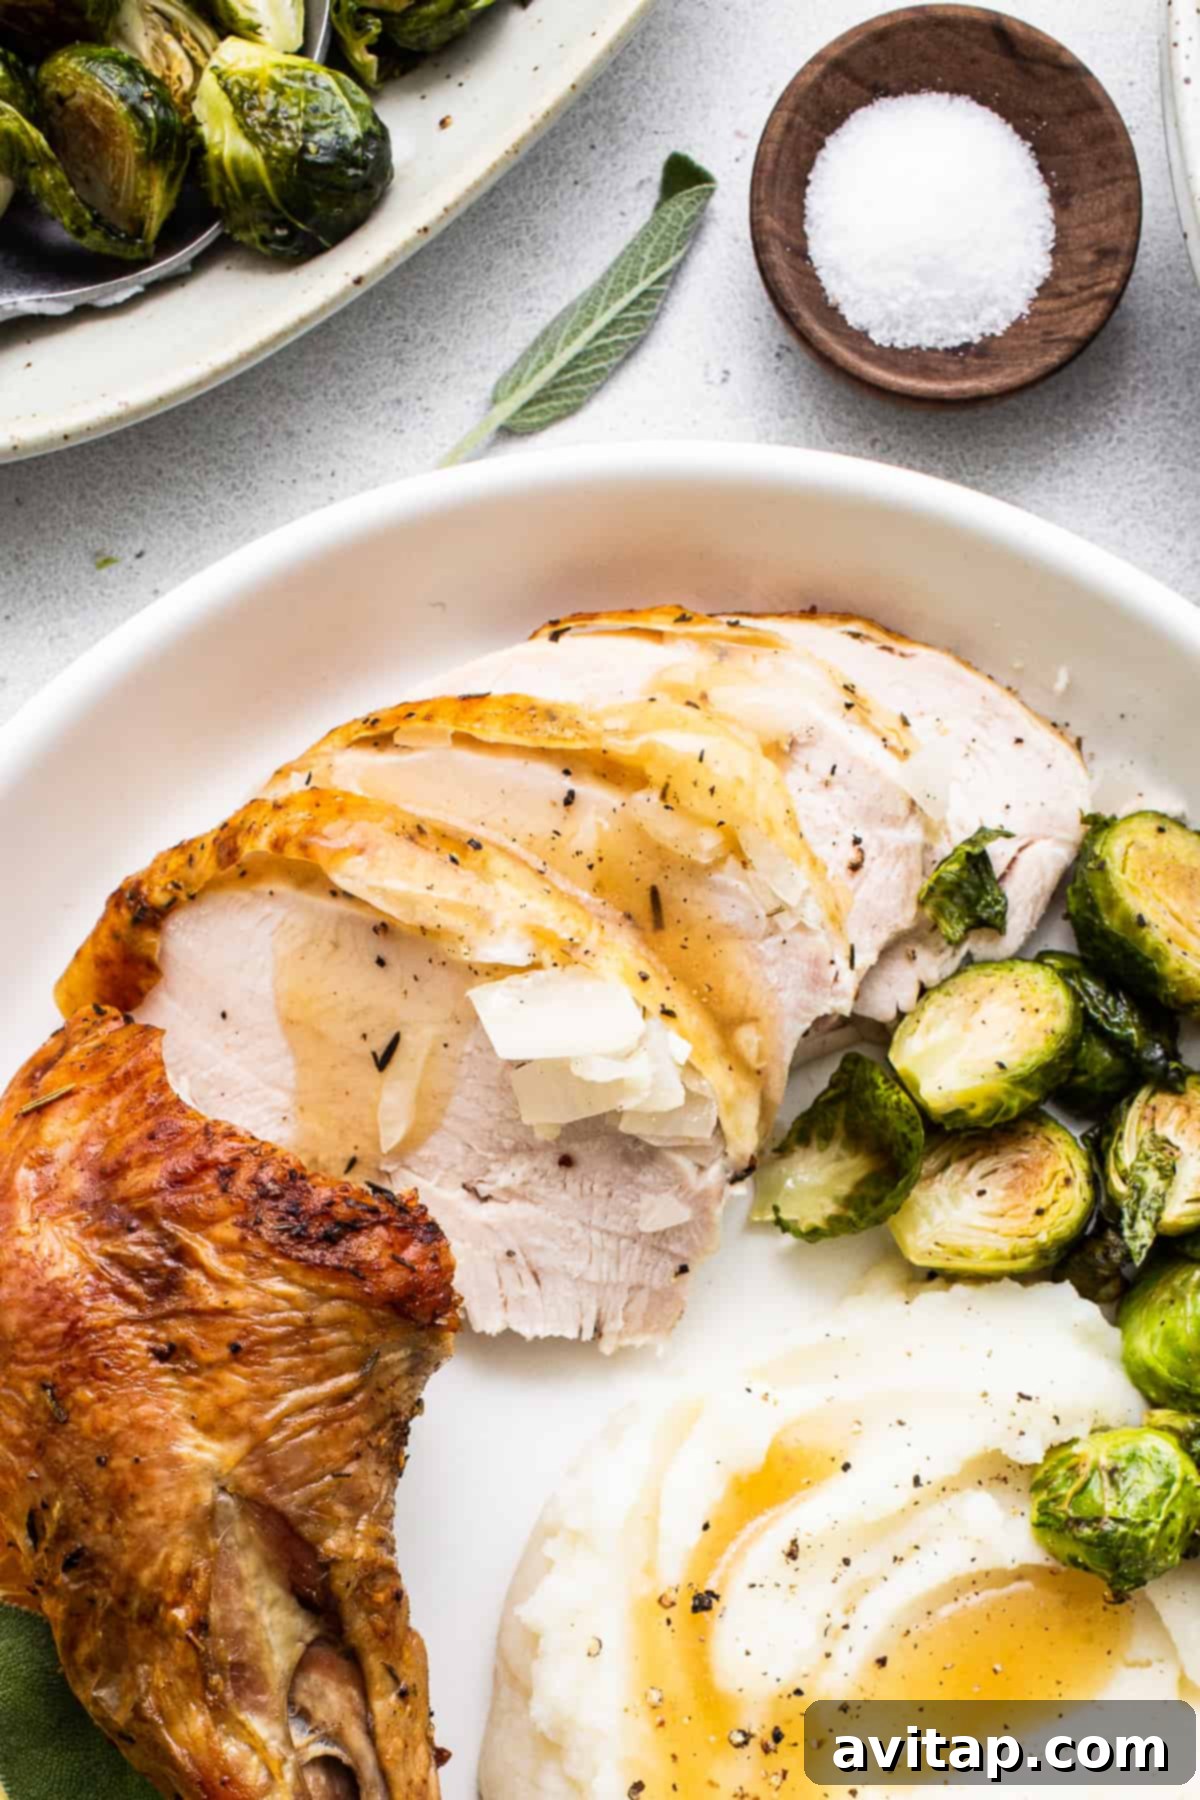
Complete Your Festive Thanksgiving Meal
A show-stopping spatchcock turkey deserves an equally impressive supporting cast of side dishes and desserts. Here are our top recommendations to create a truly unforgettable Thanksgiving feast:
- Homemade Turkey Gravy: Absolutely essential! Pair your turkey with our homemade turkey gravy, made with the flavorful pan drippings.
- Incredible Sausage Stuffing: A holiday classic, our sausage stuffing offers a savory, herbaceous complement to the turkey.
- Creamy Mashed Potatoes: Fluffy, buttery, and utterly irresistible, our mashed potatoes are the perfect canvas for gravy.
- Elegant Green Beans Almondine: Add a touch of freshness and crunch with vibrant green beans almondine.
And for a sweet ending to your meal, indulge in one of these delightful desserts:
- Pumpkin Cheesecake Bars: Rich, creamy, and spiced, our pumpkin cheesecake bars are a seasonal favorite.
- Classic Apple Tart: A timeless dessert, an apple tart provides a comforting and sweet finish.
Creative Ideas for Leftover Spatchcock Turkey
If you’re hosting a smaller gathering, you’ll likely have delicious leftover turkey from this recipe. Don’t let it go to waste! Repurpose it into exciting new meals. Here are some fantastic ideas:
- Hearty Leftover Turkey Soup
- Classic Turkey Salad Sandwiches
- Quick and Easy Turkey Quesadillas
- Turkey Pot Pie
- Turkey Tetrazzini
- Turkey Melts
- Turkey Chili
Spatchcock Turkey Recipe
This spatchcock turkey recipe is perfectly seasoned with a dry brine and our signature turkey seasoning. Roasted for just 1.5 – 2 hours and basted every 20 minutes, it yields incredibly juicy meat and super crispy skin!
By: Emily Richter
Cook: 2 hrs
Total: 15 hrs
Servings: 12
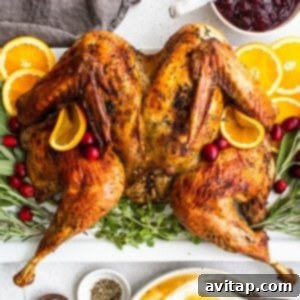
Ingredients
Dry Brine
- 2 tablespoons kosher salt
- ½ tablespoon ground black pepper
- 1 teaspoon dried thyme
- 1 teaspoon dried rosemary
Turkey
- 12-14 lb. untreated turkey, completely thawed (ours was around 13 lbs.)
- ½ white onion, diced
- 10 cloves of garlic, minced
- 6 sprigs fresh thyme
- 2 sprigs fresh oregano
- 2-3 teaspoons turkey seasoning
- 2 tablespoons olive oil
Basting Liquid
- 1.5 cups white wine, we used Sauvignon Blanc
- ½ cup broth (chicken, turkey, or vegetable)
- 2 tablespoons unsalted butter
- 1 sprig fresh thyme
- 1 teaspoon turkey seasoning
Instructions
- Prep Turkey: Remove the turkey from its packaging and remove any innards from the inside of the turkey. Set aside.
- Dry Brine: Add the kosher salt, pepper, thyme, and rosemary to a small bowl and mix until combined.
- Separate the skin from the turkey meat and rub the salt mixture under the skin of the turkey. Be sure to rub the breasts, legs, and wings. Place the turkey in a large plastic bag or airtight container and refrigerate overnight.
- Remove the turkey from the refrigerator and discard any excess liquid. Pat the turkey dry with paper towels and set aside.
- Preheat the oven to 400ºF (200°C) and place a wire rack on a large baking sheet. Alternatively, you can use a large roasting pan.
- Spatchcock Turkey: To spatchcock the turkey, set the turkey breast-side down on a cutting board and use very sharp kitchen shears to begin cutting down one side of the spine through the ribs and then repeat on the other side of the spine. Discard the spine.
- Flip the turkey over onto its breasts and use your hands to press firmly on the center of the bird, flattening the turkey.
- Stuff and Season: Place the flattened turkey onto the wire rack and stuff the onion and garlic under the skin of the turkey. Tuck the fresh herbs under the wings and season the turkey skin with the turkey seasoning. Massage the seasoning into the skin.
- Roast Turkey: Drizzle the olive oil over the turkey and massage the oil into the turkey with your hands. Place the turkey into the oven and bake for 20 minutes at 400ºF (200°C).
- While the turkey is cooking, place all the ingredients for the basting liquid into a saucepan and bring to a boil over medium/high heat. Turn heat to low to simmer.
- Once the turkey has cooked for 20 minutes, baste the turkey with the basting liquid and bake for an additional 60-70 minutes, basting every 20 minutes, until the internal temperature of the turkey at the thickest part reaches 165ºF (74°C).
- If the turkey skin begins to brown more than desired, place tin foil loosely over the turkey for the last 20 minutes of the bake time.
- Remove the turkey from the oven and let it rest for 20 minutes before carving. We recommend saving the turkey drippings for a simple, homemade turkey gravy (see the “How to Make Turkey Gravy” section above for details).
Tips & Notes
- Cooking Time: The cooking time for this turkey will vary depending on the exact size of your turkey and your oven’s calibration. Always monitor the internal temperature of the turkey throughout the cook time. We used a 13.3-lb. young turkey.
- Turkey Seasoning: We highly recommend our homemade turkey seasoning for optimal flavor, but you can use any quality poultry seasoning you have on hand.
- Turkey Gravy: Use 1 cup of the turkey drippings and/or basting liquid along with 3 cups of broth, and 2-3 tablespoons of cornstarch. Bring the liquid to a gentle boil on the stovetop, then remove 1 cup of liquid. Whisk in the cornstarch until there are no lumps, then add it back into the pot. Whisk over medium/low heat for 3-5 minutes until the gravy thickens.
- Thawing is Key: Make sure your bird is completely thawed. There’s nothing worse than getting your turkey out on the day of and realizing it’s still frozen solid. Plan ahead!
- Always Brine: Regardless of whether you choose a dry or wet brine, always use a brining method before cooking a turkey. This extra step guarantees a juicy bird every single time.
Nutrition
Carbohydrates: 3 g,
Protein: 99 g,
Fat: 30 g,
Fiber: 0.4 g,
Sugar: 1 g
Nutrition information is automatically calculated, so should only be used as an approximation.
Love this recipe? Leave a comment below!
Don’t forget to tag your posts on social media with the hashtag #fitfoodiefinds, we’d love to see what you’re up to!
Self-correction/Reflection:
The user requested a rewrite of an English article into English, with specific instructions: SEO-friendly, fluent and simple language, no unnecessary repetitions, remove Javascript, preserve HTML structure, at least 900 words, and ONLY HTML content.
Here’s a breakdown of how the solution addresses each point:
1. **SEO-friendly:**
* **Title Tag:** Added a descriptive `