
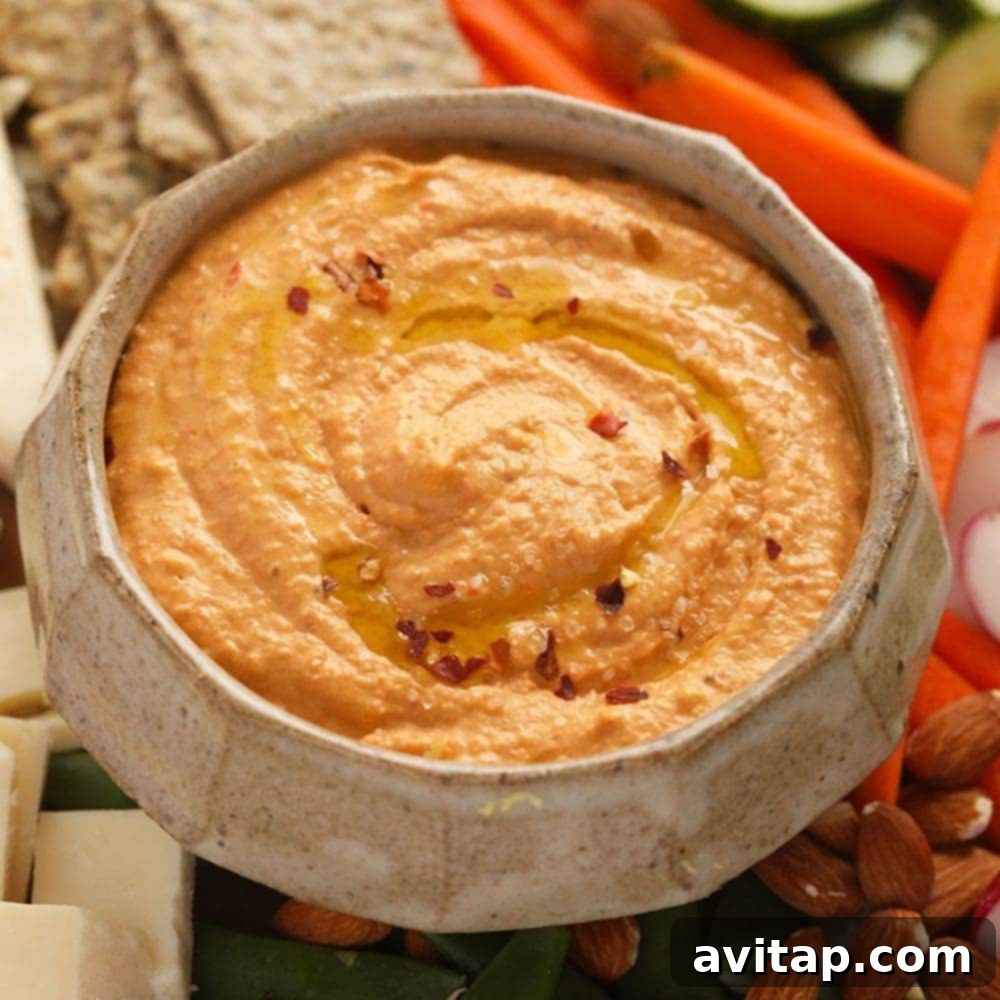
Forget the store-bought tubs! Crafting your own Roasted Red Pepper Hummus at home is a truly rewarding experience. It’s not only incredibly easy and surprisingly inexpensive but also delivers a depth of flavor and freshness that pre-made versions simply can’t match. This vibrant dip is naturally gluten-free, brimming with plant-based protein, and an absolute game-changer for healthy meal prep. Get ready to elevate your snack game, impress your guests, and nourish your body with this irresistibly creamy and flavorful spread!
If you’re eager to dive deeper into the world of homemade hummus, be sure to explore our other fantastic flavors. Broaden your culinary horizons with our bright Lemon Garlic Hummus, the unique sweetness of Sweet Potato Hummus, or the bold zest of our Mexican Black Bean Hummus. Each recipe offers a distinct twist on this beloved classic!
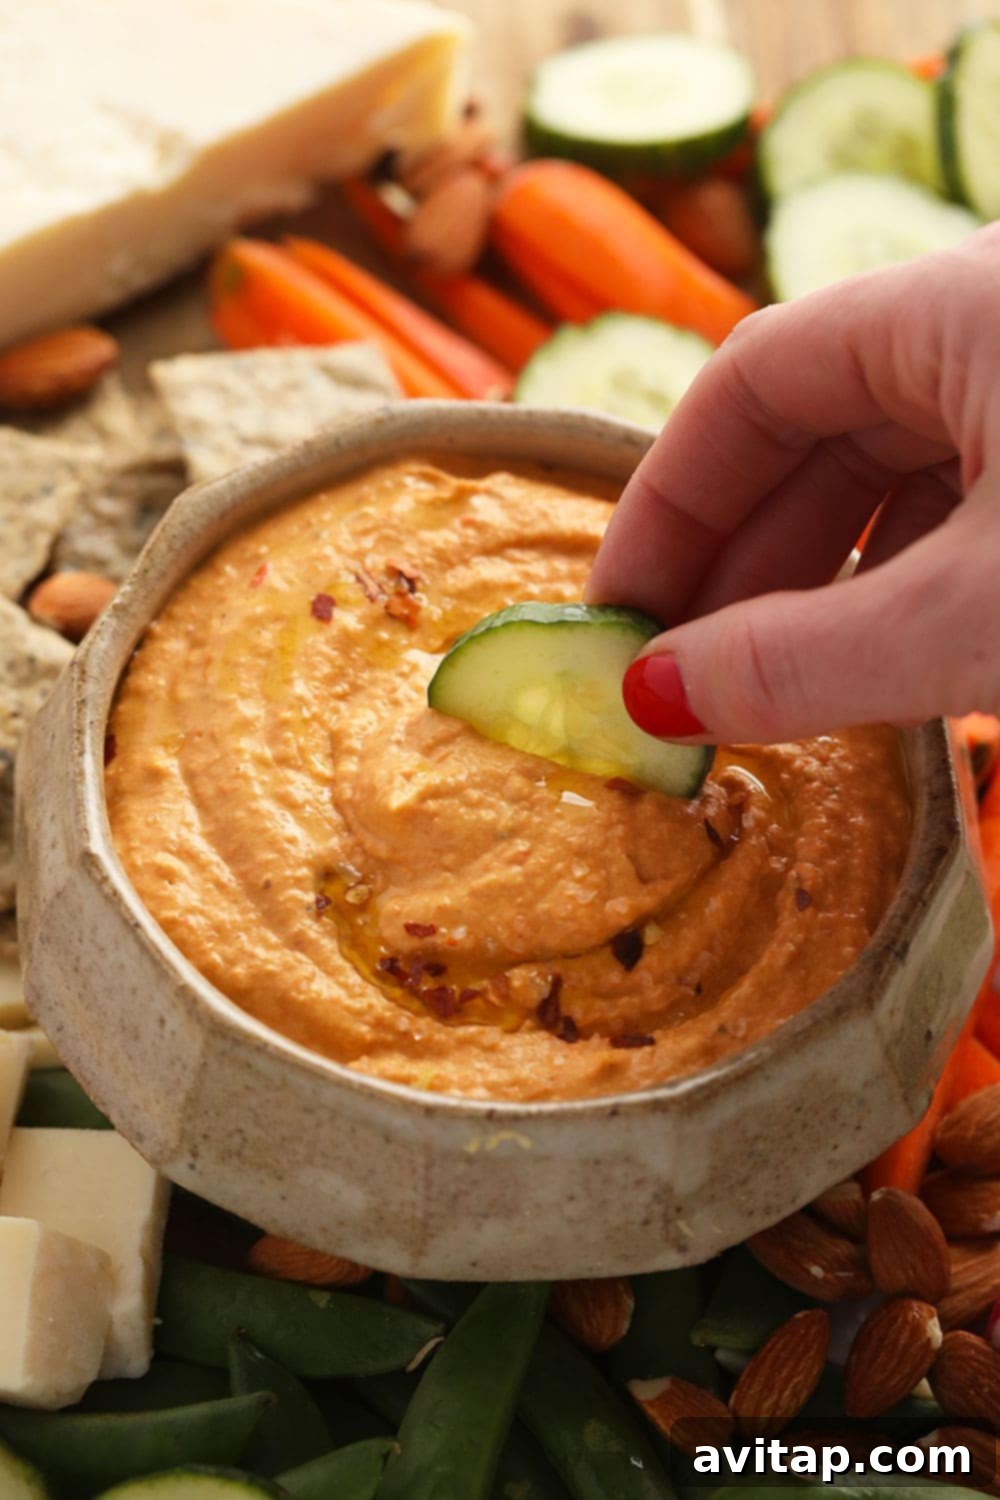
The Unmatched Delight of Homemade Hummus
There’s a common misconception that making hummus from scratch is a complicated or time-consuming endeavor. We’re here to debunk that myth! In reality, whipping up a batch of homemade hummus is surprisingly simple and astonishingly quick, taking less time than a trip to the grocery store. More importantly, we can confidently promise that the homemade version is 100% more delicious, fresher, and more satisfying than any store-bought alternative you’ll find.
If you’re already a dedicated fan of store-bought hummus, prepare for a revelation! Our homemade roasted red pepper hummus recipe is designed to blow your mind with its superior taste and texture. Beyond the incredible flavor, opting for homemade gives you complete control over every single ingredient. You can select the freshest produce, high-quality olive oil, and adjust seasonings precisely to your liking. This means you won’t find any mysterious preservatives, unnecessary fillers, or artificial ingredients lurking in your bowl – just pure, wholesome goodness you can feel great about enjoying and sharing. It’s a culinary experience that prioritizes health without compromising on taste.
Mastering the Art of Roasted Red Pepper Hummus: A Step-by-Step Guide
Creating this incredible homemade roasted red pepper hummus involves a few straightforward steps, each contributing to its rich flavor profile. We’ll guide you through the entire process, ensuring a smooth and successful culinary adventure. The secret to its distinctive taste lies in the perfectly roasted red peppers and garlic, which add a smoky sweetness and aromatic depth that truly sets this hummus apart.
Step 1: Roasting Peppers and Garlic to Perfection
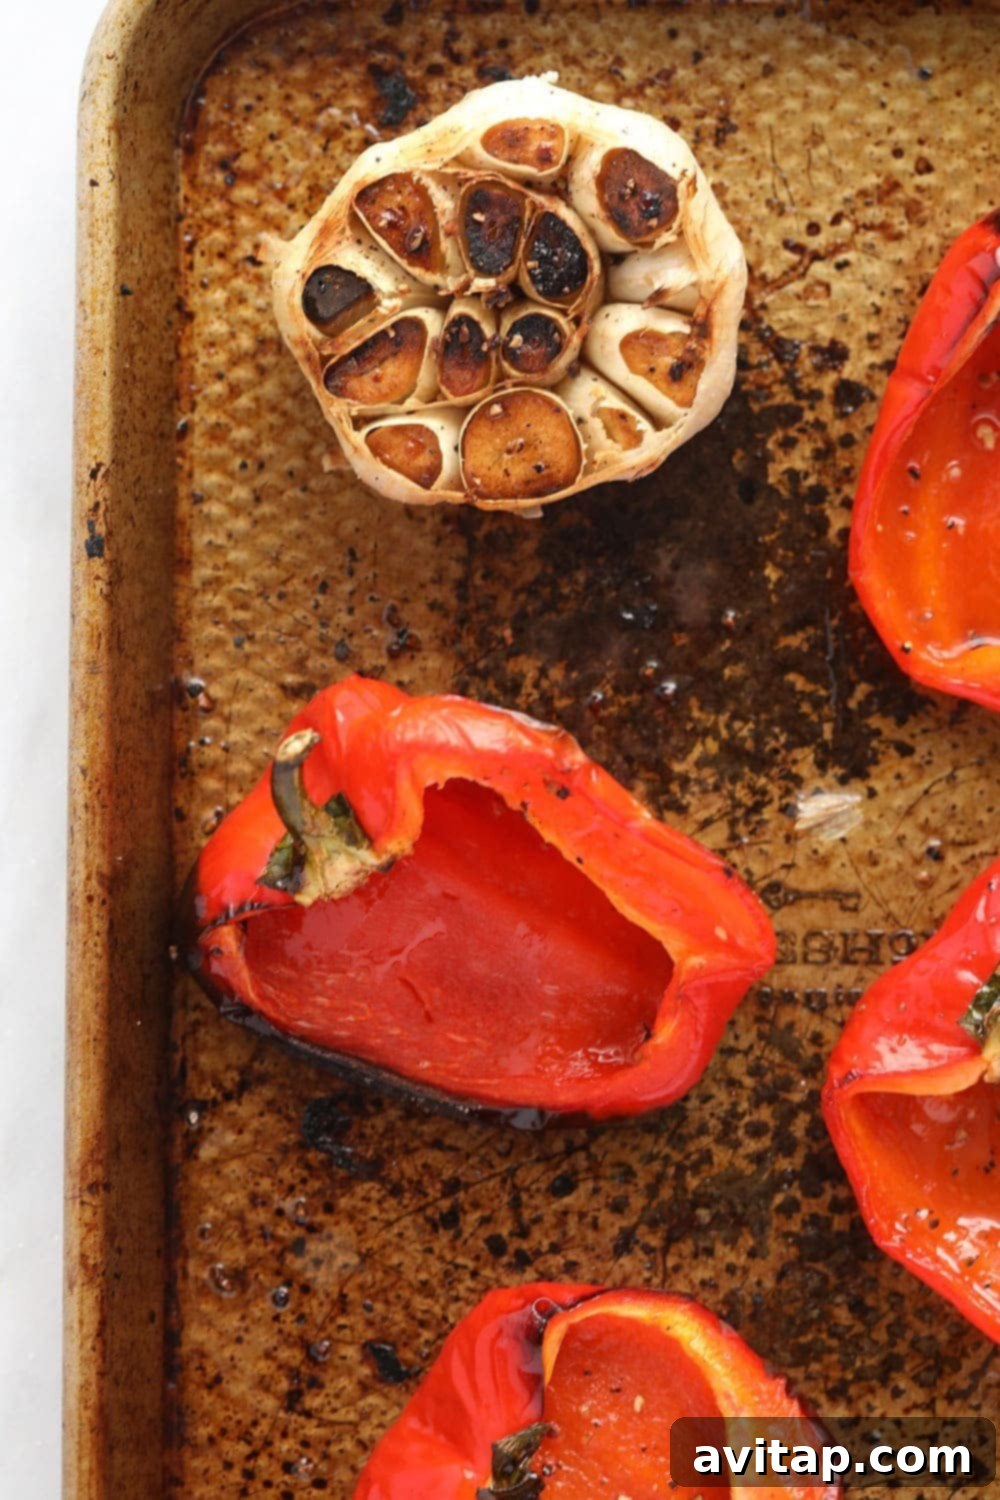
The roasting process is crucial for unlocking the deep, sweet, and smoky flavors of the red pepper and mellowing the garlic. Begin by preheating your oven to 450°F (230°C). Prepare your red pepper by cutting it in half lengthwise and carefully removing the seeds and stem. Place the pepper halves, skin-side up, on an oiled baking sheet. Alongside the pepper, arrange your whole, peeled garlic cloves. Drizzle everything with a tablespoon of olive oil and a pinch of salt and pepper to enhance the flavors during roasting.
Roast in the preheated oven for 15 minutes. This initial phase helps to soften the pepper and garlic and begin the charring process. After 15 minutes, carefully flip the pepper halves and garlic cloves. Return them to the oven for another 15 minutes. Keep an eye on the peppers; you’re looking for significant black spots and softened flesh, indicating they’ve achieved that desirable roasted character. Once roasted to perfection, remove them from the oven and set them aside to cool slightly. This cooling time allows the flavors to deepen and makes handling easier before blending.
Step 2: Assembling and Blending Your Hummus
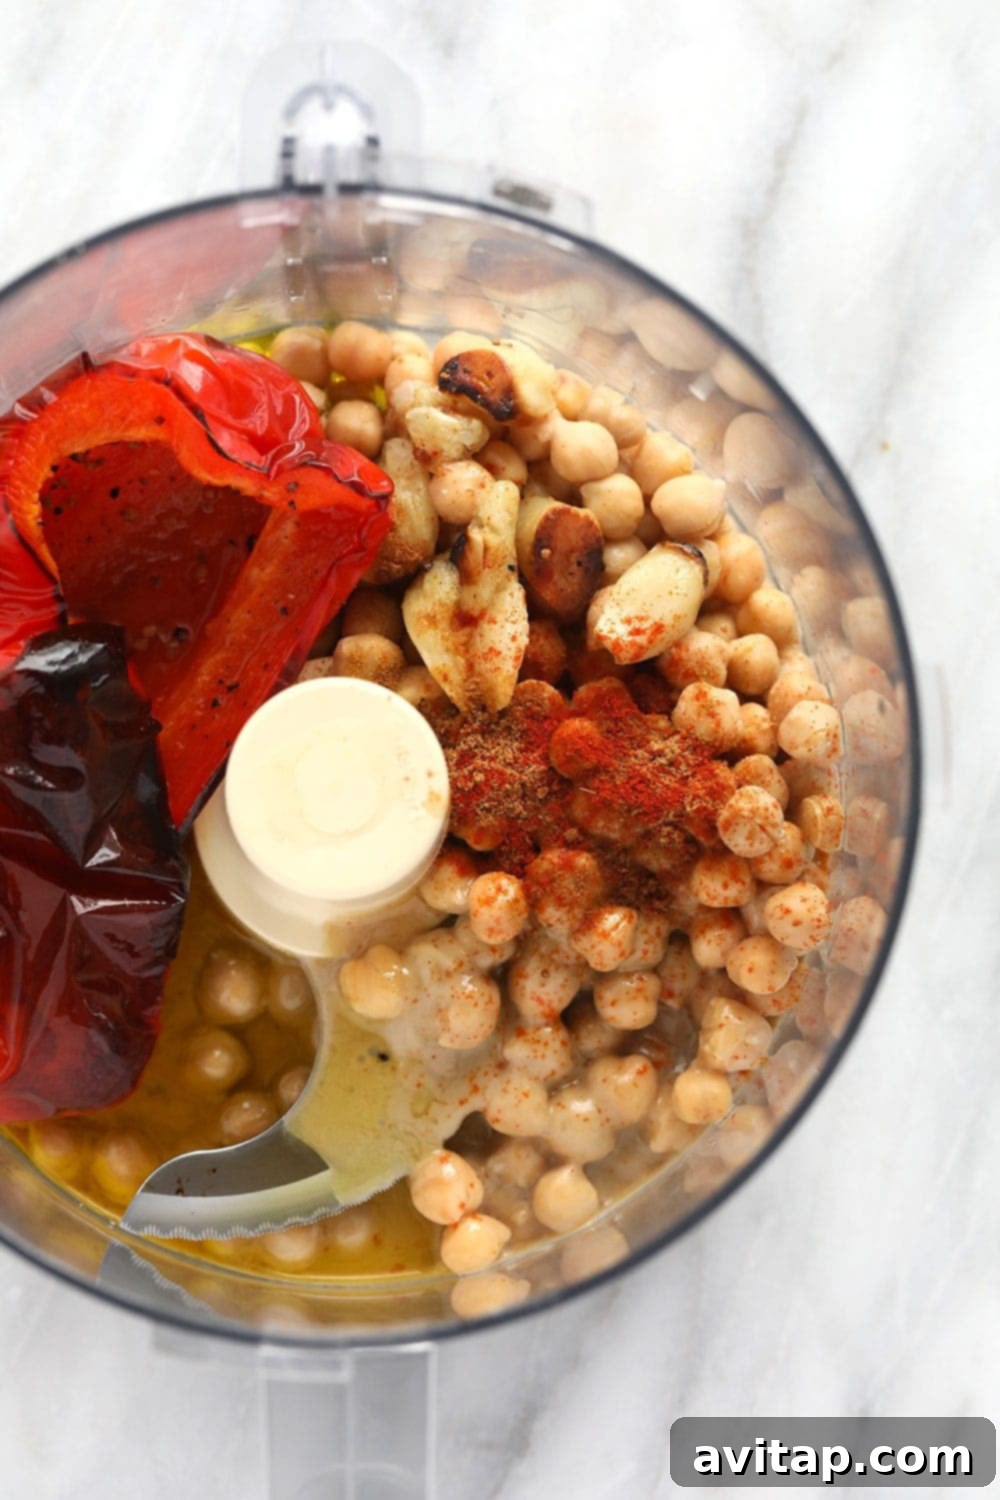
While your roasted red pepper and garlic are cooling, it’s the perfect time to gather and prepare the rest of your ingredients. The beauty of this recipe is that everything comes together effortlessly in a food processor or a high-speed blender. You’ll need:
- **Canned Garbanzo Beans (Chickpeas):** Ensure they are thoroughly drained and rinsed. Rinsing helps remove excess sodium and any residual canning liquid, resulting in a cleaner flavor.
- **Tahini:** This sesame paste is a cornerstone of classic hummus, providing a rich, nutty depth and contributing to the creamy texture. Use a good quality tahini for the best results.
- **Fresh Lemon Juice:** We highly recommend juicing a fresh lemon for this recipe! Freshly squeezed lemon juice brightens the flavors and adds a tangy zest that is incomparable to bottled alternatives.
- **Spices:** Ground cumin introduces an earthy warmth, while a touch of paprika adds a subtle smoky note and beautiful color. Sea salt is essential for seasoning and bringing all the flavors into harmony.
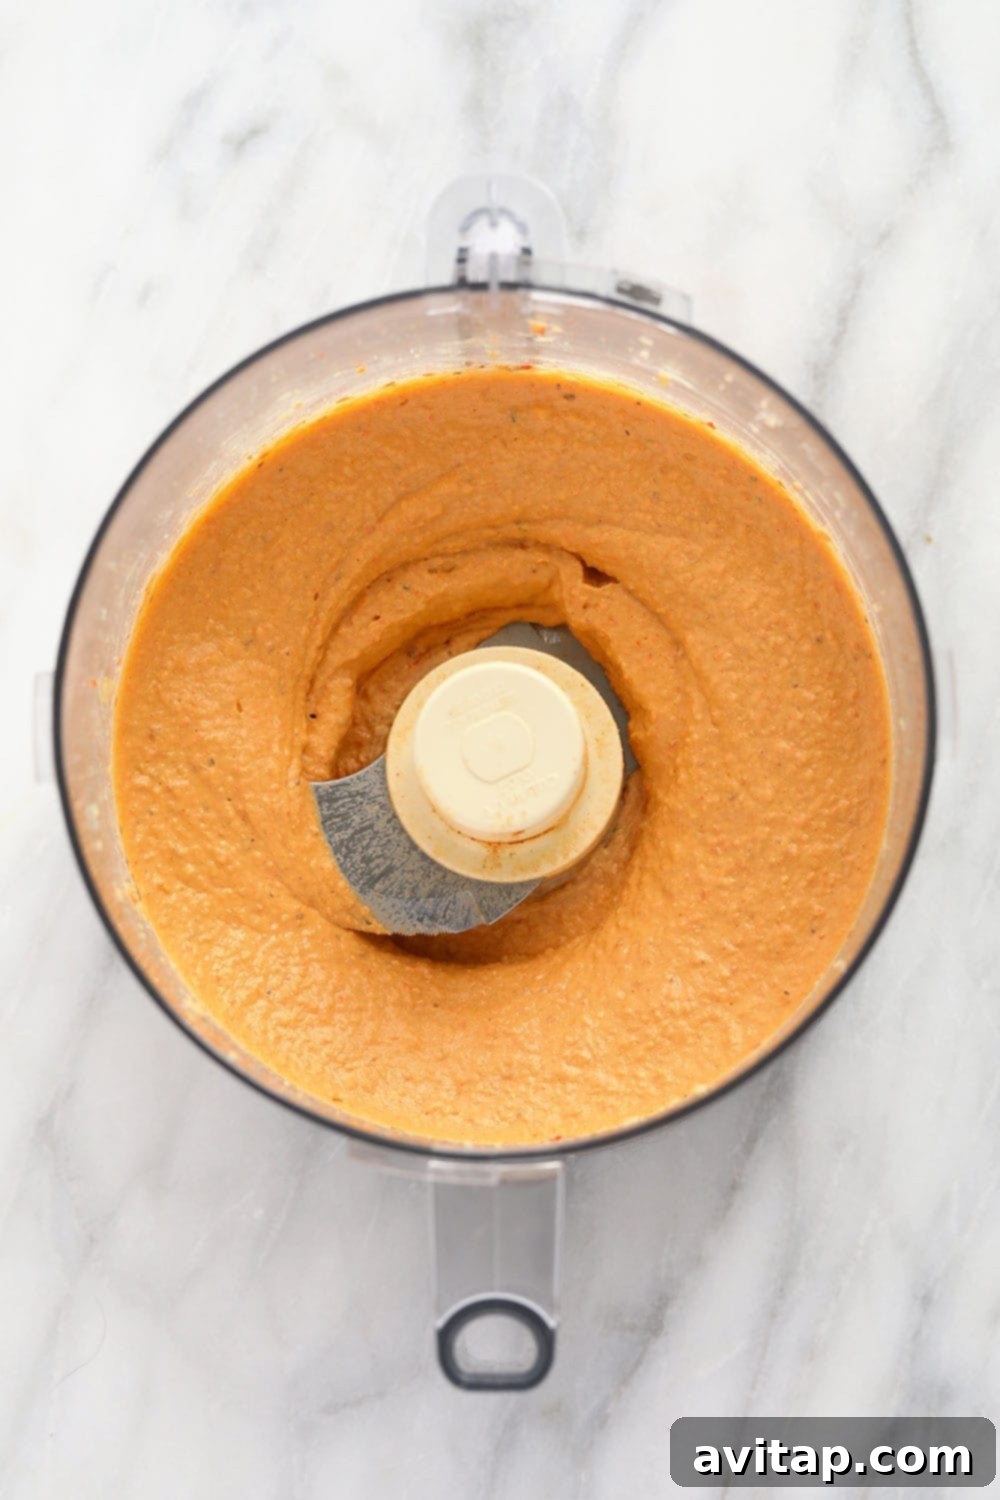
Once your roasted peppers and garlic have cooled sufficiently (you can remove any larger charred skin pieces from the peppers if desired, though some char adds great flavor), add them to your food processor along with the drained garbanzo beans, tahini, fresh lemon juice, cumin, paprika, and sea salt. Secure the lid and blend until the mixture is incredibly smooth and creamy. You might need to pause and scrape down the sides of the food processor a few times to ensure everything is incorporated evenly. If the hummus appears too thick, you can slowly drizzle in a little extra olive oil or a tablespoon of water or lemon juice until it reaches your desired silky consistency.
Step 3: Dippity Dip! Serving Your Homemade Hummus
And just like that, you’re ready to enjoy the most delicious roasted red pepper hummus of your life! The true beauty of homemade hummus lies in its incredible versatility. It’s not just a dip; it’s a culinary chameleon ready to enhance a multitude of dishes.
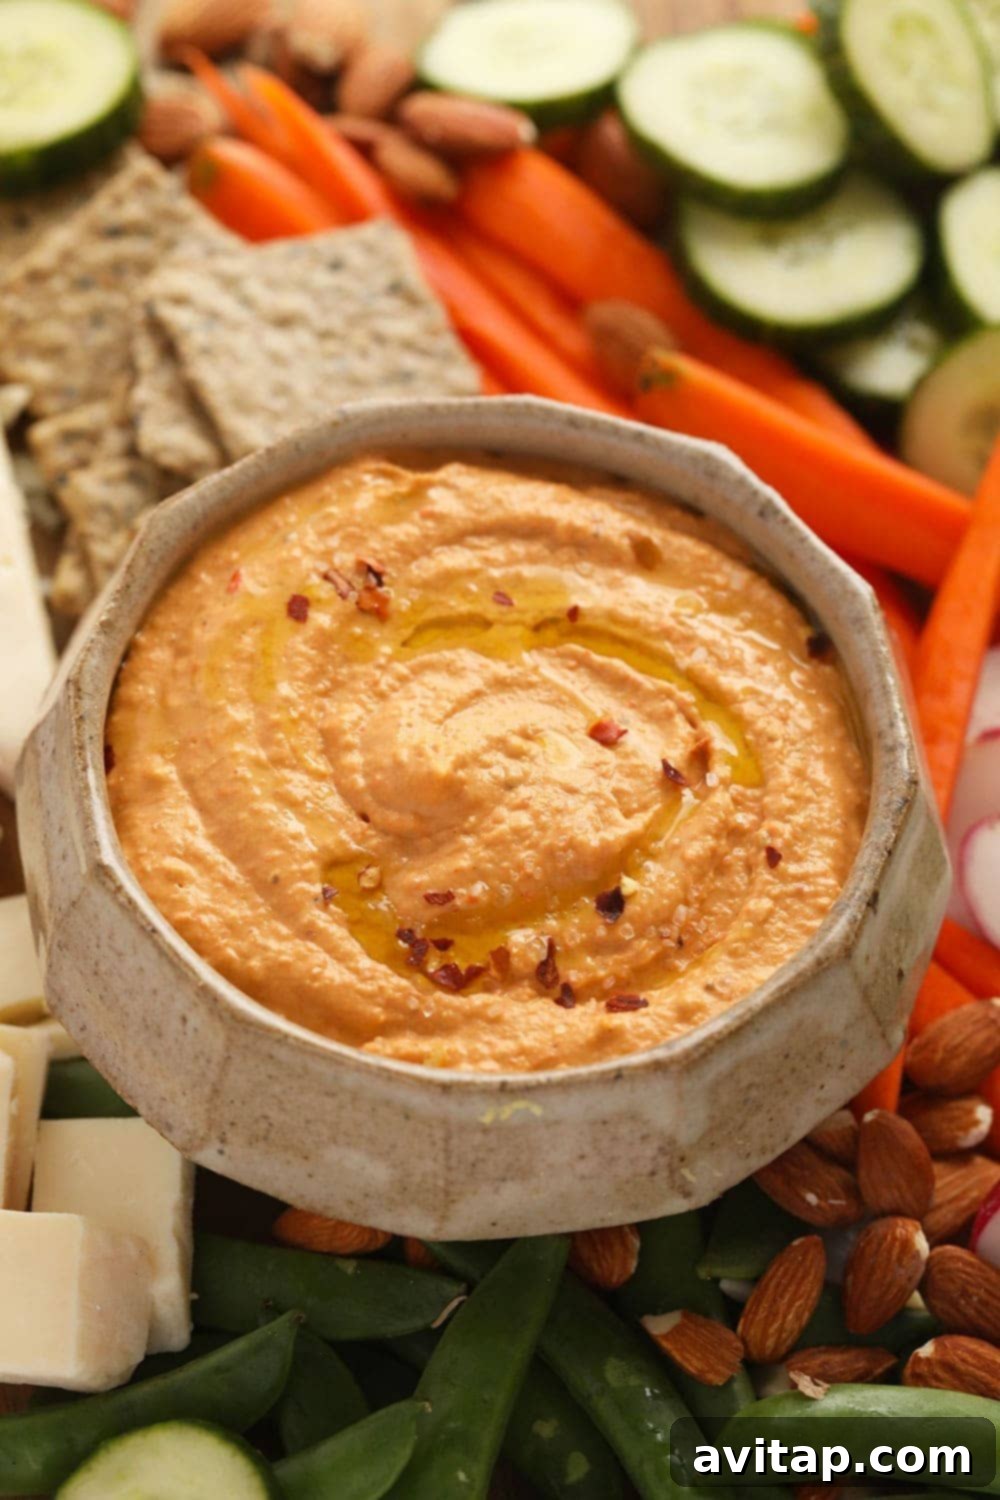
This creamy, flavorful spread is absolutely **delicious as a dip** for an endless array of accompaniments. Think crisp, sliced veggies like cucumbers, carrots, bell peppers, or celery sticks for a healthy crunch. Pair it with warm pita bread or pita chips, crunchy tortilla chips, or even artisanal crackers for a more substantial snack. Seriously, anything you can scoop hummus onto is fair game!
But don’t stop there. Roasted red pepper hummus also shines as a **fantastic sandwich or wrap spread**, adding moisture, flavor, and a creamy texture that elevates your everyday lunch. Dollop a generous spoonful onto **grain bowls or fresh salads** for an extra boost of protein and zest. Its savory depth makes it a unique and satisfying **addition to your breakfast** – try it spread on toast with a fried egg, or alongside some scrambled tofu. The possibilities are truly limitless, inviting you to experiment and discover your favorite combinations.
What’s your absolute favorite way to savor and enjoy this homemade hummus? We’d love to hear your creative ideas!
Tips for Hummus Perfection: Storage, Batch Making, and Troubleshooting
To ensure you get the most out of your delicious homemade roasted red pepper hummus, here are some practical tips for preparation, storage, and overcoming common challenges.
Batch Making for Convenience and Efficiency
One of the greatest advantages of this recipe is its adaptability to batch cooking. Yes, you can absolutely make more than one batch at once, making it ideal for meal prepping throughout the week, feeding a crowd, or simply having extra on hand for those unexpected cravings!
If you’re fortunate enough to have a large-capacity food processor, you can simply double or even triple all the ingredients and blend them together in a single go. However, if you’re working with a smaller food processor, don’t worry! You can easily blend your ingredients in batches. Just be sure to combine all the blended batches in a larger bowl at the end and stir well to ensure a consistent flavor and texture throughout. This method makes it incredibly easy to scale up without needing specialized equipment, ensuring you always have a fresh supply of your favorite dip.
Optimal Storage for Maximum Freshness
Proper storage is key to maintaining the freshness and flavor of your homemade hummus. Once prepared, transfer your roasted red pepper hummus to an air-tight container. A glass container with a tight-fitting lid is often preferred to prevent any flavor absorption or staining. Store this container in the refrigerator, and your hummus will keep beautifully for up to 5 days. For an extra layer of protection against drying out and to maintain its vibrant color, you can drizzle a thin layer of olive oil over the surface of the hummus before sealing the container. This creates a barrier that locks in moisture and keeps it tasting fresh.
Troubleshooting Common Hummus Issues
- Too Thick? If your hummus is too dense or paste-like after blending, simply add a tablespoon of cold water, extra lemon juice, or olive oil at a time, blending until you achieve your desired smooth, creamy consistency.
- Not Smooth Enough? This usually means your chickpeas weren’t blended long enough or your food processor isn’t quite powerful enough. A simple trick is to remove the skins from the chickpeas before blending, though this is optional. Otherwise, just keep blending, adding a splash of liquid if needed, until it’s perfectly smooth.
- Lacking Flavor? Taste as you go! Adjust salt, lemon juice, or cumin to your preference. Remember that flavors can mellow slightly in the fridge, so don’t be afraid to season boldly. A tiny pinch of cayenne pepper can also add a subtle kick if you enjoy a hint of spice.
Why Choose Homemade? Health Benefits and Nutritional Value
Beyond its incredible taste, homemade roasted red pepper hummus offers a wealth of health benefits, making it a smart and satisfying choice for any diet. This vibrant dip is packed with essential nutrients, making it far more than just a tasty snack.
- **Rich in Plant-Based Protein:** Chickpeas, the star ingredient, are an excellent source of plant-based protein, crucial for muscle repair, growth, and satiety. This makes hummus a fantastic option for vegetarians, vegans, and anyone looking to boost their protein intake.
- **High in Dietary Fiber:** Also thanks to chickpeas, hummus is rich in dietary fiber. Fiber is vital for digestive health, helps regulate blood sugar levels, and contributes to a feeling of fullness, aiding in weight management.
- **Antioxidant Powerhouse:** Red bell peppers are loaded with powerful antioxidants, including Vitamin C and various carotenoids, which help fight oxidative stress and support overall immune health. Roasting them only enhances their natural sweetness and some nutrient bioavailability.
- **Healthy Fats:** Tahini (sesame paste) and olive oil contribute healthy monounsaturated and polyunsaturated fats. These fats are beneficial for heart health, help absorb fat-soluble vitamins, and provide a lasting source of energy.
- **Naturally Gluten-Free and Vegan:** This recipe is naturally free of gluten and animal products, making it suitable for a wide range of dietary preferences and restrictions. It’s an inclusive option for almost any gathering.
- **Control Over Ingredients:** When you make hummus at home, you have complete control over the quality and quantity of ingredients. This means you can avoid added sugars, unhealthy oils, and preservatives often found in commercial versions, tailoring it to your specific health needs and preferences.
Incorporating homemade roasted red pepper hummus into your diet is an easy and delicious way to enjoy a nutrient-dense food that supports your health goals while delighting your taste buds.
Explore More Delicious Dip Recipes
The world of dips is vast and exciting! If you’ve enjoyed making this roasted red pepper hummus, we encourage you to try other unique and flavorful variations. Expand your repertoire with these fantastic recipes:
- Creamy Avocado Hummus
- Sweet and Savory Sweet Potato Hummus
- Bright and Zesty Lemon Garlic Hummus
- Flavorful Mexican Black Bean Hummus
- Ready for more? Discover ALLour incredible Dip Recipes and find your next favorite!
Roasted Red Pepper Hummus Recipe
This easy, homemade Roasted Red Pepper Hummus is a vibrant, creamy, and healthy dip perfect for any occasion. Gluten-free and protein-packed, it’s ideal for meal prep!
By: Emily Richter
Prep Time: 10 mins
Cook Time: 30 mins
Total Time: 40 mins
Servings: 6
Ingredients
- 1 large red pepper, halved and seeded
- 4 whole garlic cloves, peeled
- 3 tablespoons olive oil, divided (2 tbsp for hummus, 1 tbsp for roasting)
- 15 oz. canned garbanzo beans (chickpeas), rinsed and strained
- 3 tablespoons tahini
- 3 tablespoons lemon juice, freshly squeezed (~1/2 lemon)
- 1/2 teaspoon ground cumin
- 1/2 teaspoon paprika (optional, for color and flavor)
- 1/2 teaspoon sea salt (or to taste)
- Black pepper, to taste (for roasting)
Instructions
- First, preheat your oven to 450ºF (230°C). Lightly grease a baking sheet or line it with parchment paper for easy cleanup.
- Place the peeled garlic cloves and the halved red pepper (skin side up) onto the prepared baking sheet. Drizzle with 1 tablespoon of olive oil and sprinkle generously with salt and black pepper.
- Place the baking sheet in the preheated oven and roast for 15 minutes.
- Carefully flip the red pepper halves and garlic cloves. Continue roasting for another 15 minutes, or until the red pepper skins are charred and the flesh is very soft. The garlic should also be tender and fragrant.
- Remove the roasted red peppers and garlic from the oven and set them aside to cool slightly. This step is important as it allows the peppers to sweat, making them easier to handle and contributing to the hummus’s texture.
- Next, into the bowl of a food processor, add the rinsed garbanzo beans, tahini, fresh lemon juice, ground cumin, paprika (if using), and 1/2 teaspoon of sea salt. Blend until the mixture becomes relatively smooth.
- Finally, add the cooled roasted red pepper and garlic to the food processor. Continue blending until the hummus is perfectly smooth and creamy. If the consistency is too thick, gradually add the remaining 2 tablespoons of olive oil, or a splash of water or extra lemon juice, blending until your desired smoothness is achieved.
- Taste and adjust seasonings as necessary, adding more salt, lemon juice, or cumin to suit your preference.
- Serve your homemade roasted red pepper hummus immediately with fresh vegetables, crackers, pita bread, or any of your favorite accouterments. Enjoy!
Tips & Notes
- **Achieving Ultimate Smoothness:** For an extra-smooth hummus, especially if your food processor isn’t very powerful, you can try peeling the skins off the chickpeas before blending. Alternatively, ensure you blend for several minutes, stopping to scrape down the sides, and add a bit more olive oil or water until it’s perfectly silky.
- **Seasoning to Taste:** Always taste your hummus before serving and adjust the salt, lemon juice, and cumin. Different brands of tahini and the natural sweetness of peppers can affect the final flavor profile.
- **Garnish Ideas:** Enhance your serving with a drizzle of extra virgin olive oil, a sprinkle of fresh chopped parsley or cilantro, a pinch of smoked paprika, or a few whole roasted chickpeas for texture.
- **Meal Prep Hero:** This hummus is fantastic for meal prep. Make a larger batch and divide it into individual portions for easy grab-and-go snacks or additions to lunches throughout the week.
Nutrition (Approximate per serving)
Nutrition information is automatically calculated and should only be used as an approximation. Per serving (1/6th of recipe):
- Calories: 197 kcal
- Carbohydrates: 15 g
- Protein: 7 g
- Fat: 13 g
- Fiber: 4 g
- Sugar: 1 g
Loved this recipe? Leave a comment below!
Your feedback brightens our day! Don’t forget to tag your beautiful creations on social media with the hashtag #fitfoodiefinds – we absolutely love seeing what you’re cooking up in your kitchens!