
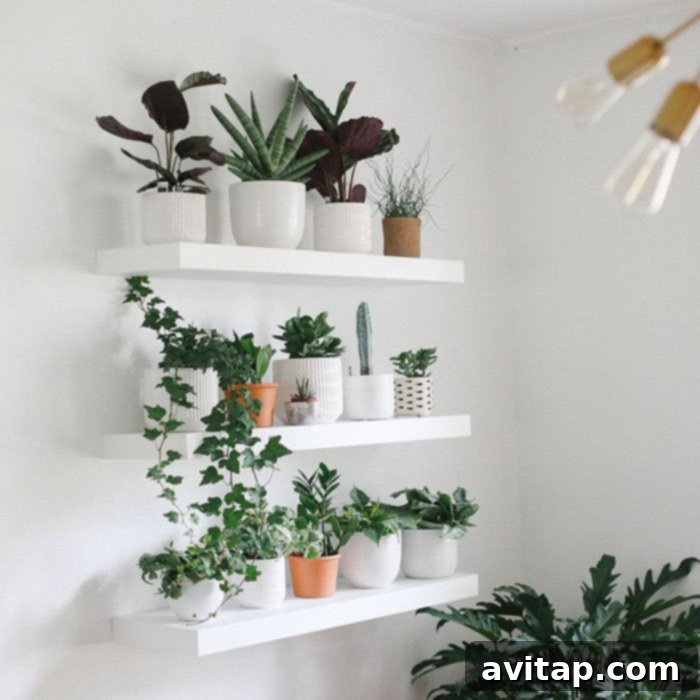
Create Your Own Stunning Indoor Plant Wall: A Step-by-Step Guide to a Lush Vertical Garden
Imagine stepping into a space vibrant with life, where lush greenery cascades down a wall, purifying the air, calming the senses, and adding an undeniable touch of natural elegance to your home. Building an indoor plant wall, often referred to as a vertical garden or living wall, is a deeply rewarding project that allows you to bring the beauty of nature indoors, even in compact urban spaces. Far more than just a decorative feature, a living wall transforms your environment, enhancing air quality by filtering toxins, boosting humidity, and contributing to overall well-being. This comprehensive guide will walk you through every essential step, from selecting the perfect spot in your home to choosing the right shelving and ideal plants, and ultimately mastering their ongoing care, ensuring your vertical garden thrives and becomes a captivating focal point.
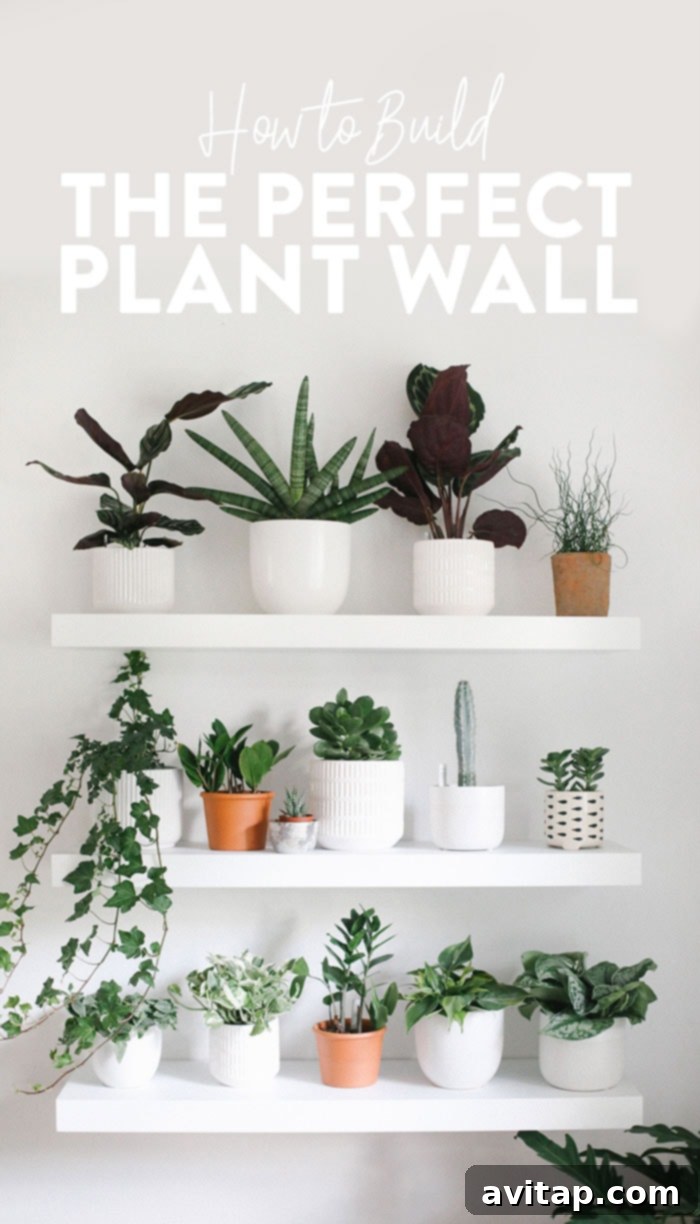
Step 1: Identify the Ideal Location for Your Indoor Plant Wall
The foundation of a successful indoor plant wall begins with choosing the right location. This critical decision will significantly influence the types of plants you can cultivate and the long-term maintenance required. While it might seem straightforward, selecting a wall that receives indirect sunlight is highly recommended. Indirect light means the sun’s rays do not directly hit the wall for extended periods. Direct, intense sunlight can scorch delicate leaves, leading to stressed and unhealthy plants, especially for many popular indoor varieties.
To identify the best spot, observe how light moves through your room throughout the day. Consider an adjacent wall to an east-facing window, for instance. East-facing windows provide gentle morning light, which is less intense and shorter in duration compared to the harsh afternoon sun from west-facing windows. North-facing walls often receive consistent, soft indirect light, making them excellent candidates for a plant wall. South and west-facing walls, on the other hand, typically receive stronger, more direct sunlight. If your chosen wall faces south or west, you might need to use sheer curtains or blinds to filter the light, or opt for plants that specifically tolerate higher light levels, such as certain succulents or cacti, though these will require more attention to their individual light needs.
Don’t despair if you can’t find a wall with perfectly indirect light! A beautiful plant wall is still achievable. However, be prepared for your plant selection to be more specific, potentially requiring more frequent monitoring and varied watering schedules. For very low-light areas, you might also consider investing in supplemental grow lights. Modern LED grow lights are energy-efficient and can be discreetly integrated into your shelving, allowing you to cultivate a wider range of plants regardless of natural light availability. Prioritizing optimal light conditions from the outset will set your plant wall up for long-term success and reduce future headaches.
Step 2: Selecting and Installing Your Shelves for a Dynamic Display
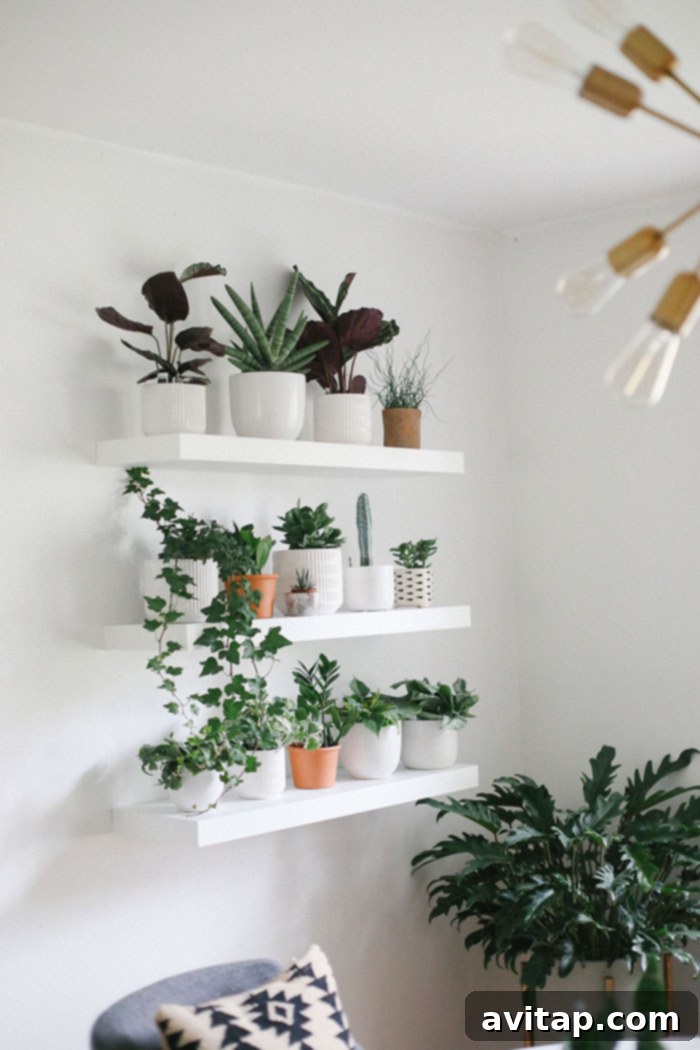
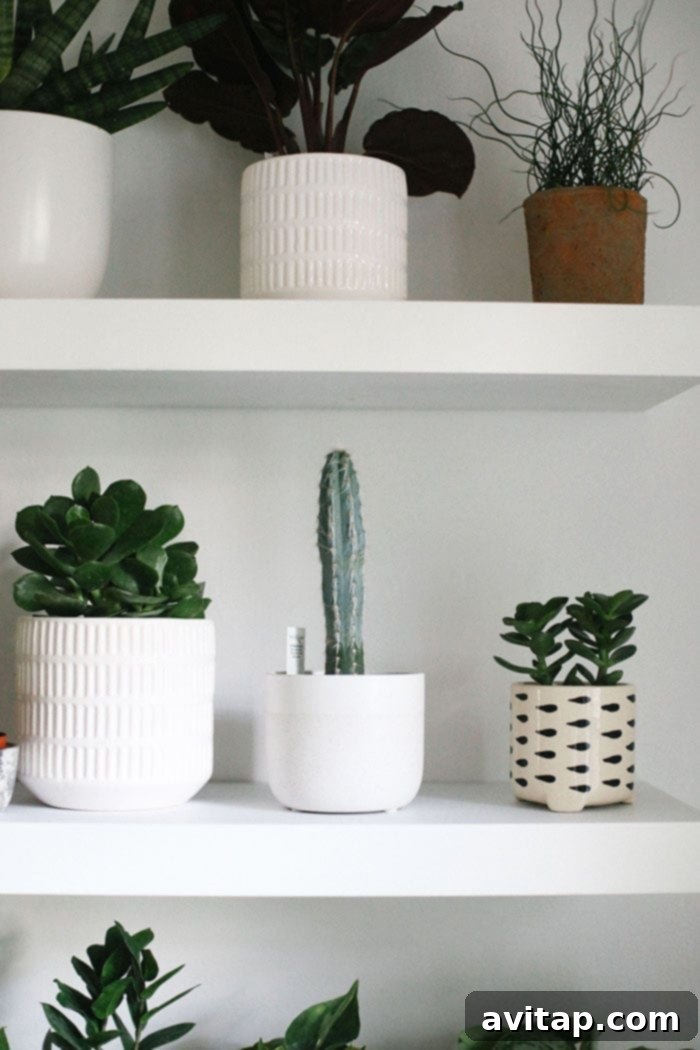
Once your ideal wall is chosen, it’s time to select the shelving that will form the robust backbone of your indoor plant wall. The right shelves are crucial for both aesthetics and functionality. The size of your room will naturally guide the length of your shelves; larger rooms can accommodate longer shelves for a more expansive display, while smaller spaces might benefit from shorter, strategically placed shelves to avoid overwhelming the area. For instance, many successful plant walls feature sleek 36-inch white floating shelves, which are a popular choice for their clean lines and minimalist appeal, allowing the lush plants to truly be the focal point.
When choosing shelves, consider both style and practicality. Floating shelves offer a contemporary, seamless look, perfect for a modern aesthetic. Alternatively, you can opt for bracketed shelves for a more rustic, industrial, or traditional feel. Material choice is also important: wood, metal, glass, or acrylic each offer different aesthetic and functional properties. If you choose wood, ensure it’s treated, sealed, or naturally water-resistant to prevent damage from moisture and spills during watering. Metal shelves can offer industrial chic and excellent durability, while glass or acrylic shelves can create a lighter, more ethereal look, allowing light to pass through to lower plants.
Crucially, pay close attention to the depth of your shelves. We strongly recommend finding shelves that are at least 8 inches deep; ideally, aiming for 10 inches or more. This depth provides ample space for your plant pots, allowing them to sit securely without precariously close to the edge. It also offers room for future growth, enabling you to accommodate slightly larger pots or plants as your green companions mature. A good depth also makes watering easier, reduces the risk of accidental knock-overs, and provides a stable base for your thriving mini-ecosystem. You can find quality shelving at various home improvement stores, furniture retailers, or online marketplaces like Overstock.
Strategic Shelf Spacing for Optimal Growth and Visual Appeal
The spacing of your shelves is vital for creating a balanced visual display and providing adequate room for your plants to thrive. While it might seem daunting, achieving perfect shelf spacing is quite simple with a straightforward approach. An excellent rule of thumb, often shared by interior design experts, is to place your center shelf at approximately 56 inches above the floor. This height generally aligns with eye level for many people, creating an attractive anchor point and a natural visual center for your vertical arrangement.
From this central shelf, space subsequent shelves both above and below it about 12 inches apart. This 12-inch gap is a proven sweet spot, offering enough vertical room for a variety of medium-sized plants to grow without feeling cramped or overshadowing each other. It comfortably accommodates plants with a moderate upright habit or those that gently trail. For plants that are particularly tall or have a more sprawling growth habit, you might consider adjusting the spacing slightly for specific sections. This strategic spacing not only ensures your plants have room to breathe and flourish but also contributes to a visually harmonious and dynamic living wall design, allowing each plant to be admired individually while contributing to the overall lush tapestry. Remember to consider the mature height of your chosen plants when finalizing your spacing decisions.
Step 3: Curating Your Pots: The Vessel for Your Greenery
Pots are far more than just containers; they are integral to both the aesthetic appeal and the long-term health of your plant wall. With an abundance of styles, colors, and materials available today, choosing the right pots can be an exciting and creative part of the process. We highly recommend acquiring a variety of sizes and shapes to introduce personality, texture, and visual interest to your display. Mixing and matching different pot designs, from sleek modern ceramic to rustic terracotta or even patterned glazed options, can create a truly unique and captivating look. The pots featured in successful plant walls often range from smaller 3.5-inch tall vessels for delicate accents to more substantial 6-inch tall pots for statement plants, offering a lovely gradient and dynamic visual flow.
Beyond aesthetics, the material of your pots plays a crucial role in plant care. Terracotta pots are porous, allowing air and moisture to pass through the soil, which is excellent for plants that prefer their soil to dry out between waterings. Glazed ceramic or plastic pots, on the other hand, retain moisture longer, making them suitable for plants that prefer consistently moist soil or for those in drier indoor environments. Always prioritize pots with adequate drainage holes to prevent waterlogging, which is a common and detrimental cause of root rot. If a pot lacks drainage, you can either drill holes (if the material allows) or employ the “cachepot” method, where the plant is kept in a smaller, nursery pot with drainage, placed inside a larger decorative pot without holes. This allows you to remove the inner pot for watering and ensures excess water can drain away before returning it to the cachepot.
A key insider tip for seamless plant selection is to purchase your pots before your plants! Your chosen pots will ultimately dictate the maximum size of the plants you can comfortably accommodate. By having your pots ready, you can even bring them to the nursery or garden center to ensure a perfect fit, allowing you to visualize exactly how each plant will look in its new home and verify you’re selecting appropriately sized specimens. This proactive approach saves time and prevents the frustration of buying plants that are either too large or too small for your curated collection of pots.
Wonderful places to explore for unique and functional plant pots include:
- Anthropologie – For eclectic and artisan-crafted designs that add character.
- CB2 – Offering modern, minimalist, and architectural aesthetics for a contemporary look.
- West Elm – Featuring contemporary styles with a focus on natural materials and sophisticated finishes.
- IKEA – Providing affordable and functional options in a variety of styles to suit any home.
- Overstock – A wide variety of pots available, often at competitive prices, perfect for finding unique pieces.
- Target – Accessible and stylish options for home decor, including a great selection of plant pots.
- Local Greenhouses and Nurseries – Often carry unique, high-quality pots and can offer expert advice tailored to your region.
For inspiration, many beautiful pots can be found at retailers like Overstock, helping you achieve a cohesive yet varied look. Specific examples from an established plant wall include a range of styles and sizes: Pot 1, Pot 2, Pot 3, Pot 4 (from Tonkadale), Pot 5, Pot 6 (from Tonkadale), Pot 7, Pot 8, Pot 9, Pot 10, Pot 11, Pot 12 (from Tonkadale), Pot 13, Pot 14.
Step 4: Choosing the Perfect Plants for Your Vertical Oasis
The selection of plants is where your indoor plant wall truly comes to life, transforming it into a vibrant, breathable piece of living art. As previously highlighted, the light conditions of your chosen wall are the primary determinant for your plant choices. For walls receiving low to medium indirect light, a vast and forgiving array of plants thrives. These “low-maintenance” plants are often ideal for beginners or those with busy lifestyles, as they typically don’t demand constant attention, making the experience more enjoyable and less stressful.
Moreover, having your pots ready before plant shopping is invaluable. This allows you to match plants to pots visually and practically, ensuring you select specimens that will grow comfortably in their new homes. When selecting, consider the mature size of the plant, its growth habit (trailing, upright, bushy), its unique foliage color and texture, and its overall aesthetic contribution to your wall design. Don’t be afraid to mix and match for a diverse and captivating display.
Top Low and Medium-Light Plant Recommendations for Your Plant Wall:
- Snake Plant (Sansevieria trifasciata): Renowned for its resilience and striking architectural, upright leaves, the Snake Plant thrives in low light and tolerates neglect, making it a beginner’s dream. It’s also an excellent air purifier.
- ZZ Plant (Zamioculcas zamiifolia): Another incredibly hardy option, the ZZ Plant features glossy, dark green leaves and can endure very low light conditions and infrequent watering. Perfect for those who tend to forget to water.
- Calathea (Calathea spp.): Known for its stunning patterned foliage, Calatheas prefer medium, indirect light and higher humidity. While slightly more demanding, their unique leaf patterns and movement (praying plant) are unparalleled.
- Pothos (Epipremnum aureum): A versatile and exceptionally easy-to-care-for trailing plant, Pothos comes in various variegations (e.g., Marble Queen, Neon). It tolerates low light beautifully and looks spectacular cascading down shelves.
- California Branching Ivy (Hedera canariensis): A classic trailing plant that adds a touch of elegant green texture and a traditional feel. It prefers medium light and consistent moisture, ideal for creating lush draping effects.
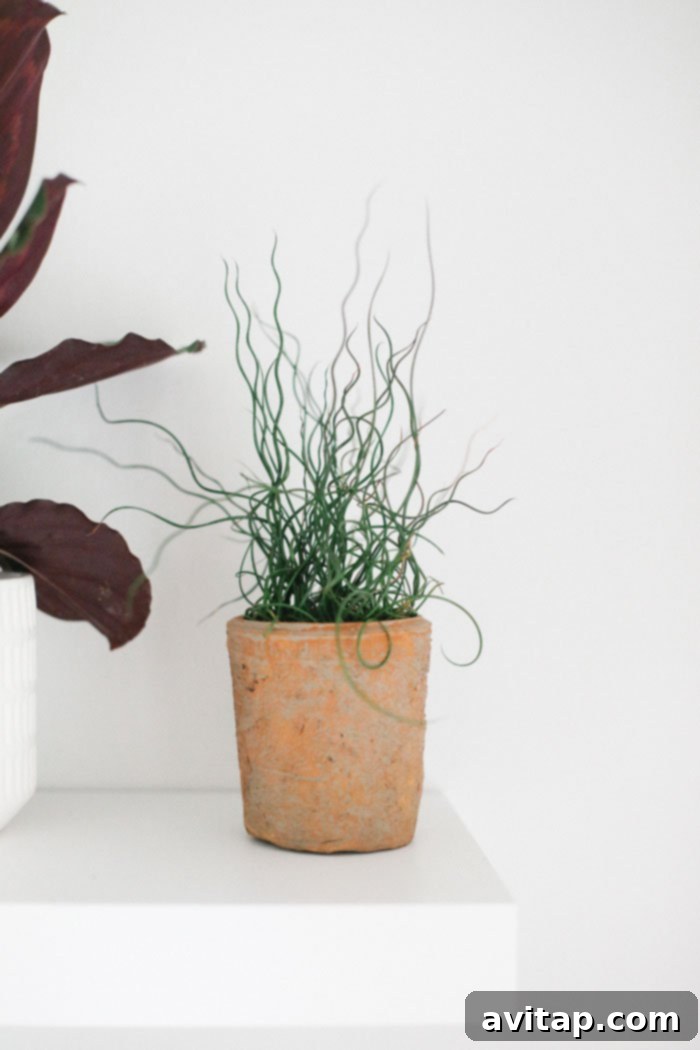
- Cork Screw Rush (Juncus effusus ‘Spiralis’): This unique plant features distinct spiraling, cylindrical stems, adding intriguing form and texture to your wall. It can handle a range of light from low to full sun, preferring consistently moist soil.
Now, you might notice some cacti and succulents making an appearance on plant walls, even in less-than-ideal light conditions. These sun-loving plants typically require a lot of direct sunlight to thrive, often needing several hours of intense sun daily. If you simply can’t resist including them, as was the case for the example wall, a strategic approach is required. These “sun worshipers” will need to be periodically moved into direct sunlight (daily or every other day) to receive the intense light they need to survive and prevent etiolation (stretching due to insufficient light). This requires commitment but allows for greater plant variety. Consider rotating your other plants periodically to ensure all sides receive adequate light exposure over time, especially if some areas of your wall are naturally darker than others.
A crucial tip for sourcing healthy, robust plants is to shop local whenever possible. Local greenhouses, like Tonkadale Greenhouse (highly recommended if you’re in Minnetonka, MN, for their quality and expertise), often provide plants that are already acclimatized to your region’s conditions. Their staff are usually passionate experts eager to share their knowledge. Don’t hesitate to ask them for advice on plant selection, care, and specific recommendations tailored to your home’s unique light and humidity conditions. Their guidance can be invaluable in creating a thriving indoor plant wall that brings joy for years to come.
Step 5: Mastering Watering Schedules for a Thriving Plant Wall
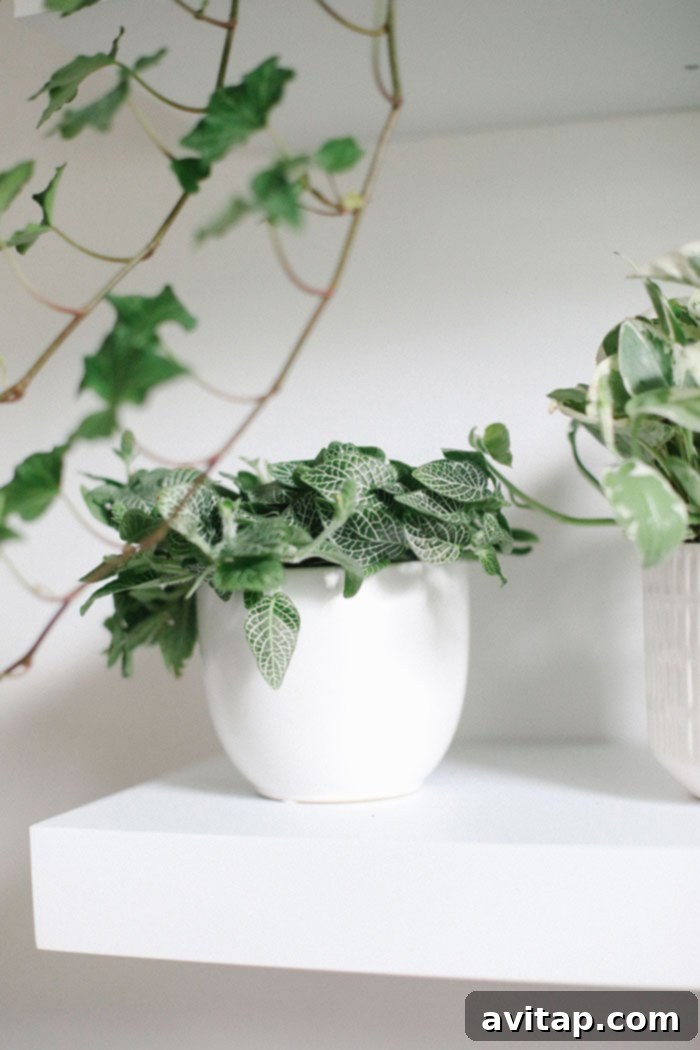
Without a doubt, proper watering is the most crucial aspect of maintaining a healthy and vibrant indoor plant wall. It’s a skill that often requires practice and a bit of trial and error; even experienced plant enthusiasts have, at some point, learned hard lessons from over or underwatering. The golden rule here is simple but paramount: research each individual plant’s specific watering needs.
Fortunately, most plants purchased from reputable nurseries come with a small tag providing basic care instructions, including preferred watering frequency. This is your first and most reliable source of information. Beyond that, a quick online search for your specific plant species will yield a wealth of detailed care guides. You’ll quickly discover that there’s no “one size fits all” watering schedule for a diverse plant wall, as each plant’s origins and characteristics dictate its hydration requirements.
For example, a Corkscrew Rush typically thrives in consistently moist soil and might require more frequent watering, perhaps every few days, especially if the air is dry. In contrast, a Pothos prefers its soil to dry out considerably between waterings, often every 7-10 days, to prevent root rot. Succulents and cacti, as you might expect, need even less frequent watering, sometimes only every 2-4 weeks, depending on humidity and light exposure. Overwatering is often more detrimental than underwatering, as it starves roots of oxygen.
To accurately gauge your plants’ thirst and avoid common watering mistakes, employ these simple techniques:
- The Finger Test: Insert your finger about an inch or two (2-5 cm) into the soil. If it feels dry to the touch, it’s likely time to water. If it still feels moist, check again in a day or two.
- Soil Moisture Meter: For more precision, an inexpensive soil moisture meter can give you an exact reading of the moisture level at the root zone, helping to remove guesswork.
- Pot Weight: Over time, you’ll learn to recognize the difference in weight between a fully watered pot and a dry one. A noticeably lighter pot usually signals it’s time for a drink.
Remember that factors like ambient humidity, room temperature, pot material (porous terracotta dries faster than glazed ceramic), and light exposure will all influence how quickly your plants’ soil dries out. In drier indoor environments, especially during winter with heating systems on, you might need to water more frequently or consider boosting humidity around your plant wall. Misting foliage (for plants that appreciate it, like Calatheas) or placing pebble trays filled with water beneath pots can help increase localized humidity. Also, don’t forget about plant nutrition; a balanced liquid fertilizer applied during the active growing season (spring and summer) can further support your plants’ health and vibrant growth, but always dilute it according to package instructions to avoid fertilizer burn.
Patience and observation are key. Take the time to get to know each plant on your wall, understanding its unique signals for thirst and contentment. Over time, you’ll develop an intuitive understanding, becoming a confident and successful plant parent for your beautiful indoor living wall.
Long-Term Care and Maintenance for a Flourishing Living Wall
Building your plant wall is just the beginning of your journey; consistent long-term care will ensure its continued beauty and vitality. Beyond mastering watering schedules, a few routine maintenance tasks will keep your green companions healthy and happy, allowing your living wall to flourish for years to come:
- Dusting Leaves: Over time, dust can accumulate on plant leaves, hindering photosynthesis and making them appear dull. Gently wipe down larger leaves with a soft, damp cloth. For smaller, more delicate foliage, a soft brush or a gentle shower in a sink can work wonders.
- Pest Control: Regularly inspect your plants for signs of common houseplant pests like spider mites, mealybugs, or aphids. Early detection is crucial for effective treatment. Most common pests can be treated with insecticidal soap or neem oil, applied according to package instructions. Isolate affected plants immediately if necessary to prevent pests from spreading to your entire wall.
- Pruning and Trimming: Remove any yellowing, brown, or dead leaves to encourage new, healthy growth and maintain a neat, tidy appearance. Pruning can also help shape your plants, manage their size, and encourage bushier growth, especially for trailing varieties that might become too leggy.
- Rotation: If your plant wall doesn’t receive perfectly even light, or if certain plants are showing signs of leaning towards a light source, consider rotating your pots periodically. This ensures all sides of the plants get adequate light exposure, promoting balanced growth and preventing uneven development.
- Repotting: As your plants grow, they may become root-bound, meaning their roots have filled the pot and are circling. Signs include water draining straight through quickly, stunted growth, or roots emerging from drainage holes. Repotting into a slightly larger pot with fresh, well-draining soil will give them room to expand and continue thriving.
By dedicating a little time each week or month to these simple yet essential care practices, your indoor plant wall will not only survive but truly thrive, becoming a continuously evolving, breathtaking piece of living art in your home. Enjoy the journey of nurturing your green oasis!
Disclaimer: This post contains affiliate links, meaning we may earn a small commission if you make a purchase through them, at no extra cost to you. Please note that some products mentioned were provided by partners (Overstock and Tonkadale) for this feature; however, all opinions expressed are our own and based on genuine experience, with no monetary exchange influencing our recommendations.