

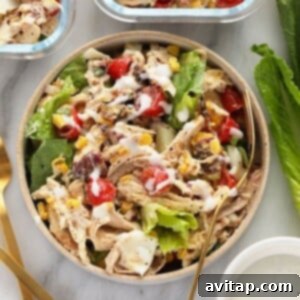
Fuel your week with a vibrant, protein-packed meal that’s both delicious and incredibly easy to prepare! This **Rotisserie Chicken Cobb Salad** comes together in under 30 minutes, making it the perfect solution for busy schedules and healthy eating goals. Featuring tender shredded rotisserie chicken, crisp vegetables, hard-boiled eggs, savory bacon, and a delightful Greek yogurt blue cheese dressing, this salad is a flavor explosion that will keep you satisfied and energized.
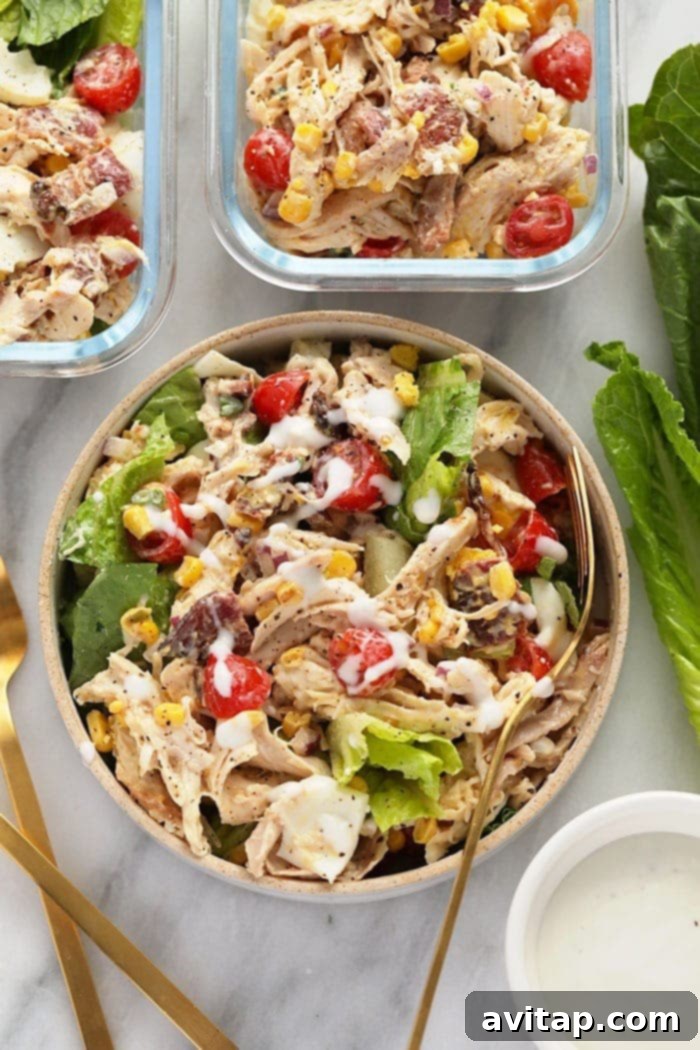
Effortless Lunch Meal Prep: Your Key to Healthy Eating
In today’s fast-paced world, finding time for healthy eating can be a challenge. That’s where **easy lunch meal prep** becomes a true game-changer! Imagine having delicious, nutritious meals ready to grab and go all week long, saving you precious time and ensuring you stick to your wellness goals. This **Rotisserie Chicken Cobb Salad** embodies everything we love about efficient meal prep: it’s incredibly simple to assemble, unbelievably tasty, and boasts an impressive 45g of protein per serving. Say goodbye to dull desk lunches and hello to a week of satisfying, flavorful meals!
Prepping your lunches in advance not only saves valuable time during hectic weekdays but also empowers you to make healthier food choices. When you have a ready-made, balanced meal like this Cobb salad waiting for you, you’re significantly less likely to reach for less nutritious, quick-fix options or expensive takeout. The substantial protein content from the chicken, eggs, and Greek yogurt dressing is specifically designed to keep you feeling full, satiated, and mentally focused throughout the afternoon, effectively preventing those dreaded midday energy slumps and unhealthy snack cravings. Embrace the unmatched convenience, the remarkable nutritional benefits, and the sheer joy of this fantastic recipe to completely transform your lunch routine into a highlight of your day.
Crafting Your Perfect Rotisserie Chicken Cobb Salad: A Step-by-Step Guide
Making a delicious, restaurant-quality **Cobb salad with rotisserie chicken** is surprisingly straightforward and incredibly rewarding. We’ll meticulously guide you through each essential step, ensuring that you create a vibrant, flavorful, and perfectly balanced dish that’s equally impressive for serving to a gathering of friends or conveniently portioned and prepped for your entire week’s lunches. The inherent beauty and primary advantage of utilizing pre-cooked rotisserie chicken lie in its unparalleled convenience; it drastically cuts down your overall preparation time by eliminating the need for extensive cooking, all without compromising on that tender, savory flavor that makes this salad so appealing.
Step 1: Preparing the Star – Rotisserie Chicken
Begin your salad creation by selecting a medium-sized, succulent rotisserie chicken from the deli section of your local grocery store. Rotisserie chickens are a fantastic culinary shortcut because they are not only incredibly budget-friendly but also offer a flavorful, moist, and tender base for your salad, completely eliminating the need for lengthy roasting or grilling. Carefully **debone and shred the chicken** into perfect, bite-sized pieces. You can easily achieve this using your clean hands, two forks, or for an even quicker method, a stand mixer fitted with a paddle attachment. Once shredded, set the tender chicken aside; it’s now perfectly prepared to become the hearty and delicious centerpiece of your exquisite Cobb salad.
Step 2: Perfectly Hard-Boiled Eggs for Creamy Texture
Next, we’ll turn our attention to preparing the **hard-boiled eggs**, a quintessential Cobb salad component that contributes significant richness, creamy texture, and an additional boost of protein. Bring a medium pot of water to a vigorous rolling boil over high heat. Gently lower the eggs into the rapidly boiling water using a spoon or a slotted skimmer, then continue to boil for precisely 8 minutes to achieve a firm, fully cooked yolk that’s not overly dry. Immediately after boiling, remove the eggs and transfer them to a waiting ice bath for a full 5 minutes. This crucial step serves a dual purpose: it instantly halts the cooking process, preventing the unsightly gray-green ring around the yolk, and also makes the eggs remarkably easier to peel. Once thoroughly cooled, carefully peel and chop the eggs, then set them aside with your shredded chicken.
Step 3: Vibrant and Fresh Vegetable Preparation
Now it’s time to infuse your salad with a burst of vibrant color, refreshing crunch, and essential nutrients by preparing your fresh vegetables. **Prepare the veggies** by halving a cup of sweet, ripe cherry tomatoes; these will add delightful bursts of juiciness and natural sweetness to each bite. Finely dice one-third cup of crisp red onion; its distinctive sharp, pungent flavor provides a wonderful, zesty contrast to the richer ingredients in the salad. For the yellow corn, if you’re using frozen corn, simply run cool water over it in a colander until it’s completely thawed. If you opt for canned corn, ensure you drain and rinse it thoroughly to remove excess sodium and any residual canning liquid. These fresh, colorful additions are absolutely key to creating a well-rounded, visually appealing, and texturally dynamic Cobb salad.
Step 4: Achieving Crispy Bacon Perfection
No truly authentic Cobb salad is ever complete without the irresistible, savory crunch of perfectly cooked bacon. **Prepare the bacon** by pan-frying four strips of thick-cut bacon over medium-high heat. Cook for approximately 8-10 minutes, making sure to flip the strips halfway through, until each piece reaches your desired level of golden-brown crispness. For an even more consistent and hands-off crispy result, you can also bake it in the oven or cook it efficiently in an air fryer. Once cooked to perfection, carefully remove the bacon and transfer it to a plate generously lined with a paper towel to absorb any excess grease. This vital step ensures your bacon is perfectly crisp and flavorful, not greasy. After allowing it to cool slightly, roughly chop the bacon into delectable bits and add it to your growing collection of perfectly prepared salad ingredients.
Step 5: Assembling Your Delicious Cobb Salad Masterpiece
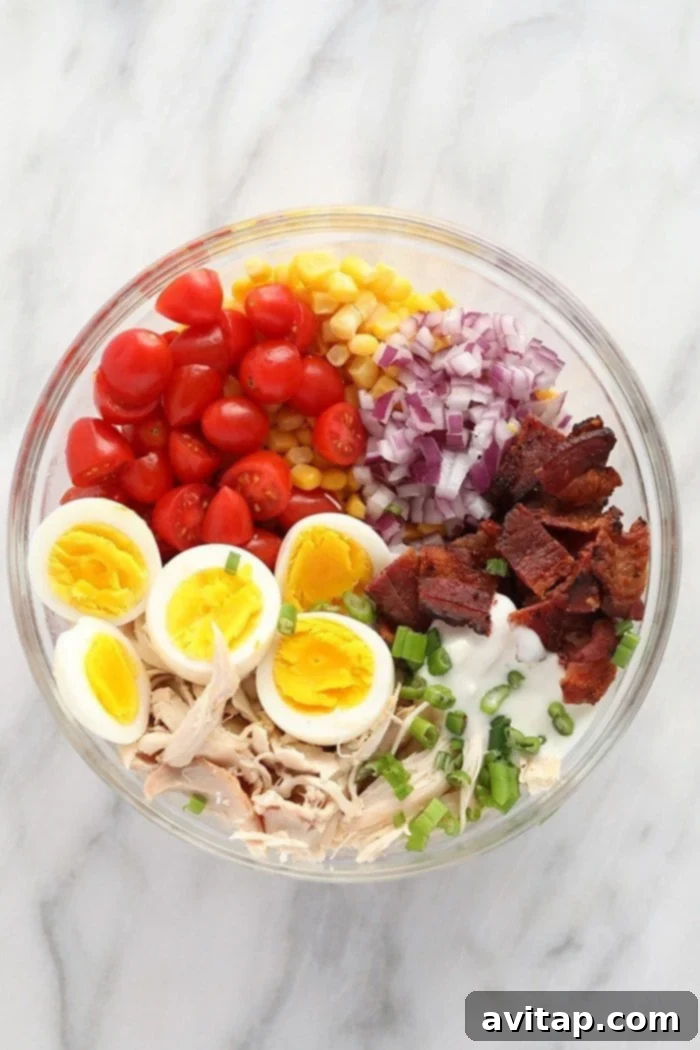
With all your individual components now meticulously prepared and ready, it’s time for the grand finale: the thoughtful **assembly of your chicken cobb salad**. In a generously sized mixing bowl, gently combine the tender shredded rotisserie chicken, the creamy diced hard-boiled eggs, the delightful chopped crispy bacon, the juicy halved cherry tomatoes, the pungent finely diced red onion, and the vibrant yellow corn. Take your time to toss these diverse ingredients gently and thoroughly until they are uniformly combined, ensuring an even distribution of all the wonderful flavors, textures, and colors throughout the bowl. This creates the rich, satisfying, and visually appealing base of your salad, now perfectly poised and ready for the final touch: the dressing.
Step 6: The Finishing Touch – Creamy Greek Yogurt Dressing
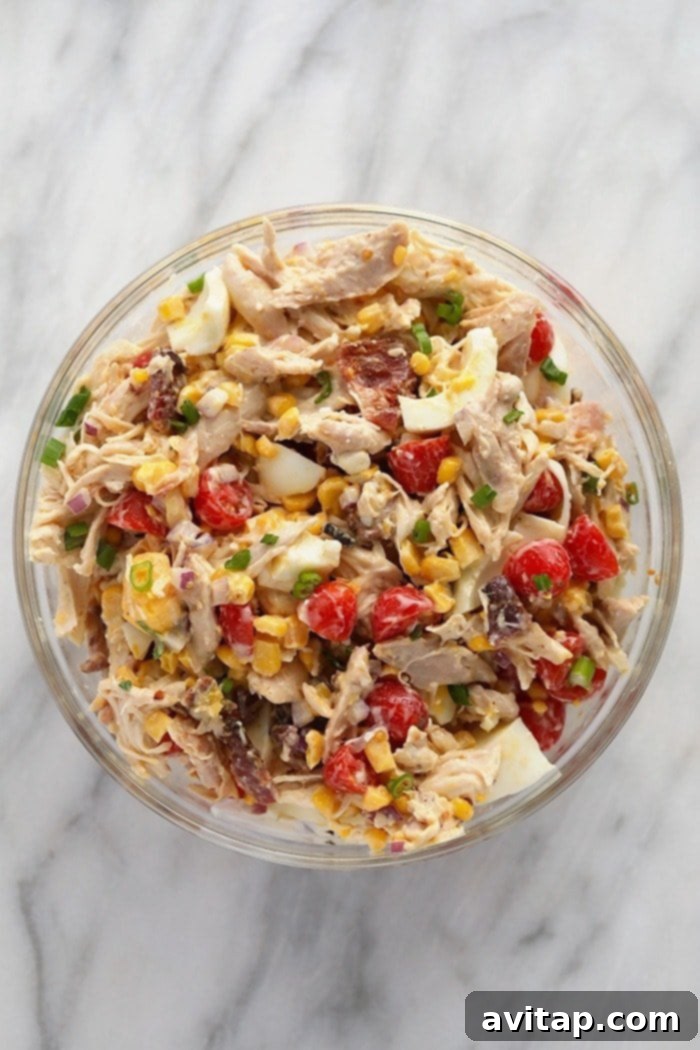
The dressing is undeniably what truly brings this multifaceted salad to its ultimate life, harmonizing all the distinct flavors into a cohesive, delectable experience. Generously **pour in the homemade Greek yogurt blue cheese dressing** (the recipe for which is detailed just below!) over your beautifully assembled ingredients. Toss everything once more with care until every single piece is lightly and evenly coated with the creamy, tangy, and exquisitely flavored dressing. Before serving, make sure to taste the salad and then season it with a pinch of salt and freshly ground black pepper entirely to your liking and preference. This final step of dressing and seasoning truly ties all the diverse elements together, creating a harmonious and incredibly satisfying dish that’s ready to impress.
Step 7: Serve Immediately or Smartly Meal Prep
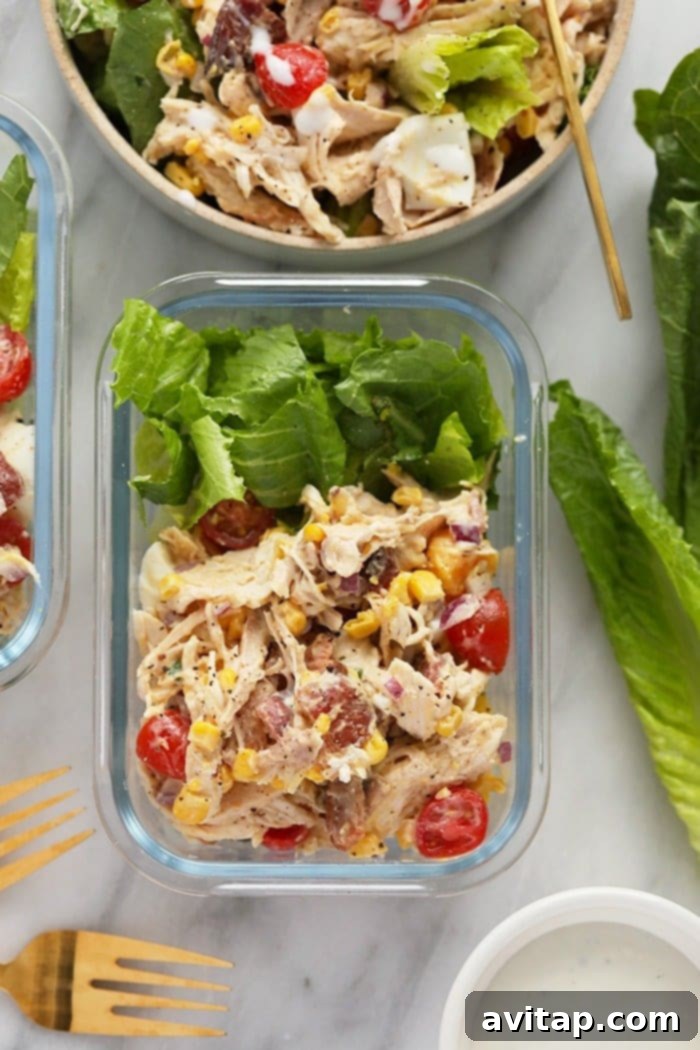
You now have two fantastic and convenient options for enjoying your culinary masterpiece! For immediate indulgence, simply **serve the salad immediately**, tossed with 1-2 cups of fresh, crisp romaine lettuce. The romaine adds a delightful, refreshing lightness and an essential textural contrast to the heartier ingredients. Alternatively, for smart and efficient **meal prep for later**, store the prepared chicken salad mixture (without the romaine lettuce) and the chopped romaine lettuce in separate, airtight containers in your refrigerator. This incredibly smart storage method is crucial as it expertly prevents the lettuce from becoming soggy or limp, thereby preserving its perfectly crisp texture and vibrant appeal for up to 3-5 days. With this thoughtful meal prep approach, you can confidently look forward to enjoying fresh, healthy, and incredibly flavorful lunches every single day without any extra fuss or last-minute preparation!
Whip Up Your Own Healthier Greek Yogurt Blue Cheese Dressing
Elevate your Cobb salad to new heights with a homemade, incredibly flavorful **Greek yogurt blue cheese dressing**! Making your own dressing from scratch is an exceptionally rewarding experience, primarily because it grants you complete control over the quality of your ingredients, allows you to meticulously adjust the flavors to perfectly suit your personal preference, and ensures your dressing is entirely free from any unnecessary additives or preservatives often found in many store-bought varieties. This healthier, lighter twist on a classic, rich blue cheese dressing cleverly utilizes plain Greek yogurt to achieve a wonderfully creamy texture and provide a significant protein boost, all without compromising on that distinctive, tangy, and pungent blue cheese flavor that makes it so beloved.
While the process of making your own dressing is simple and highly recommended for superior taste and health benefits, if you find yourself truly pressed for time on a particularly hectic day, a good quality store-bought Greek yogurt blue cheese dressing (brands like OPA Greek Yogurt Blue Cheese Dressing are often a decent option) can serve as a convenient and acceptable alternative. However, we confidently predict that once you experience the fresh, vibrant, and customizable taste of this homemade version, you might just find yourself never wanting to go back to pre-made dressings!
Step 1: Combine All Dressing Ingredients
To begin crafting your exceptional dressing, meticulously gather all the necessary ingredients: plain Greek yogurt, blue cheese crumbles, apple cider vinegar, fresh lemon juice, water, black pepper, and salt. **Place all of these ingredients for the dressing into a small mixing bowl.** Using a whisk or a sturdy fork, vigorously mix them together thoroughly until they are well combined and smoothly integrated. The initial aim here is to ensure all the liquid and creamy components are fully blended and the foundational flavors are well dispersed before you address the texture of the blue cheese itself.
Step 2: Customizing Blue Cheese Texture
For that authentic, satisfying blue cheese dressing experience, a certain level of texture is paramount. To achieve this, **use a fork to gently but deliberately partially break up the blue cheese crumbles** into smaller, more manageable chunks. This strategic action allows the intense and distinctive blue cheese flavor to more effectively disperse throughout the entire dressing, while still providing delightful, discernible pockets of cheesy intensity in every spoonful. If you are a true blue cheese enthusiast and unequivocally prefer an extra chunky dressing, characterized by larger, more pronounced pieces of cheese, you can certainly feel free to completely skip this step and leave the crumbles in their original, larger form!
Step 3: Achieving Your Desired Dressing Consistency
The final consistency of your homemade dressing is an entirely personal preference and completely up to your individual liking. To achieve your ideal texture, **add more water as needed to thin out the dressing** until it reaches your desired consistency. It’s important to note that the thickness of plain Greek yogurt can vary significantly between brands and even batches, meaning the exact amount of water required will depend both on the initial thickness of your yogurt and your personal preference for how thick or thin you want your dressing. Add water in very small, controlled increments, perhaps starting with a teaspoon at a time, mixing well after each addition, until the dressing is perfectly pourable, smooth, and coats a spoon beautifully, but without being excessively thick or too watery. This meticulous approach ensures a dressing that will evenly coat your salad ingredients without clumping or running off.
Versatile Ways to Enjoy Your Protein-Rich Chicken Cobb Salad
This delightful **Rotisserie Chicken Cobb Salad** is much more than just a typical side dish; it’s an incredibly versatile and hearty meal that lends itself to a myriad of delicious serving possibilities. While serving it freshly tossed with crisp romaine lettuce, as elegantly suggested in the recipe, remains a delicious and timeless classic, we wholeheartedly encourage you to unleash your culinary creativity and experiment! Its robust, savory, and incredibly flavorful profile allows for numerous fantastic serving options that can cater to various preferences, dietary needs, and different meal occasions. If you happen to discover a new, innovative, or exceptionally delicious way to savor this chicken salad, please don’t hesitate to share your brilliant ideas with us in the comments section below – we absolutely love hearing from our community!
- **In a Lettuce Wrap:** For an exceptionally light, refreshing, and carb-conscious option, generously spoon the chicken salad mixture into large, crisp lettuce leaves (such as butter lettuce, iceberg, or sturdy romaine hearts) for a satisfyingly crunchy and refreshing handheld wrap.
- **On a Sandwich:** Transform this hearty salad into a remarkably satisfying and substantial sandwich by spreading it generously between two slices of your favorite bread – perhaps a rustic whole-grain sourdough or a soft brioche bun. For an extra touch, add a fresh slice of ripe tomato or a few vibrant spinach leaves.
- **On a Piece of Toast:** This makes for a perfect quick breakfast, a delightful brunch option, or a wholesome snack. Simply serve a generous scoop of the chicken salad on a warm, crispy piece of toasted artisan bread, a toasted English muffin, or even a bagel for added chewiness.
- **In a Tortilla or Other Wrap:** For a more substantial and portable handheld meal, expertly roll the salad up in a soft flour tortilla, a warm pita bread, or a whole-wheat wrap. This is an ideal solution for convenient lunchboxes, picnics, or meals on the go.
- **With Tortilla Chips:** Embrace the playful side of eating by scooping it up like a delicious, chunky dip! The creamy, yet chunky texture of the salad pairs wonderfully with crispy, salty tortilla chips for a fun, easy, and incredibly flavorful snack or a delightful appetizer for sharing.
- **On Its Own with a Fork!** Sometimes, the purest pleasures are found in simplicity. This hearty, well-balanced, and incredibly flavorful salad is perfectly delicious and satisfying enough to be thoroughly enjoyed entirely on its own, straight from the bowl, for a truly fulfilling and wholesome meal that requires no additional fuss.
Smart Storage for Lasting Freshness: Maximizing Meal Prep Success
One of the most significant and appealing advantages of this particular recipe is its outstanding suitability for efficient **meal prepping**. To ensure that your delectable **chicken cobb salad** remains optimally fresh, vibrant, and utterly delicious throughout your entire week, proper and strategic storage techniques are absolutely crucial. The prepared salad mixture (specifically, the chicken, eggs, bacon, tomatoes, onion, and corn, *without* the romaine lettuce) will keep beautifully when stored in an airtight container placed in the refrigerator for a commendable period of 3 to 5 days. It is critically important to remember to keep the chopped romaine lettuce completely separate from the main salad mixture until just moments before you intend to serve. This simple yet highly effective storage tip is key: it expertly prevents the delicate lettuce from wilting, becoming soggy, or losing its appealing crispness, thereby preserving its vibrant texture and fresh appeal. By meticulously following this smart storage method, you can confidently look forward to enjoying fresh, healthy, and incredibly flavorful lunches every single day of your busy week without any additional fuss or last-minute preparation!
Explore More Delicious & Healthy Salad Creations
If you’ve fallen in love with the simplicity, fresh ingredients, and robust flavors of this Rotisserie Chicken Cobb Salad, then you’re in for a treat! We’re confident you’ll thoroughly enjoy these other fantastic and equally delicious salad recipes from our collection, perfect for any meal or occasion:
- 4 Healthy Chicken Salad Recipes
- Shaved Brussels Sprouts Salad
- Southwest Chicken Salad
- Mexican Street Corn Salad
- Healthy Asian Chicken Salad
Boost Your Week with More Convenient Meal Prep Recipes
Make your weekdays significantly easier, more organized, and healthier by incorporating these other incredibly convenient and delicious meal prep ideas into your routine. Prepare them in advance, and enjoy stress-free, wholesome meals all week long!
- Make Ahead Freezer Burritos
- Healthy Orange Chicken
- Instant Pot Shredded Chicken
- Black Bean Quinoa Chili
Make This Protein-Packed Recipe Today!
Rotisserie Chicken Cobb Salad
Your lunch for the week is ready in less than 30 minutes with this protein-packed Rotisserie Chicken Cobb Salad!
By: Emily Richter
Prep Time: 20 minutes
Cook Time: 10 minutes
Total Time: 30 minutes
Servings: 6
Ingredients
For the Cobb Chicken Salad:
- 1 medium rotisserie chicken, fully deboned and shredded
- 4 large hard-boiled eggs, carefully peeled and diced
- 4 strips thick-cut bacon, cooked until crispy and then chopped
- 1 cup cherry tomatoes, thoroughly washed and halved
- 1/3 cup red onion, very finely diced for a milder flavor
- 1 cup yellow corn (if frozen, ensure it’s thawed; if canned, drain and rinse well)
- Salt and freshly ground black pepper, to taste
- 6-8 cups chopped romaine lettuce (to be served separately or tossed just before eating)
For the Greek Yogurt Blue Cheese Dressing*:
- 1/2 cup plain Greek yogurt (any fat percentage will work, choose your preference)
- 2 oz. blue cheese crumbles
- 1/2 teaspoon apple cider vinegar
- 1 tablespoon fresh lemon juice
- 1 tablespoon water* (start with this amount, add more gradually as needed to thin)
- 1/8 teaspoon black pepper
- 1/8 teaspoon salt, or adjust to your personal taste
Instructions
Preparing the Greek Yogurt Blue Cheese Dressing:
- First, begin by preparing your homemade Greek Yogurt Blue Cheese Dressing.
- Place all listed ingredients for the dressing (Greek yogurt, blue cheese, apple cider vinegar, lemon juice, water, black pepper, and salt) into a small bowl and mix them together thoroughly until well combined.
- Using a fork, gently partially break up the blue cheese crumbles into smaller chunks throughout the dressing. This step can be adjusted based on your preference for a chunkier or smoother dressing.
- Add more water gradually, as needed, to thin out the dressing until it reaches your desired pourable consistency. Stir well after each addition.
- Set the prepared dressing aside to allow the flavors to meld while you prepare the salad components.
Assembling the Cobb Chicken Salad:
- First, **debone and shred a medium rotisserie chicken** into bite-sized pieces. Set the shredded chicken aside.
- Next, **prepare the hard-boiled eggs**. Bring a medium pot of water to a rolling boil over high heat. Carefully add the eggs to the boiling water and continue to boil for 8 minutes. Immediately remove the eggs from the hot water and transfer them to an ice bath for 5 minutes. Once cooled, peel and chop them, then set aside.
- **Prepare the veggies** by halving the cherry tomatoes and finely dicing the red onion. If using frozen corn, thaw it under cool water; if using canned corn, drain and rinse thoroughly.
- **Prepare the bacon** by pan-frying 4 strips of thick-cut bacon over medium/high heat for approximately 10 minutes, or until the bacon has reached your desired level of crispness. Remove the cooked bacon to a paper towel-lined plate to absorb excess grease, then roughly chop it.
- Finally, **assemble the salad**. In a large mixing bowl, combine the shredded chicken, diced hard-boiled eggs, chopped crispy bacon, halved cherry tomatoes, finely diced red onion, and yellow corn. Toss all ingredients gently until they are well combined.
- Pour in the prepared Greek yogurt blue cheese dressing over the salad mixture and toss one more time to ensure all ingredients are evenly coated. Season with additional salt and pepper to taste, if desired.
- **Serve immediately** tossed with 1-2 cups of fresh romaine lettuce, or **meal-prep for later** by storing the chicken salad mixture and the chopped romaine lettuce in separate airtight containers in the refrigerator.
Tips & Notes
Greek yogurt dressing: For ultimate convenience and if you’re short on time, you have the option to use a high-quality store-bought Greek yogurt blue cheese dressing instead of making your own from scratch.
Watch It
Video Title: Rotisserie Chicken Cobb Salad
Video Description: Your lunch for the week is ready in less than 30 minutes with this protein-packed Rotisserie Chicken Cobb Salad! Watch how to make this delicious and easy meal prep recipe.
Nutrition Information (Per Serving)
Calories: 325 kcal
Carbohydrates: 11 g
Protein: 45 g
Fat: 11 g
Fiber: 2 g
Sugar: 4 g
Nutrition information is automatically calculated and should therefore be used only as an approximation, not as precise dietary advice.
Love this recipe? We’d be thrilled if you leave a comment below!
Don’t forget to tag your amazing culinary posts on social media with the hashtag #fitfoodiefinds – we’d absolutely love to see what delicious creations you’re whipping up!