
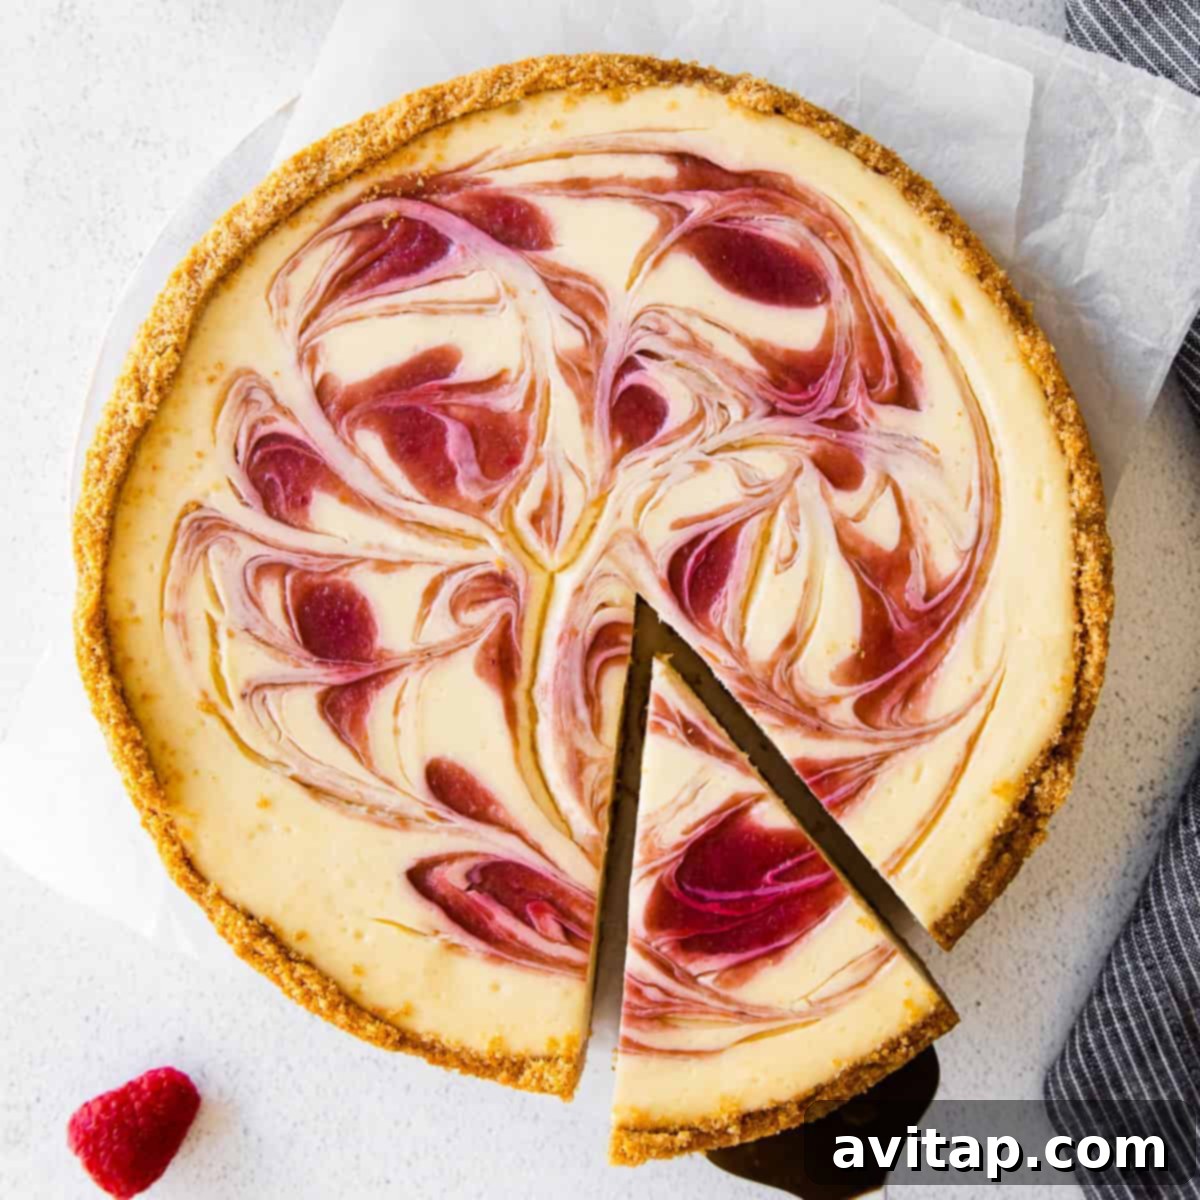
Prepare to be enchanted by the most incredibly creamy and utterly delicious Greek Yogurt Cheesecake you’ve ever tasted! This dessert masterpiece is not only irresistibly flavorful but also a healthier alternative to traditional cheesecake, thoughtfully crafted with a simple, buttery graham cracker crust and elegantly topped with a vibrant, homemade raspberry swirl. It’s the perfect harmony of indulgent pleasure and wholesome goodness, proving that healthy eating can indeed be wonderfully decadent.
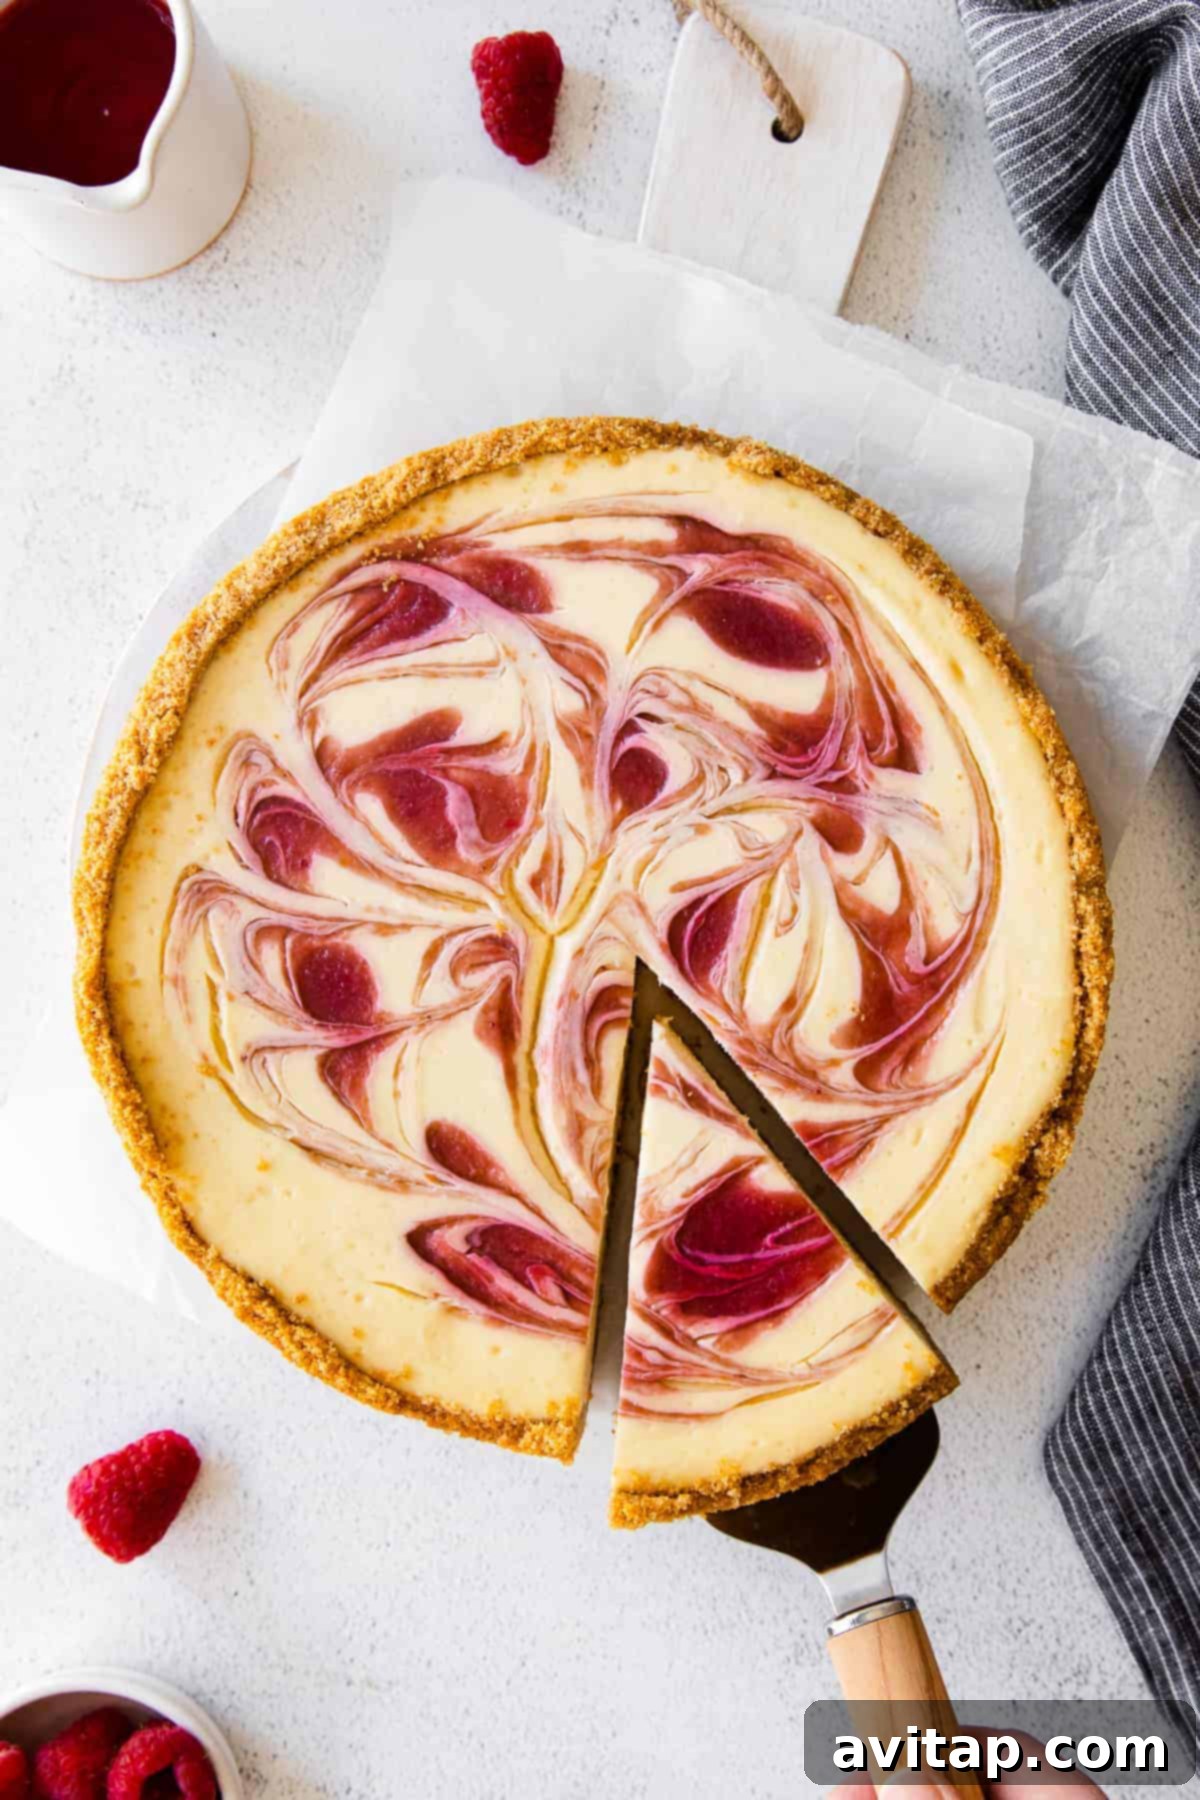
Indulge in Healthy Decadence: Our Creamy Greek Yogurt Cheesecake
Few desserts can rival the universal appeal of a rich, creamy slice of cheesecake. But what if we told you that you could savor all that luxurious texture and incredible flavor without the usual calorie overload? Our meticulously developed healthy cheesecake recipe transforms this desire into a delicious reality. We’ve mastered a method that retains the iconic smoothness and richness of classic cheesecake while significantly enhancing its nutritional value, making it a dessert you can truly feel good about.
The Secret to a Healthier and High-Protein Cheesecake: Greek Yogurt
A common question we hear is: “How can cheesecake truly be healthy?” The ingenious secret lies in incorporating Greek yogurt. In all our cheesecake-inspired creations, ranging from our delightful chocolate chai cheesecake bars to our comforting pumpkin cheesecake bars, we strategically substitute a substantial portion of traditional cream cheese with GREEK YOGURT. This smart swap isn’t merely about reducing fat; it profoundly elevates the dessert’s overall quality and nutritional profile.
Consider the remarkable benefits: did you know that a modest 5-ounce serving of Greek yogurt typically contains an impressive 14 grams of protein? Beyond its powerful protein punch, Greek yogurt introduces a wonderful, subtle tartness to any cheesecake recipe. This tang beautifully cuts through the sweetness, adding a refreshing complexity and depth of flavor that is truly unique. When combined with cream cheese, it creates a harmonious blend that is both wonderfully creamy and surprisingly light – a textural and flavor match made in dessert heaven, offering a truly healthy alternative without compromising on the decadent experience.
Choosing the Best Greek Yogurt for Your Cheesecake
For the creamiest texture and optimal results in this recipe, we highly recommend selecting a plain Greek yogurt with a higher fat content, ideally between 2% and 5%. Brands renowned for their consistency and rich creaminess, such as Fage, often yield exceptional results, making them a preferred choice for this healthier cheesecake.
If your goal is to further enhance the protein content and achieve an even thicker, more luxurious cheesecake, consider incorporating Skyr yogurt. This Icelandic-style yogurt is celebrated for its dense, incredibly creamy consistency and its remarkably high protein levels, often surpassing those of standard Greek yogurt. Our personal favorite is Painterland Sisters Plain, which packs an impressive 18 grams of protein per 5-ounce serving. Regardless of your choice, always opt for plain, unsweetened yogurt to control the flavor and sugar content of your cheesecake.
Essential Pre-Baking Tips for a Perfect Healthy Cheesecake
To ensure your Greek yogurt cheesecake achieves that coveted creamy texture and crack-free surface, paying close attention to these preparatory steps and expert tips is crucial. These small details collectively make a significant difference in the final outcome of your homemade masterpiece.
- Utilize a Stand Mixer for Smoothness: We strongly advocate for using a stand mixer, such as a KitchenAid, to prepare your cheesecake batter. Its consistent power and ability to maintain a steady speed ensure an exceptionally smooth, lump-free mixture, preventing arm fatigue and guaranteeing uniform incorporation of ingredients.
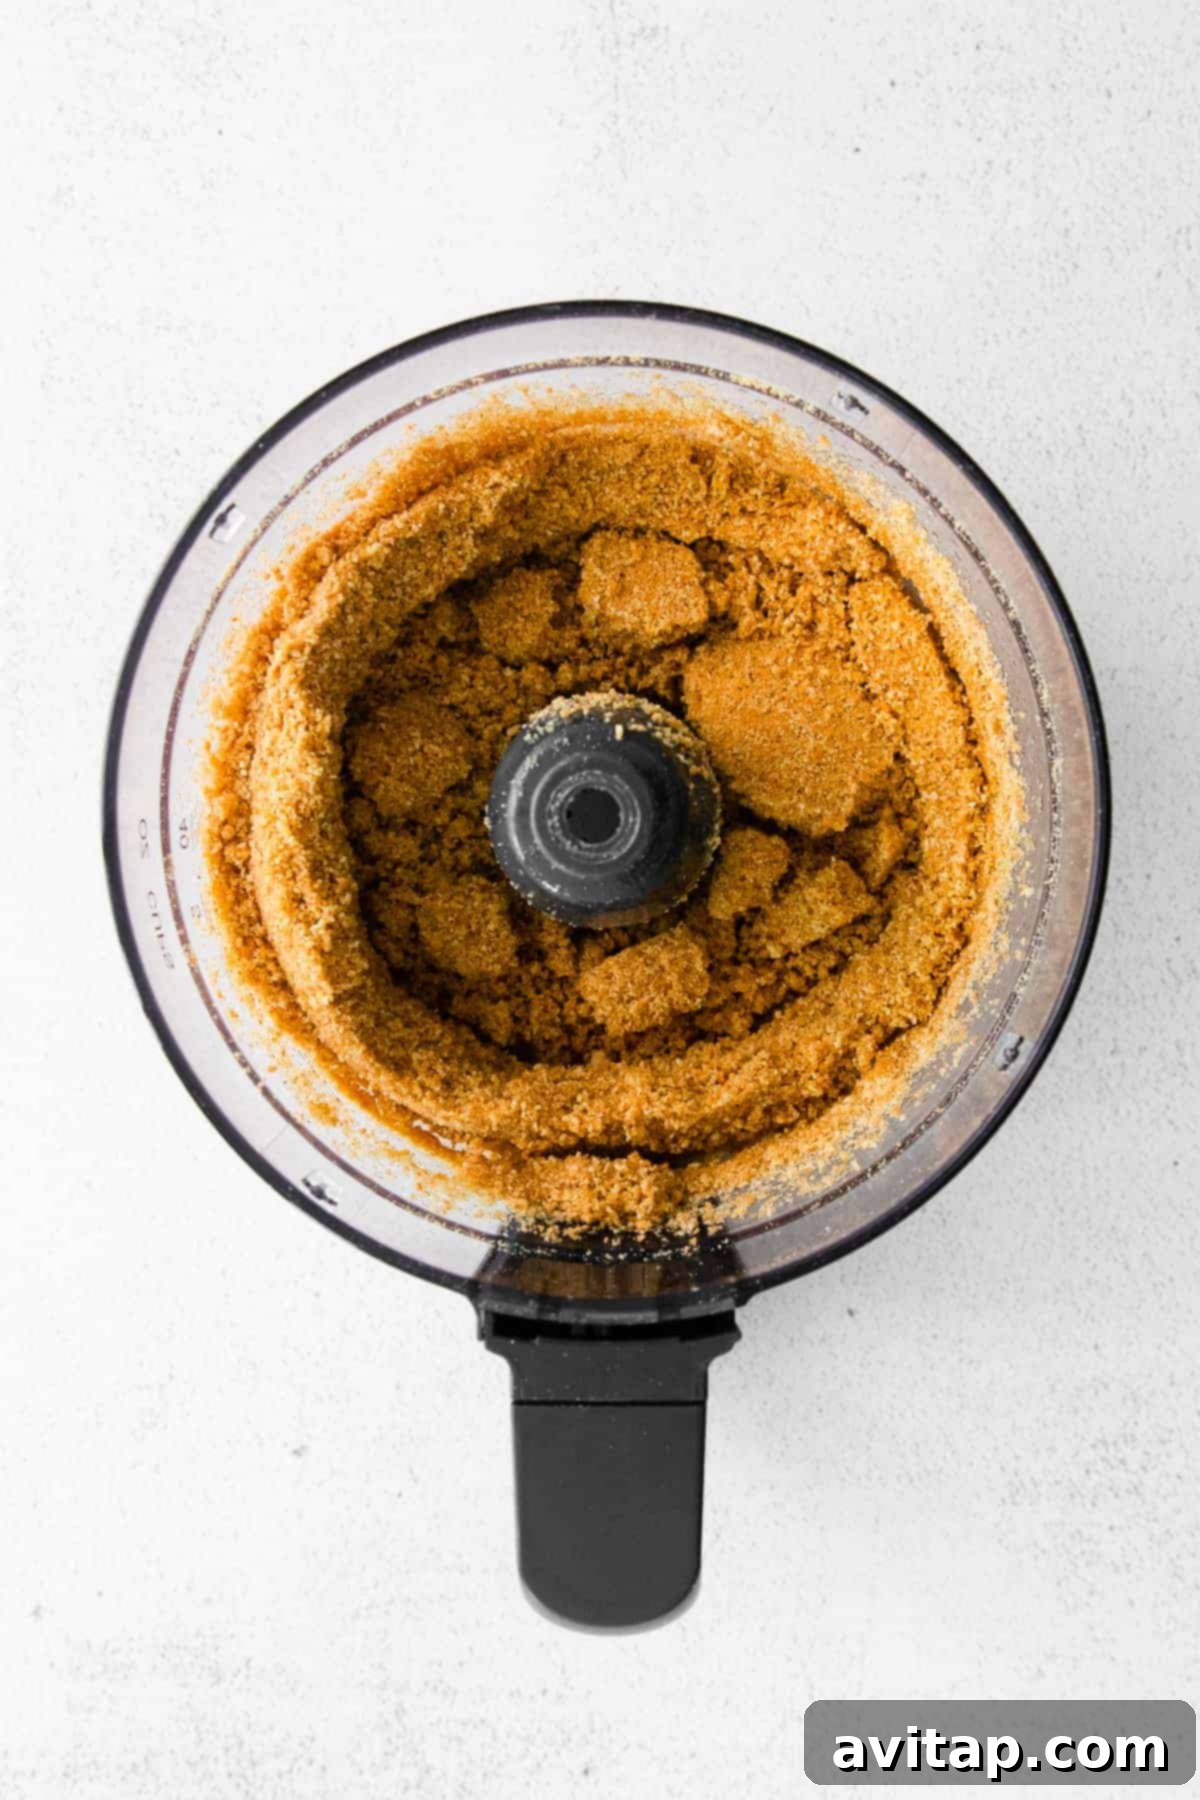
- Crafting Your Own Graham Cracker Crumbs: If you don’t have pre-crushed graham cracker crumbs, making them from scratch is incredibly simple. Just pulse whole graham crackers in a food processor for approximately 30-45 seconds until they achieve a fine, consistent crumb texture. This ensures a uniform and sturdy base for your cheesecake.
- Ensure Softened Cream Cheese is Key: This is a non-negotiable step for achieving a silky-smooth cheesecake filling. Always start with full-fat cream cheese that has been brought to room temperature. Cold cream cheese will stubbornly resist blending smoothly, resulting in an unappealingly lumpy batter, regardless of how long you mix it.
- Room Temperature Eggs are a Must: Similar to cream cheese, ensure your eggs are also at room temperature. This allows them to emulsify and incorporate more seamlessly into the batter, contributing to a wonderfully uniform texture and reducing the risk of overmixing, which can introduce excess air and lead to cracks during baking.
- Avoid Overmixing Your Batter: Once the cream cheese and Greek yogurt mixture is smooth and combined, add the eggs one at a time, mixing only until each egg is just incorporated. Overmixing, particularly after the eggs have been added, can incorporate too much air into the batter. This air expands rapidly during baking and then collapses as the cheesecake cools, creating unsightly cracks on the surface.
- Never Skip the Oven Cooling Period: This might be the most critical, yet often overlooked, step for preventing cracks. After the cheesecake has finished baking, turn off your oven and leave the cheesecake inside with the oven door slightly ajar for a full hour. This gradual, slow cooling process helps the cheesecake set gently and evenly, preventing the sudden temperature shock that is a primary cause of surface cracks.
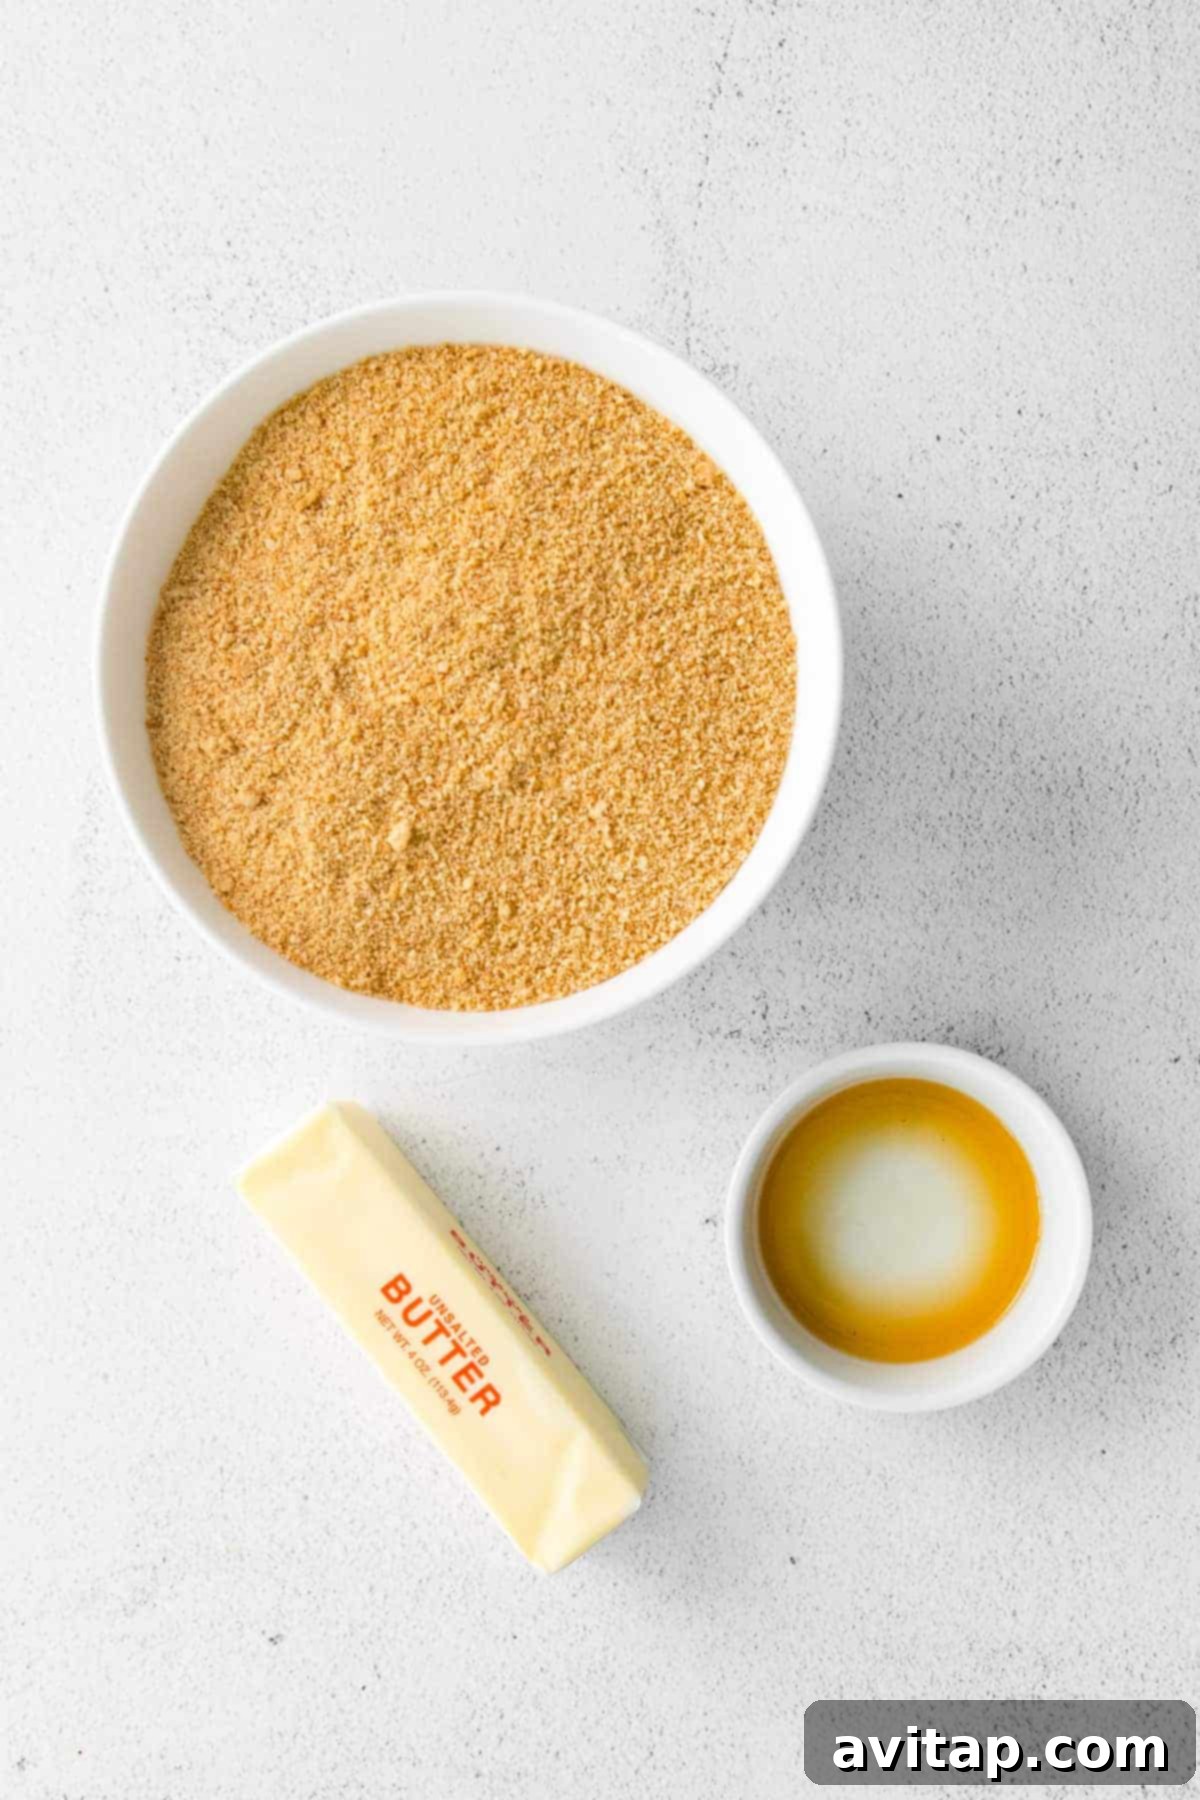
What You’ll Need: Ingredients for Your Creamy Greek Yogurt Cheesecake
This exquisite Greek yogurt cheesecake is artfully composed of three distinct yet harmonizing elements: a robust and flavorful crust, a sumptuously smooth filling, and a bright, tangy raspberry sauce. Here’s a detailed breakdown of the ingredients required for each delicious component.
Crust Ingredients
- Graham Cracker Crumbs: The timeless choice for a sweet, subtly spiced, and wonderfully textured base.
- Melted Butter: The essential binder that perfectly holds the crumbs together, ensuring a rich, firm, and flavorful crust.
- Vanilla Extract: Adds a delicate, warm aromatic depth that beautifully complements the sweet and slightly spiced notes of the graham crackers.
Customize Your Cheesecake Crust with Alternative Bases
While a classic graham cracker crust offers undeniable comfort and tradition, feel empowered to unleash your creativity and customize your cheesecake experience! You can effortlessly alter the flavor profile of your crust by experimenting with other crushed cookies. Imagine a decadent base made from crushed Oreos for a rich, chocolatey contrast, or perhaps gingersnaps to introduce a warm, spicy autumnal note. Shortbread cookies offer a buttery, delicate foundation, while even digestive biscuits can provide a delightful, wholesome crunch. The possibilities are truly endless for personalizing this delicious dessert to your taste.
Raspberry Sauce Ingredients
- Fresh Raspberries: The star of this vibrant topping, delivering a perfect balance of natural sweetness and delightful tartness.
- Water: Used to create the ideal sauce consistency and to prevent the raspberries from scorching during cooking.
- Honey: A natural, wholesome sweetener that enhances the raspberries’ inherent fruitiness without being overly saccharine.
- Vanilla Extract: An aromatic enhancer that expertly rounds out the bright, fruity notes of the raspberries, adding complexity.
- Pinch of Salt: A secret ingredient that subtly brightens and balances all the flavors, making them pop.
- Cornstarch: Acts as a crucial thickening agent, ensuring your raspberry sauce achieves that perfect, luscious consistency.
Cheesecake Filling Ingredients
- Full-Fat Cream Cheese: The foundational element for any classic cheesecake, imparting its characteristic richness and creamy structure. Remember, room temperature is absolutely essential for a smooth batter.
- Plain Greek Yogurt (2% or 5%): Our healthy hero ingredient, adding a delightful tang, boosting creaminess, and significantly increasing the protein content while contributing to a lighter dessert.
- Honey: A natural and subtly sweet counterpoint that harmonizes beautifully with the tang of Greek yogurt and the brightness of raspberries.
- Vanilla Extract: Indispensable for its warm, comforting aroma and its ability to enrich the overall flavor profile of the filling.
- Large Eggs: Serve as the primary binder for the cheesecake, essential for achieving its characteristic smooth, custard-like texture and ensuring it sets properly. Always ensure they are at room temperature.
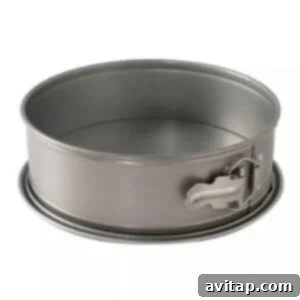
Essential Baking Tool
The Indispensable Springform Pan for Perfect Cheesecakes
For any serious cheesecake enthusiast or aspiring baker, a high-quality springform pan is an absolute kitchen essential. Its ingenious design, featuring removable sides, allows for incredibly easy release of delicate desserts, ensuring your beautifully baked cheesecake remains intact, picture-perfect, and effortless to serve. Make sure this indispensable baking item is always readily available in your culinary arsenal!
How to Make the Ultimate Healthy Greek Yogurt Cheesecake
While the instructions for creating this exquisite Greek yogurt cheesecake might appear lengthy at first glance, there’s no need to feel intimidated! We’ve meticulously broken down the entire process into three simple, manageable parts: preparing the crust, crafting the vibrant raspberry sauce, and assembling and baking the luscious cheesecake filling. Each step is clearly outlined to guide you effortlessly towards achieving an outstanding, show-stopping dessert that tastes as good as it looks.
Step 1: Prepare the Perfect Graham Cracker Crust
- Prep and Preheat: Start by preheating your oven to 350ºF (175ºC). Lightly grease a 9-inch springform pan to prevent sticking and ensure easy release of your finished cheesecake.
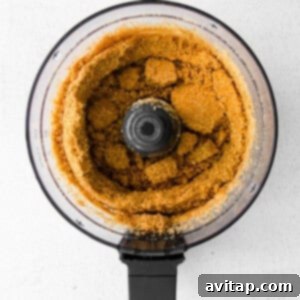
- Create Graham Cracker Crumbs: If you’re using whole graham crackers, place them into a high-speed food processor. Pulse the crackers until they transform into fine, uniform crumbs. Measure out exactly 3 cups of these crumbs, then return them to the food processor bowl. Add the melted butter and vanilla extract, and pulse again until the mixture resembles wet sand and begins to clump together. This forms the cohesive and flavorful base for your cheesecake.
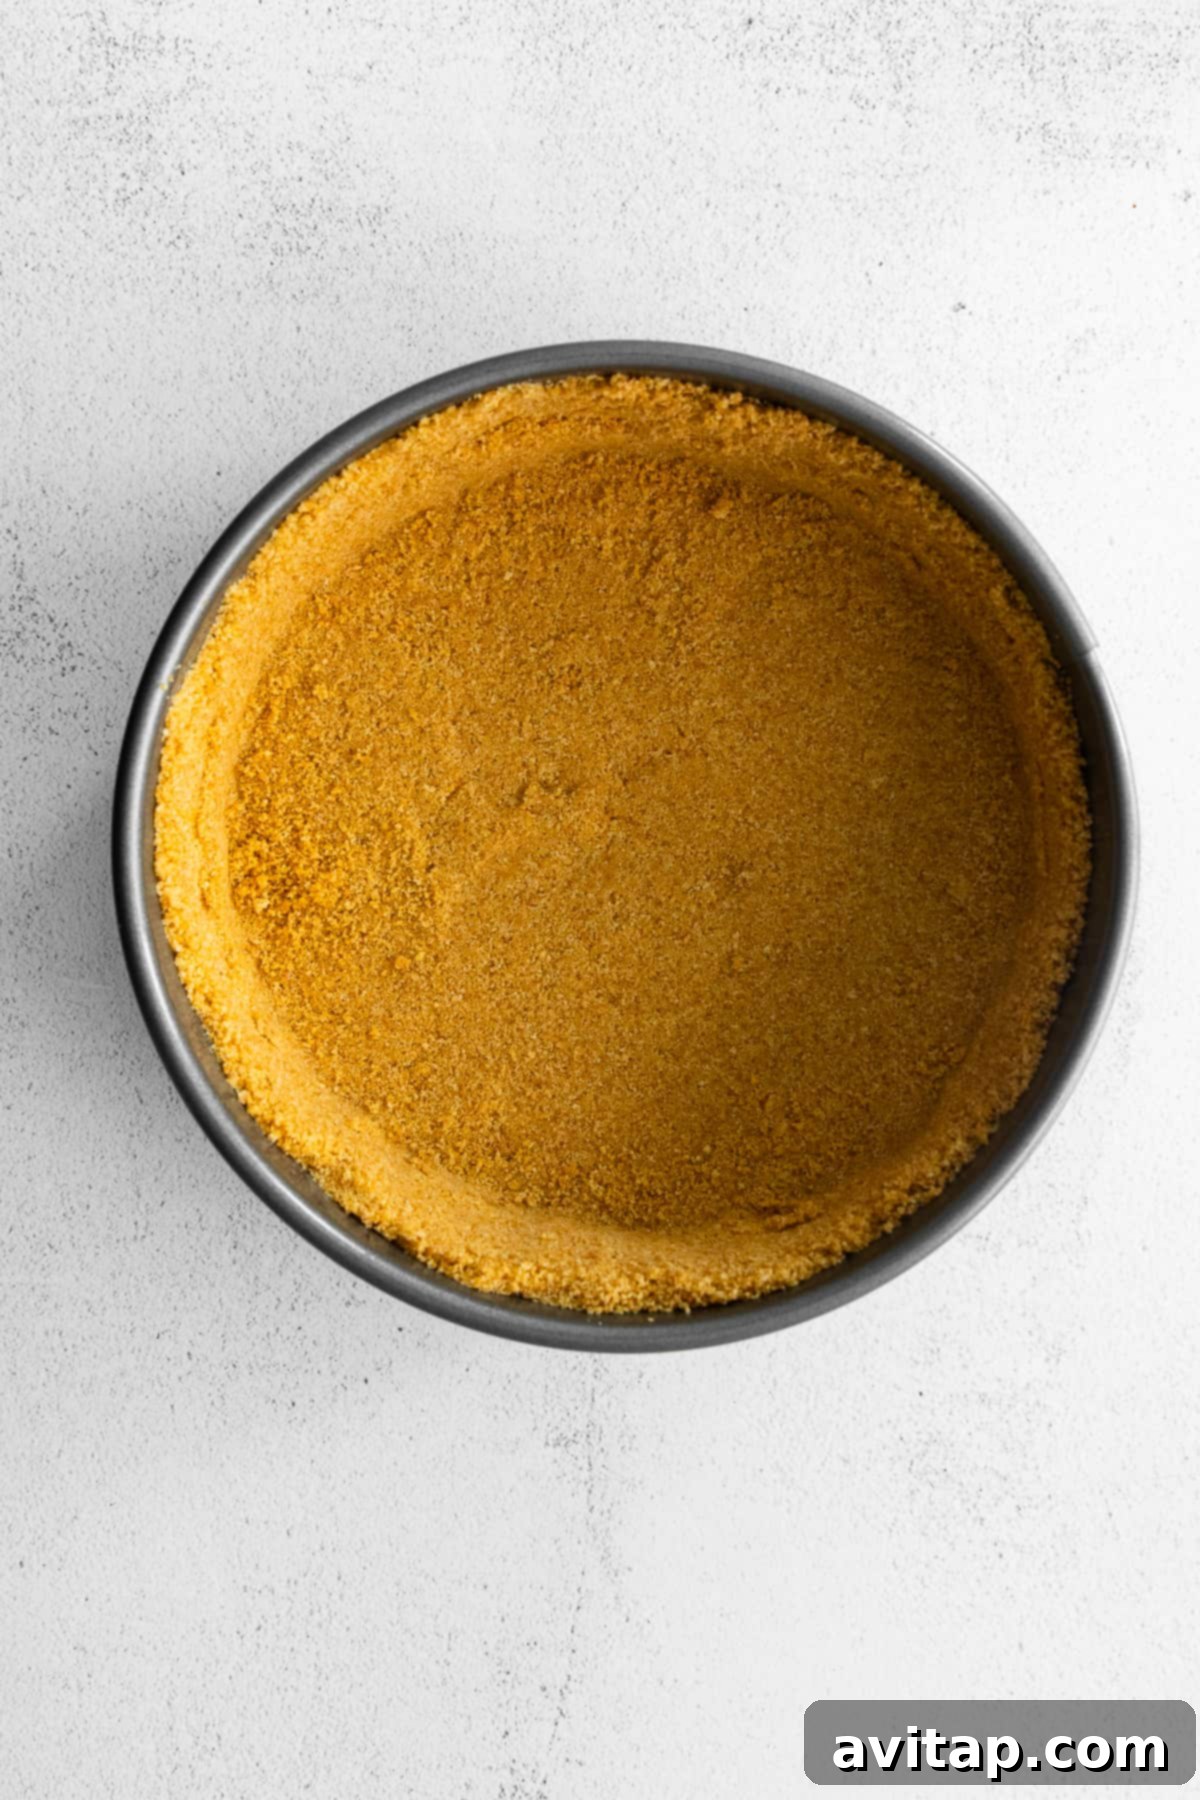
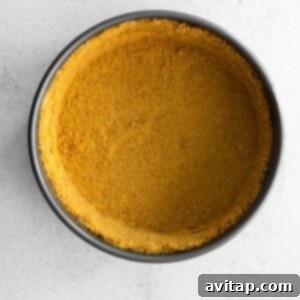
- Form the Crust: Carefully pour the graham cracker mixture into the prepared springform pan. Use the bottom of a flat measuring cup or a sturdy spatula to firmly press the crumbs evenly across the bottom of the pan. Continue pressing the mixture about ½ inch up the sides of the pan. This creates a sturdy and protective barrier, ensuring your cheesecake filling stays contained.
- Pre-bake the Crust: Bake the formed graham cracker crust in the preheated oven for just 5 minutes at 350ºF (175ºC). This brief baking period helps to set the crust, making it firm and preventing it from becoming soggy once the wet filling is added. Remove the pan from the oven and set it aside to cool completely while you prepare the other components.
Step 2: Craft the Homemade Raspberry Swirl Sauce
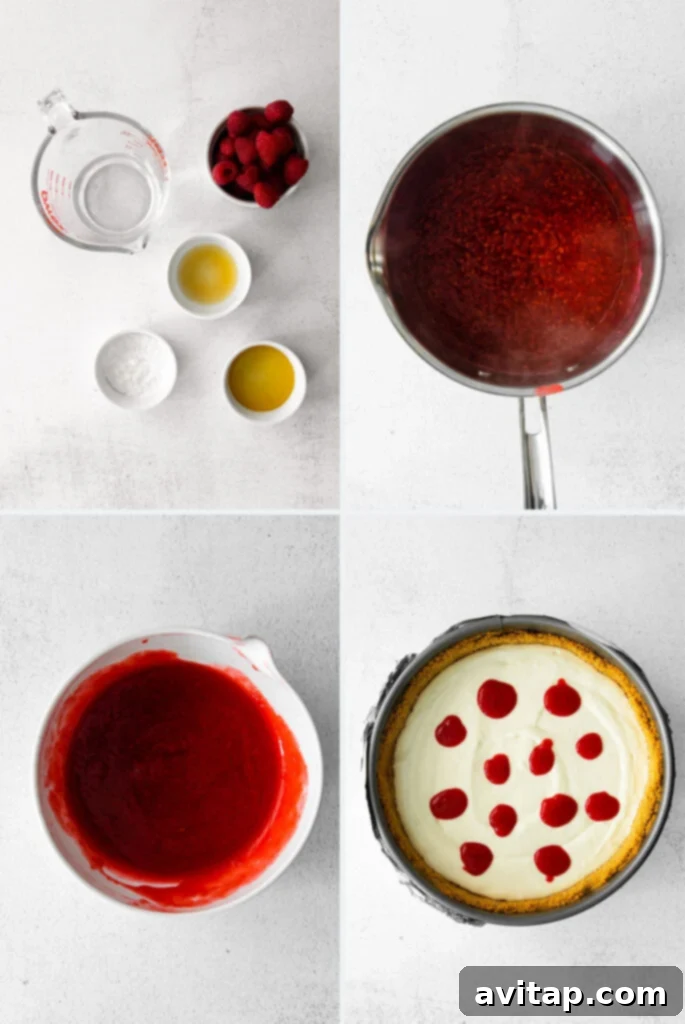
- Initiate Heating: In a small saucepan, combine the fresh raspberries, ¼ cup of water, and 1 tablespoon of honey. Gently stir these ingredients together over medium-high heat, bringing the mixture to a gentle boil.
- Simmer and Mash: Once the mixture reaches a boil, reduce the heat to low. Using a wooden spoon or a potato masher, gently smash the raspberries, breaking them down into a thick, jam-like consistency. Continue to stir occasionally to prevent sticking.
- Infuse Flavors: Add the vanilla extract and a tiny pinch of salt to the simmering raspberry mixture. Stir thoroughly to combine all the ingredients. Allow the sauce to simmer gently for another 5 minutes, giving the flavors ample time to meld and deepen beautifully. Your kitchen will smell absolutely delightful!
- Prepare Cornstarch Slurry: In a separate small bowl, whisk the remaining ¼ cup of water with the cornstarch until the cornstarch is completely dissolved and the mixture is lump-free. This creates a “slurry,” which is essential for smoothly thickening your sauce without creating clumps.
- Thicken the Sauce: Pour the cornstarch slurry into the simmering raspberry sauce in the saucepan. Stir continuously and vigorously. You will observe the sauce beginning to thicken almost immediately as you mix. Continue to simmer over low heat for another 5 minutes, stirring occasionally, until the sauce reaches your desired luscious consistency.
- Strain for Silky Smoothness: Remove the raspberry sauce from the heat. Carefully pour the sauce through a fine-mesh strainer set over a clean bowl. Use the back of a spoon to press the sauce through the strainer, separating the smooth, seedless sauce from the raspberry seeds. This crucial step results in a wonderfully silky-smooth, elegant sauce.
- Pro Tip for Efficient Straining: If a significant amount of sauce stubbornly remains with the seeds in the strainer, gently pour 1-2 tablespoons of water over the seeds and use a spoon to aid in pushing any remaining sauce through the mesh. This ensures you extract every last drop of deliciousness.
- Cool and Reserve: Discard the raspberry seeds. Set the smooth raspberry sauce aside and allow it to cool completely. It will continue to thicken slightly as it cools.
Step 3: Assemble and Bake the Creamy Cheesecake
Prepare the Essential Water Bath
Before you even begin to mix your cheesecake filling, strategically place a large roasting pan or a baking sheet with high sides into your preheating oven. Fill this pan with approximately 1-2 inches of hot water. This proactive step ensures that the water comes to temperature as you prepare the filling, thereby creating the perfect steamy, gentle baking environment crucial for your cheesecake.
The Indispensable Role of a Cheesecake Water Bath
We unequivocally recommend utilizing a water bath for baking cheesecakes, and here’s a deeper dive into why: A water bath (also scientifically known as a bain-marie) provides a moist, incredibly even heat environment that completely surrounds your cheesecake. This gentle, consistent temperature facilitates slow and uniform baking, critically preventing the cheesecake’s edges from setting and cooking faster than its delicate center. This differential cooking is a primary culprit behind unsightly cracks. Furthermore, a water bath is instrumental in cultivating that incredibly smooth, silky, and tender texture that is the hallmark of a truly perfect cheesecake.
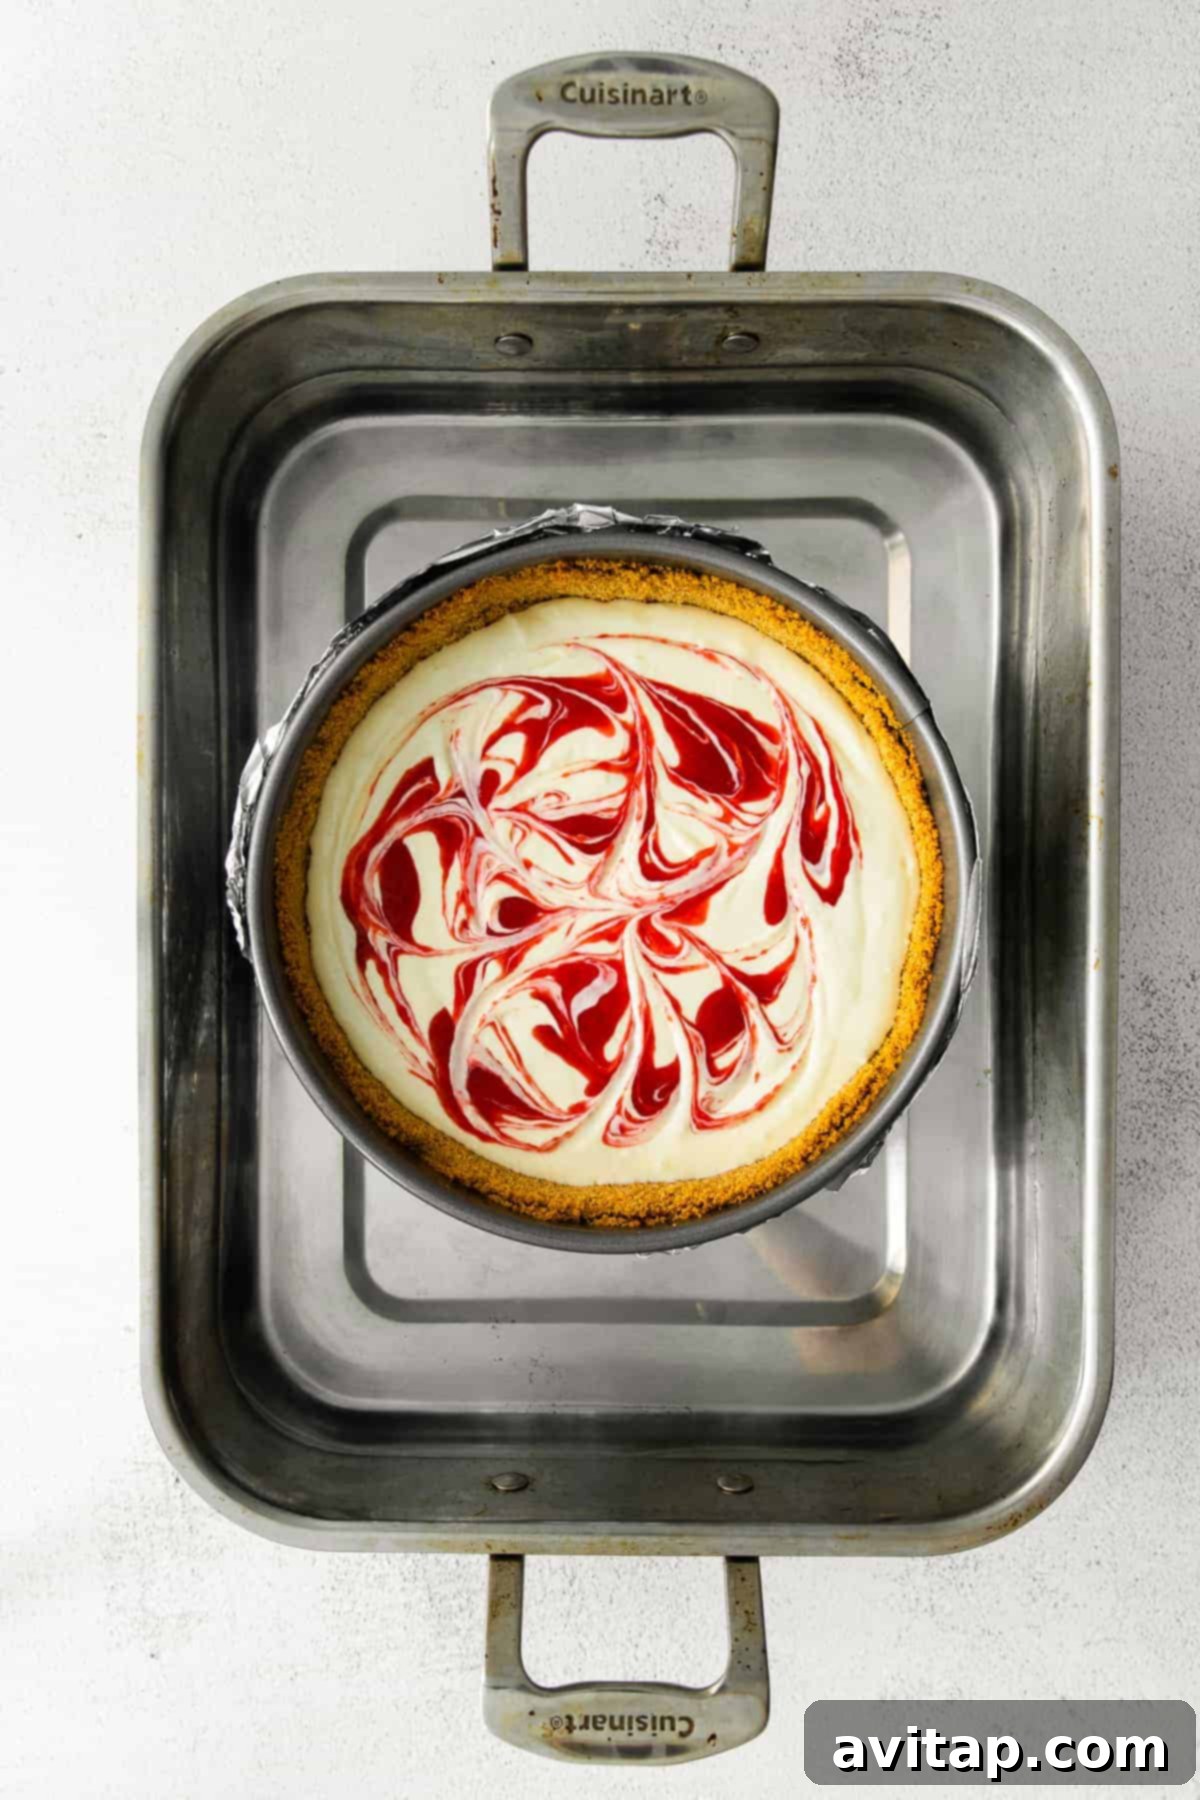
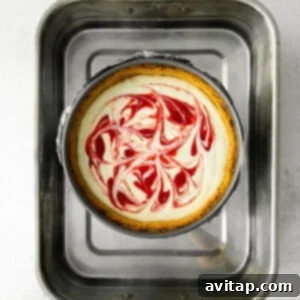
To meticulously prepare your springform pan for its water bath, simply wrap the bottom and sides of the pan tightly and securely with several layers of heavy-duty aluminum foil. This meticulous wrapping creates an impenetrable, watertight seal, vigilantly preventing any water from seeping into the crust and compromising the integrity of your beautiful cheesecake. Once wrapped, carefully place the foil-covered springform pan directly into the larger roasting pan that is already filled with hot water. Then, with care, transfer this entire setup into your preheated oven.
Make the Luscious Cheesecake Filling
- Cream the Cream Cheese: In a stand mixer equipped with the paddle attachment, place the softened full-fat cream cheese. Beat on medium speed until the cream cheese is impeccably smooth, light, and entirely free of any lumps. Stop the mixer frequently to use a spatula and scrape down the sides and bottom of the bowl, ensuring every bit is evenly mixed.
- Combine with Greek Yogurt and Sweeteners: Add the plain Greek yogurt, honey, and vanilla extract to the creamed cheese mixture. Increase the mixer speed to medium-high and beat until the mixture achieves a light, fluffy consistency and is thoroughly combined. Scrape down the sides of the bowl one final time to guarantee all ingredients are fully incorporated. At this stage, feel free to indulge in a quick taste test – it’s wonderfully delicious even before baking!
- Incorporate Eggs Gently: Reduce the mixer speed to low. Add the large eggs one at a time, beating just until each individual egg is fully incorporated into the mixture before adding the next. Crucially, as soon as the third egg is fully mixed in, turn off the mixer immediately. This step is vital because overmixing at this stage can incorporate excessive air into the batter, which is a primary cause of cracks in your baked cheesecake.
- Pour Filling Over Crust: Carefully pour the impeccably prepared cheesecake filling over the cooled, pre-baked graham cracker crust already nestled in the springform pan. Gently shake the pan side-to-side a few times; this subtle motion helps the filling settle evenly and encourages any trapped air bubbles to rise to the surface.
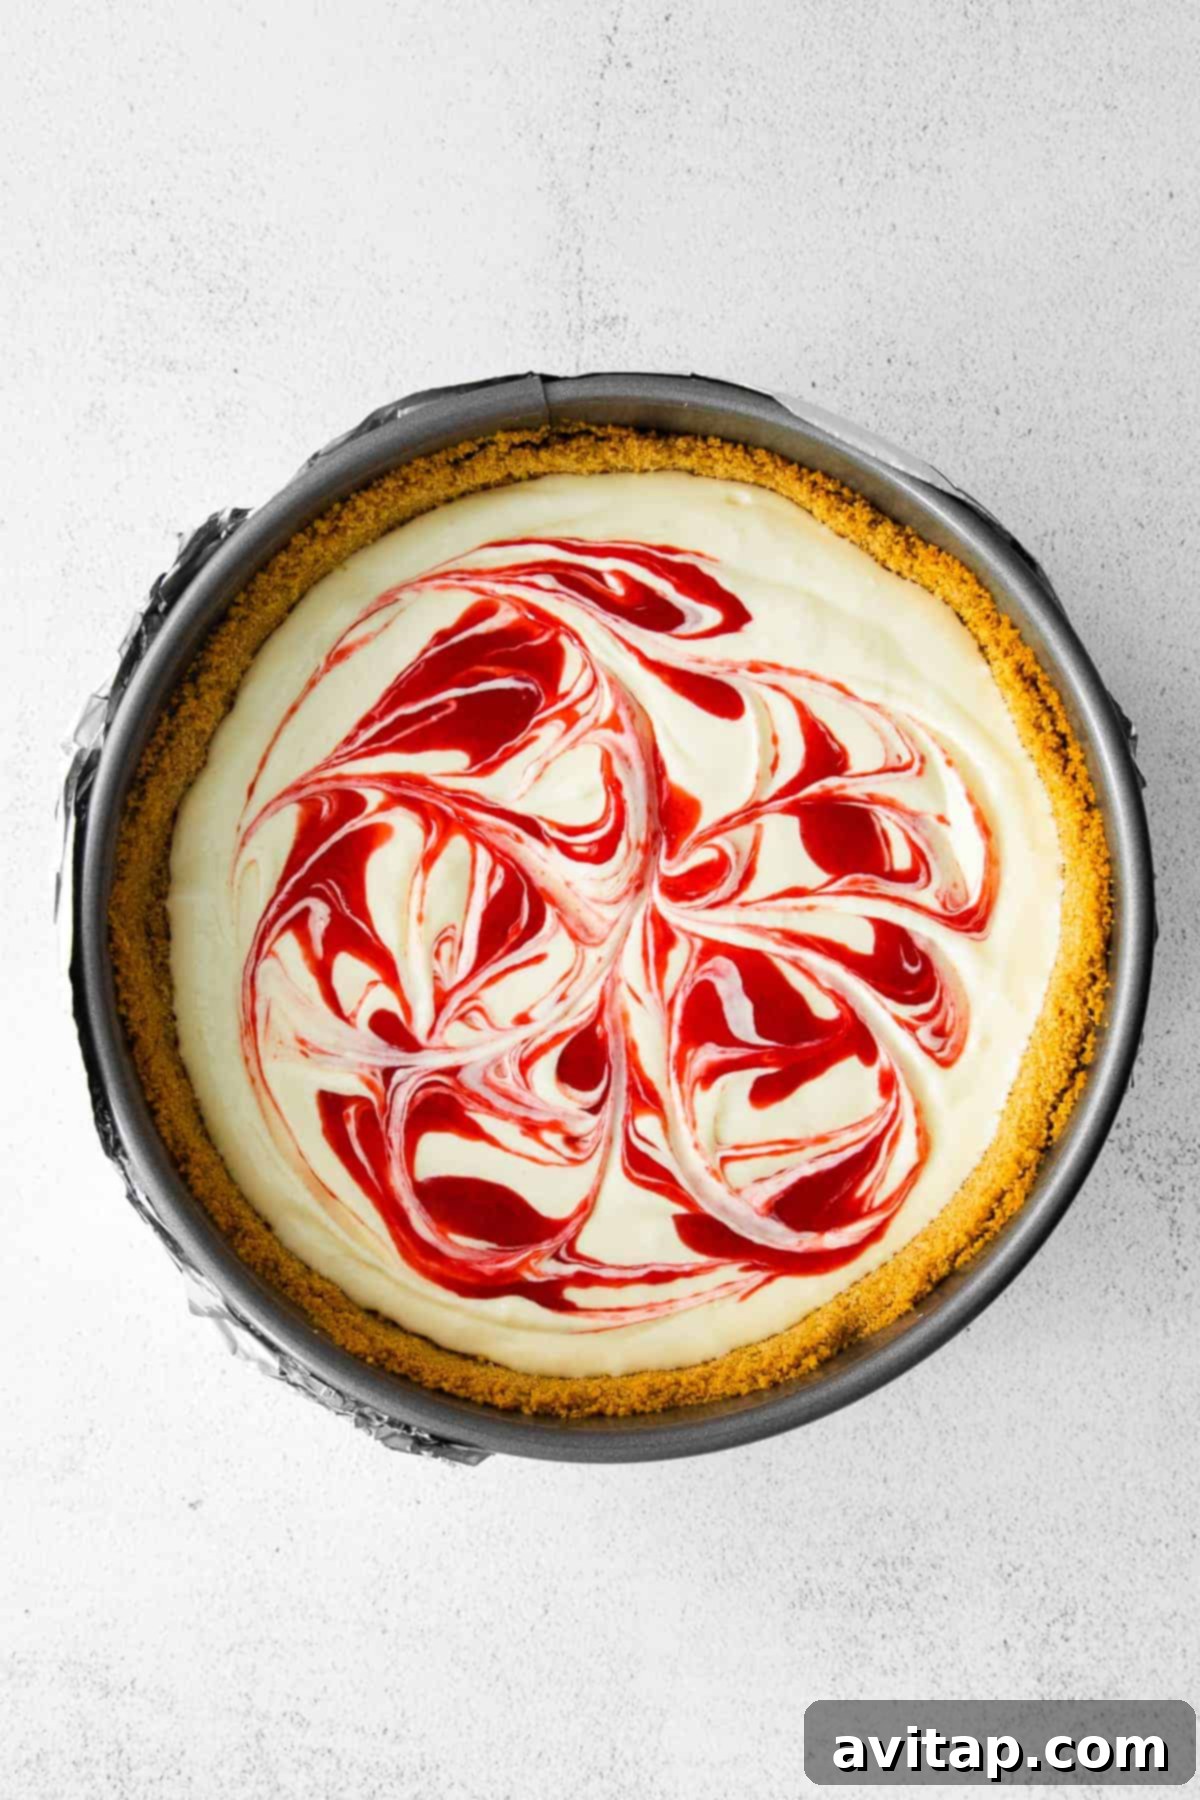
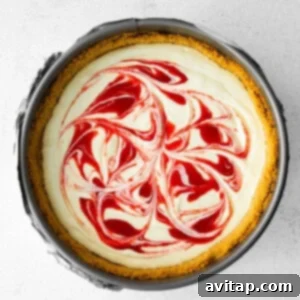
- Drizzle and Swirl Raspberry Sauce: Set aside approximately ¼ cup of the cooled raspberry sauce; this will be used for a fresh drizzle when serving. With the remaining raspberry sauce, artfully drizzle it over the cheesecake filling. You can create a classic checkerboard pattern, elegant concentric circles, or any freehand design that sparks your creativity. Then, using a toothpick or a slender skewer, gently swirl the raspberry sauce and cheesecake filling together to create stunning, marbled patterns. This is your opportunity to unleash your artistic flair and make each cheesecake uniquely beautiful!
Baking Time for Your Perfect Greek Yogurt Cheesecake
Carefully place the foil-wrapped springform pan (nested within its water bath) into the preheated oven. Bake your cheesecake for approximately 60 minutes. It’s important to remember that baking times can vary slightly depending on the calibration of your specific oven, so knowing how to accurately check for doneness is absolutely essential for a flawless result.
How can you confidently tell if your cheesecake is perfectly done? The crucial indicator is a subtle, delicate jiggle. When gently nudged, the edges of the cheesecake should appear fully set and firm, while the very center (an area roughly 2-3 inches in diameter) should still exhibit a slight, delicate jiggle. It should absolutely not be liquid-y or slosh around. This precise state of doneness indicates a perfectly baked cheesecake that will continue to set beautifully as it cools and chills, resulting in that coveted creamy texture.
The Final Touches: Cooling, Setting, and Serving Your Cheesecake Masterpiece
The journey to creating a truly perfect Greek yogurt cheesecake extends beyond the oven. Proper cooling and meticulous setting are just as critical as the baking process itself to achieve that coveted crack-free surface, firm texture, and incredibly creamy mouthfeel. Follow these three essential post-baking steps to ensure your cheesecake is nothing short of perfection:
Cool Cheesecake Slowly Within the Oven
Once your cheesecake has reached its perfect state of doneness (indicated by that slight jiggle), immediately turn off the oven completely. Without removing the cheesecake, crack open the oven door, leaving it ajar by a few inches. Allow the cheesecake to cool slowly and gradually within the cooling oven for approximately 60 minutes. This method of gradual cooling is absolutely vital. It prevents the rapid temperature change that is a primary cause of cheesecakes cracking, thereby ensuring a beautifully smooth and intact top surface.
Chill to Perfection in the Refrigerator
After the crucial oven cooling period, carefully remove the cheesecake from the oven. Gently unwrap and remove all aluminum foil from the springform pan. Transfer the cheesecake (still in its pan) to the refrigerator. Allow it to chill and set undisturbed for a minimum of 4 hours, though ideally, for the best texture and flavor development, we recommend chilling it overnight. This extended chilling time is fundamental for the cheesecake to fully firm up, develop its rich, dense texture, and for all the delightful flavors to deepen and meld together beautifully.
Drizzle, Slice, and Savor Your Creation!
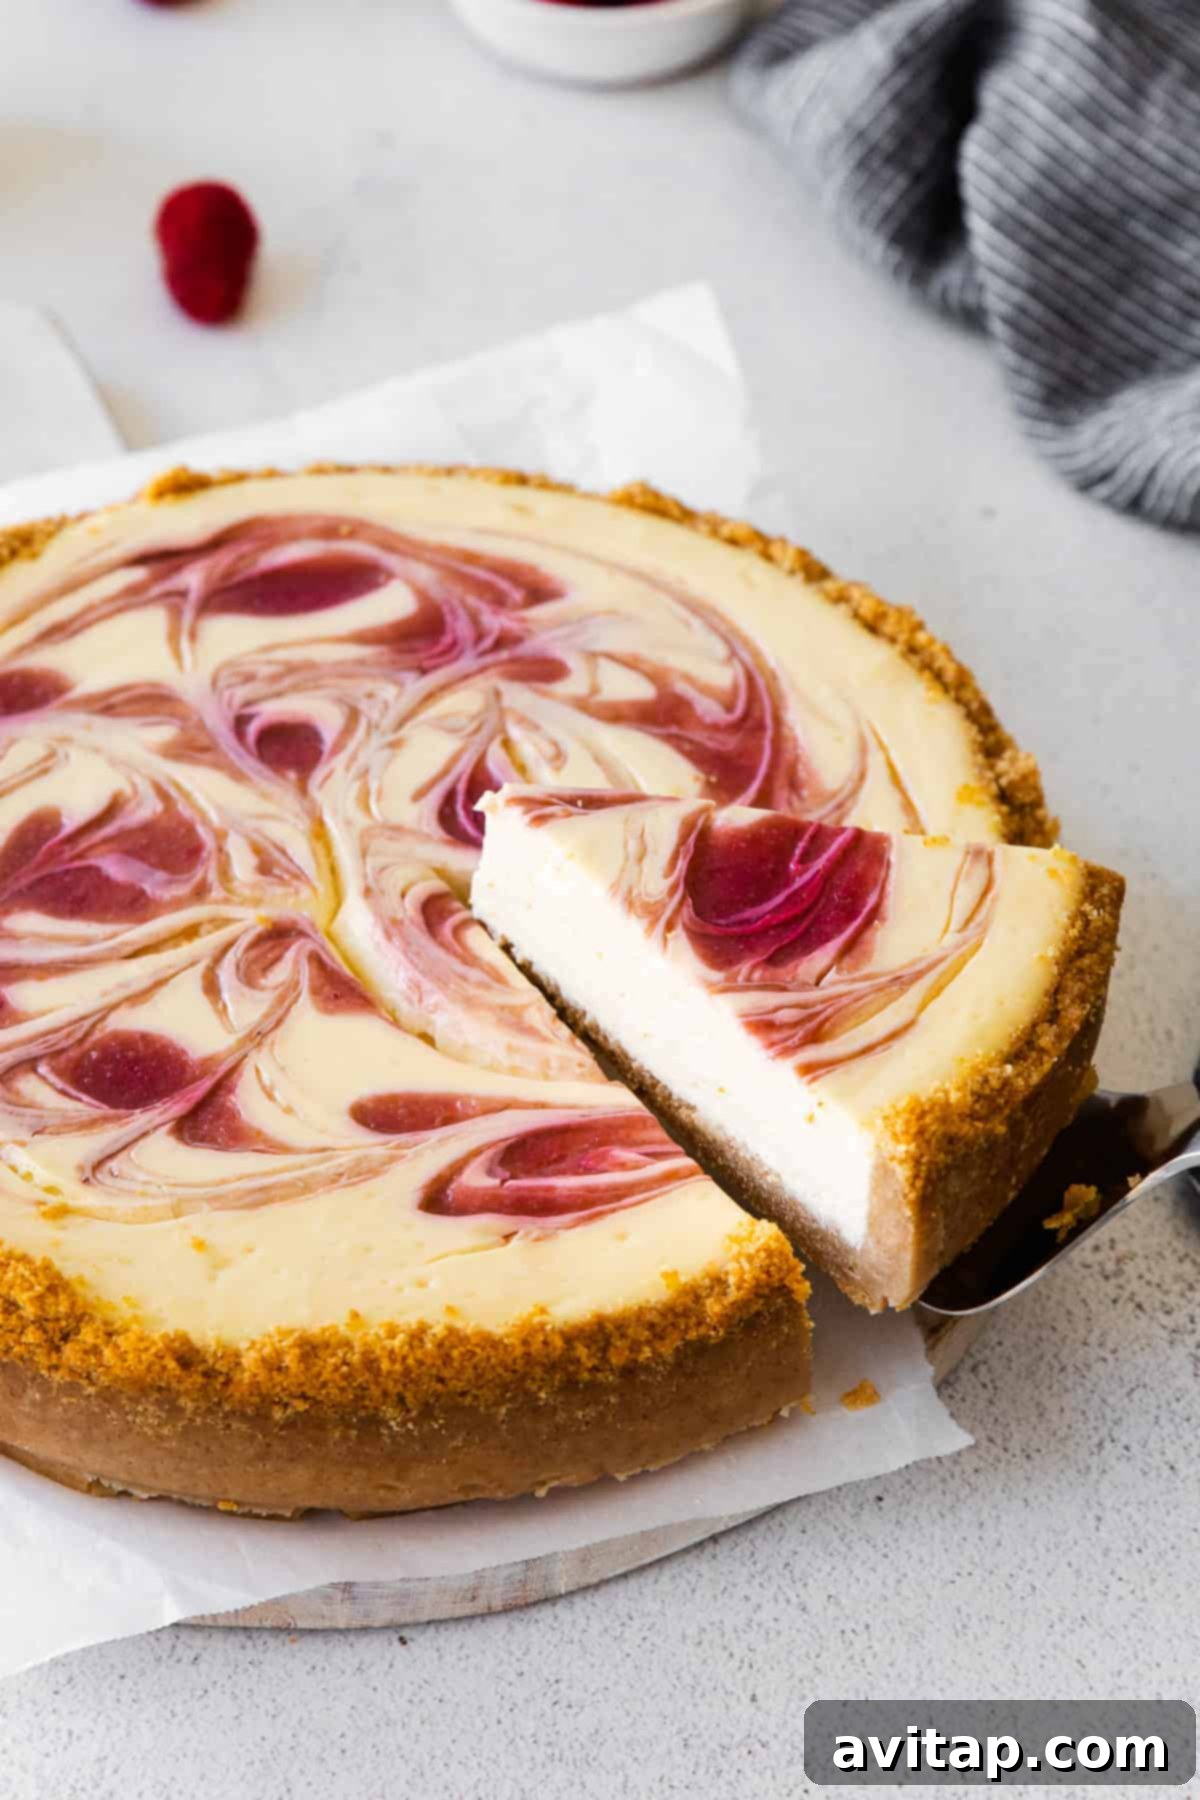
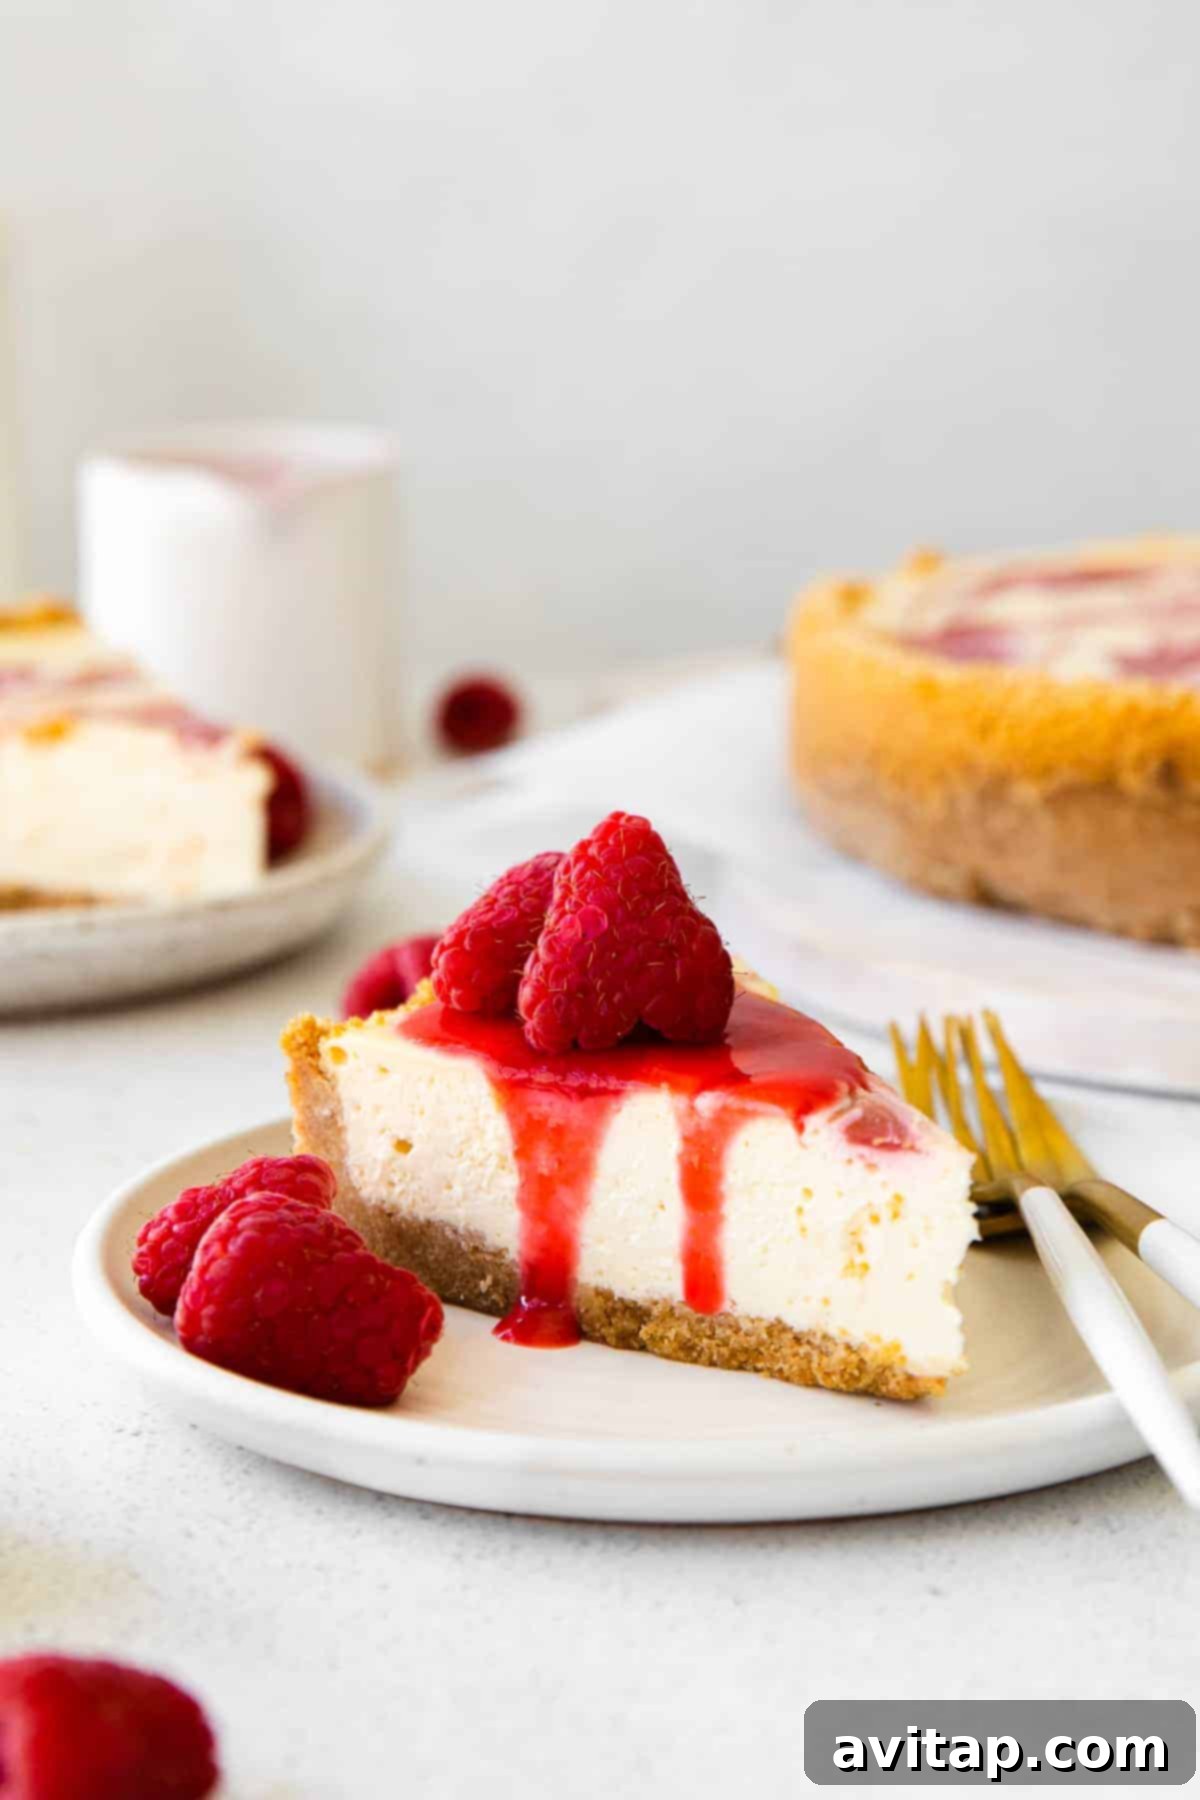
Once your cheesecake is thoroughly chilled and perfectly set, remove it from the refrigerator. Carefully unlatch and gently remove the sides of the springform pan. Transfer the exquisite cheesecake to your chosen serving plate or stand. Before serving each individual slice, bestow upon it a generous drizzle of the reserved raspberry sauce. For an extra touch of elegance and fresh vibrancy, consider garnishing with a few additional fresh raspberries or a delicate sprig of mint. Now, slice with a warm, sharp knife for impeccable cuts, and prepare to delight yourself and your guests with this stunning, healthier dessert!
Delicious and Creative Toppings for Your Greek Yogurt Cheesecake
While our homemade raspberry swirl sauce provides an absolutely fantastic and flavorful topping on its own, there are countless ways to further customize and elevate your Greek yogurt cheesecake. Feel free to get creative and experiment with these delightful ideas to add extra flair and flavor:
- Extra Raspberry Drizzle: An undeniable classic! The leftover sauce is perfectly designed to add another layer of bright, fruity tartness and luscious texture to each and every slice.
- Fresh Berries Medley: A colorful assortment of fresh strawberries, blueberries, or blackberries adds vibrant color, bursts of natural fresh flavor, and a delightful textural contrast.
- Light Whipped Cream: A generous dollop of homemade whipped cream, lightly sweetened, contributes an airy, cloud-like, and luxurious touch that melts in your mouth.
- Chocolate Shavings or Syrup: For the ultimate chocolate lovers, a delicate sprinkle of finely shaved dark chocolate or an elegant drizzle of rich chocolate syrup can transform this dessert into a heavenly indulgence.
- Caramel Drizzle: A rich, buttery, and slightly salty caramel sauce offers a wonderfully sweet and indulgent counterpoint to the bright, tart raspberries.
- Toasted Nuts: A sprinkle of lightly toasted, finely chopped pecans or walnuts introduces a pleasant crunch and a warm, earthy, nutty flavor dimension.
- Fresh Lemon Zest: A delicate touch of freshly grated lemon zest can subtly brighten the entire dessert, adding fragrant citrus notes that awaken the palate.
How to Properly Store Your Greek Yogurt Cheesecake
To ensure your exquisite Greek yogurt cheesecake remains as fresh, creamy, and delicious as possible, proper storage is paramount. Once the cheesecake has fully cooled and completely set after its chilling period, cover it securely with plastic wrap or aluminum foil directly within its springform pan. Place the covered cheesecake in the refrigerator, where it will maintain its peak freshness and delightful flavor for up to 7 days. Always ensure it is tightly covered to prevent it from absorbing any unwanted odors from other foods stored in your fridge.
How to Freeze Your Cheesecake for Future Enjoyment
Freezing a cheesecake is an excellent and surprisingly simple method for advanced meal preparation or for saving leftovers to enjoy at a later date. It’s incredibly straightforward! After your healthy cheesecake has completely cooled in the springform pan and has undergone its initial chilling, wrap the entire cheesecake (still in the pan) very tightly with several layers of plastic wrap, followed by an additional layer of heavy-duty aluminum foil. This dual-layer wrapping provides superior protection against freezer burn. Place the securely wrapped cheesecake in the freezer, where it can be safely stored for up to 3 months.
To expertly thaw your frozen cheesecake, simply remove it from the freezer and carefully unwrap it. Transfer the cheesecake to the refrigerator and allow it to thaw completely overnight (or for a minimum of 8-12 hours) before slicing and serving. It’s crucial not to thaw cheesecake at room temperature, as this can negatively impact its delicate texture and compromise food safety.
Discover More of Our Favorite…
Healthy Cheesecake Recipes to Inspire You!
If you’ve been captivated by the deliciousness and health benefits of this Greek Yogurt Cheesecake, you’ll be absolutely thrilled to explore our other fantastic healthy cheesecake creations. Each recipe offers a unique and enticing flavor profile while steadfastly maintaining our commitment to wholesome ingredients and incredible, satisfying taste:
- Blueberry Cheesecake Bars: Bursting with the sweet and slightly tart flavor of fresh blueberries, perfect for any occasion.
- Cranberry Cheesecake Bites: Delightful, bite-sized treats ideal for festive gatherings or a quick, healthy indulgence.
- Raspberry Cheesecake Fat Bombs: A satisfying and flavorful keto-friendly option for those watching their carb intake.
- Pumpkin Cheesecake Bars: A comforting seasonal favorite, rich with warm spices and creamy pumpkin.
- High-Protein Pumpkin Cheesecake: Another protein-packed variation, perfect for an autumn-inspired, guilt-free treat.
- PB Chocolate Cheesecake Cups: The ultimate decadent combination for lovers of peanut butter and rich chocolate, in a perfectly portioned cup.
We absolutely adore seeing your culinary masterpieces! Don’t forget to share your delicious creations on social media by tagging your posts with the hashtag #fitfoodiefinds – we’d genuinely love to see what delightful treats you’re baking in your kitchen!
Healthy Greek Yogurt Cheesecake with Raspberry Swirl
Indulge in this exceptionally creamy and healthier Greek Yogurt Cheesecake, featuring a delightful graham cracker crust and a vibrant homemade raspberry swirl. A perfect guilt-free dessert for any occasion!
By: Emily Richter
Prep Time: 30 minutes
Cook Time: 1 hour
Total Time: 1 hour 30 minutes (plus cooling and chilling time)
Servings: 12 slices
Ingredients
Crust
- 3 cups graham cracker crumbs (~25-30 full sheets)
- 8 tablespoons melted butter
- 1 teaspoon vanilla extract
Raspberry Sauce
- 1 pint fresh raspberries
- ½ cup water, separated (¼ cup for heating, ¼ cup for cornstarch slurry)
- 1 tablespoon honey
- 1 teaspoon vanilla extract
- Pinch of salt
- 2.5 teaspoons cornstarch
Cheesecake Filling
- 24 oz. (3 bricks) full-fat cream cheese, room temperature
- 1 cup plain Greek yogurt (2% or 5%)
- ½ cup honey
- 1 teaspoon vanilla extract
- 3 large eggs, room temperature
Instructions
For the Crust
- First, preheat your oven to 350ºF (175ºC) and lightly grease a 9-inch springform pan.
- If not using pre-made crumbs, place graham crackers into a high-speed food processor and process until fine crumbs are formed. Measure out 3 cups, then return to the food processor. Add the melted butter and vanilla extract, pulsing until a moist crumble forms.

- Pour the graham cracker mixture into the springform pan. Use the bottom of a measuring cup or a spatula to press the crust down firmly across the bottom and about ½ inch up the sides of the pan.
- Bake the graham cracker crust for 5 minutes at 350ºF (175ºC). Remove from the oven and set aside to cool.
For the Raspberry Sauce
- In a small saucepan, combine fresh raspberries, ¼ cup water, and 1 tablespoon honey. Stir over medium-high heat and bring to a boil.
- Once boiling, reduce heat to low and use a wooden spoon to smash the raspberries into a jam-like consistency.
- Add vanilla extract and a pinch of salt to the pot and stir. Let the mixture simmer for 5 minutes.
- In a separate small bowl, dissolve the cornstarch into the remaining ¼ cup water until lump-free.
- Add the cornstarch mixture to the saucepan and mix continuously until the sauce begins to thicken.
- Let the sauce simmer over low heat for another 5 minutes, stirring occasionally.
- Remove from heat and pour the sauce through a fine-mesh strainer into a bowl, pressing to remove all seeds for a smooth sauce. If any sauce remains stuck, add 1-2 tablespoons of water over the seeds and use a spoon to assist it through the strainer.
- Discard seeds and set the smooth raspberry sauce aside to cool completely.
For the Cheesecake
- Place a large roasting pan or baking sheet with sides into the oven and fill with about 1-2 inches of hot water to create a water bath.
- Prepare the cheesecake filling: Place softened cream cheese into a stand mixer and beat on medium speed until completely smooth. Scrape down the sides of the bowl.
- Add Greek yogurt, honey, and vanilla extract to the cream cheese. Mix on medium-high speed until the mixture is light and fluffy. Scrape the bowl again to ensure all ingredients are combined.
- Reduce mixer speed to low. Add eggs one at a time, beating just until each is incorporated before adding the next. Turn off the mixer immediately after the third egg is mixed in to avoid overmixing.
- Wrap the bottom and sides of your springform pan tightly with several layers of aluminum foil to prevent water from entering during the water bath bake.
- Pour the cheesecake filling into the cooled graham cracker crust in the foil-wrapped springform pan. Gently shake the pan to evenly distribute the filling.
- Set aside ¼ cup of the cooled raspberry sauce for later serving. Drizzle the remaining raspberry sauce over the cheesecake filling in a decorative pattern (e.g., checkerboard or concentric circles).
- Use a toothpick or skewer to gently swirl the raspberry sauce and cheesecake filling together, creating an attractive marbled design.
- Carefully place the foil-wrapped springform pan into the water bath in the oven. Bake for 60 minutes.
- The cheesecake is done when the edges are set and the center still has a slight, delicate jiggle (about 2-3 inches in diameter) when gently nudged. It should not be liquidy.
- Once baked, turn off the oven and crack the oven door slightly. Allow the cheesecake to cool slowly in the oven for about 60 minutes. This gradual cooling helps prevent cracks.
- Remove the cheesecake from the oven and carefully remove the aluminum foil from the springform pan.
- Place the cheesecake (still in its pan) in the refrigerator to chill and set for at least 4 hours, or preferably overnight, for best results.
- Once thoroughly chilled, remove the cheesecake from the fridge. Carefully unlatch and remove the sides of the springform pan. Slice and serve each piece with a drizzle of the reserved raspberry sauce and, if desired, fresh raspberries. Enjoy your masterpiece!
Nutrition Information (Approximate per serving)
- Calories: 457 kcal
- Carbohydrates: 36 g
- Protein: 9 g
- Fat: 31 g
- Fiber: 3 g
- Sugar: 20 g
Nutrition information is automatically calculated and should be used as an approximation. Actual values may vary based on ingredients, preparation methods, and portion sizes.