
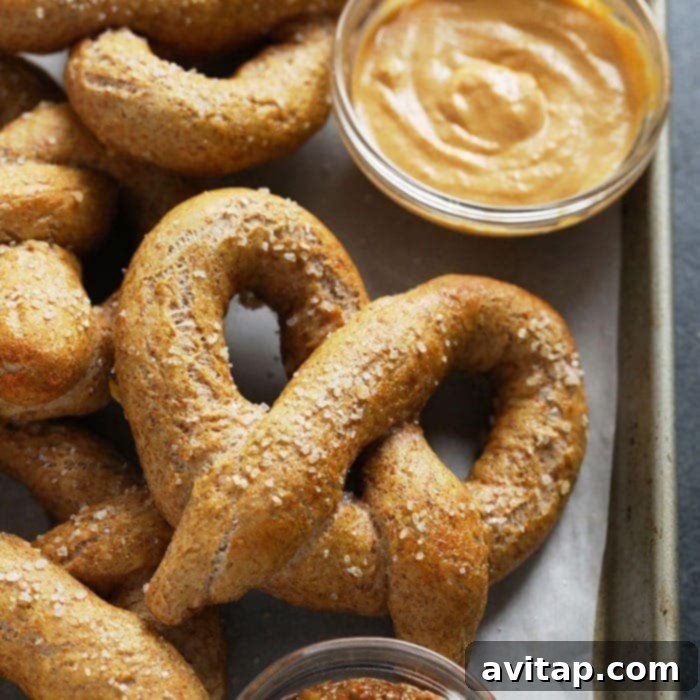
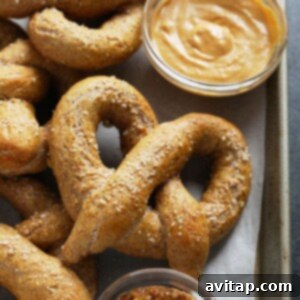
Craving the warm, chewy delight of a classic soft pretzel but looking for a healthier alternative? You’ve landed in the perfect spot! We’ve crafted a fantastic healthy soft pretzel recipe that marries the irresistible taste and texture of your favorite mall snack with a more wholesome nutritional profile. By ingeniously blending white and whole wheat flour, we achieve pretzels that are not only wonderfully soft and satisfying but also packed with a little extra fiber and goodness. This homemade pretzel recipe is surprisingly simple, calling for just a handful of basic ingredients and coming together in about an hour. Get ready to ditch the greasy food court and whip up a batch of these ridiculously easy and insanely delicious pretzels right in your own kitchen.

Featured Comment: A Family Favorite!
“This recipe is great! I made them on a Saturday night then served the delicious pretzels with a cinnamon sugar sauce, eggs and bacon for brunch the next morning. And it was a hit! My family really liked them and my brothers even asked if I would make them again. Thank you for this recipe!” – Isabella
Imagine biting into a warm, fluffy pretzel with a subtle hint of sweetness and that signature satisfying crunch on the outside. Our recipe delivers exactly that, with smart swaps that make these pretzels a touch healthier without compromising any of the beloved flavor or texture. These aren’t just a snack; they’re a delightful experience, perfect for game nights, weekend brunch, or simply satisfying that soft pretzel craving in a better-for-you way.
Essential Ingredients & Equipment for Your Homemade Pretzels
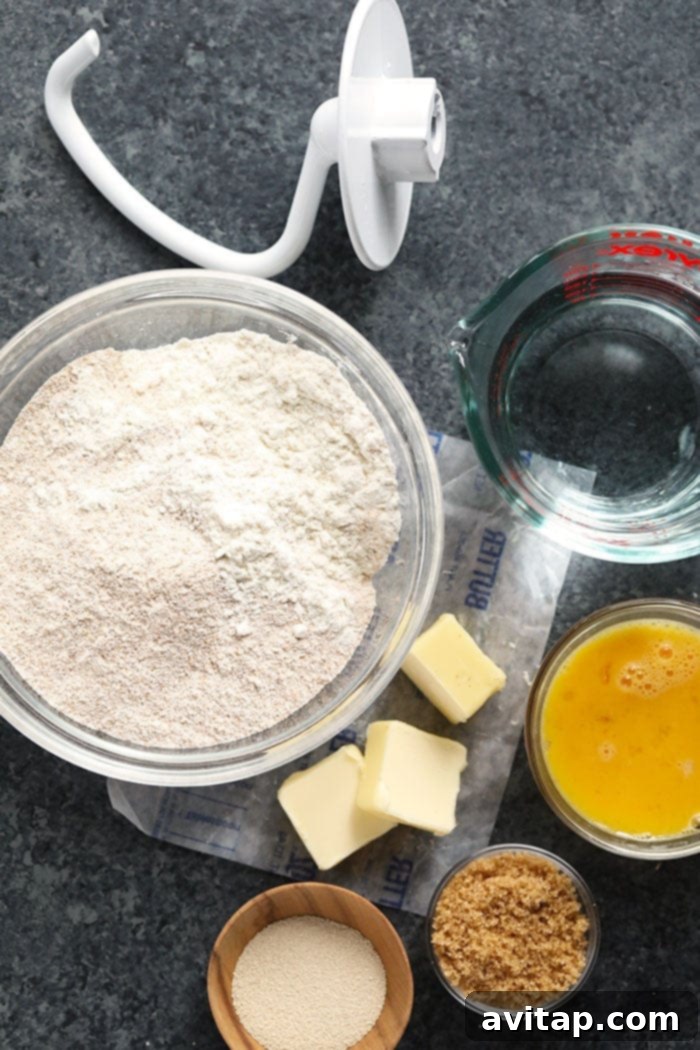
Crafting delicious homemade soft pretzels requires a few key ingredients that work together to create that iconic taste and texture. Understanding the role of each component can elevate your baking experience and ensure perfect results every time.
- Active Dry Yeast: This magical ingredient is the heart of any good pretzel dough. It acts as the leavening agent, transforming simple flour and water into a light, airy, and fluffy dough by producing carbon dioxide gas. If you have instant yeast on hand, you can use it interchangeably; simply skip the activation step and add it directly to your dry ingredients.
- Lukewarm Water: The perfect temperature of water is crucial for awakening your yeast. Around 105°F (40°C) is ideal – warm enough to activate but not so hot as to kill it. This helps dissolve the yeast and sugar, kick-starting the fermentation process.
- All-Purpose Flour: Forming the foundation and structure of our pretzel dough, all-purpose flour contains the right balance of gluten to give the pretzels their characteristic chewiness and helps them rise beautifully.
- Whole Wheat Flour: This is where our pretzels get their healthy twist! Whole wheat flour not only adds a slightly nutty, robust flavor but also significantly boosts the fiber content and nutritional value compared to using only white flour. It contributes to a more satisfying and wholesome snack without sacrificing the beloved soft texture.
- Brown Sugar: Beyond just sweetness, brown sugar serves as the initial food source for the yeast, helping it to activate and multiply efficiently, ensuring a good rise for your dough.
- Salt: Essential for flavor, salt also plays a vital role in regulating yeast activity, preventing the dough from rising too quickly and developing a better overall flavor profile.
- Melted Butter: A touch of melted butter enriches the dough, adding a subtle flavor and contributing to the pretzel’s tender crumb.
- Baking Soda: The secret to that unmistakable dark brown crust and classic “pretzel” flavor! When the pretzels are dipped into a hot baking soda solution, the alkaline environment accelerates the Maillard reaction during baking, creating the distinctive color and taste.
- Egg: Used for an egg wash, it gives the pretzels a beautiful golden-brown sheen and helps the coarse salt adhere to the surface.
- Coarse Sea Salt: The traditional topping that provides that satisfying salty crunch and balances the dough’s mild sweetness.
Essential Equipment:
- Stand Mixer with Dough Hook: We absolutely adore our KitchenAid stand mixer for its efficiency in mixing and kneading dough, thanks to the dough hook attachment. It saves time and effort, ensuring perfectly kneaded dough every time. However, don’t fret if you don’t have one; mixing and kneading by hand is entirely possible and a great arm workout!
- Large Mixing Bowls: For combining ingredients and resting the dough.
- Large Stock Pot: Essential for the crucial baking soda bath.
- Baking Sheet & Parchment Paper: For baking the pretzels evenly and preventing sticking.
- Slotted Spoon or Spatula: To safely transfer pretzels from the boiling bath to the baking sheet.
- Pastry Brush: For applying the egg wash.
Who knew baking delicious, healthy homemade pretzels could be this easy and rewarding?
Step-by-Step Guide: Crafting Your Healthy Soft Pretzels
Step 1: Activate the Yeast (The Proof is in the Foam!)
- Begin by gathering your warm water, brown sugar, and active dry yeast. The temperature of the water is vital here, aiming for around 105°F (40°C). This gentle warmth is perfect for “waking up” the yeast from its dormant state without killing it. The brown sugar acts as a quick energy source, stimulating the yeast’s growth.
- In the bowl of your stand mixer (or a large mixing bowl if kneading by hand), combine the lukewarm water, brown sugar, and active yeast. Give it a gentle whisk to ensure everything is well-integrated.
- Set this mixture aside in a warm spot for about 10-15 minutes. During this time, you should observe a foamy, bubbly layer forming on the surface. This delightful foam is a clear indicator that your yeast is alive, active, and happily multiplying, releasing carbon dioxide – a perfect sign it’s ready to work its magic on your dough! If no foam appears, your yeast might be old or the water temperature was off; it’s best to start again with fresh yeast.
Step 2: Prepare the Soft Pretzel Dough
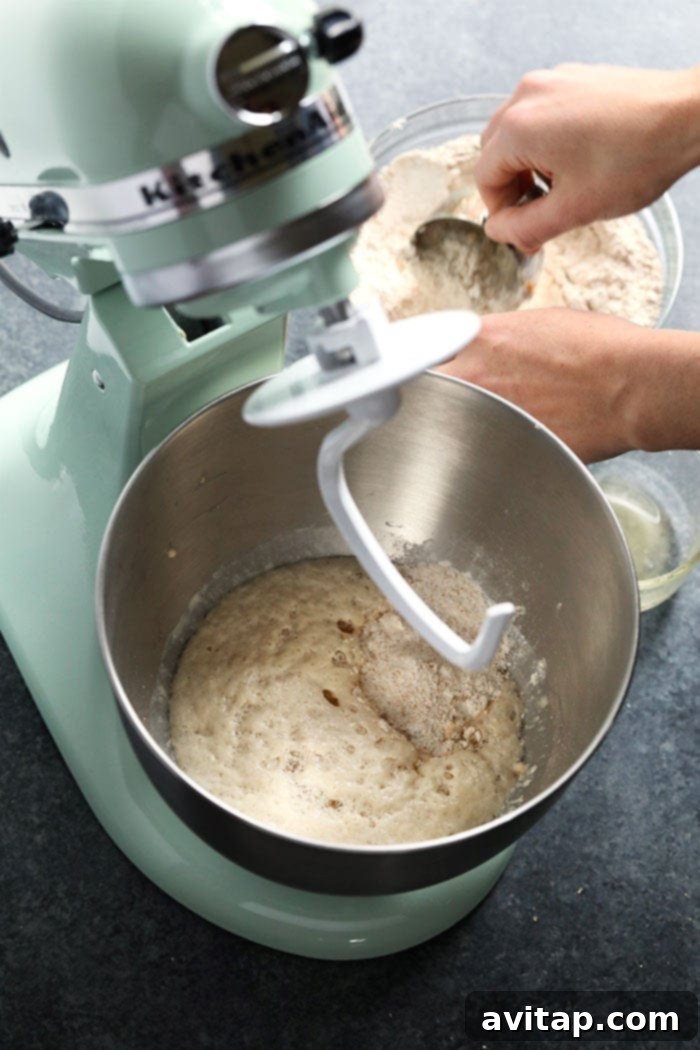
- Once your yeast is frothy and active, attach the dough hook to your stand mixer.
- In a separate medium bowl, whisk together the all-purpose flour, whole wheat flour, salt, and melted butter. Pre-mixing the dry ingredients ensures they are evenly distributed throughout the dough, which is key for a consistent texture.
- With your stand mixer running on a low speed, begin gradually adding the dry ingredient mixture to the wet yeast mixture. Add it about a third of a cup at a time. This slow and steady incorporation allows the flour to fully hydrate and encourages the development of gluten strands. These gluten strands are what will give your pretzels their characteristic elasticity and satisfying chew.
- Continue adding flour and mixing on low speed until a soft, cohesive dough forms. The dough is ready when it pulls cleanly away from the sides of the bowl and is no longer excessively sticky to the touch. Be mindful that the exact amount of flour needed can vary slightly based on environmental factors like humidity in your kitchen, so trust the feel of the dough. It should be pliable but not tacky.
Step 3: Allow the Dough to Rest
- After the dough has come together, remove it from the stand mixer bowl. On a lightly floured surface, gently knead the dough by hand for just a minute or two. This brief kneading further develops the gluten, creating a smoother, more elastic dough that will be easier to work with. Shape the dough into a neat ball.
- Lightly flour your countertop or a clean surface and place the dough ball on top. Cover the dough ball with a clean kitchen towel (a tea towel works perfectly). Allow the dough to rest undisturbed for approximately 10-15 minutes. This resting period is crucial as it gives the gluten a chance to relax, making the dough much more pliable and easier to roll out into long ropes in the next step, preventing it from snapping back too much.
Step 4: Roll and Shape Your Pretzels
- Once the dough has rested and relaxed, divide it into 6 equal portions. For precision, you can use a kitchen scale to ensure each portion is the same weight, leading to uniformly sized pretzels. Alternatively, you can simply eyeball it, aiming for roughly even pieces.
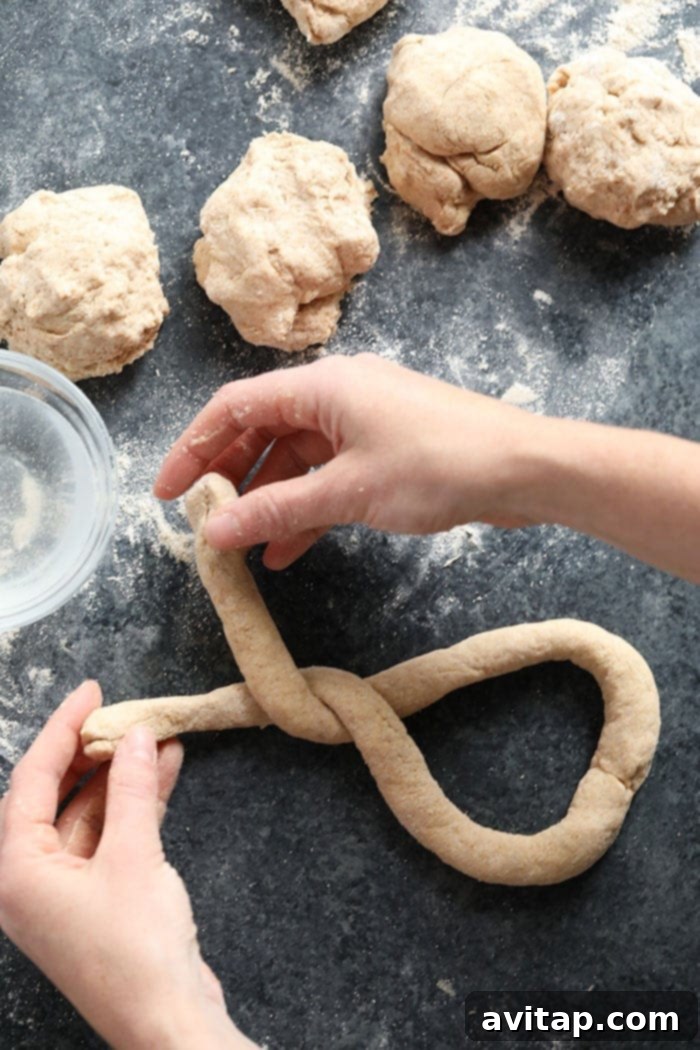
- Take one portion of dough and, on a lightly floured surface, begin rolling it out. Use both hands, starting from the center and working your way outwards, to create a long, slender rope. Aim for a length of approximately 20-25 inches and strive for a consistent thickness throughout the entire rope to ensure even baking.
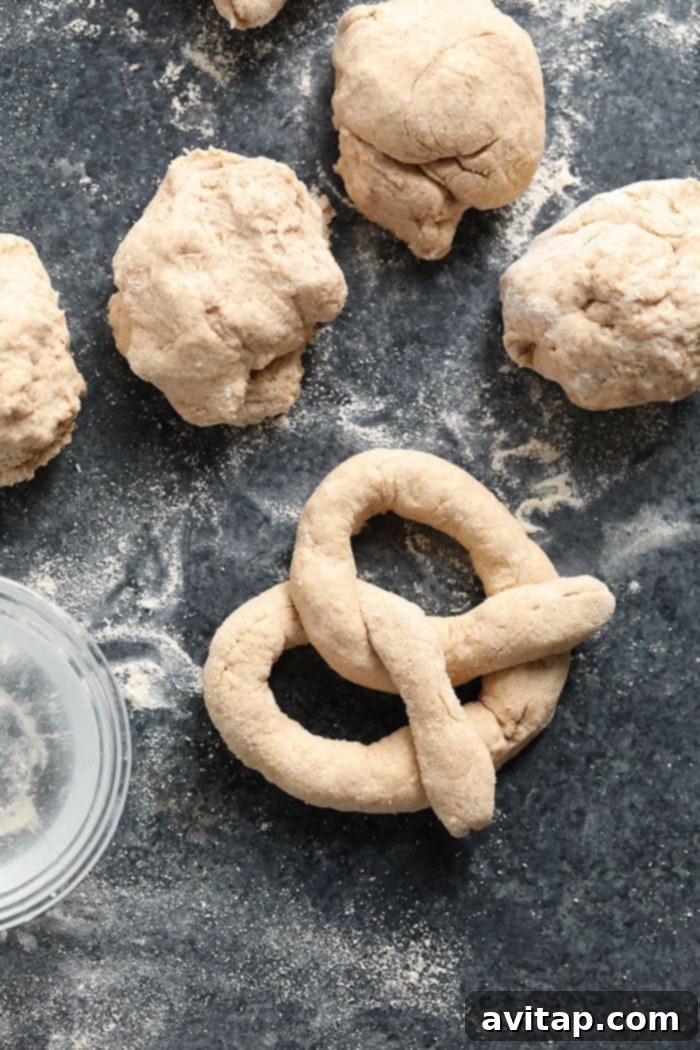
- To form the classic pretzel shape, first fold the rope in half to create a ‘U’ shape. Then, cross the ends over each other twice, creating a double twist. Finally, bring the twisted ends down towards the bottom curve of the ‘U’ and gently press them into the dough to secure the pretzel form. Make sure to pinch the ends firmly so they don’t unravel during the boiling process.
Pro Tip for Pretzel Shaping!
Feel free to get creative with your pretzel shapes! You can twist them into traditional loops, sticks, bites, or any fun design you like. The most important thing is to firmly pinch the ends of the dough together to ensure they create one cohesive shape. This prevents your beautiful pretzels from falling apart when they hit the water bath, maintaining their structure during the crucial boiling and baking stages.
Step 5: The Crucial Baking Soda Bath (Flash Boil)
- Fill a large stockpot with approximately 8 cups of water and bring it to a rolling boil over high heat. Once boiling, carefully add 1/3 cup of baking soda to the water. Be aware that the water will fizz up, so use a large enough pot to prevent overflow and add the baking soda slowly. This alkaline baking soda solution is fundamental; it raises the pH on the surface of the pretzel dough, which is what enables the characteristic deep brown color and authentic “pretzel” flavor to develop during baking through the Maillard reaction.
- Once the baking soda water is at a consistent boil, carefully lower each shaped pretzel into the water, one at a time, using a slotted spoon or spatula. Allow each pretzel to boil for a short but precise duration of about 15-20 seconds. This quick boil serves multiple purposes: it immediately sets the pretzel’s shape, creates that desirable chewy texture, and initiates the browning process. Avoid overcrowding the pot; boil them in batches if necessary.
- After the specified time, remove the pretzel from the boiling water using the slotted spoon, allowing any excess water to drip off.
Step 6: Egg Wash & Coarse Salt Application
- Immediately after removing them from the boiling bath, transfer the pretzels to a baking sheet that has been lined with parchment paper. In a small bowl, whisk one large egg with a splash of water (about a teaspoon) to create your egg wash.
Quick Tip: Don’t Worry About Excess Water!
It’s perfectly normal for there to be a little excess water on the parchment paper after transferring the pretzels from the boiling bath. Don’t worry about patting them dry; this moisture will evaporate completely during the baking process and won’t negatively affect your pretzels. The heat of the oven will take care of it!
- Using a pastry brush, gently and evenly wipe the tops and visible surfaces of each pretzel with the egg wash. This egg wash is vital as it acts as a glaze, contributing to a beautiful, shiny, golden-brown crust once baked and helping the salt adhere.
- Finally, sprinkle a generous amount of coarse sea salt over the egg-washed pretzels. The coarse salt not only adds the classic salty flavor but also provides a delightful textural contrast. Don’t be shy; a good sprinkle is part of the pretzel experience!
Step 7: Bake to Golden Perfection
Preheat your oven to 400ºF (200°C) before you begin the boiling step to ensure it’s ready. Once your pretzels are washed and salted, carefully place the baking sheet into the preheated oven. Bake for approximately 13-15 minutes, or until the pretzels achieve a gorgeous, deep golden-brown color and look perfectly puffed. The exact baking time can vary depending on your oven, so keep an eye on them. Once baked, remove the pretzels from the oven and let them cool slightly on the baking sheet for a few minutes before transferring them to a wire rack to cool completely, or enjoy them warm!
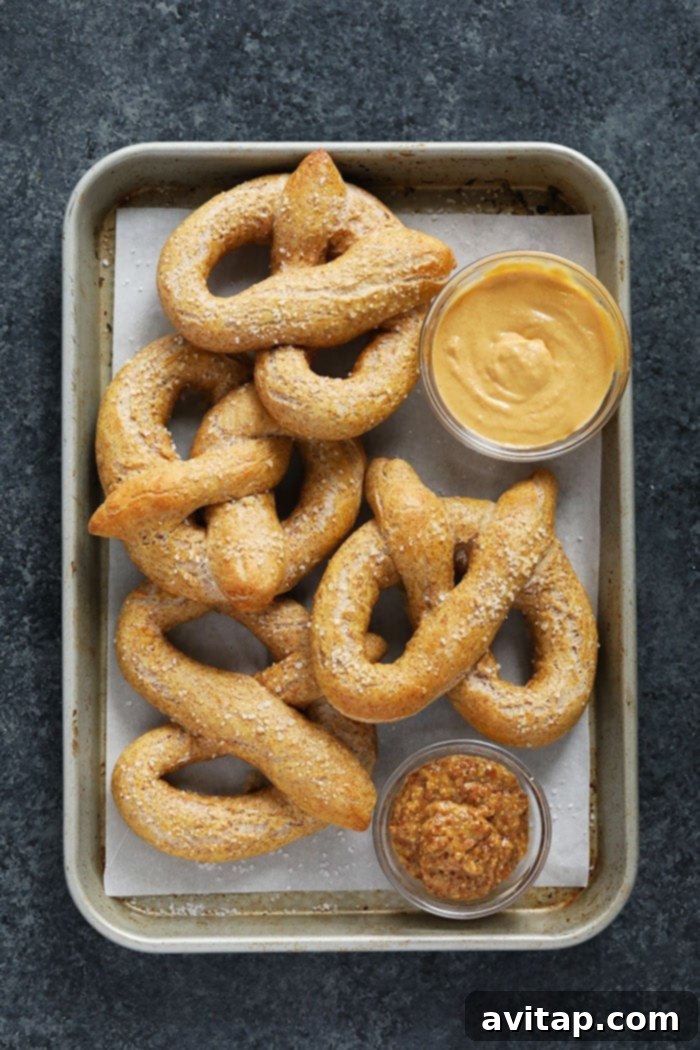
Storing and Reheating Your Delicious Pretzels
To keep your homemade soft pretzels fresh, store any leftovers in an airtight container at room temperature for up to 2-3 days. They are quite good enjoyed as is, but for that just-baked warmth and chewiness, a quick reheat is recommended. You can toast them in a preheated oven at 300°F (150°C) for 1-2 minutes, or pop them in a toaster oven until warmed through. Avoid microwaving for too long, as it can make them rubbery.
For longer storage, these pretzels freeze beautifully! Once completely cooled, place them in a freezer-safe bag or container and freeze for up to 3 months. When you’re ready to enjoy them, simply let them thaw on the counter at room temperature for a few hours, then reheat using the oven method for best results.
Beyond Salt: Creative Topping Ideas for Your Pretzels
Absolutely! While coarse sea salt is the traditional topping, these versatile pretzels are a blank canvas for other delicious flavors. If you’re craving something sweet, you can easily transform them into cinnamon-sugar pretzels, just like you’d find at the mall! To do this, skip sprinkling salt over the pretzels before baking. Instead, bake them plain.
While the pretzels are still warm from the oven, brush them generously with melted butter. Then, in a shallow dish or on a baking sheet, combine granulated sugar and ground cinnamon. Dip the warm, buttered pretzels into this cinnamon-sugar mixture, ensuring they’re thoroughly coated. Other delightful sweet toppings include a drizzle of chocolate sauce or a light dusting of powdered sugar.
For savory variations, consider “Everything Bagel” seasoning for an extra flavor kick, or a sprinkle of garlic powder and Parmesan cheese before baking. The possibilities are endless!
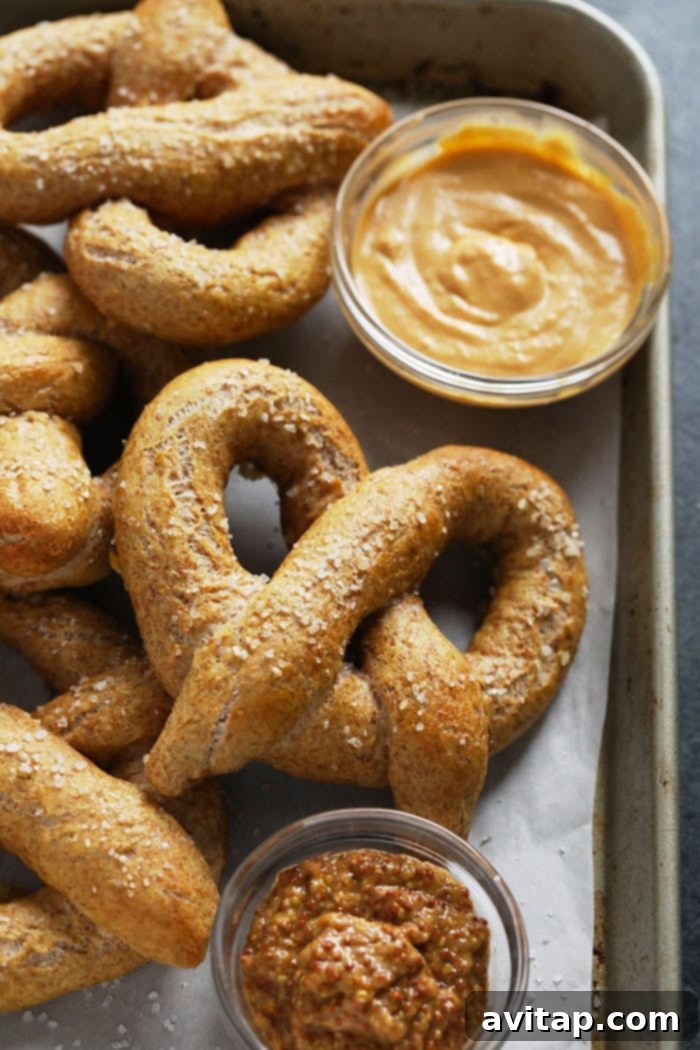
Perfect Dipping Companions for Your Whole Wheat Pretzels
These healthy soft pretzels are fantastic on their own, but pairing them with a delicious dipping sauce takes them to the next level. Whether you prefer sweet or savory, there’s a perfect dip for every pretzel lover.
- Creamy Vegan Queso: For a cheesy, flavorful savory experience without the dairy.
- Healthy Chili Cheese Dip: A robust and satisfying option perfect for game day or a hearty snack.
- Classic Mustard: Yellow mustard, spicy brown mustard, or even a gourmet Dijon mustard offer a traditional and tangy pairing.
- Warm Cheese Sauce: A creamy, melted cheese dip is a quintessential pretzel companion.
- Nut Butter: For a sweet and protein-packed option, try dipping them in your favorite peanut butter, almond butter, or cashew butter.
- Chocolate Ganache: If you’ve opted for a sweet pretzel (like cinnamon sugar), a rich chocolate ganache makes for an indulgent treat.
- Cream Cheese Dip: A simple cream cheese dip, perhaps with a touch of chives for savory or vanilla for sweet, can be surprisingly delicious.
Healthy Soft Pretzel Recipe
Lee Funke
Prep:
1 hour
Cook:
15 minutes
Total:
1 hour 15 minutes
6
Ingredients
- 1 packet of active dry yeast, (~about 2.5 teaspoons)
- 2 tablespoons brown sugar
- 1 cup lukewarm water
- 1.5 cups all-purpose flour
- 1.5 cups whole wheat flour
- 1 teaspoon salt
- 2 tablespoons butter, melted
- 1/3 cup baking soda
- 1 large egg
- coarse sea salt, for topping
Instructions
-
Preheat the oven to 400ºF (200°C) and line a baking sheet with parchment paper. Set aside.
-
In the bowl of your stand mixer, combine yeast, lukewarm water, and brown sugar. Gently stir and let sit for 10-15 minutes until a foamy layer forms, indicating the yeast is active.
-
While the yeast mixture is activating, in a separate medium bowl, whisk together all-purpose flour, whole wheat flour, salt, and melted butter until combined.
-
Once the yeast mixture is ready, attach the dough hook to your stand mixer. With the mixer on low speed, slowly add the flour mixture, about 1/3 cup at a time, to the wet ingredients. Continue mixing until a soft, non-sticky dough forms that pulls away from the sides of the bowl. You may need slightly more or less flour.
-
Lightly flour a clean counter. Remove the dough from the mixer, briefly knead for 1-2 minutes, and shape it into a ball. Cover with a clean tea towel and let rest for 10-15 minutes.
-
While the dough rests, fill a large stockpot with 8 cups of water and add 1/3 cup baking soda. Bring the mixture to a rolling boil.
-
After resting, divide the dough into 6 equal portions.
-
Take one dough portion and roll it out evenly into a 20-25 inch rope on a lightly floured surface. Twist the dough into your desired pretzel shape, firmly pinching the ends together to secure them. Repeat for all dough portions.
-
Once the baking soda water is boiling, carefully place one pretzel at a time into the water using a slotted spoon. Boil for 15-20 seconds per side. Remove, allow excess water to drip off, and place onto the prepared baking sheet.
-
Whisk one large egg with a splash of water to create an egg wash. Brush the top of each pretzel with the egg wash and generously sprinkle with coarse sea salt.
-
Bake the pretzels in the preheated oven for 13-15 minutes, or until golden brown.
-
Remove from oven, let cool slightly, and enjoy your delicious homemade soft pretzels!
Tips & Notes
- The amount of flour can vary slightly. Your dough is ready when it is soft, pliable, and no longer excessively sticky.
- Ensure your water for yeast activation is lukewarm (around 105°F / 40°C) to prevent killing the yeast.
- Don’t overcrowd the pot during the baking soda bath; boil pretzels in batches.
Nutrition
Carbohydrates: 48 g,
Protein: 8 g,
Fat: 6 g,
Fiber: 4 g
Nutrition information is automatically calculated, so should only be used as an approximation.
Shop This Post
Active Dry Yeast
Baking Sheet
Love this recipe? Leave a comment below!
Don’t forget to tag your posts on social media with the hashtag #fitfoodiefinds, we’d love to see what you’re up to!
More of Our Favorite Nostalgic Snacks
Wholesome & Delicious Retro Treats
- White Chocolate Funfetti Blondies
- Protein Monster Cookie Dough
- Healthy Oatmeal Cookies
- Instant Pot Applesauce
- Homemade Dole Whip
- Ginger Molasses Whoopie Pies