
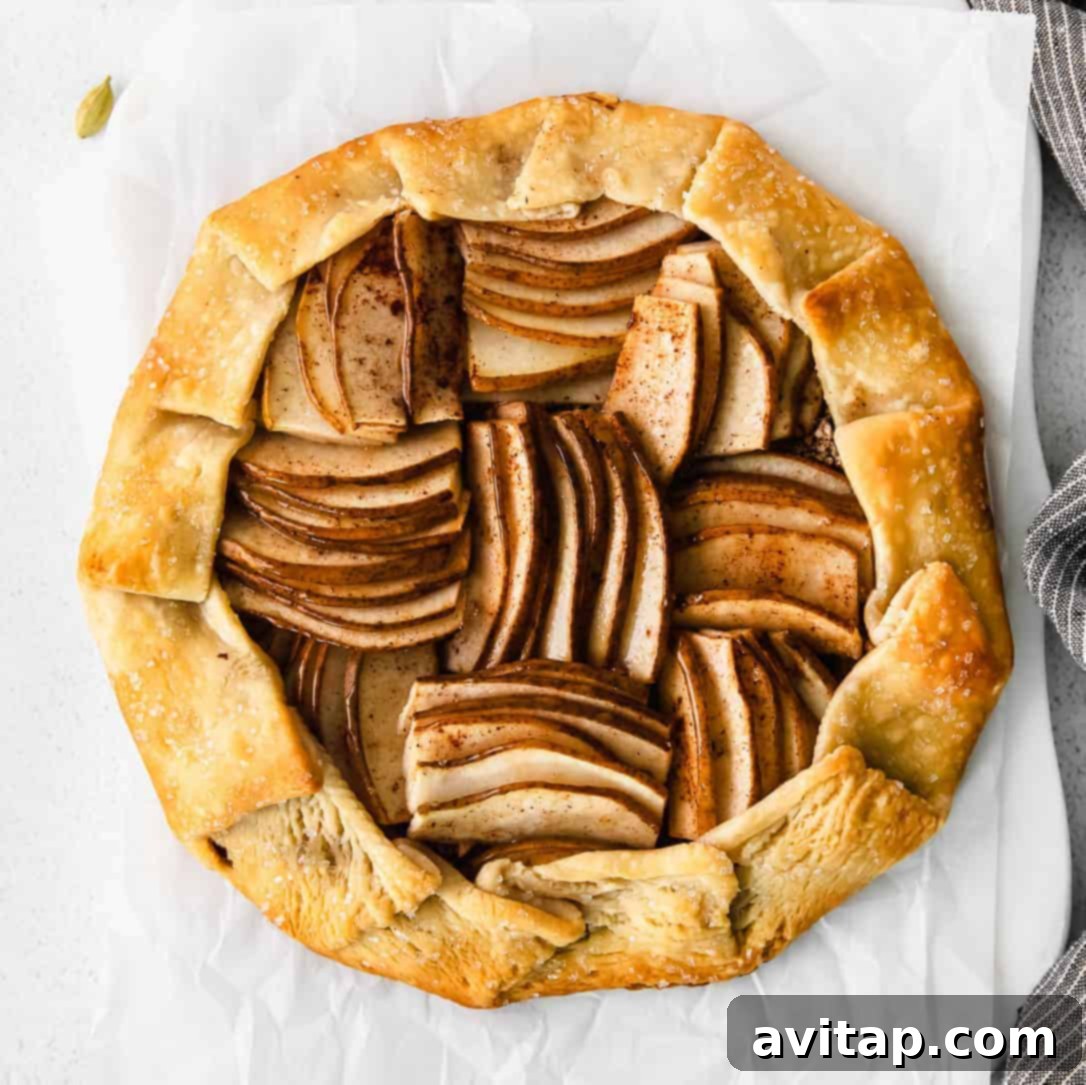
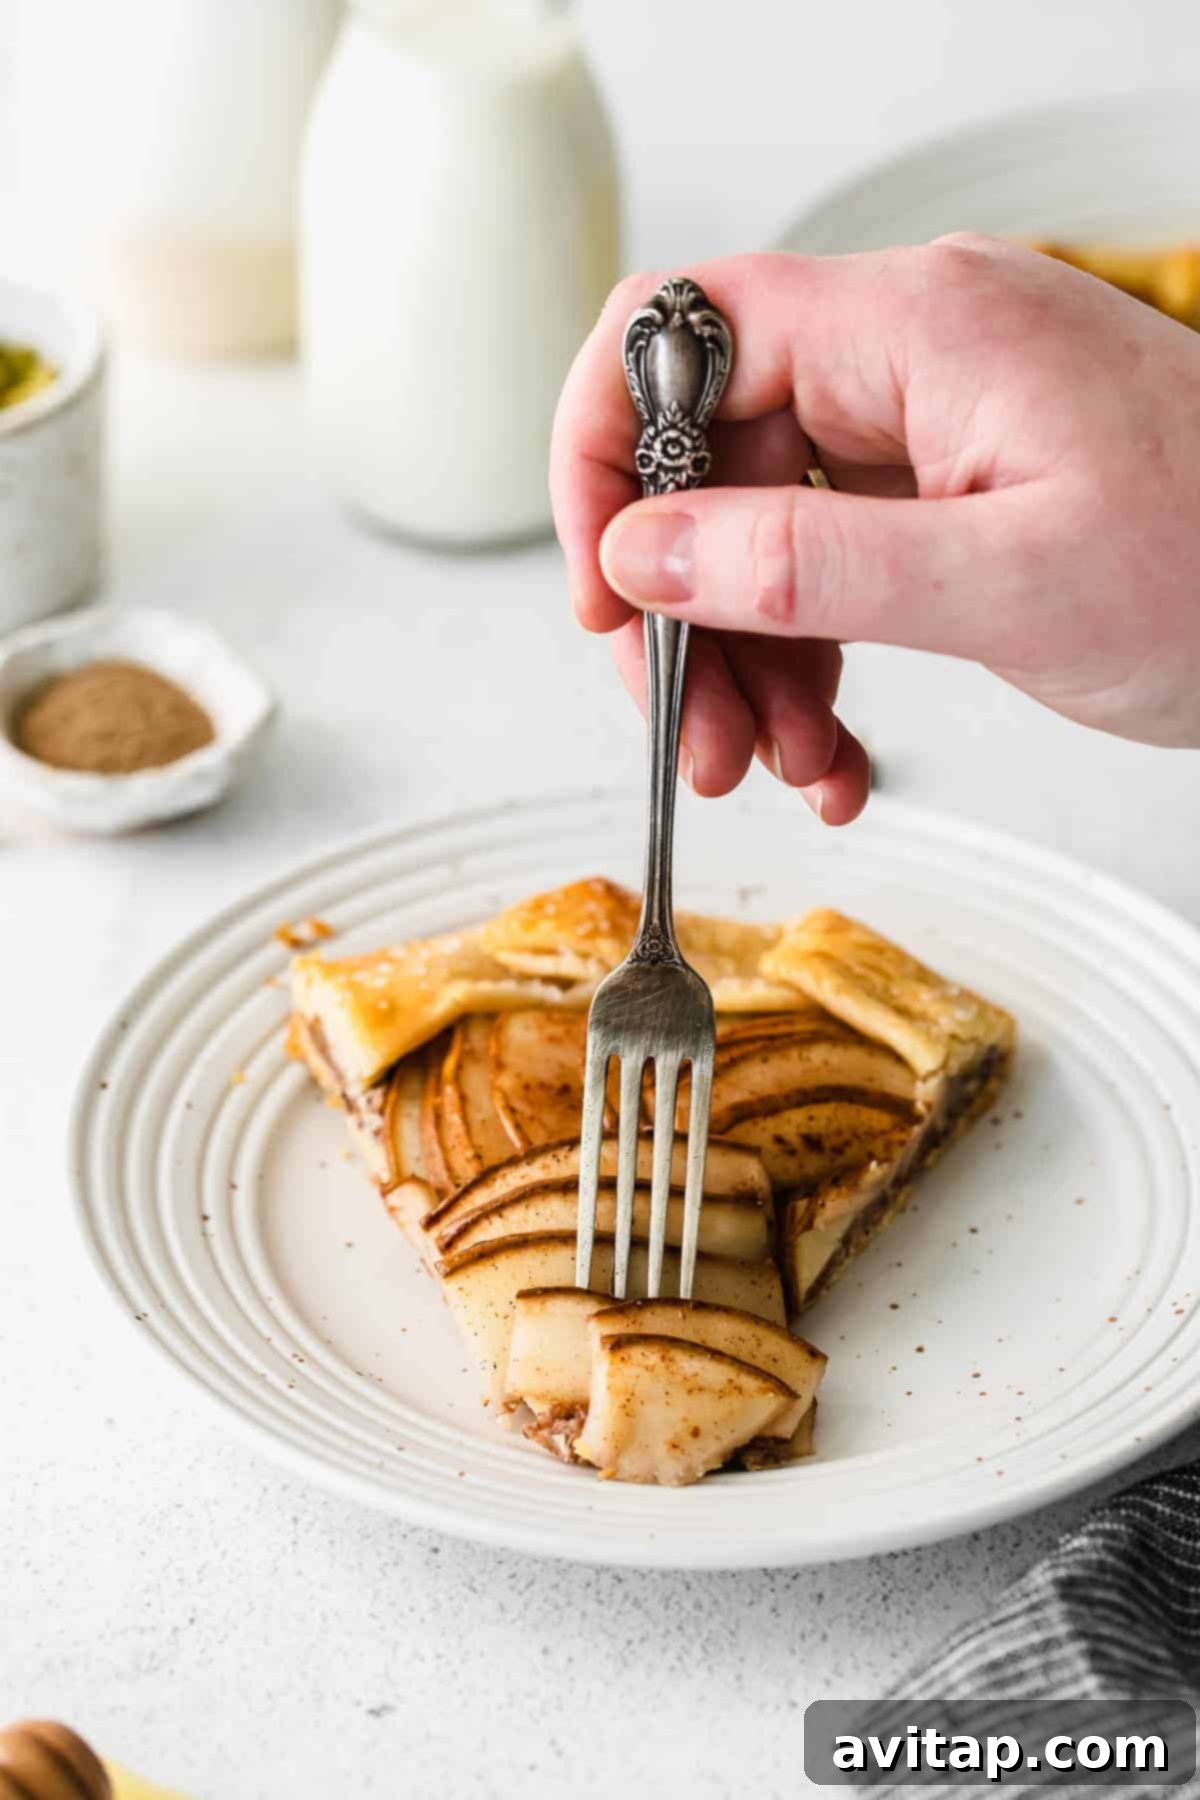
This Honey Pear Galette embodies rustic elegance, delivering an impressive dessert that is surprisingly simple to create. Forget complicated pie crusts and intricate designs; our recipe utilizes a readily available store-bought pie crust, thinly sliced fresh pears, and a delightful brown sugar and pecan sprinkle to achieve a galette with a perfectly crispy crust and a tender, flavorful filling. It’s the ideal treat when you desire something fancy without spending hours in the kitchen.
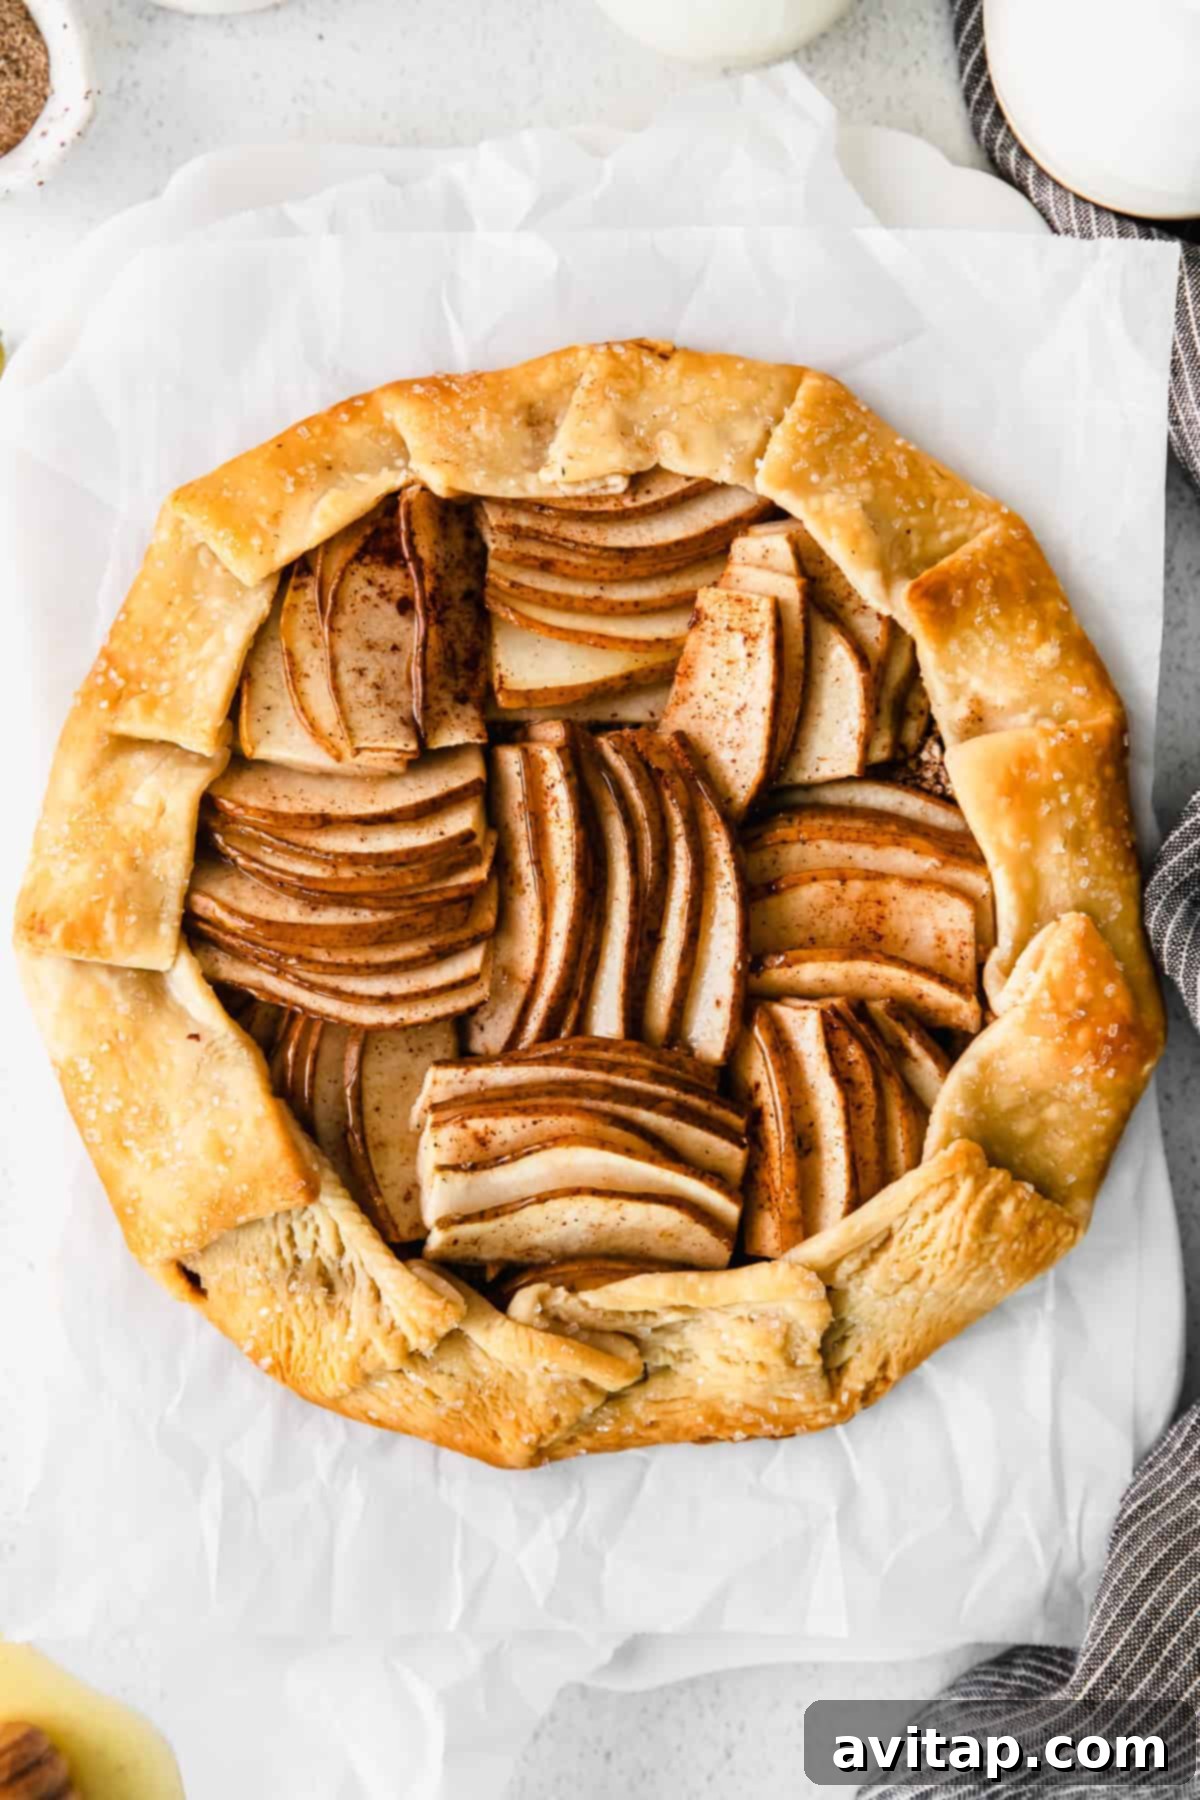
The Enchanting Honey Pear Galette: Simple Sophistication
Have you ever admired a stunning galette, perhaps on a magazine cover or a culinary blog, and convinced yourself that such a creation was beyond your baking capabilities? It’s time to challenge that notion! Galettes, often referred to as “rustic tarts,” are inherently forgiving and wonderfully easy to assemble, making them an accessible baking project for home cooks of all skill levels.
Once you’ve selected your desired filling – whether you lean towards a sweet fruit medley like our honey pear combination or a savory blend of vegetables and cheese – the process is straightforward. Simply roll out your pie dough, artfully arrange your filling, gently fold over the edges, and bake. The beauty of a galette lies in its imperfect, free-form nature; there’s no need for perfect crimping or complex lattice work. The “nitty-gritty” details for mastering this elegant dessert are all laid out below.
Why You’ll Fall in Love with This Pear Galette
This Honey Pear Galette isn’t just a recipe; it’s an experience. Here’s why it deserves a spot in your dessert rotation:
- Effortlessly Elegant: This dessert looks incredibly sophisticated, yet it comes together in under an hour from start to finish. It’s perfect for last-minute entertaining or a spontaneous sweet craving.
- Irresistible Texture and Flavor: Each bite offers a harmonious blend of sweet, crunchy pecans, tender, spiced pears, and a rich, buttery crust. The honey drizzle adds an extra layer of fragrant sweetness that truly elevates the dish.
- Perfect Warm Treat: We adore serving this warm pear galette straight from the oven, ideally accompanied by a scoop of creamy vanilla bean ice cream. The contrast of warm fruit and cold ice cream is simply heavenly. Whipped cream or a dollop of mascarpone also make excellent companions.
- Remarkably Adaptable: While our honey pear combination is a true classic, this recipe is incredibly versatile. Feel free to experiment with different fruits or spices to tailor it to your preferences or whatever fresh produce is in season.
Key Ingredients for Your Delicious Pear Galette
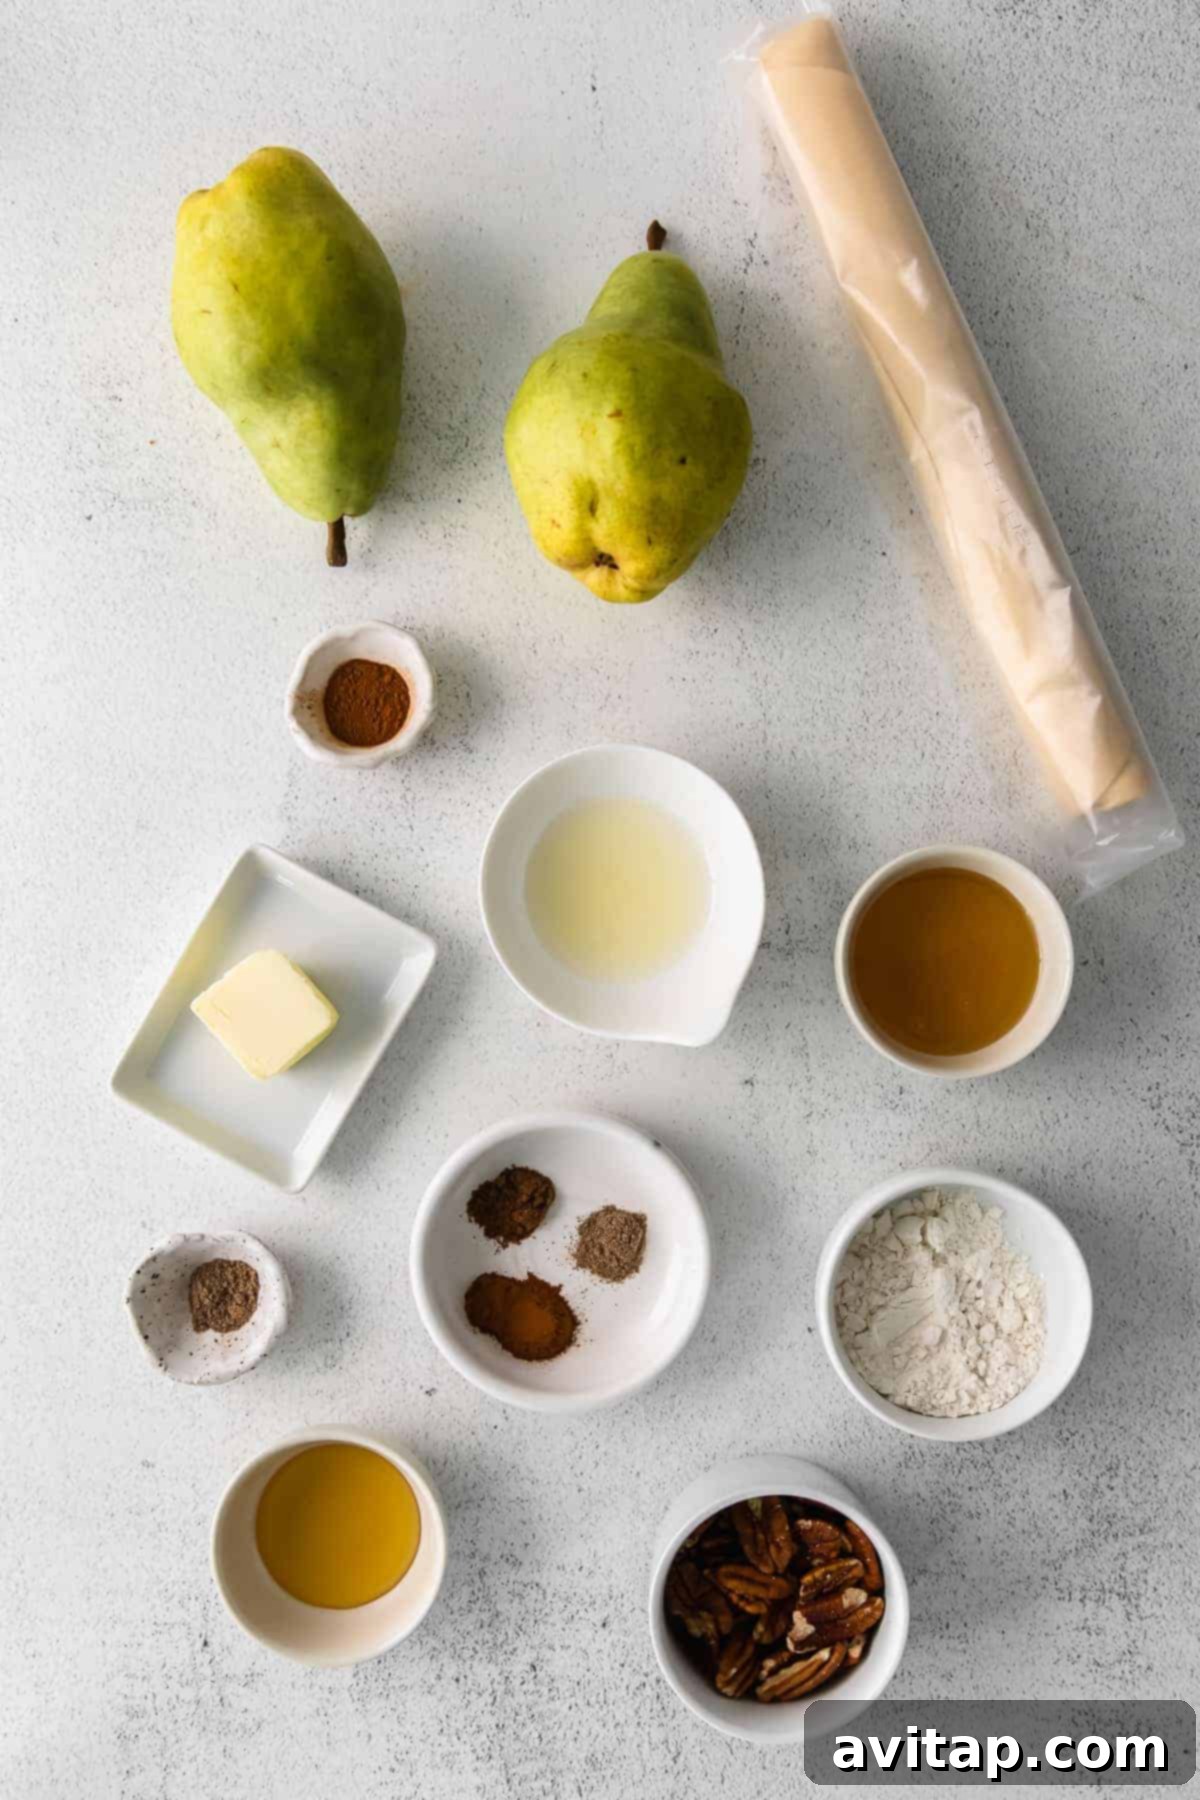
Crafting this delightful galette requires a handful of accessible ingredients, each playing a crucial role in the final flavor and texture. Here’s what you’ll need to gather:
- Pie Crust: Our goal for this recipe is speed and convenience, which is why we recommend using a good quality store-bought pie crust. This significantly reduces prep time, allowing you to enjoy your galette sooner. If you have a cherished homemade pie crust recipe, feel free to use it – just ensure it’s rolled out to the specified dimensions.
- Raw Pecans: Pecans are chosen for their earthy, buttery flavor and delightful crunch, which beautifully complement the sweet pears and warm spices. They form the base of our protective, flavorful crumble.
- All-Purpose Flour: A small amount of flour serves a dual purpose: it helps absorb any excess juices that release from the pears during baking, preventing a soggy bottom, and it also contributes to the texture of the pecan crumble.
- Aromatic Spices (Cardamom, Cinnamon, Nutmeg): This warming trio of spices is handpicked to enhance the natural sweetness of the pears. Cardamom offers a unique, slightly floral note, cinnamon provides classic warmth, and nutmeg adds a hint of sweet spice, creating a complex and inviting aroma.
- Honey: True to its name, honey is a star in this galette. It’s incorporated into the pecan crumble, brushed onto the crust with butter for a glossy finish, and drizzled over the baked galette for an extra layer of golden sweetness. Its floral notes perfectly match the pears.
- Yellow Pears: For the best texture, opt for yellow pears that are firm but not rock-hard. Varieties like Bartlett, Anjou, or Bosc work wonderfully. Avoid overly ripe or mushy pears, as they can become watery and lose their shape during baking. Thin slicing is key to even cooking.
- Fresh Lemon Juice: Do not skip the lemon juice! It’s an essential ingredient that brightens the flavor of the pears and, more importantly, prevents them from oxidizing and turning brown before and during baking.
- Unsalted Butter: Melted butter is combined with honey to create a luscious glaze that is brushed over the galette crust. This not only imparts a rich, golden-brown color but also adds a wonderful buttery flavor that makes the crust irresistible.
Simple Ingredient Swaps to Customize Your Galette
One of the many joys of baking galettes is their incredible adaptability. This recipe serves as a fantastic foundation, and with a few easy ingredient swaps, you can personalize it to suit your taste or what you have on hand. Don’t be afraid to get creative!
Pecans —> Walnuts: If pecans aren’t available or you prefer a different flavor, chopped walnuts make an excellent substitute in the crumble mixture, offering a similar nutty crunch.
All-Purpose Flour —> White Whole Wheat Flour: For a slightly nuttier flavor and added fiber, white whole wheat flour can be used in place of all-purpose flour for the pecan crumble.
Yellow Pears —> Any Pear Variety or Apples: While yellow pears are lovely, feel free to use other firm pear varieties (e.g., Bosc, Anjou). This recipe also works beautifully with thinly sliced apples, such as Granny Smith or Honeycrisp, offering a different but equally delicious flavor profile.
Honey —> Maple Syrup or Agave: If you’re out of honey or prefer an alternative sweetener, pure maple syrup or agave nectar can be used in the pecan mixture and for drizzling, though the flavor will be slightly different.
Cardamom/Nutmeg —> Ginger/Allspice: Experiment with other warming spices like a pinch of ground ginger or allspice for a different aromatic twist.
Essential Tools for a Smooth Galette-Making Experience
While galettes are designed to be rustic and forgiving, having a few key tools on hand can make the preparation process even smoother and more enjoyable. These aren’t strictly mandatory, but they certainly simplify things:
- Rolling Pin: Essential for rolling out your pie crust to the desired thickness and circular shape.
- Parchment Paper: Crucial for preventing the galette from sticking to your baking sheet and making cleanup a breeze. It also aids in easily transferring the assembled galette.
- Baking Sheet: A sturdy baking sheet provides the surface for baking your galette.
- Food Processor: While not strictly necessary (you can finely chop pecans by hand), a food processor makes quick work of preparing the pecan crumble, ensuring a fine, even texture.
- Sharp Knife or Mandoline: For thinly slicing the pears consistently. A mandoline (such as this one) is highly recommended for uniform slices, which ensures even baking and a beautiful presentation. If using a knife, take your time for thin, consistent cuts.
- Large Mixing Bowls: For tossing pears with lemon juice and spices, and for preparing the pecan mixture.
- Pastry Brush: Ideal for evenly coating the crust and pears with the honey-butter glaze.
- Measuring Cups and Spoons: For accurate ingredient measurements, ensuring consistent results.
Mastering the Art of Galette Making: Step-by-Step Guide
Galettes share many wonderful characteristics with traditional pies, utilizing similar dough and often showcasing delicious fruit fillings. However, the galette distinguishes itself by being far less fussy and much easier to create. Its free-form nature eliminates the pressure of a perfect pie shell, inviting creativity and celebrating rustic charm. Let’s walk through the simple steps to create your masterpiece.
Step 1: Prepare and Chill the Crust for a Flaky Foundation
A crucial step for achieving a wonderfully flaky and firm galette crust is proper chilling. This prevents the dough from becoming sticky or overly soft during assembly and helps it hold its shape in the oven.
Gently roll out your store-bought pie crust (or homemade dough) on a lightly floured surface or directly between two sheets of parchment paper. Aim for a roughly 10-inch diameter circle, approximately 1/8 inch thick. Uniform thickness is important for even baking.
Once rolled, carefully transfer the crust onto a parchment paper-lined large plate or a clean baking sheet. Cover it loosely with plastic wrap and refrigerate for a minimum of 15 minutes. This chilling period allows the gluten in the dough to relax and the butter to firm up, leading to a crispier crust.
Step 2: Craft the Essential Pecan Crumble
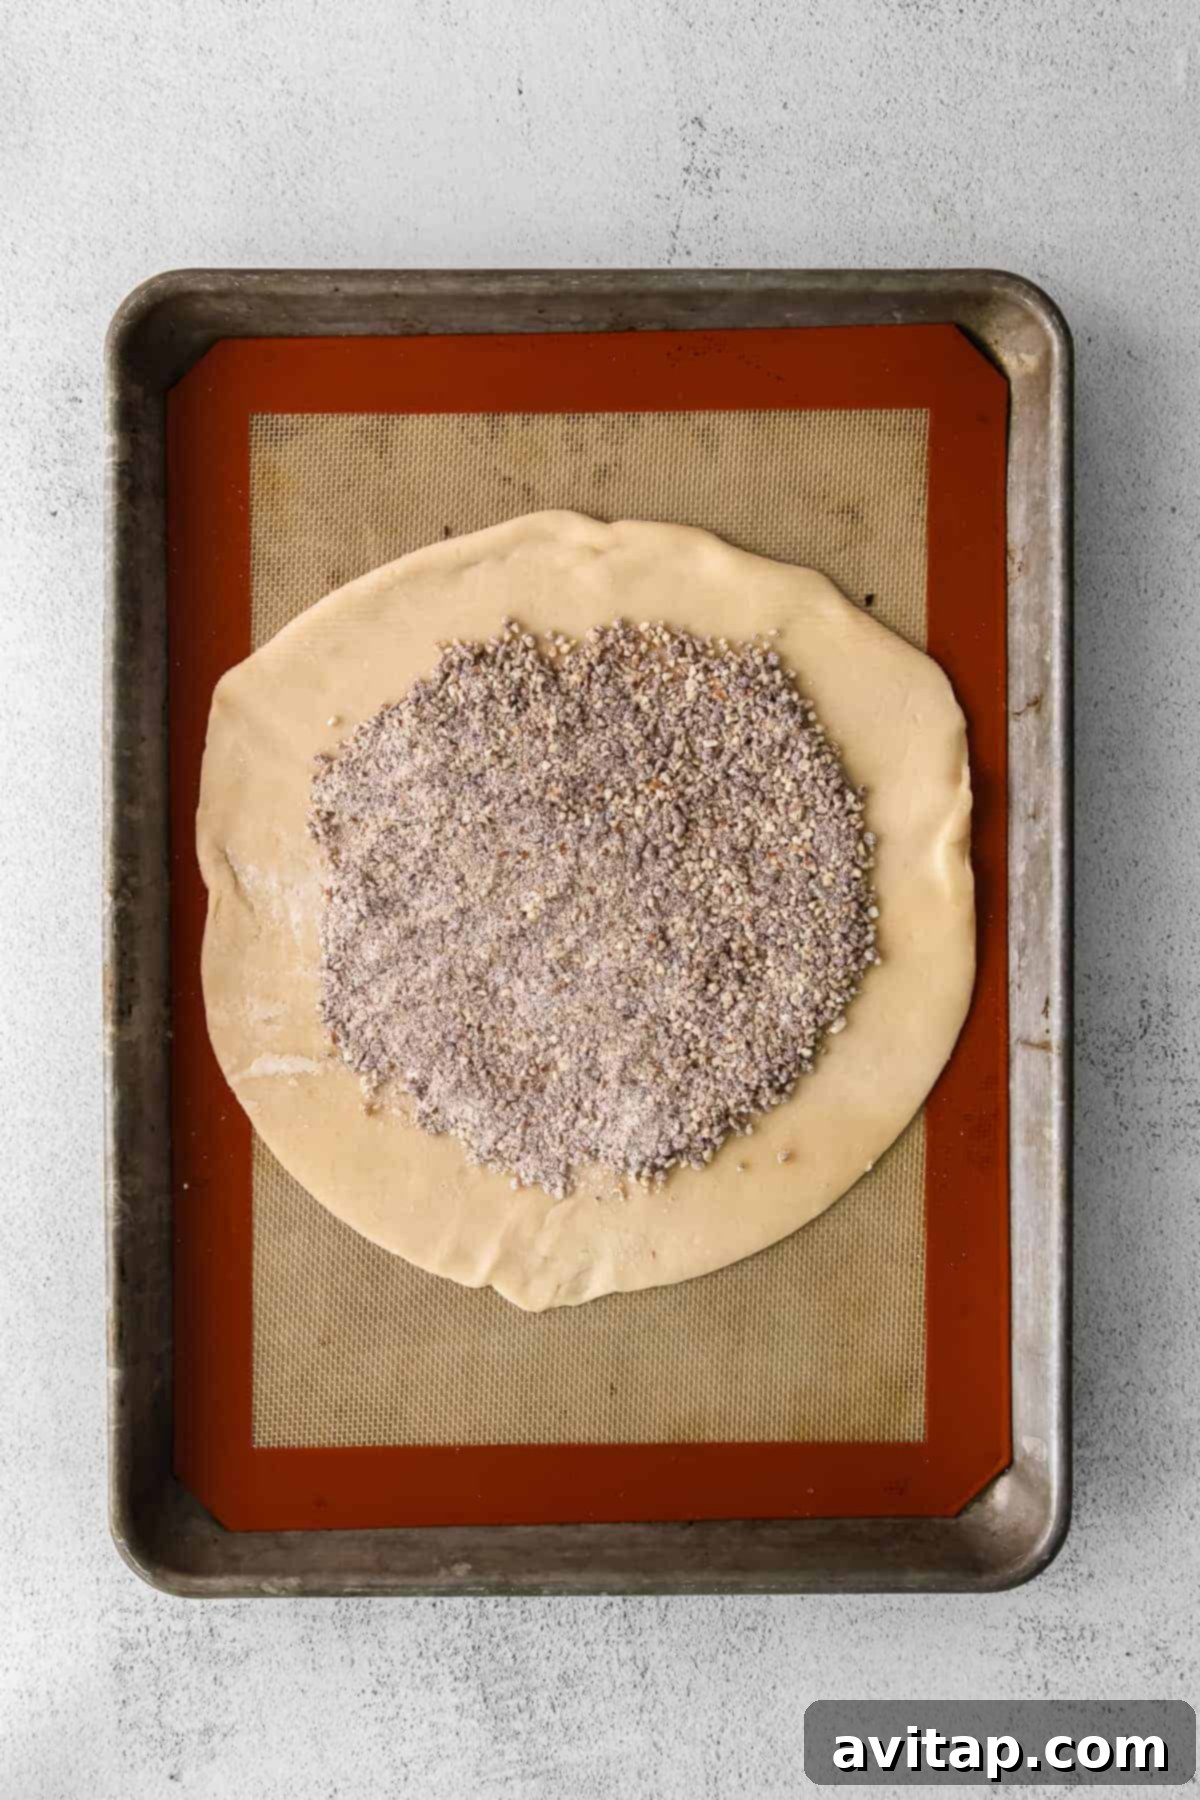
This pecan mixture is a game-changer for your galette. It serves a vital role in preventing a soggy crust by absorbing excess moisture from the pears, while simultaneously infusing the base with a rich, nutty flavor and a delightful textural contrast. Do not skip this step!
While your pie crust is chilling in the refrigerator, combine the raw pecans, all-purpose flour, 1/4 teaspoon ground cardamom, 1/2 teaspoon ground cinnamon, and 1/4 teaspoon ground nutmeg in a food processor. Pulse on low speed until the ingredients are finely processed and the pecans resemble a coarse flour. Be careful not to over-process, as you want a crumbly texture, not a paste.
Next, with the food processor running on low, slowly drizzle in 2 teaspoons of honey. Continue to process just until the honey is incorporated and the mixture comes together into a moist crumble. Immediately stop processing once combined to prevent it from forming a dough. Set this fragrant pecan mixture aside.
What is the purpose of the pecan mixture in this galette?
The pecan mixture is strategically placed on the galette dough before adding the pear slices. Its primary function is to create a barrier, soaking up any natural liquids that release from the pears during baking. This crucial step ensures your galette crust remains crisp and flaky, rather than becoming soft and soggy. Additionally, it contributes a wonderful depth of flavor and a pleasing textural crunch that perfectly complements the soft fruit filling.
Step 3: Perfectly Prep Your Pears for Optimal Flavor and Texture
The secret to a beautifully baked fruit galette, regardless of the fruit you choose, lies in uniformly thin slices. This not only ensures that the fruit cooks evenly and becomes tender but also significantly reduces the overall baking time. Precision in slicing leads to a superior final product.
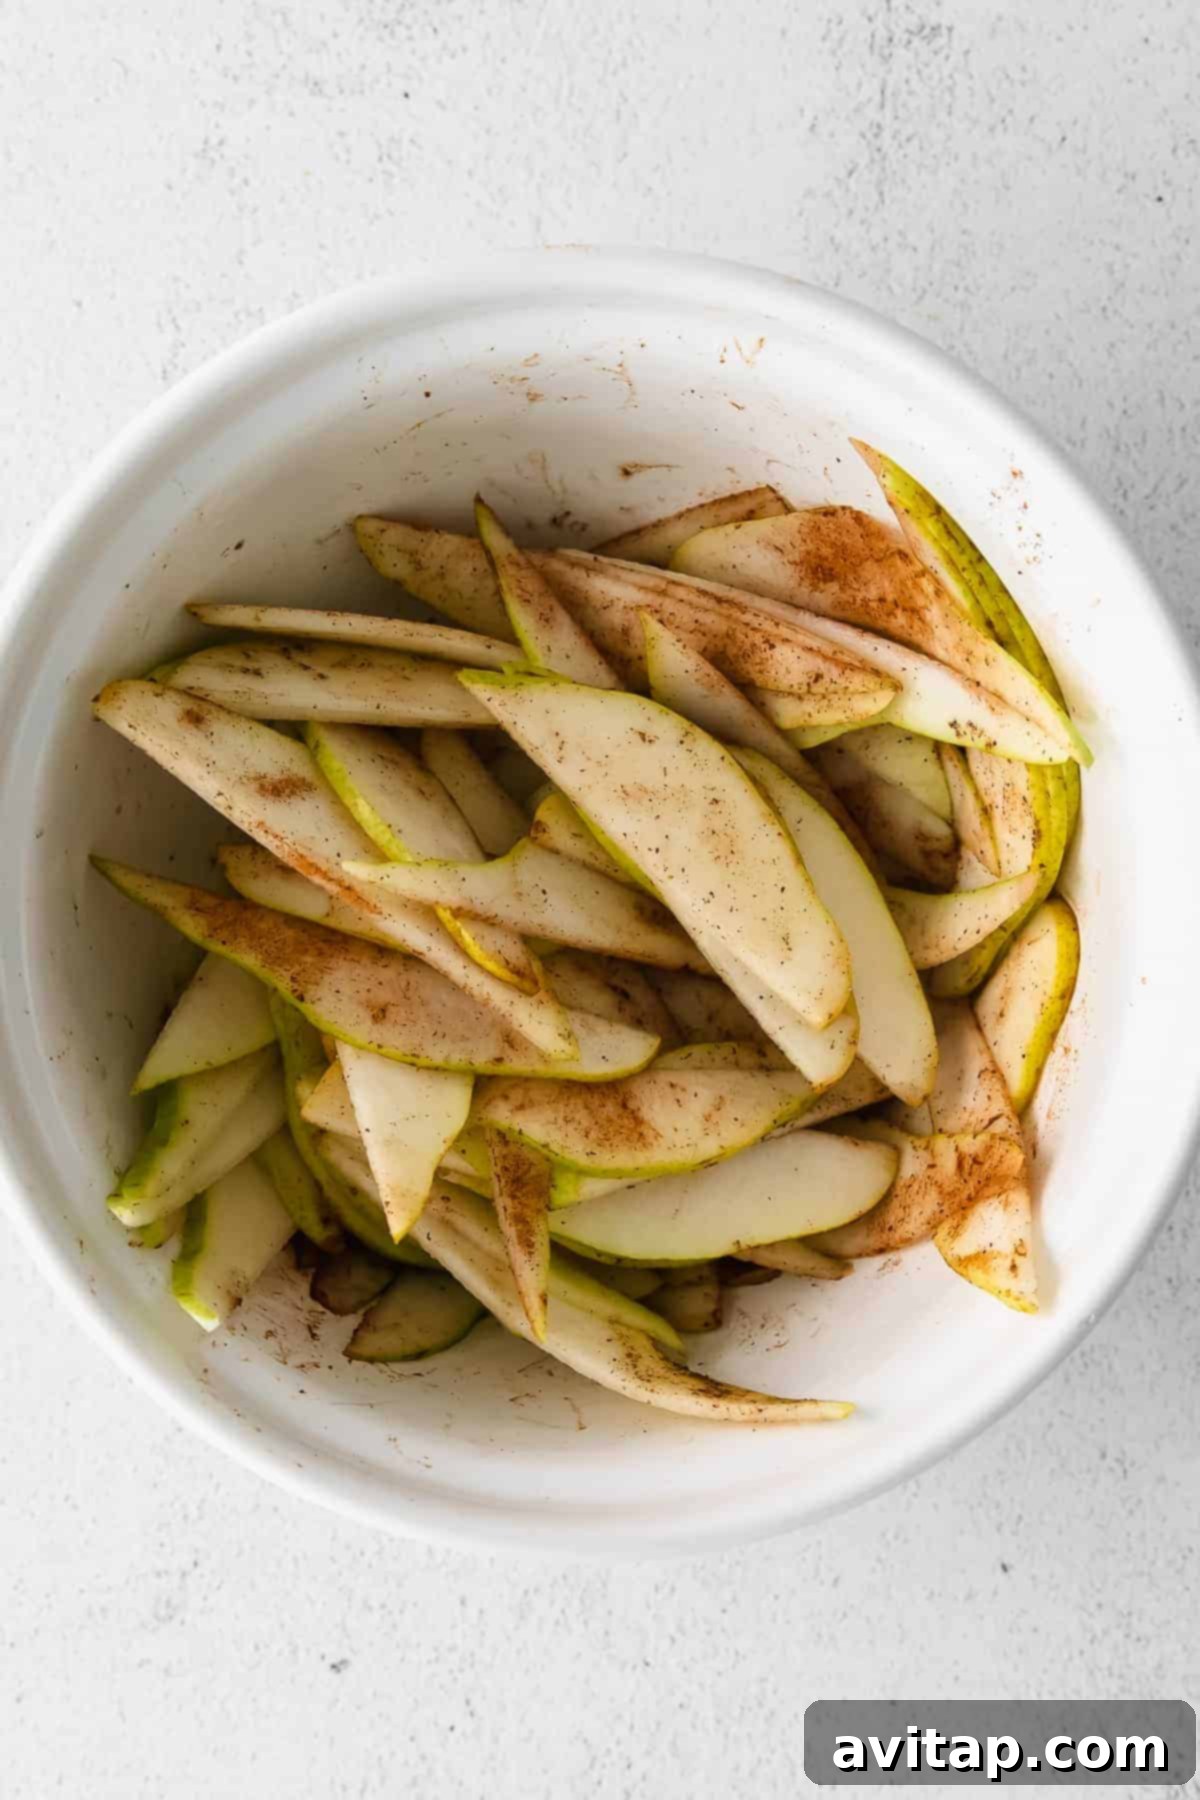
To prepare your pears for the galette, first wash and core them. Then, using a mandoline (our preferred tool for consistent results) or a very sharp knife, thinly slice the pears into approximately 1/8-inch thick pieces. The thinner and more uniform, the better. Place these delicate pear slices into a large mixing bowl.
Immediately add 1 tablespoon of fresh lemon juice to the sliced pears and gently toss them. This essential step prevents the pears from browning due to oxidation, preserving their fresh appearance and bright flavor.
Finally, sprinkle the remaining 1/4 teaspoon of cardamom, 1/2 teaspoon of cinnamon, and 1/4 teaspoon of nutmeg over the lemon-coated pears. Toss gently once more to ensure every slice is evenly coated with the aromatic spices. Set the spiced pears aside to allow the flavors to meld while you assemble the galette.
Step 4: Assemble Your Pear Masterpiece with Creative Flair
With your components prepared, it’s time for the exciting part: assembling your gorgeous honey pear galette! This is where you can let your creativity shine, as the free-form nature of a galette encourages artistic arrangement.
Remove your chilled pie crust from the refrigerator and place it onto a baking sheet that has been lined with parchment paper. This will be its home throughout the baking process.
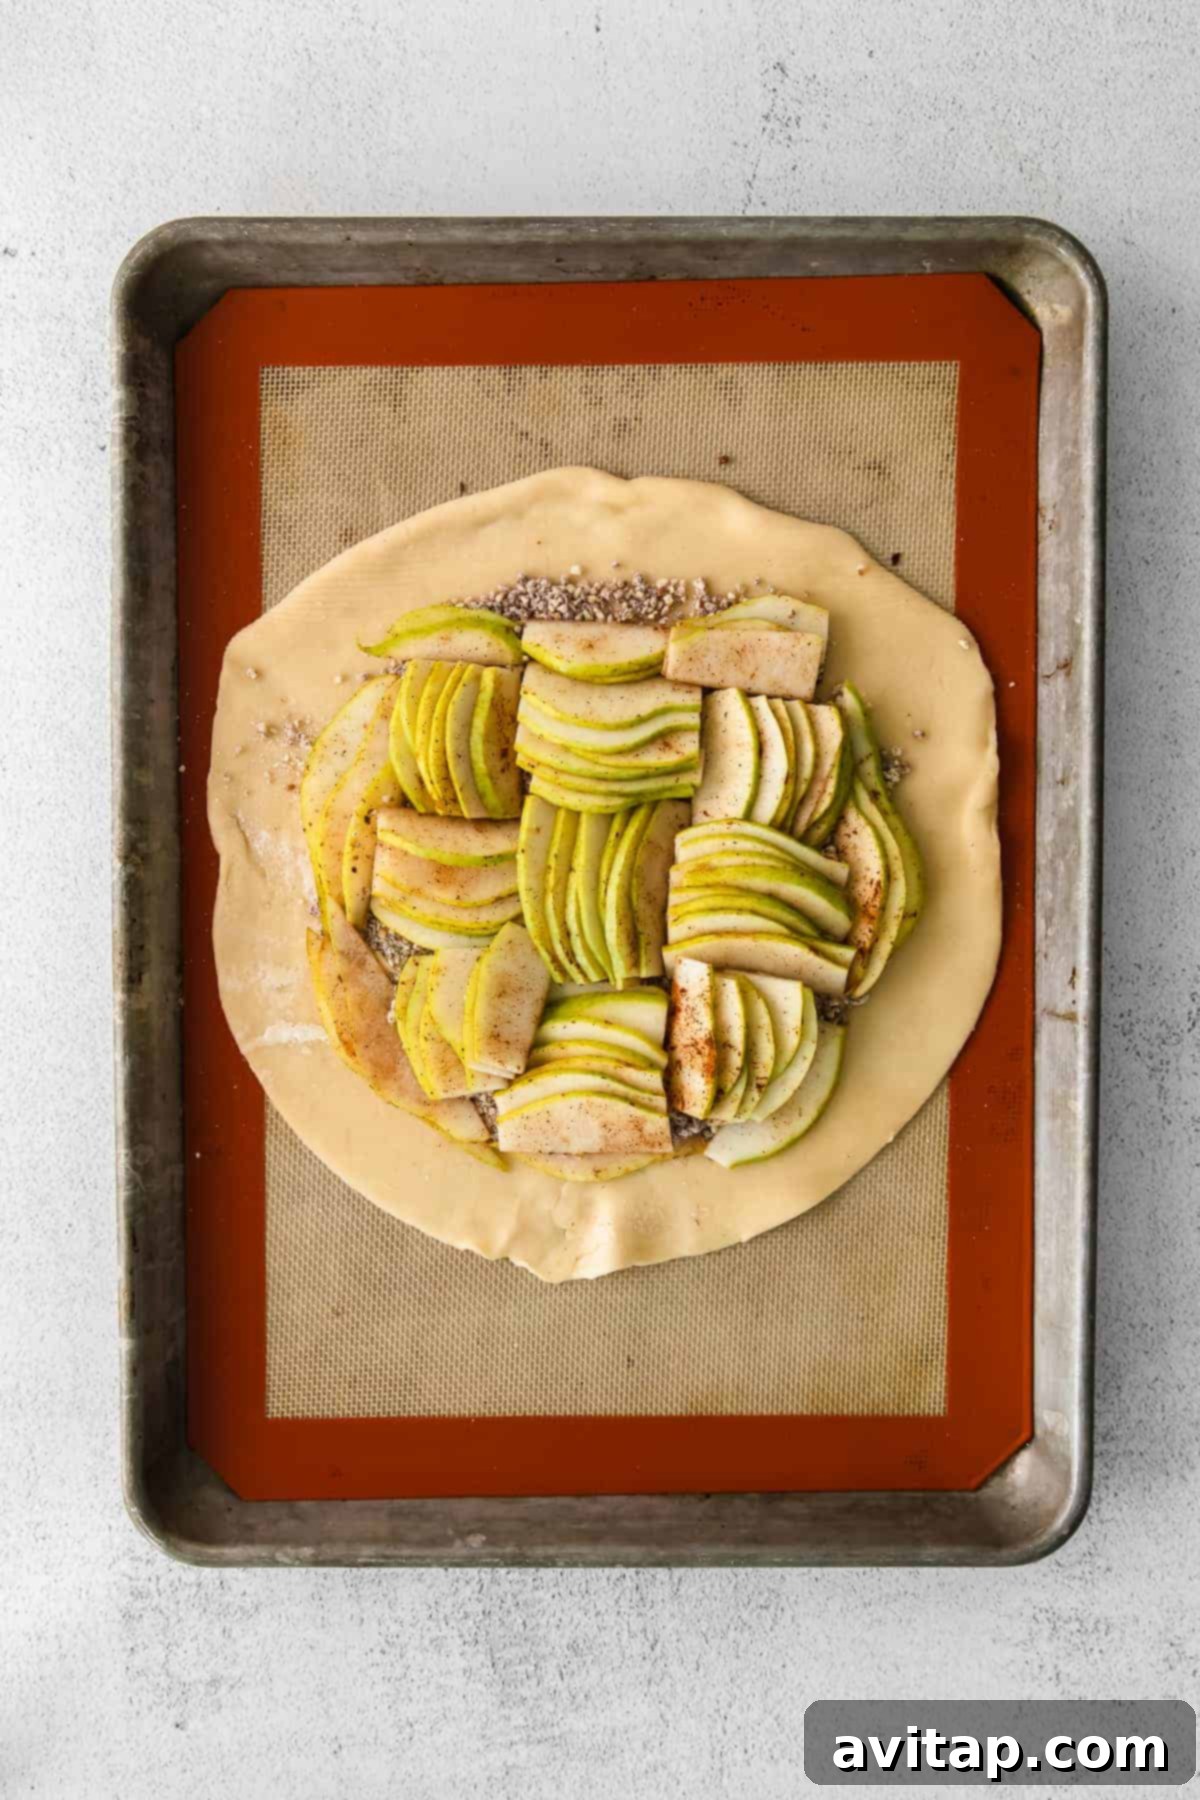
Carefully sprinkle the pecan mixture evenly over the pie crust. Be sure to leave a generous 1.5 to 2-inch border of bare dough around the entire edge of the circle. This clean border is crucial, as it will be folded over to form the rustic crust of your galette.
Now for the artistic step: arranging the pear slices. Get creative! You can opt for a beautiful spiral pattern, starting from the center and overlapping the slices as you work your way outwards towards the pecan mixture. Alternatively, create a patchwork design, layering slices in a more organic fashion. The key is to arrange the pears snugly but not too tightly, ensuring even coverage over the pecan crumble. Stop arranging when you reach the bare dough border.
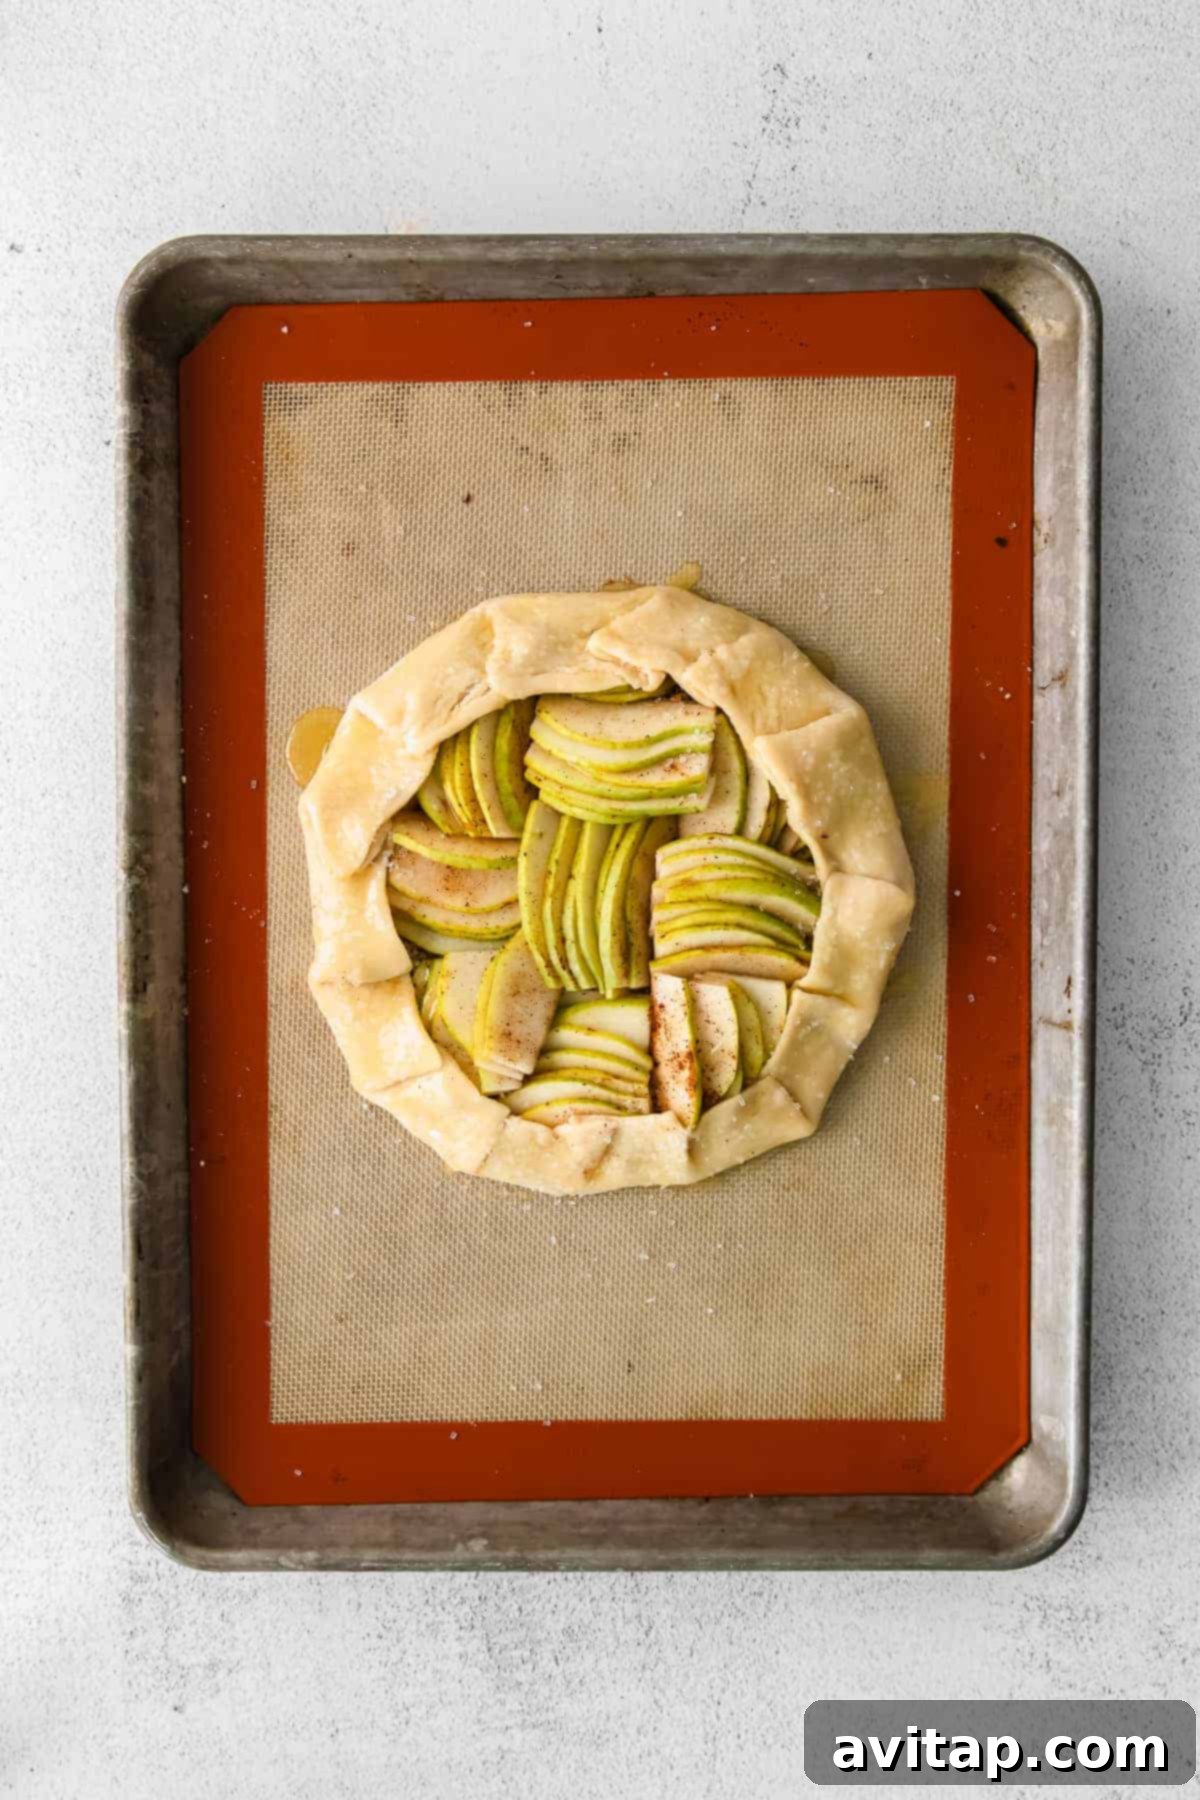
Once you are satisfied with your pear arrangement, it’s time to form the crust. Gently fold the exposed edge of the galette dough up and over the outer perimeter of the fruit filling. Work your way around the circle, creating natural pleats and folds as you go. Don’t strive for perfection; the rustic, uneven edges are part of the galette’s charm.
Finally, prepare your honey-butter glaze. In a small saucepan, gently melt 2 tablespoons of butter with 2 tablespoons of honey over low heat until fully combined and smooth. Remove from heat and, using a pastry brush, generously brush this warm honey butter mixture over the exposed crust and the pear slices. This glaze will give your galette a beautiful golden sheen and a rich, sweet, buttery flavor as it bakes.
Craving an Extra Layer of Crunch? For an additional textural delight and a hint of sparkle, sprinkle 2-3 teaspoons of turbinado sugar (or any coarse sugar like demerara or sanding sugar) over the honey-butter glaze just before placing the galette in the oven. This creates a beautifully caramelized, crunchy topping.
Step 5: Bake Your Honey Pear Galette to Golden Perfection
The moment of truth arrives as your beautifully assembled galette enters the oven. Baking in two stages helps achieve that ideal golden-brown crust and perfectly tender fruit.
Preheat your oven to 375°F (190°C). Place the parchment-lined baking sheet with your assembled galette into the preheated oven and bake for 15 minutes. This initial burst of heat helps the crust set and begin to crisp.
After 15 minutes, carefully rotate the baking sheet 180 degrees. Reduce the oven temperature slightly to 350°F (175°C) and continue baking for an additional 15 to 25 minutes. Keep a close eye on your galette during this stage. The galette is done when the crust is beautifully golden brown, and the pears are tender when pierced with a knife.
Step 6: Finish with a Drizzle and Serve!
The final touches elevate your galette from great to extraordinary, adding an extra layer of sweetness and a fresh aromatic note.
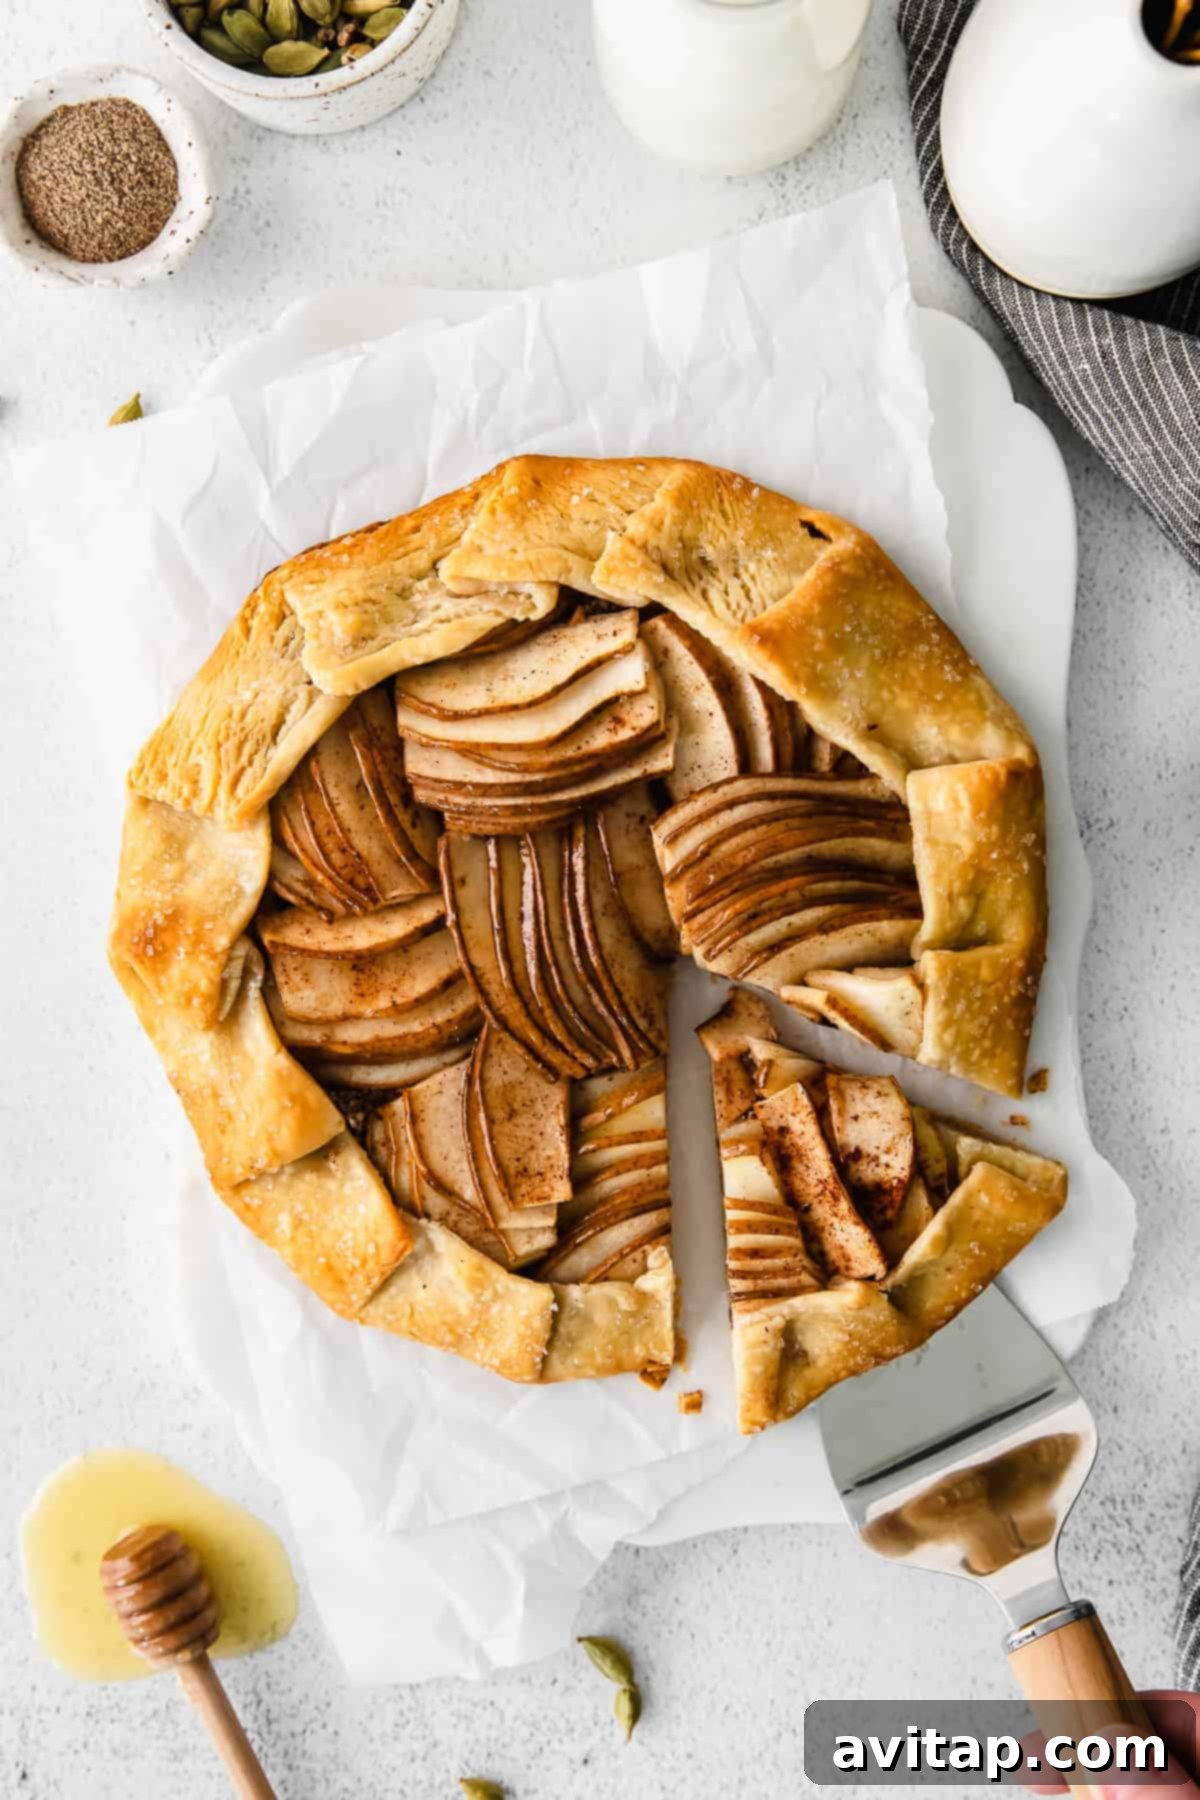
Once baked to golden perfection, carefully remove the galette from the oven. Let it cool on the baking sheet for at least 10-15 minutes before attempting to move or slice it. This allows the filling to set and prevents it from falling apart.
Before serving, give your warm galette a final, generous drizzle of fresh honey. For an added touch of gourmet elegance and a fragrant garnish, sprinkle with a few fresh thyme leaves. The herbaceous notes of thyme beautifully complement the sweet pears and honey.
This Honey Pear Galette is truly delicious on its own, but for a truly indulgent experience, serve it warm with a scoop of premium vanilla ice cream, a dollop of freshly whipped cream, or a spoonful of crème fraîche. It makes a stunning dessert for any meal, from a casual family dinner to a festive gathering.
Expert Galette Tips and Troubleshooting
To ensure your galette baking experience is always a success, keep these expert tips and tricks in mind. They cover everything from ingredient choices to storage, making sure you get a perfect, rustic tart every time.
What other fillings can I use for a galette?
The versatility of a galette is one of its greatest strengths! You can explore an endless array of sweet or savory fillings. Get creative with vegetables, cheeses, or various fruits. Here are a few popular and delicious galette filling options:
- Sweet Varieties:
- Granny Smith Apple Galette (classic and tart)
- Blueberry and Lemon Galette (bright and refreshing)
- Peach Galette (especially delightful in summer)
- Mixed Berry Galette (strawberries, raspberries, blueberries)
- Rhubarb and Strawberry Galette (sweet and tangy)
- Savory Varieties:
- Potato and Leek Galette (hearty and comforting)
- Tomato and Goat Cheese Galette (fresh and flavorful)
- Caramelized Onion and Gruyere Galette (rich and savory)
- Spinach and Feta Galette (a delicious Mediterranean twist)
- Pizza Lovers’ Galette (marinara, mozzarella, and your favorite toppings for a fun, deconstructed pizza!)
Can a galette be made in advance?
Absolutely! Galettes are excellent make-ahead desserts, which is perfect for entertaining or meal prep. You have a couple of options:
- Prepare and Refrigerate: Assemble the entire galette, right up to the point of baking (before brushing with the honey-butter glaze and baking). Cover it loosely with plastic wrap and store it in the refrigerator for up to 2-3 days. When ready to bake, preheat the oven, apply the glaze, and bake as directed, adding a few extra minutes if necessary.
- Bake and Refrigerate: Bake the galette completely, then let it cool to room temperature. Cover tightly and refrigerate for up to 2-3 days. To reheat, warm your oven to 350°F (175°C) and bake for 15-20 minutes, or until thoroughly warm and the crust is crisp again.
Can you freeze a galette for later enjoyment?
Yes, galettes freeze remarkably well, allowing you to enjoy this delicious treat months down the line. We recommend freezing a baked galette:
- To Freeze a Baked Galette: Bake the galette as instructed and let it cool completely to room temperature. Once cooled, wrap it tightly in several layers of plastic wrap, followed by a layer of aluminum foil, or place it in a freezer-safe container. Label it with the date. It can be frozen for up to 3 months.
- To Reheat from Frozen: There’s no need to thaw! Simply preheat your oven to 350°F (175°C). Place the frozen galette (unwrapped) directly on a baking sheet and bake for 25-30 minutes, or until heated through and the crust is crisp. Keep an eye on it to prevent over-browning.
Why is my galette crust soggy?
A soggy crust is a common issue, often due to excess moisture from the fruit. Our pecan crumble helps significantly, but here are extra tips:
- Firm Pears: Always start with firm, slightly under-ripe pears.
- Thin Slices: Thin slices release less juice and cook faster.
- Lemon Juice: While preventing browning, lemon juice also helps the pears firm up slightly.
- Pecan Crumble: Ensure you use the full amount of pecan mixture as a moisture barrier.
- Hot Oven: Make sure your oven is fully preheated to the correct temperature to ensure the crust begins baking immediately.
- Baking Stone/Steel: Baking on a preheated baking stone or steel can provide a boost of heat to the bottom crust, making it extra crispy.
More of our Favorite…
Delectable Dessert Recipes You’ll Love
If you’ve enjoyed the simple elegance of this Honey Pear Galette, you’re in for a treat! Explore more of our cherished dessert recipes that are perfect for satisfying your sweet tooth, impressing guests, or simply enjoying a delightful homemade treat.
- Simple Apple Tart: Another rustic fruit tart, showcasing the timeless appeal of apples.
- Healthy Cheesecake Recipe: A lighter take on a classic, creamy dessert without compromising on flavor.
- Cranberry Swirl Cheesecake Bites: Adorable, bite-sized cheesecakes perfect for parties or individual servings.
- Easy Apple Crisp: A comforting, warm dessert with a crunchy oat topping that’s always a crowd-pleaser.
- Decadent Chocolate Lava Cake: For the ultimate chocolate indulgence, with a molten center.
- Seasonal Berry Cobbler: A bubbling fruit dessert topped with a fluffy biscuit-like crust.
Honey Pear Galette
This beautiful pear galette is made with a simple store-bought crust, slices of thin pears, and a delicious pecan crumble. It’s the perfect elegant dessert for any occasion.
Ingredients
- 1 pie crust rolled into a 10-inch round (we used a Pillsbury pie crust)
- 1/4 cup raw pecans
- 2 tablespoons all-purpose flour
- 1/2 teaspoon ground cardamom, separated
- 1 teaspoon ground cinnamon, separated
- 1/4 teaspoon ground nutmeg
- 2 teaspoons honey, plus more for topping
- 2 yellow pears, thinly sliced with a mandoline or sharp knife
- 1 tablespoon fresh lemon juice
Honey Glaze
- 2 tablespoons honey
- 2 tablespoons butter
Instructions
- Preheat the oven to 375ºF (190°C) and line a baking sheet with parchment paper.
- Roll out your pie crust into a 10-inch circle, about 1/8-inch thick, and place it on a lined plate or baking sheet. Refrigerate for 15 minutes to firm up.
- While the pie crust chills, combine pecans, flour, 1/4 teaspoon cardamom, 1/2 teaspoon cinnamon, and 1/4 teaspoon nutmeg in a food processor. Process on low until pecans are finely ground into a coarse flour.
- With the food processor running on low, slowly drizzle in 2 teaspoons of honey until just combined into a crumble. Do not over-process into a dough. Set aside.
- Place thin pear slices into a large bowl and toss with 1 tablespoon of lemon juice. Sprinkle the remaining 1/4 teaspoon cardamom and 1/2 teaspoon cinnamon over the pears and toss to combine.
- Remove the pie crust from the fridge and place it on your parchment-lined baking sheet. Pour the pecan mixture into the middle of the crust, spreading it evenly but leaving a 1.5 to 2-inch clean border around the edges.
- Arrange the pear slices artfully on top of the pecan mixture, starting from the center and overlapping them in layers, moving towards the clean edge of the crust.
- Fold the clean edges of the pie crust up and over the pears, creating a rustic, pleated border.
- In a small saucepan, gently heat 2 tablespoons of honey and 2 tablespoons of butter over medium-low heat until melted and combined.
- Remove the honey-butter glaze from the heat and use a pastry brush to generously brush it over the folded crust and the exposed pear slices.
- Place the galette in the preheated oven and bake for 15 minutes. Rotate the pan 180 degrees, reduce the oven temperature to 350°F (175°C), and bake for an additional 15-25 minutes, or until the crust is golden brown and the pears are tender.
- Remove the galette from the oven and let it rest on the baking sheet for 10-15 minutes. Drizzle with additional honey and serve warm, optionally garnished with fresh thyme.
Tips & Notes
- You can use either a homemade pie crust or a quality store-bought one. The crucial part is to ensure it’s rolled out to approximately a 10-inch circle that is about 1/8-inch thick for even baking.
- We’ve used Bartlett pears, but feel free to substitute with any firm pear variety you prefer, such as Anjou or Bosc. Even crisp apples like Granny Smith or Honeycrisp can be a delicious alternative.
- Never skip the lemon juice! It’s essential for preventing your pear slices from browning prematurely and adds a lovely bright counterpoint to the sweetness.
- The pecan mixture is vital for both flavor and function. It not only adds a wonderful nutty taste and crunch but, more importantly, acts as a barrier to absorb excess moisture from the pears, ensuring your galette crust remains crisp and never soggy.
- For an extra crunch and sparkle, sprinkle turbinado or coarse sugar over the honey-butter glaze before baking.
- Serve warm with vanilla ice cream, whipped cream, or crème fraîche for an elevated dessert experience.
Watch It
For a visual guide, watch our step-by-step video on how to prepare this delicious Honey Pear Galette.
Nutrition Information (per serving)
Calories: 201 kcal, Carbohydrates: 24 g, Protein: 2 g, Fat: 11 g, Fiber: 2 g, Sugar: 10 g
Nutrition information is automatically calculated and should be used as an approximation.
Love this recipe? Share your thoughts below!
Don’t forget to tag your posts on social media with the hashtag #fitfoodiefinds – we’d absolutely love to see your beautiful creations!