

Unlock the secret to effortlessly delicious butternut squash with your Instant Pot! This comprehensive guide shows you how to achieve perfectly cooked butternut squash in under 20 minutes, offering two versatile preparation methods to suit any culinary need. Whether you prefer it cubed for a quick side dish or halved for creamy purees, the Instant Pot transforms this humble autumn vegetable into a culinary delight with minimal effort.
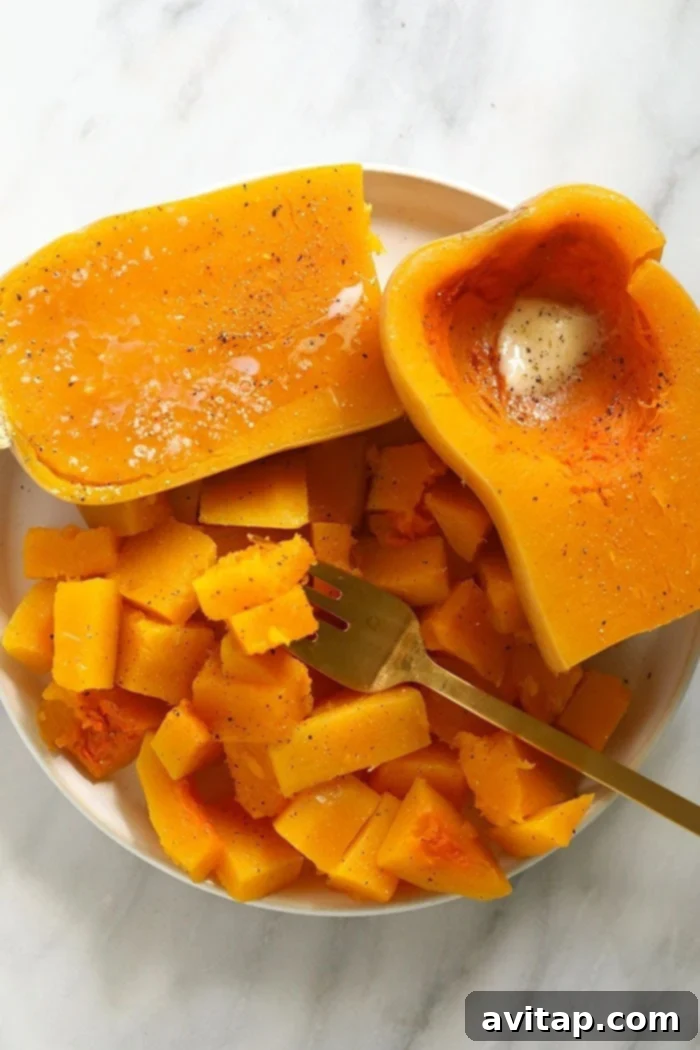
Butternut squash, a culinary chameleon, often finds its way into our kitchens during the cooler fall and winter months. Its sweet, nutty flavor and creamy texture make it a beloved ingredient, yet many find its tough exterior and dense flesh intimidating to prepare. We’ve certainly received countless questions about the most efficient and straightforward way to cook this fantastic vegetable. While some might opt for its sweeter cousin, the sweet potato, we firmly believe butternut squash holds a special place, offering unparalleled versatility and a distinct flavor profile that shines in both sweet and savory applications.
From mashing it into a comforting side, blending it into silky soups, roasting it to caramelized perfection, or pureeing it for baby food or baking, the possibilities are truly endless. But if there’s one method that consistently delivers exceptional results with incredible ease, it’s cooking butternut squash in the Instant Pot. This pressure cooking marvel handles the hard work, transforming raw squash into tender perfection in a fraction of the time compared to traditional methods. Imagine perfectly cooked butternut squash, ready to eat or incorporate into your favorite butternut squash recipes, in under 10 minutes of active cooking time. It’s truly a game-changer for busy home cooks!
No Instant Pot? No problem! You can still enjoy delicious roasted butternut squash. Follow our detailed tutorial on how to cut and roast butternut squash in the oven for equally delightful results.
Why Choose the Instant Pot for Butternut Squash?
The Instant Pot isn’t just a trendy kitchen gadget; it’s a powerhouse when it comes to cooking tough root vegetables like butternut squash. Here’s why it’s our go-to method:
- Unbeatable Speed: Traditional roasting or boiling can take 30-45 minutes or more. The Instant Pot drastically cuts down cooking time, delivering fork-tender squash in as little as 3-8 minutes under pressure.
- Effortless & Hands-Off: Once you’ve prepped the squash and sealed the lid, the Instant Pot does all the work. No constant monitoring, stirring, or checking for doneness required. This frees you up to prepare other components of your meal.
- Consistent Results: Pressure cooking ensures even heat distribution, resulting in uniformly cooked squash every single time. Say goodbye to unevenly cooked chunks – you’ll get perfectly tender squash from edge to center.
- Nutrient Retention: Because pressure cooking uses less liquid and a sealed environment, more water-soluble vitamins and minerals are retained compared to boiling, making it a healthier cooking method.
- Easy Cleanup: Cooking in one pot (or with a bowl on a trivet) simplifies cleanup significantly, a major bonus on busy weeknights.
Choosing and Preparing Your Butternut Squash
Selecting the right butternut squash is the first step to a delicious meal. Look for squash that feels heavy for its size, has a dull, not shiny, skin (a sign of ripeness), and is free from soft spots, blemishes, or green patches. The skin should be uniformly tan.
Preparing butternut squash can seem daunting due to its hard skin. Here’s a detailed, safe way to tackle it:
- Stabilize: Place the squash on a sturdy cutting board. For safety, it’s crucial to create a flat, stable surface. Slice off both ends of the squash to create two flat surfaces.
- Peel: Stand the squash upright on one of its flat ends. Using a sharp vegetable peeler, carefully peel the tough outer skin. Work from top to bottom, rotating the squash as you go. Avoid using a knife for peeling, as the uneven surface makes it difficult and potentially dangerous.
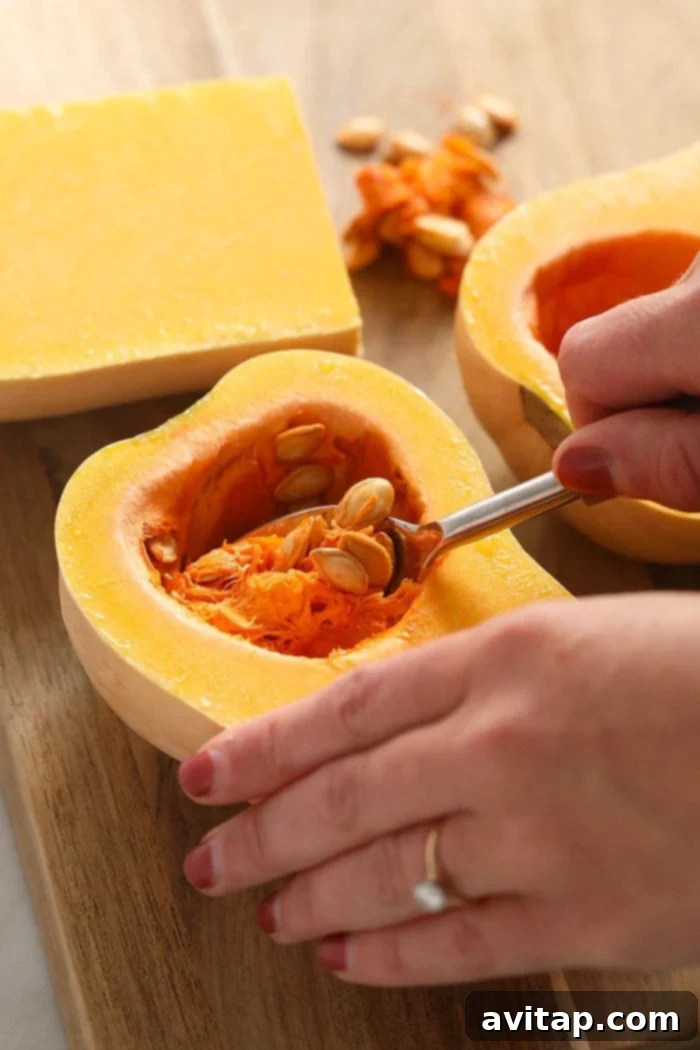
- Halve and Deseed: Lay the peeled squash on its side. Carefully slice it lengthwise down the middle using a large, sharp chef’s knife. Scoop out the seeds and fibrous strands with a spoon. Don’t discard the seeds; they can be roasted for a tasty snack!
Essential Ingredients for Instant Pot Butternut Squash
Simplicity is key when it comes to this Instant Pot method. You only need a couple of core ingredients to get started, with optional additions to elevate the flavor:
- Butternut Squash: One medium-sized squash (approx. 2-3 pounds) is usually perfect for 4 servings.
- Water: About 1 cup is sufficient to create the necessary steam for pressure cooking.
- Olive Oil (optional): For sautéing cubed squash before pressure cooking, which adds a layer of rich, caramelized flavor.
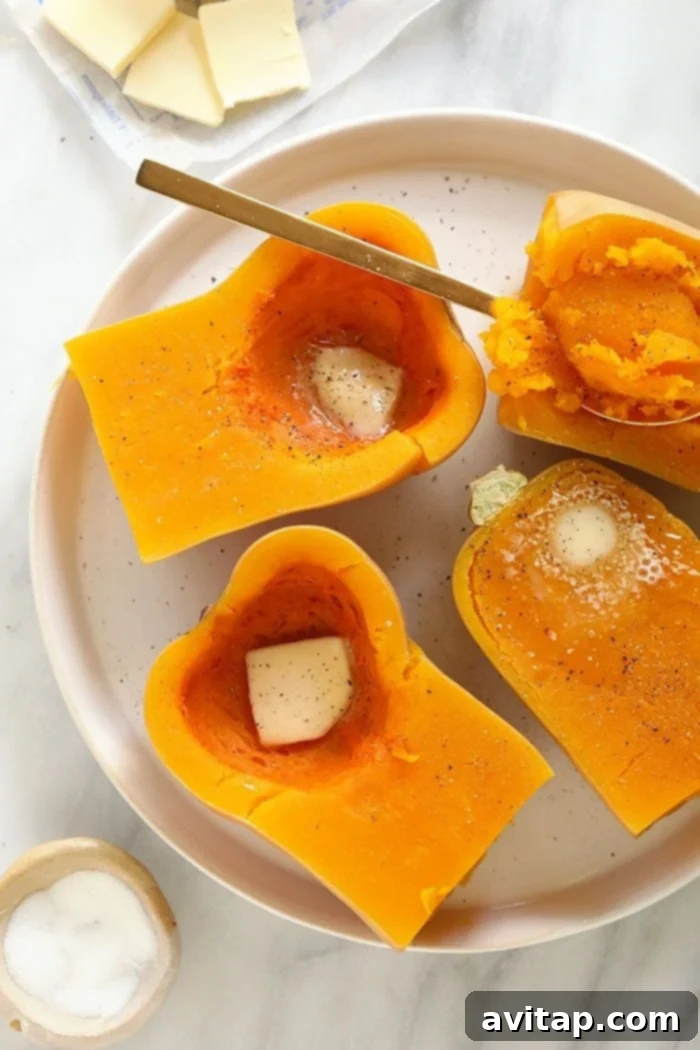
- Butter (optional): A dollop of room temperature butter makes a wonderful garnish for serving, enhancing the squash’s natural sweetness and creaminess.
- Salt and Pepper (optional): Essential for seasoning to taste, bringing out the best in the squash.
- Spices (optional): Consider a pinch of cinnamon, nutmeg, sage, or a hint of garlic powder for added depth.
Two Ways to Cook Butternut Squash in Your Instant Pot
The beauty of Instant Pot butternut squash lies in its adaptability. Depending on how you plan to use it, you can cook it in two primary ways:
1. Cubed Butternut Squash: Ideal for Side Dishes and Meal Prep
If your goal is to have ready-to-eat pieces for a simple side dish, incorporating into stir-fries, grain bowls, or meal prep recipes like these butternut squash buddha bowls, cubing the squash is the way to go. You have the option to either steam the squash directly or add an extra step of sautéing first for enhanced flavor and texture.
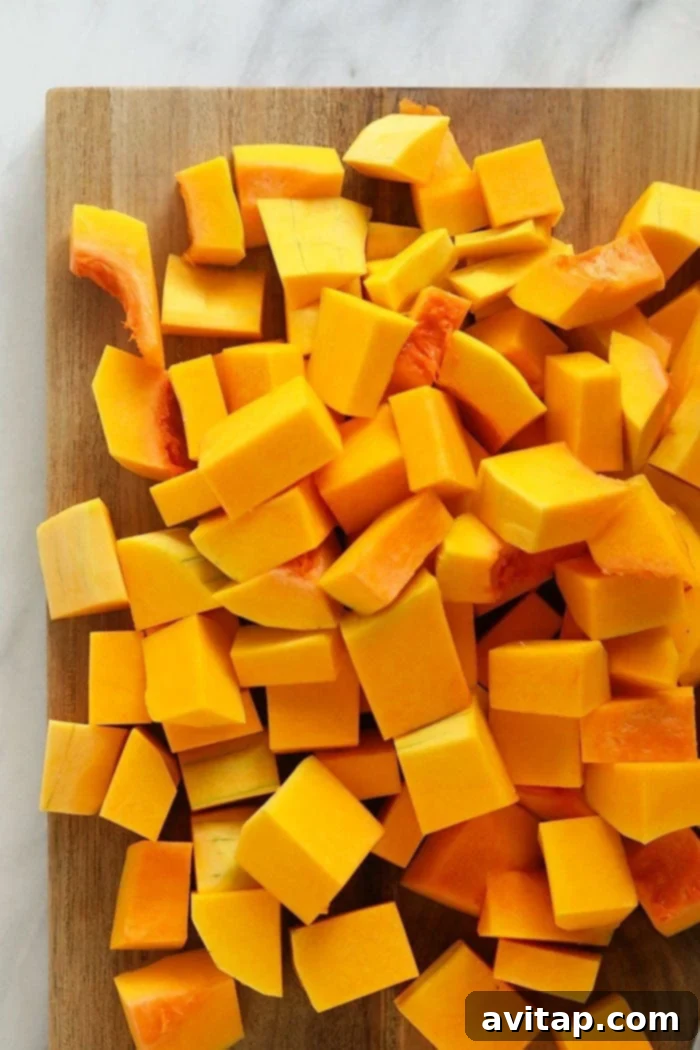
To prepare cubed butternut squash, after peeling and deseeding, cut the squash into uniform 1-inch cubes. Uniformity helps ensure even cooking. You can then proceed with either the steamed or sautéed-then-steamed method described in the recipe section below.
2. Halved Butternut Squash: Perfect for Purees and Soups
When your ultimate goal is a smooth butternut squash puree, a hearty butternut squash soup, or if you simply want to cook it and decide on its use later, cooking the squash in halves or quarters is incredibly convenient. This method requires minimal initial chopping – simply slice off one end, halve the squash lengthwise, and scoop out the seeds. You don’t even need to peel it before cooking, as the tender flesh easily separates from the skin once pressure cooked.
Cooking the squash in larger pieces also allows for greater flexibility. Once cooked, you can easily scoop out the soft flesh to mash, blend, or even stuff for a beautiful main course.
Step-by-Step Instant Pot Cooking Instructions
Follow these simple steps for perfectly cooked butternut squash, tailored to your preferred preparation method:
For Cubed Butternut Squash (Steamed Method)
This method yields soft, tender cubes perfect for general use, with minimal effort.
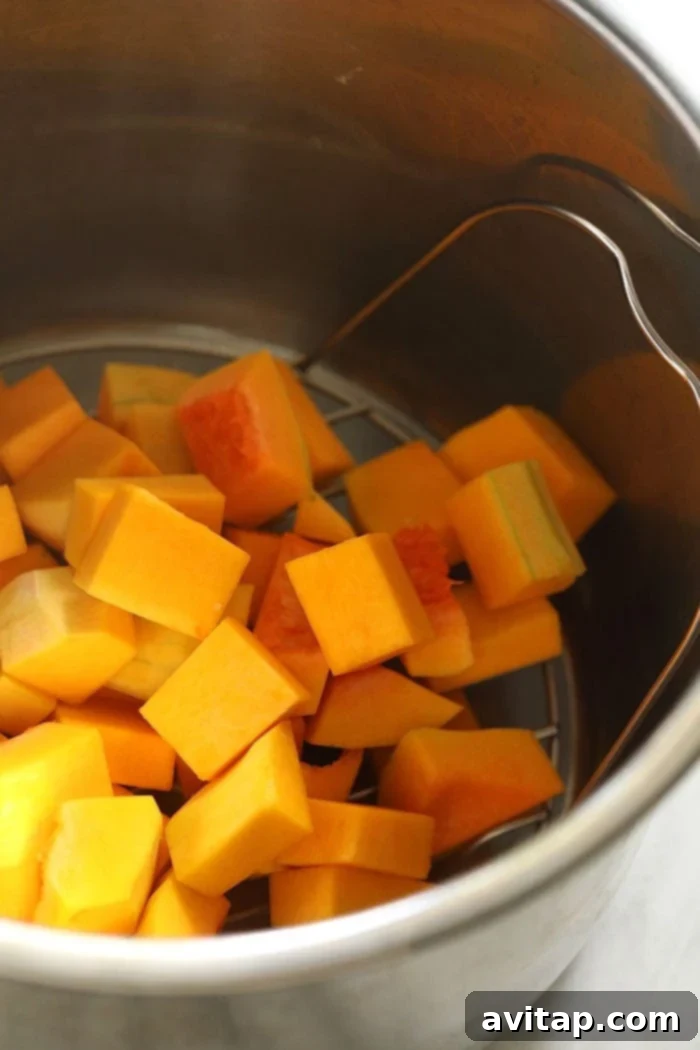
- Prepare the Pot: Pour 1 cup of water into the bottom of your Instant Pot’s inner pot. Place the Instant Pot trivet (or a steamer rack) onto the bottom.
- Load the Squash: Carefully place a heat-safe glass bowl (oven and microwave safe) on top of the trivet. Add all the prepared 1-inch butternut squash cubes into the bowl.
- Pressure Cook: Secure the Instant Pot lid, ensuring it’s properly sealed. Turn the pressure release valve to the “Sealing” position. Select “Manual” or “Pressure Cook” on high pressure and set the cooking time for 3 minutes.
- Release Pressure: Once cooking is complete, perform a quick release of the pressure by carefully turning the valve to “Venting.” When the float valve drops, open the lid and gently remove the bowl of perfectly steamed butternut squash.
For Cubed Butternut Squash (Sautéed and Steamed Method)
This option adds a delicious depth of flavor and a slight caramelization to the squash before it’s tenderized by pressure cooking.
- Sauté: Turn on the Instant Pot’s “Sauté” function and add 2 tablespoons of olive oil to the inner pot.
- Brown the Squash: When the oil is hot and fragrant, add the cubed butternut squash. Sauté for 3-4 minutes, stirring occasionally, until the squash pieces begin to lightly brown. This is an excellent moment to add any desired spices, like sage, cinnamon, or a pinch of red pepper flakes for a kick.
- Remove & Deglaze: Remove the sautéed squash from the Instant Pot and set it aside in a bowl. Pour 1 cup of water into the bottom of the Instant Pot and scrape up any browned bits from the bottom using a wooden spoon. This prevents a “Burn” warning and adds flavor to the steam.
- Pressure Cook: Place the Instant Pot trivet into the pot. Place the bowl containing the sautéed butternut squash on top of the trivet.
- Final Cook: Secure the Instant Pot lid and turn the pressure release valve to “Sealing.” Select “Manual” or “Pressure Cook” on high pressure and set the cooking time for 1 minute (since it’s already softened from sautéing).
- Release Pressure: Once cooking is complete, perform a quick release of the pressure. Open the lid and carefully remove the squash.
For Halved Butternut Squash
This method is incredibly simple and yields squash that’s perfect for pureeing.
- Prepare the Pot: Pour 1 cup of water into the bottom of your Instant Pot’s inner pot. Place the Instant Pot trivet inside.
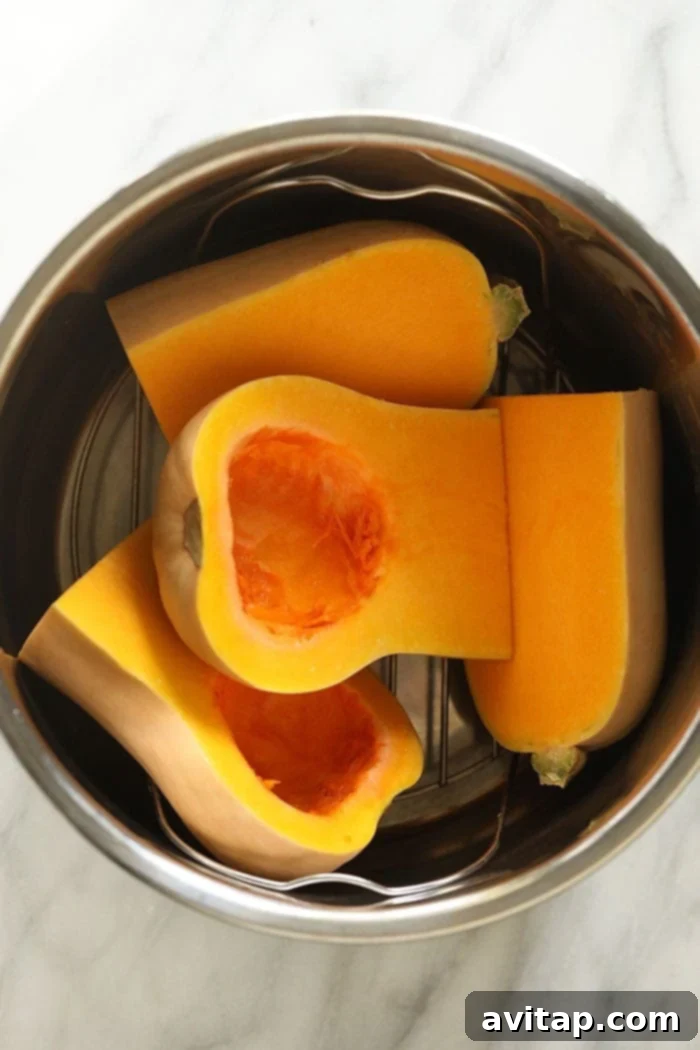
- Load the Squash: Carefully place the prepared butternut squash halves (or quarters, if preferred for smaller pots) onto the trivet, ensuring they are stable.
- Pressure Cook: Secure the Instant Pot lid and turn the pressure release valve to the “Sealing” position. Select “Manual” or “Pressure Cook” on high pressure and set the cooking time for 8 minutes.
- Release Pressure: Once cooking is complete, perform a quick release of the pressure. When the float valve drops, open the lid and carefully remove the squash. The flesh should be very tender and easy to scoop out.
Frequently Asked Questions About Butternut Squash
Here are some common questions we receive about preparing and cooking butternut squash:
For safety and ease, a large, very sharp chef’s knife is your best friend. Always ensure you’re cutting on a flat, secure surface that won’t slip. Start by slicing off the very top and bottom ends of the squash to create stable bases. Then, stand it upright and peel with a vegetable peeler. Finally, carefully slice it lengthwise and scoop out the seeds. Never try to peel butternut squash with a knife, as its uneven surface poses a significant risk.
Absolutely! While the Instant Pot offers unparalleled speed and convenience, you can certainly roast butternut squash in the oven for equally delicious results. Simply follow our comprehensive guide on how to cut and roast butternut squash for a classic method.
Don’t throw them away! Butternut squash seeds are a fantastic, nutritious snack when roasted. After removing them from the squash, rinse them thoroughly in a sieve to remove any stringy bits. Pat them dry with a towel. Spread the dry seeds on a baking sheet, toss with a little olive oil, salt, and pepper, and bake at 350°F (175°C) until golden brown and crispy, typically about 15-20 minutes. They’re a delicious, crunchy topping for salads or a healthy snack on their own.
Creative Serving Suggestions for Instant Pot Butternut Squash
Once your butternut squash is perfectly cooked in the Instant Pot, the culinary possibilities are truly endless. It’s an incredibly versatile ingredient that can be transformed into sweet treats, savory main courses, or wholesome sides. Here are some of our favorite ways to enjoy it:
- Butternut Squash Breakfast Hash: A hearty and flavorful way to start your day, combining tender squash with savory elements.
- Butternut Squash Harvest Bowl: Create a vibrant and nutritious bowl with cooked squash as a key component, alongside grains, greens, and other seasonal vegetables.
- Butternut Squash Buddha Bowls: A colorful and satisfying meal, perfect for healthy eating, featuring the creamy texture of butternut squash.
- Butternut Squash Kale Salad with Farro and Goat Cheese: Combine the sweetness of squash with tangy goat cheese and earthy farro for an elegant and wholesome salad.
- Chocolate Pumpkin Zucchini Muffins: For a delightful sweet treat, easily substitute the pumpkin puree with your homemade butternut squash puree for a moist and flavorful twist.
Discover More of Our Favorite…
Delicious Squash Recipes
If you’re looking for more inspiration to incorporate squash into your diet, explore these other fantastic recipes:
- Roasted Delicata Squash: A simpler squash that doesn’t even require peeling!
- Spaghetti Squash Mac and Cheese: A healthier, gluten-free twist on a comfort food classic.
- Instant Pot Butternut Squash Soup: Creamy, comforting, and incredibly easy to make in your pressure cooker.
- Butternut Squash Risotto: A luxurious and flavorful risotto, perfect for a cozy meal.
- Butternut Squash Lasagna: A hearty and satisfying vegetarian lasagna option.
- Instant Pot Stuffed Spaghetti Squash: A complete meal cooked right in your pressure cooker.
Storage Tips for Cooked Butternut Squash
Proper storage ensures your delicious Instant Pot butternut squash remains fresh and ready for your next meal or recipe:
Allow the cooked butternut squash to cool completely to room temperature. Once cooled, transfer it to an airtight container and refrigerate for up to 5 days. It’s wonderfully versatile and can be enjoyed warm after a quick reheat, or even cold straight from the fridge in salads or bowls.
We generally do not recommend freezing cooked butternut squash. While technically possible, the texture tends to become a bit grainy and watery upon thawing and reheating, losing its desirable creamy consistency. It’s best enjoyed fresh within a few days.
Make-Ahead Preparation
To save time on cooking day, you can prepare the butternut squash in advance. Peel, gut, and either cube or halve the squash up to 2 days before you plan to cook it. Store the prepared squash in an airtight container or bag in the refrigerator. When you’re ready to cook, simply follow the Instant Pot recipe as written.
Instant Pot Butternut Squash Recipe Card
Instant Pot Butternut Squash
A simple, quick, and efficient way to perfectly cook butternut squash in your Instant Pot, ready in minutes for any meal or recipe.
Author: Linley Richter
Prep Time: 15 minutes
Cook Time: 8 minutes
Servings: 4
Pin Recipe | Print Recipe
Ingredients for Cubed Butternut Squash
- 1 medium butternut squash (approx. 2-3 lbs), peeled, gutted, and cut into 1-inch cubes
- 1 cup water
- 2 tablespoons olive oil (optional, for sautéed method)
Ingredients for Halved Butternut Squash
- 1 medium butternut squash (approx. 2-3 lbs), halved lengthwise, gutted, and quartered
- 1 cup water
For Serving (Optional)
- Butter, room temperature
- Salt and freshly ground black pepper to taste
- Desired spices (e.g., cinnamon, nutmeg, sage)
Instructions for Cubed Butternut Squash (Steamed Method)
- Pour 1 cup of water into the Instant Pot inner pot and place the Instant Pot trivet inside.
- Place a heat-safe glass bowl on top of the trivet. Add the prepared 1-inch butternut squash cubes to the bowl.
- Secure the Instant Pot lid and ensure the pressure release valve is set to “Sealing.” Cook on high pressure for 3 minutes.
- Once cooking is complete, perform a quick release of the pressure. Carefully remove the butternut squash from the Instant Pot.
Instructions for Cubed Butternut Squash (Sautéed & Steamed Method)
- Turn on the Instant Pot’s “Sauté” function and add 2 tablespoons of olive oil to the inner pot.
- When the oil is fragrant, add the cubed butternut squash and sauté for 3-4 minutes, or until lightly browned. Add any optional spices at this point.
- Remove the squash from the Instant Pot and set aside. Deglaze the pot with 1 cup of water, scraping up any browned bits.
- Place the Instant Pot trivet onto the bottom of the pot. Place the glass bowl with the sautéed butternut squash on top of the trivet.
- Secure the Instant Pot lid and turn the pressure release valve to “Sealing.” Cook on high pressure for 1 minute.
- Quick release the pressure and carefully remove the butternut squash from the Instant Pot.
Instructions for Halved Butternut Squash
- Pour 1 cup of water into the Instant Pot inner pot and place the Instant Pot trivet inside.
- Carefully place the butternut squash halves or quarters onto the trivet.
- Secure the Instant Pot lid and turn the pressure release valve to “Sealing.” Cook on high pressure for 8 minutes.
- Quick release the pressure and carefully remove the butternut squash from the Instant Pot.
Tips & Notes
- Storage: Allow cooked butternut squash to cool completely. Transfer to an airtight container and refrigerate for up to 5 days.
- Make Ahead: Prepared (cubed or halved) uncooked butternut squash can be stored in an airtight container in the refrigerator for up to 2 days before cooking.
- Seasoning: For enhanced flavor, season cooked butternut squash with salt, pepper, a drizzle of maple syrup, or a sprinkle of herbs like sage or rosemary.
Nutrition Information
Serving: 1/4, Calories: 156 kcal, Protein: 2 g, Fat: 0 g, Fiber: 5 g, Sugar: 18 g
Nutrition information is automatically calculated and should be used as an approximation.
Love this recipe? Share your thoughts below!
We’d love to see your creations! Don’t forget to tag your posts on social media with the hashtag #fitfoodiefinds. Your culinary adventures inspire us!