
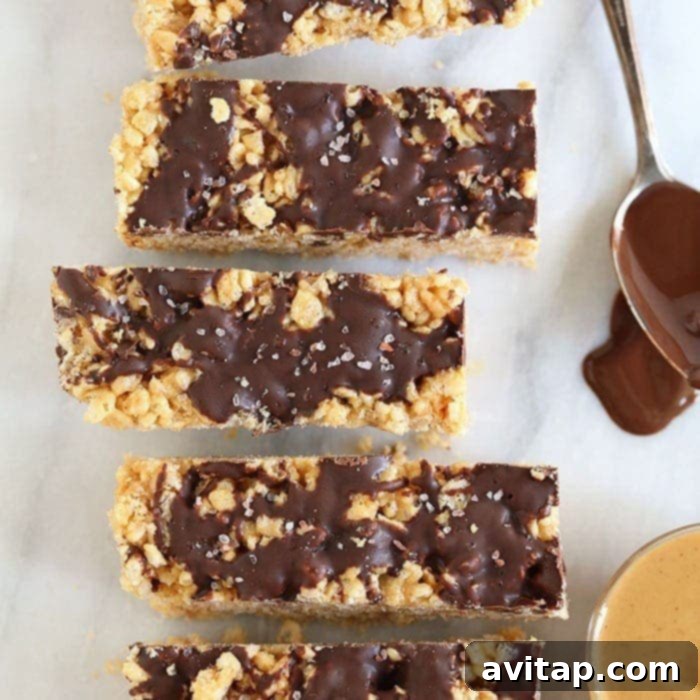
Healthy No-Bake Peanut Butter Rice Crispy Treats: Your Marshmallow-Free Delight!
Craving a classic treat but looking for a healthier twist? Look no further! These sensational Peanut Butter Rice Crispy Treats are not only incredibly delicious but also made with wholesome, natural ingredients – absolutely NO marshmallows! Get ready to indulge in a guilt-free snack that’s surprisingly simple to make, perfect for any occasion.
Whether you’re a long-time fan of crunchy treats or seeking a more nutritious alternative for your family, this recipe is designed to impress. We’ve perfected a method to achieve that beloved crispy texture and rich peanut butter flavor without any artificial additives or unnecessary sugars. Prepare yourself for a treat that caters to various dietary needs, including gluten-free and vegan preferences, making it a crowd-pleaser for everyone.
If you’re eager for more delightful crispy recipes, be sure to explore our Chocolate Peanut Butter Brown Rice Crispy Bars and our irresistible Crunchy Rice Crispy Peanut Butter Cups for even more fantastic, healthy options that are just as easy to prepare and equally satisfying.
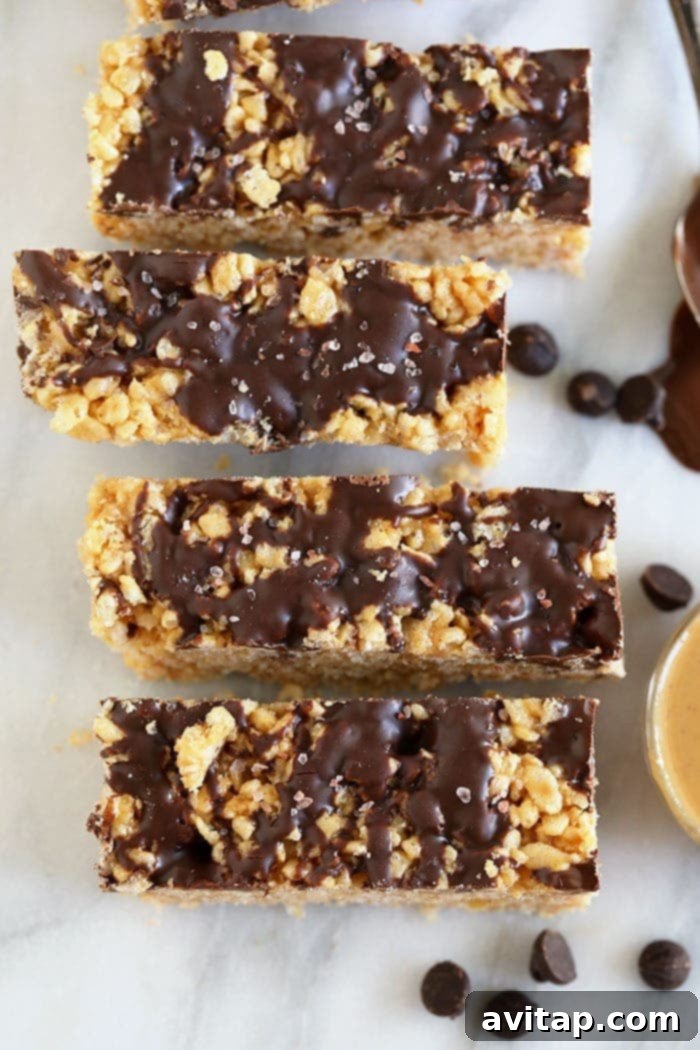
Crafting Your Perfect Peanut Butter Rice Crispy Treats: A Simple Guide
Imagine a no-bake dessert that uses real, whole ingredients and receives rave reviews from everyone in the family. Good news – this recipe for peanut butter rice crispy treats without marshmallows is incredibly straightforward, requiring no baking at all! It’s the perfect solution for busy schedules, impromptu gatherings, or when you need a quick, satisfying, and guilt-free treat without heating up your kitchen.
What’s even better? This recipe is thoughtfully crafted to be **gluten-free, vegan, and dairy-free**, making it an inclusive and versatile option for almost any dietary requirement or preference. We’ll guide you through each easy step, ensuring your treats turn out perfectly crunchy, chewy, and utterly delightful every single time. Say goodbye to complicated baking and hello to effortless, wholesome indulgence!
Step 1: Gather Your Simple, Wholesome Ingredients
You’ll be delighted to know that this recipe calls for just six fundamental ingredients and a standard square cake pan, making preparation incredibly accessible. Simplicity is truly at the heart of these wholesome treats, proving that delicious and healthy snacks don’t require an extensive shopping list. Let’s review exactly what you’ll need to create these irresistible bars:
- Rice Crispy Cereal: This forms the delightful, crunchy foundation of our treats. Any variety of rice crispy cereal will work wonderfully; we’ve had excellent results with both traditional white rice cereal and its brown rice counterpart. The choice is yours, and both deliver that satisfying, airy crunch that defines these treats. If you need to ensure the recipe is strictly gluten-free, opt for a brand that is certified gluten-free.
- All-Natural Peanut Butter: This is a crucial and flavorful component. For the best taste and texture, it’s imperative to use an all-natural peanut butter that contains no added salt or sugar. The ideal ingredient list should simply be “peanuts” or “peanuts and salt.” This ensures your treats aren’t overly sweet and maintains a natural, wholesome profile, allowing the true peanut flavor to shine. If you have a peanut allergy or prefer an alternative, almond butter or cashew butter are fantastic substitutions, offering similar creaminess and binding properties.
- Brown Rice Syrup: This acts as our primary binder, providing the necessary sticky consistency without relying on marshmallows. Brown rice syrup has a unique viscosity and a subtly sweet, caramel-like flavor that is superior to honey or maple syrup for holding these treats together, making it an indispensable ingredient for this particular recipe. Its natural stickiness creates the perfect chewy texture. You can often find it in health food stores or easily purchase it online.
- Dark Chocolate Chips: The chocolate drizzle adds an irresistible layer of indulgence and visual appeal. Feel free to use your favorite kind of chocolate chips – dark, milk, semi-sweet, or even white chocolate chips will all work beautifully. For those adhering to a strict vegan diet, simply choose a high-quality vegan-friendly chocolate chip brand.
- Coconut Oil: A small, precise amount of coconut oil is used to achieve the perfect pourable consistency for your chocolate drizzle. It helps to thin out the melted chocolate, allowing it to spread smoothly and set beautifully. A little truly goes a long way here, so measure carefully to avoid an overly oily texture.
- Coarse Sea Salt: Do not underestimate the transformative power of a sprinkle of coarse sea salt! It’s more than just a garnish; it elevates all the flavors, creating a delightful sweet-and-salty contrast that perfectly complements the rich peanut butter and decadent chocolate. Trust us on this one – it’s the secret touch that takes these treats from merely good to absolutely amazing, adding a gourmet finish.
Step 2: Expert Mixing for Perfect Consistency
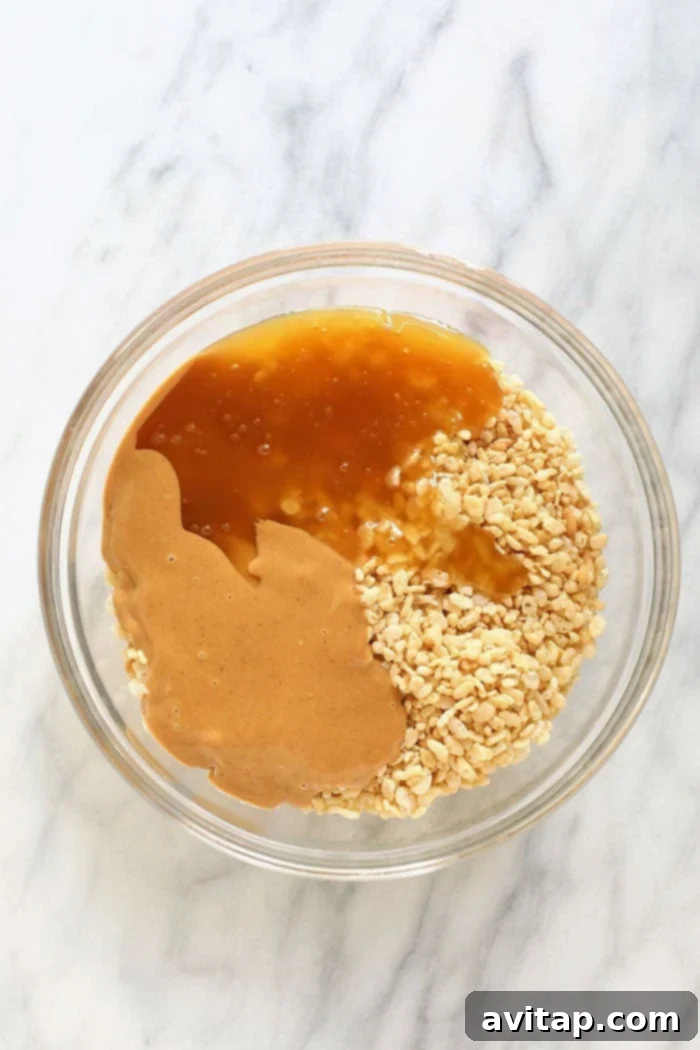
With all your wholesome ingredients meticulously gathered, it’s time for the truly fun and hands-on part: mixing! This step is crucial for achieving the ideal texture and ensuring your treats hold together beautifully. Begin by combining your all-natural peanut butter and the rich brown rice syrup in a medium-sized bowl. Stir these two together vigorously until they are thoroughly integrated and form a smooth, uniform, and wonderfully sticky mixture. This sweet and nutty blend will serve as the essential binding agent for your crispy cereal.
Next, transfer your rice crispy cereal into a larger mixing bowl. Once the peanut butter and brown rice syrup mixture is perfectly smooth, pour it evenly over the cereal in the large bowl. To prevent any frustrating sticking and make the mixing process a breeze, lightly spray a sturdy wooden spoon or a robust spatula with nonstick cooking spray. Use this utensil to gently but thoroughly fold and mix all the ingredients together. Your goal here is to ensure every single crispy piece is evenly coated with the delicious, sticky peanut butter binder.
For those who prefer a more tactile experience, you can absolutely use your hands for this step! If you choose to do so, we highly recommend lightly wetting your hands with water or giving them a quick spray with nonstick cooking spray. This simple trick will significantly reduce the stickiness and prevent the mixture from adhering excessively to your fingers. Achieving an even coating is paramount for the treats to hold together well and have a consistent, delightful texture throughout, so take your time to gently combine until everything looks uniformly sticky and perfectly coated.
Step 3: Transferring and Firmly Pressing into the Pan
Once your perfectly coated rice crispy mixture is ready, it’s time to prepare your pan for shaping. Line an 8×8 or 9×9 inch square cake pan with parchment paper. It’s a good idea to leave a slight overhang of parchment paper on the sides; this thoughtful detail will make for incredibly easy removal of the entire slab of treats later on. After lining, give the parchment paper a light, even spray with nonstick cooking spray to ensure absolutely nothing sticks, preventing any frustration when it comes time to slice your finished, hardened treats.
Carefully transfer the entire rice crispy mixture from your mixing bowl into the prepared pan. Now comes the critical step of pressing. Using your spatula or, once again, your lightly wet hands, firmly and evenly press the mixture into the pan. The key here is to compact the treats as much as possible, eliminating any air pockets and creating a dense, solid base. This firm compression is essential for the treats to hold their shape beautifully and slice cleanly once chilled and set. Ensure the surface is as flat and uniform as possible for aesthetically pleasing and perfectly portioned slices. The harder you press, the less likely your treats are to crumble.
Step 4: Drizzle on the Decadent Chocolate
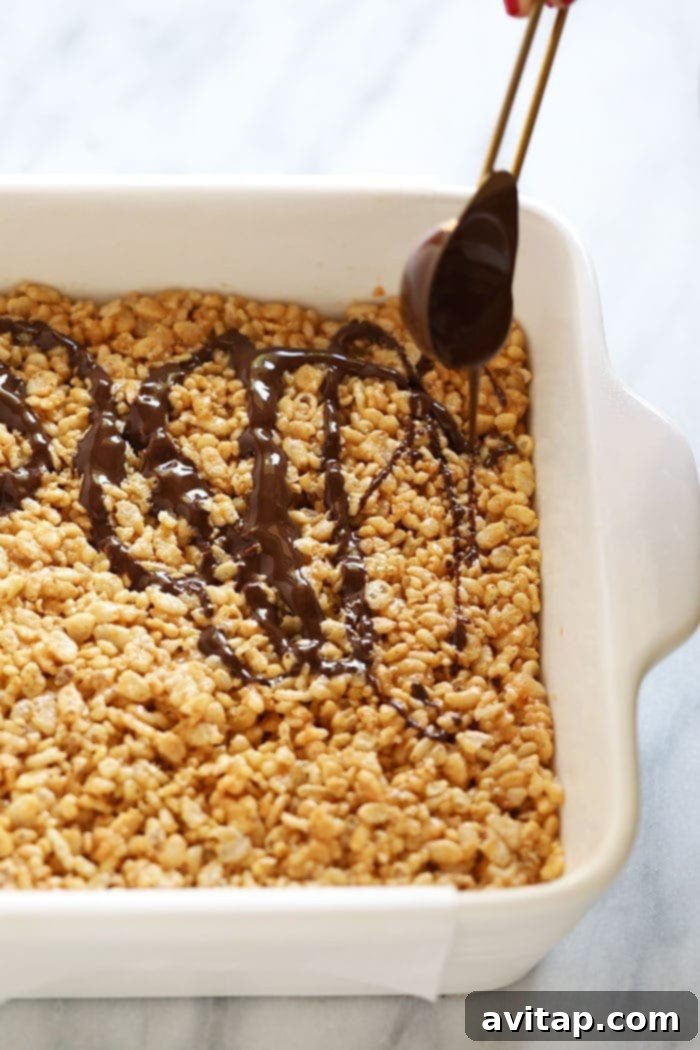
Now for the most visually appealing and utterly luscious part: the chocolate drizzle! This addition takes your healthy peanut butter rice crispy treats to the next level of indulgence. In a small, microwave-safe bowl, combine your chosen chocolate chips with the measured coconut oil. Microwave this mixture in short bursts, typically for about 60 seconds to 2 minutes in total, making sure to stir halfway through. Continue stirring until the chocolate is completely melted, smooth, and wonderfully glossy. The coconut oil plays a vital role here, helping to create a beautifully pourable consistency that will glide effortlessly over your treats.
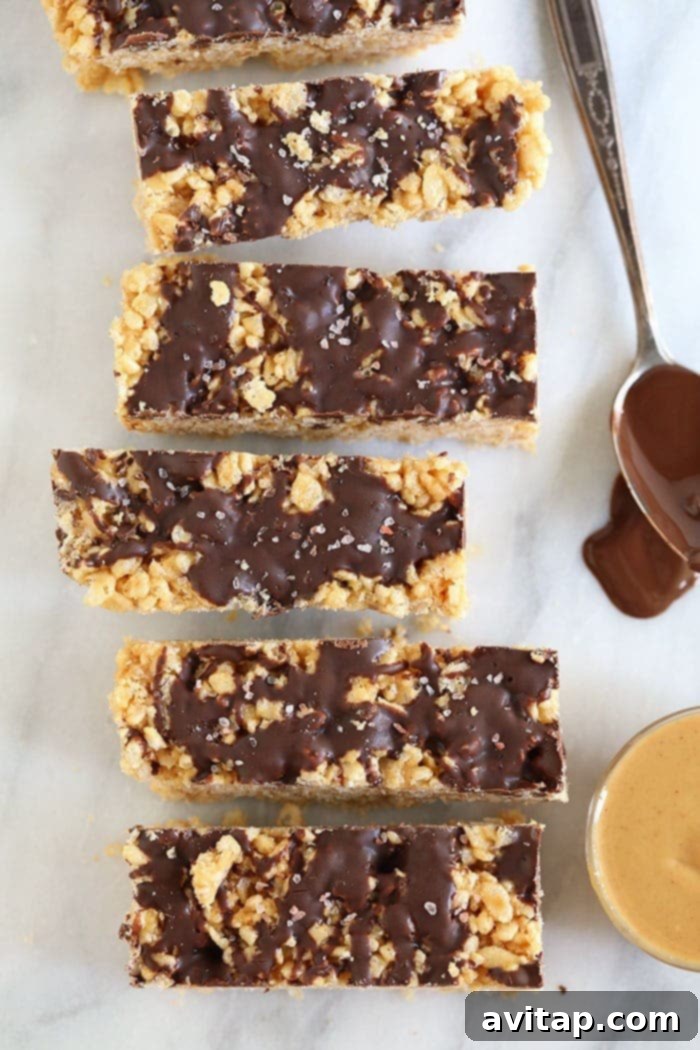
Once your rich chocolate sauce is perfectly melted and smooth, generously drizzle it over the compacted peanut butter rice krispies in the pan. You have complete creative freedom here: be as liberal or as conservative as you like with the chocolate – though, in our humble culinary opinion, the more chocolate, the better! After drizzling, and crucially while the chocolate is still slightly wet and pliable, sprinkle a good, even amount of coarse sea salt over the top. This finishing touch of flaky sea salt is truly the best part, providing that addictive sweet and salty crunch that creates a sophisticated flavor profile and makes these treats utterly irresistible. It’s a game-changer for enhancing both the taste and texture.
Step 5: Chill for Perfect Setting and Firmness
With the enticing chocolate drizzle complete and the coarse sea salt sprinkled, the next crucial step is chilling to ensure your treats set perfectly. Carefully transfer the entire pan of peanut butter rice crispy bars into the freezer. This essential cooling period allows all the ingredients to firm up properly, ensuring they are perfectly set, stable, and easy to slice without crumbling. Freeze them for at least 2 hours. However, for optimal results – especially if you desire a very firm, dense bar that holds its shape impeccably – we highly recommend freezing them overnight. The longer they chill, the firmer and easier they will be to handle, providing a satisfyingly chewy and crunchy texture that makes them so enjoyable. Don’t rush this step; patience will be rewarded with perfect treats.
Step 6: Slice and Savor Your Wholesome Creation
Once your peanut butter rice crispy bars are thoroughly chilled and wonderfully firm from their time in the freezer, it’s time to prepare them for serving. Remove the pan from the freezer. Using the convenient parchment paper overhang, carefully lift the entire slab of rice crispy bars out of the pan and place it onto a clean cutting board. Allow the slab to sit at room temperature for approximately 5 minutes to thaw slightly; this brief period makes slicing much easier and significantly reduces the likelihood of any cracking or crumbling.
To ensure clean, precise cuts, which are key for attractive and manageable portions, spray a sharp knife with a little nonstick cooking spray before you begin slicing. First, cut the large slab down the middle lengthwise. Then, take each half and slice it into approximately 6 individual bars, aiming for even sizes to yield a total of 12 delicious servings. Don’t worry if a few bars crack a little during this process – it’s perfectly normal for homemade treats, and they will still taste absolutely delightful! Any slight imperfections simply add to their rustic, homemade charm.
These perfectly portioned bars are now ready to be savored! They are excellent for on-the-go snacks, a delightful addition to lunchboxes, or a guilt-free dessert after dinner. Each bite delivers a harmonious blend of crispy texture, creamy all-natural peanut butter, rich dark chocolate, and that indispensable hint of coarse sea salt, creating a truly satisfying and wholesome experience.
Storage Solutions for Your Healthy No-Bake Treats
To maintain their optimal freshness, preserve their delightful texture, and keep their flavors at their peak, we highly recommend storing these delicious peanut butter rice crispy bars in the freezer. Freezing not only significantly extends their shelf life but also ensures they remain perfectly firm and delightfully chewy, just as they should be.
After you’ve skillfully sliced the bars into individual servings, transfer them into a freezer-safe, gallon-size plastic bag or an airtight container. It’s important to remove as much air as possible from the bag before sealing to prevent any potential freezer burn, which can affect the texture and taste. Stored properly in the freezer, these healthy treats will remain fresh and absolutely delicious for up to 3 months, making them an excellent make-ahead option. Simply grab a bar whenever a craving strikes, allow it to thaw for just a few minutes at room temperature, and enjoy a perfectly chilled, satisfying snack!
This storage method makes them excellent for meal prepping snacks or desserts in advance, ensuring you always have a wholesome and convenient option on hand. Furthermore, freezer storage helps prevent them from becoming too soft or sticky, which can sometimes happen at room temperature, especially in warmer climates, preserving their ideal crispy-chewy consistency.
Explore More Wholesome Rice Crispy Treat Recipes
Loved these healthy peanut butter rice crispy treats and eager to expand your repertoire of no-bake wonders? We have a whole collection of wholesome, delicious, and easy-to-make crispy cereal recipes for you to explore. Dive into these fan favorites and discover more ways to enjoy guilt-free indulgence:
- Chocolate Peanut Butter Brown Rice Crispy Treats: Experience the classic, irresistible combination of chocolate and peanut butter, reimagined in a healthier, chewy, and crispy form using brown rice cereal for added goodness.
- Peanut Butter Chocolate Brown Rice Crispies: Another delightful take on the beloved peanut butter and chocolate duo, specifically crafted with brown rice crispies to offer a distinct texture and earthy flavor profile.
- Rice Crispy Peanut Butter Cups: A playful and utterly delicious twist on a classic candy favorite, these peanut butter cups feature a delightful crispy texture that adds an exciting dimension to every bite.
- Almond Butter Brown Rice Crispy Treats: For those who prefer almond butter or are looking for a delicious alternative to peanut butter, this recipe offers a fantastic nutty twist using brown rice cereal for a rich and satisfying treat.
Recipe: Healthy Peanut Butter Rice Crispy Treats
Summary: Delicious and healthy Peanut Butter Rice Crispy Treats made with all-natural peanut butter and no marshmallows. This recipe is gluten-free, vegan, and dairy-free, making it a perfect wholesome snack for everyone.
By: Lee Funke
Prep Time: 2 hours 30 minutes
Cook Time: 0 minutes
Total Time: 2 hours 30 minutes
Servings: 12
Ingredients
For the Peanut Butter Rice Crispy Treats
- 4 cups rice crispy cereal (choose gluten-free if desired)
- 1/2 cup unsalted all-natural peanut butter (ensure no added sugars or oils)
- 1/2 cup brown rice syrup (essential for binding)
For the Chocolate Drizzle
- 1/4 cup semi-sweet chocolate chips (purchase on Amazon)
- 1 tablespoon melted coconut oil (purchase on Amazon)
- Coarse sea salt, to taste (purchase on Amazon)
Instructions
- First, prepare your pan: Line an 8×8 or 9×9 inch square cake pan with parchment paper, leaving an overhang on the sides for easy removal. Then, spray the parchment paper with nonstick cooking spray and set aside.
- In a medium bowl, combine the all-natural peanut butter and brown rice syrup. Mix thoroughly until the mixture is smooth and well integrated.
- Next, place the rice crispy cereal in a large mixing bowl. Pour the prepared peanut butter and brown rice syrup mixture evenly over the cereal.
- Spray a spatula or a sturdy wooden spoon with nonstick cooking spray. Use this utensil to mix all the ingredients together until every piece of cereal is evenly coated with the sticky peanut butter mixture. If using your hands, lightly wet them to prevent sticking.
- Once everything is thoroughly coated, transfer the mixture into the prepared cake pan. Use your spatula or hands to evenly and firmly press the rice crispy treats into the pan, compacting them to form a solid base.
- To prepare the chocolate drizzle, place the chocolate chips and coconut oil into a small, microwave-safe bowl. Microwave for approximately 60 seconds to 2 minutes, stirring halfway through, until the chocolate is completely melted and smooth.
- Evenly drizzle the melted chocolate sauce on top of the pressed peanut butter rice crispy treats using a spoon.
- Carefully place the cake pan into the freezer and freeze for at least 2 hours to allow the treats to set completely. For best results, freeze overnight.
- Once frozen and firm, remove the slab from the pan (using the parchment paper) and place it on a cutting board. Let it sit for about 5 minutes to thaw slightly. Spray a sharp knife with nonstick cooking spray and cut the slab down the middle, then slice each section into 6 bars, yielding 12 servings in total. Immediately sprinkle coarse sea salt over the sliced bars.
Tips & Notes
- Storage: For optimal freshness and texture, store the sliced bars in an airtight container or a gallon-size plastic bag in the freezer. They will keep well for up to 3 months.
- Substitutions: For peanut allergies, almond butter or cashew butter can be used instead of peanut butter.
- Cereal Choice: Both white and brown rice crispy cereals work beautifully in this recipe, offering slight variations in texture.
Watch It
A helpful video demonstration for making these delicious treats is available to guide you through each step.
Learn visually how to create these delightful Healthy Peanut Butter Rice Krispie Treats.
Nutrition Information (per serving, approximate)
- Calories: 174 kcal
- Carbohydrates: 23 g
- Protein: 3 g
- Fat: 8 g
- Fiber: 1 g
- Sugar: 10 g
Please note: Nutrition information is automatically calculated and should only be used as an approximation. Actual values may vary based on specific ingredients and brands used.
We’d Love to Hear From You!
If you’ve enjoyed making these healthy peanut butter rice crispy treats, we encourage you to share your experience! Please consider leaving a comment below to tell us what you thought of the recipe. Your feedback and ratings help us continuously create more delicious and wholesome recipes for our community.
Don’t forget to share your amazing creations on social media! Tag your posts with the hashtag #fitfoodiefinds. We absolutely love seeing what you’re cooking up and sharing your culinary successes with our community!